Access: who can log in
Choose who can sign in to your event app, build your attendee list, and use tags to control what each group can do.
Access decides who can sign in to your event app. It's the last of the setup steps in the event sidebar, and after launch you'll find it under App settings.
Attendees never set a password. They enter their email address in the app and receive a 6-digit code to sign in. What you choose here decides which email addresses are accepted.
Choose who can log in
Open Access settings with the gear button on the Access page. It holds who can log in, tags, badge QR codes and QR code downloads.
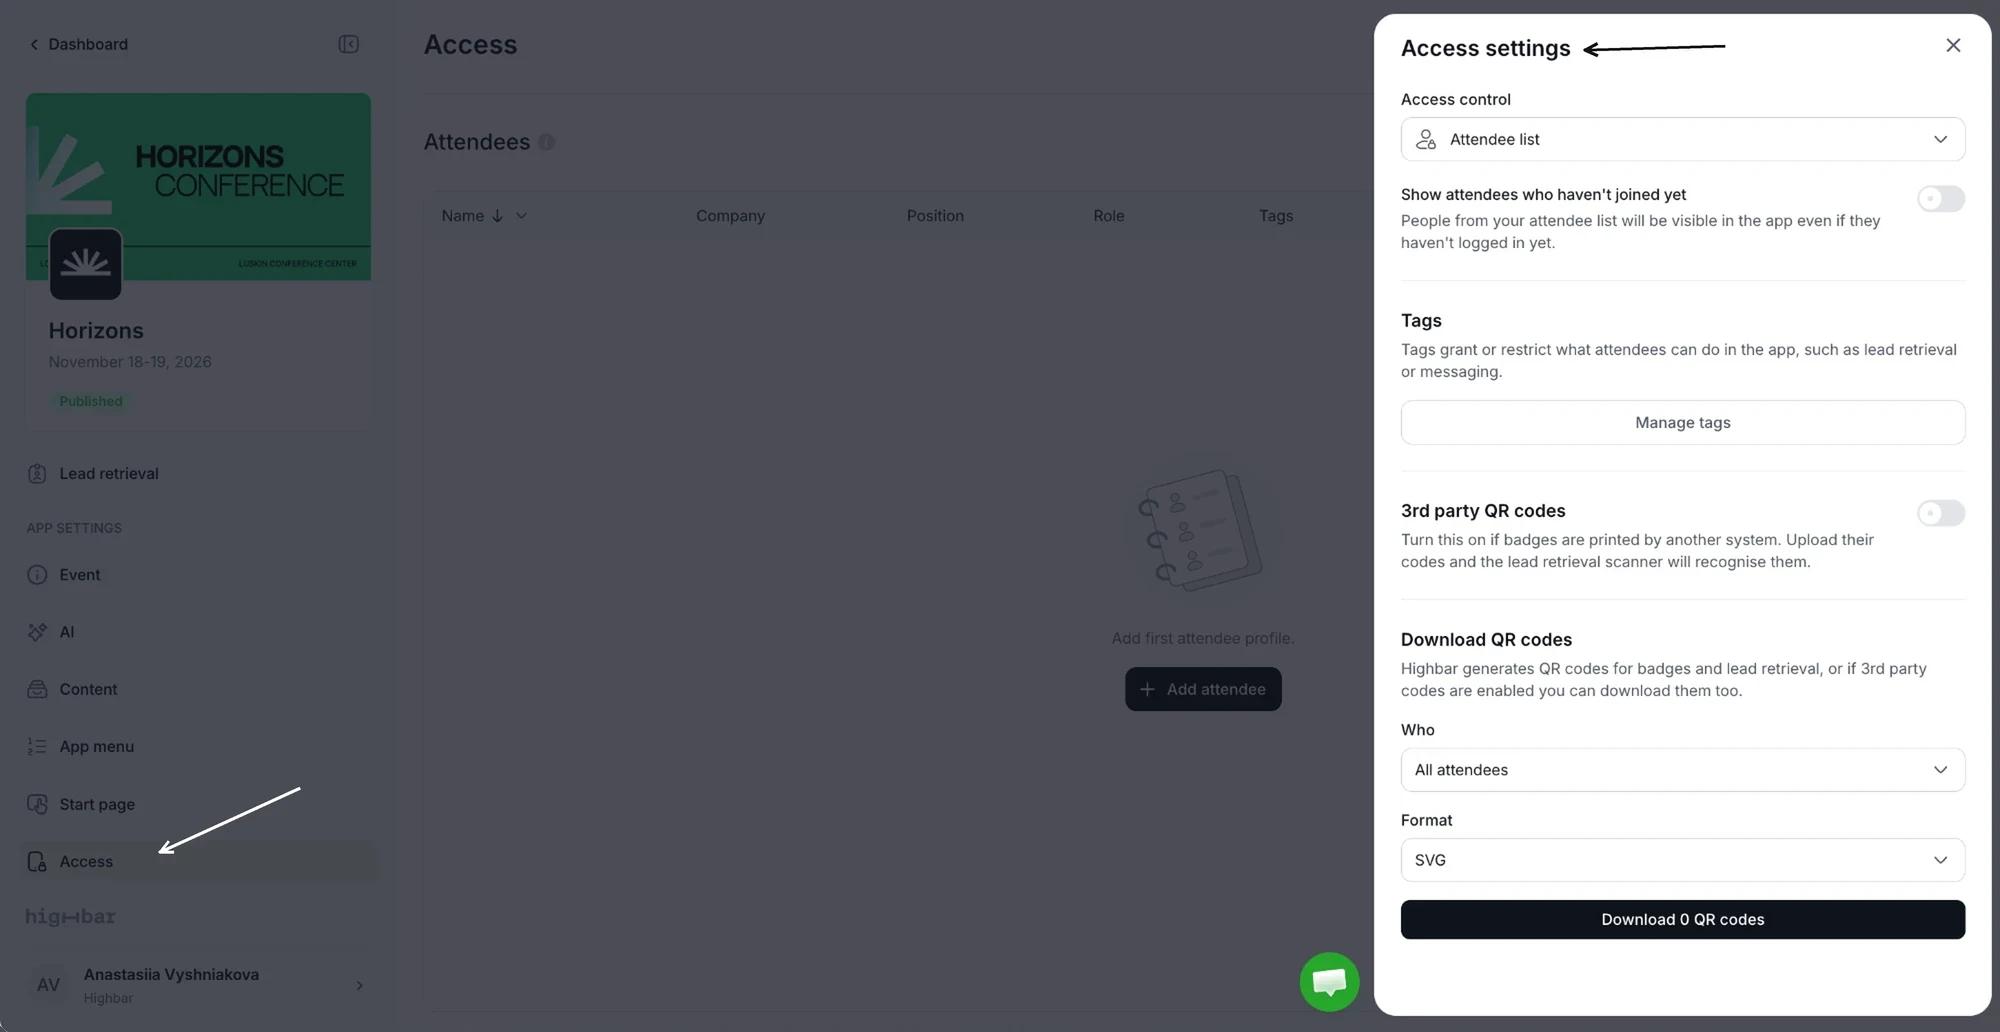
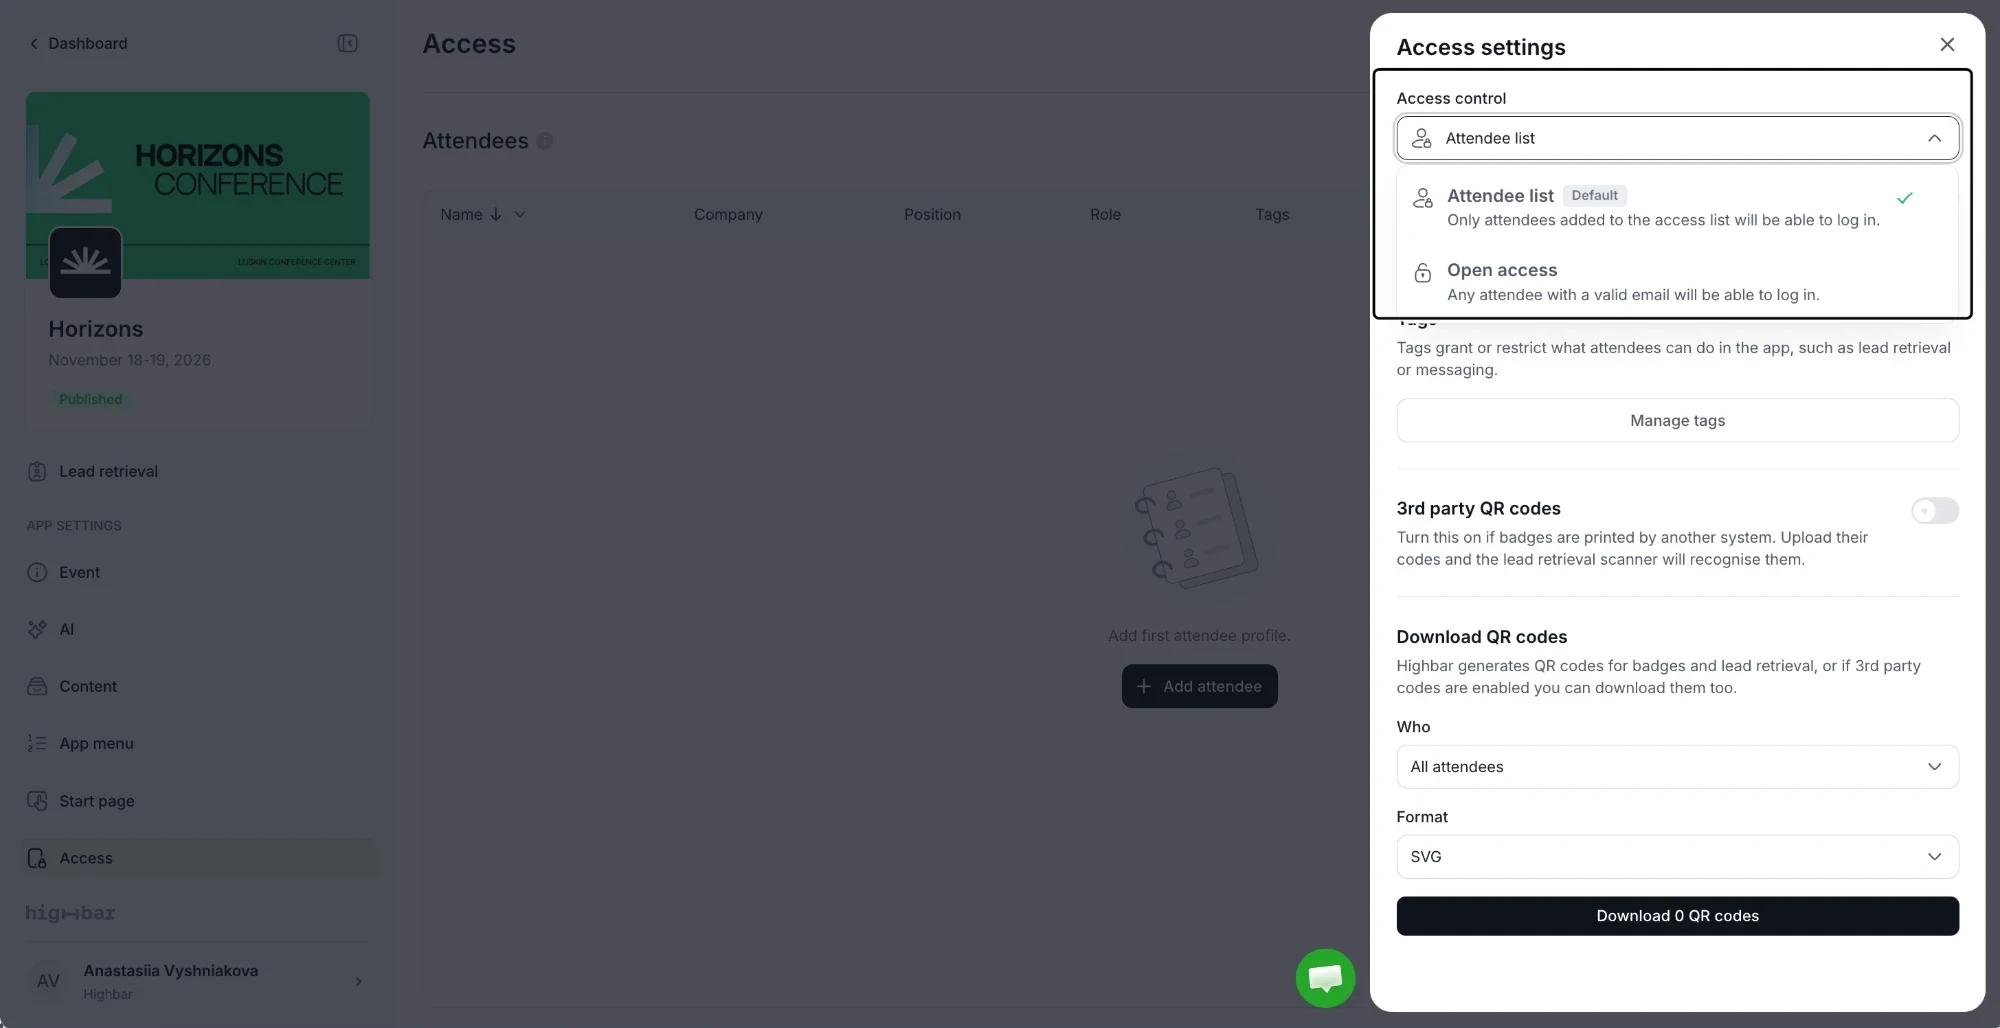
Under Access control, pick one option:
| Option | Who can log in |
|---|---|
| Attendee list (default) | Only people you've added to the attendee list. |
| Open access | Anyone with a valid email address. Their profile is created the first time they log in. |
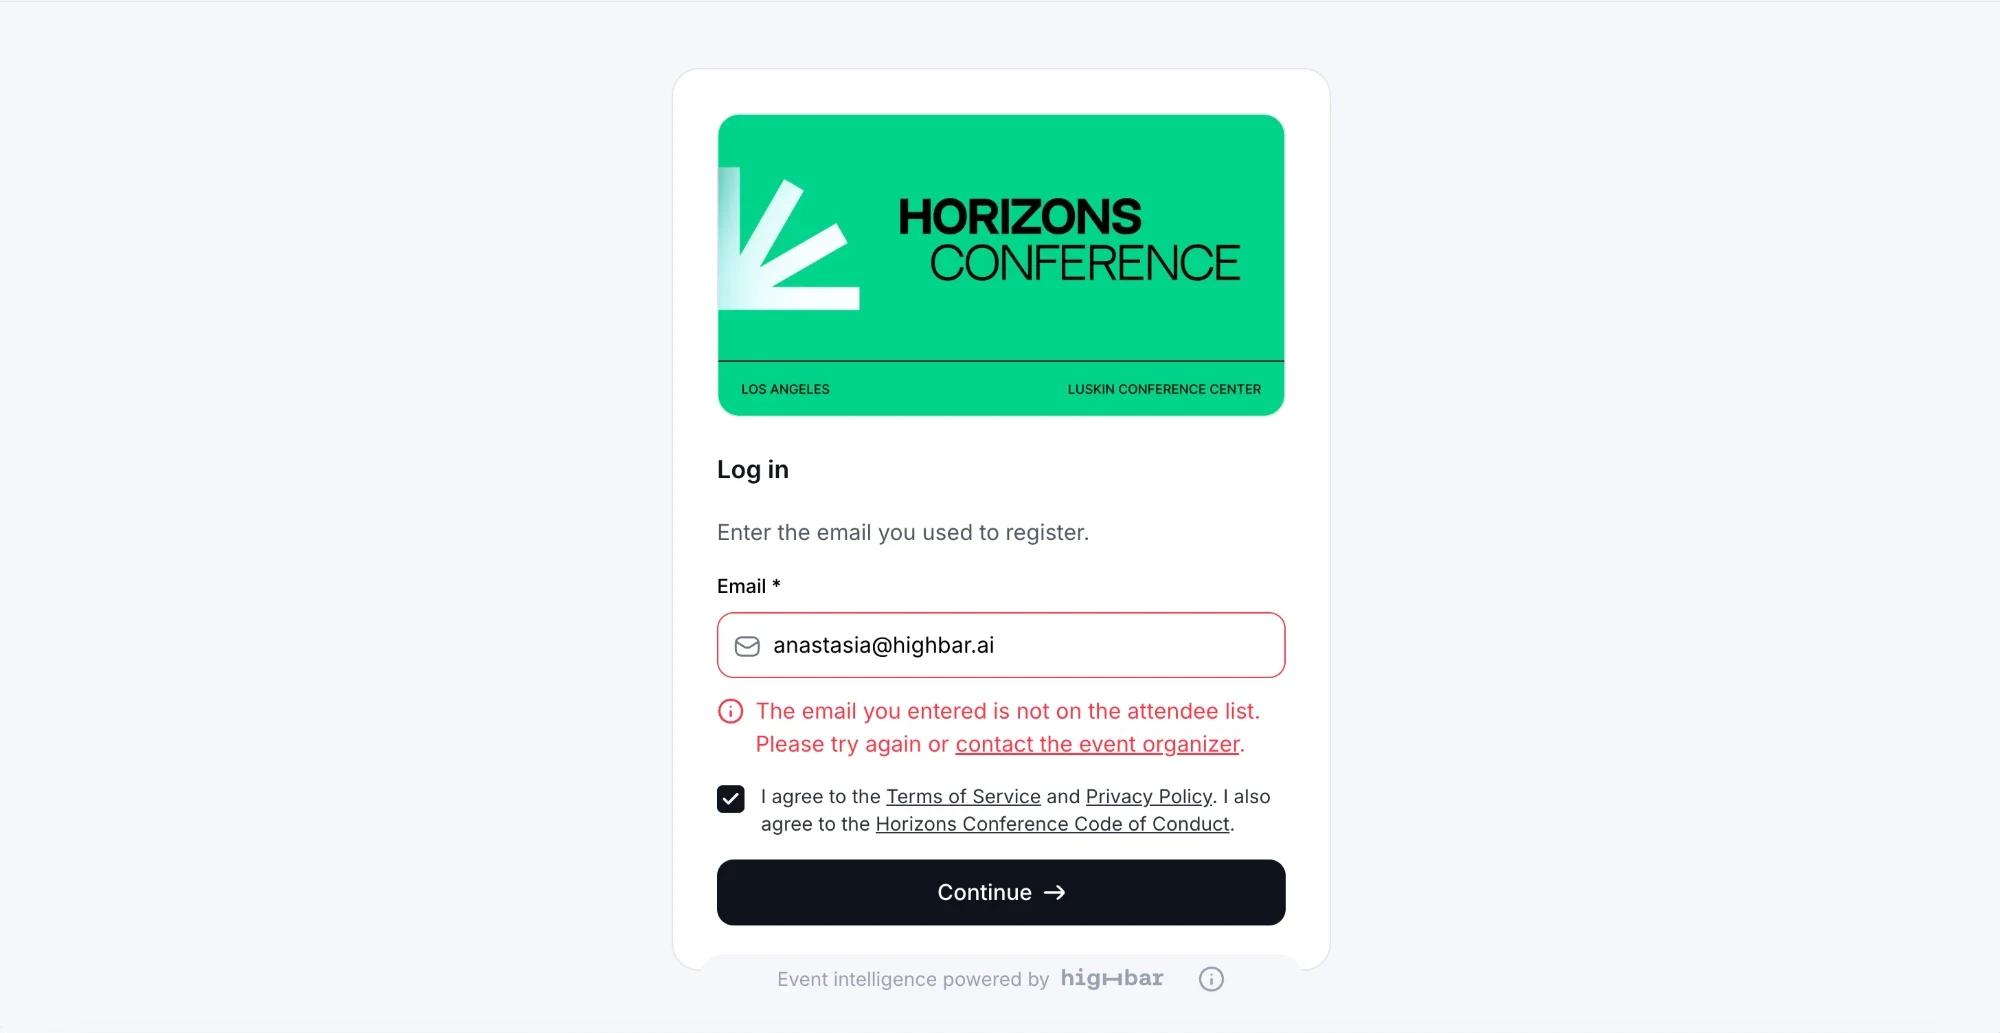
With Attendee list, someone whose email isn't on the list sees "The email you entered is not on the attendee list." and is asked to contact you. Check the spelling first: they must use the exact address you added.
Access doesn't block launch. You can launch with an empty list, but with Attendee list selected, nobody can log in until you add them.
Add people to the attendee list
There are four ways in, and you can mix them:
-
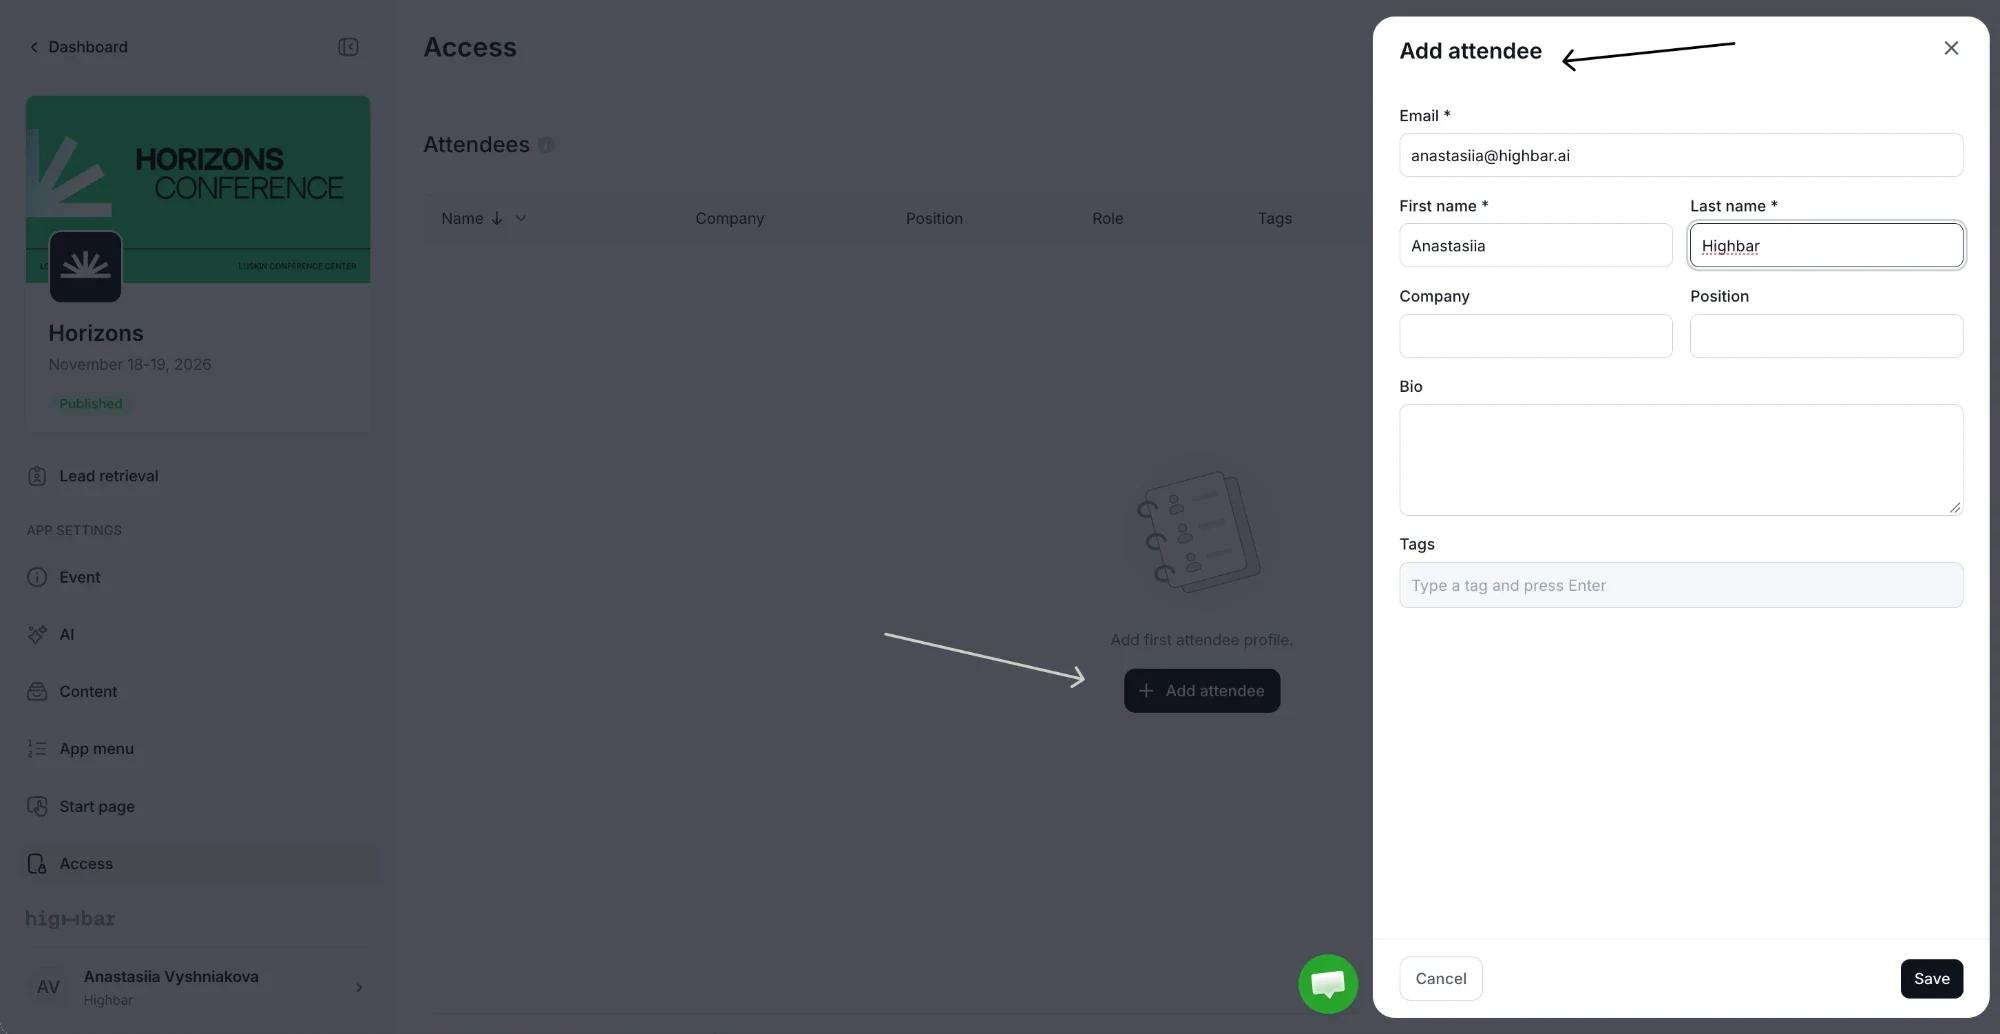
Add one person. Click Add attendee and fill in Email, First name and Last name. Company, Position, Bio and Tags are optional.
-
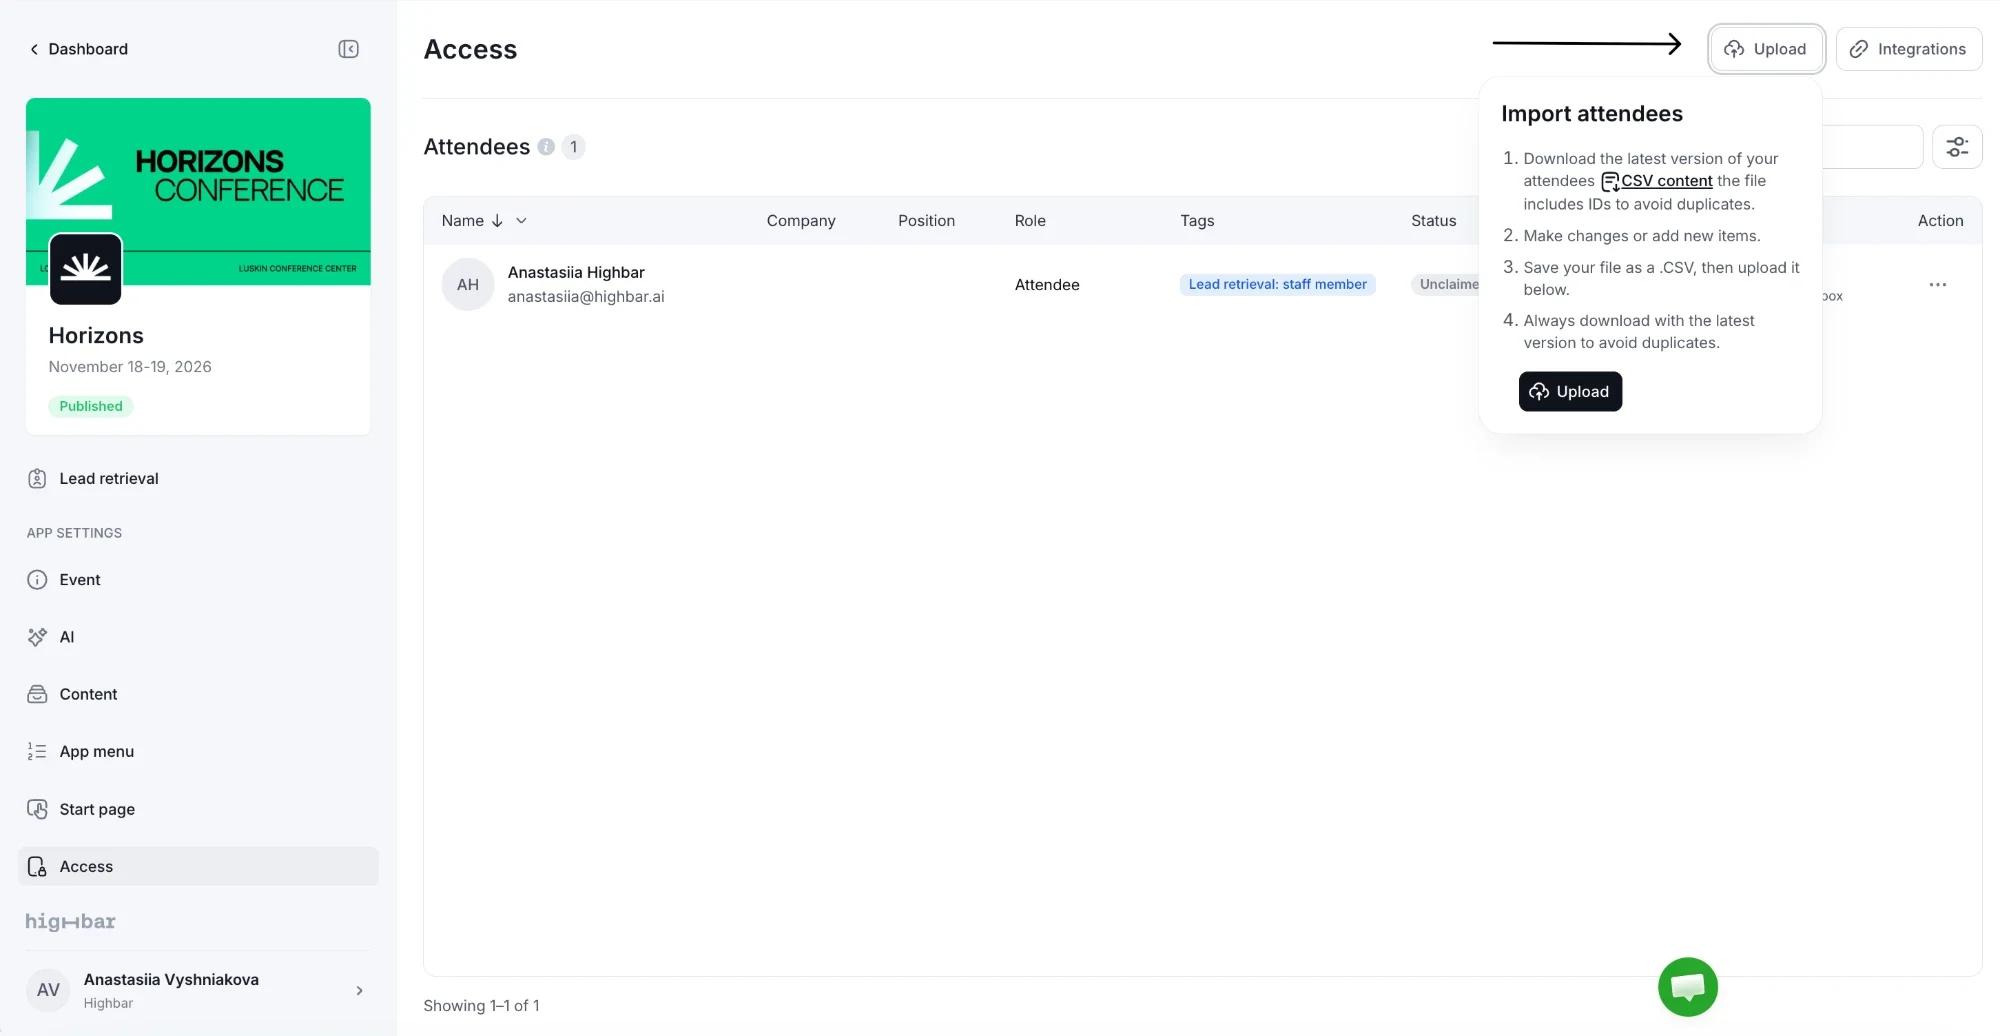
Upload a file. Click Upload. Under Import attendees, download your current list with CSV content, add or change people, save it as a .CSV and click Upload. The file includes IDs, so nobody is added twice: always start from a fresh download.
-
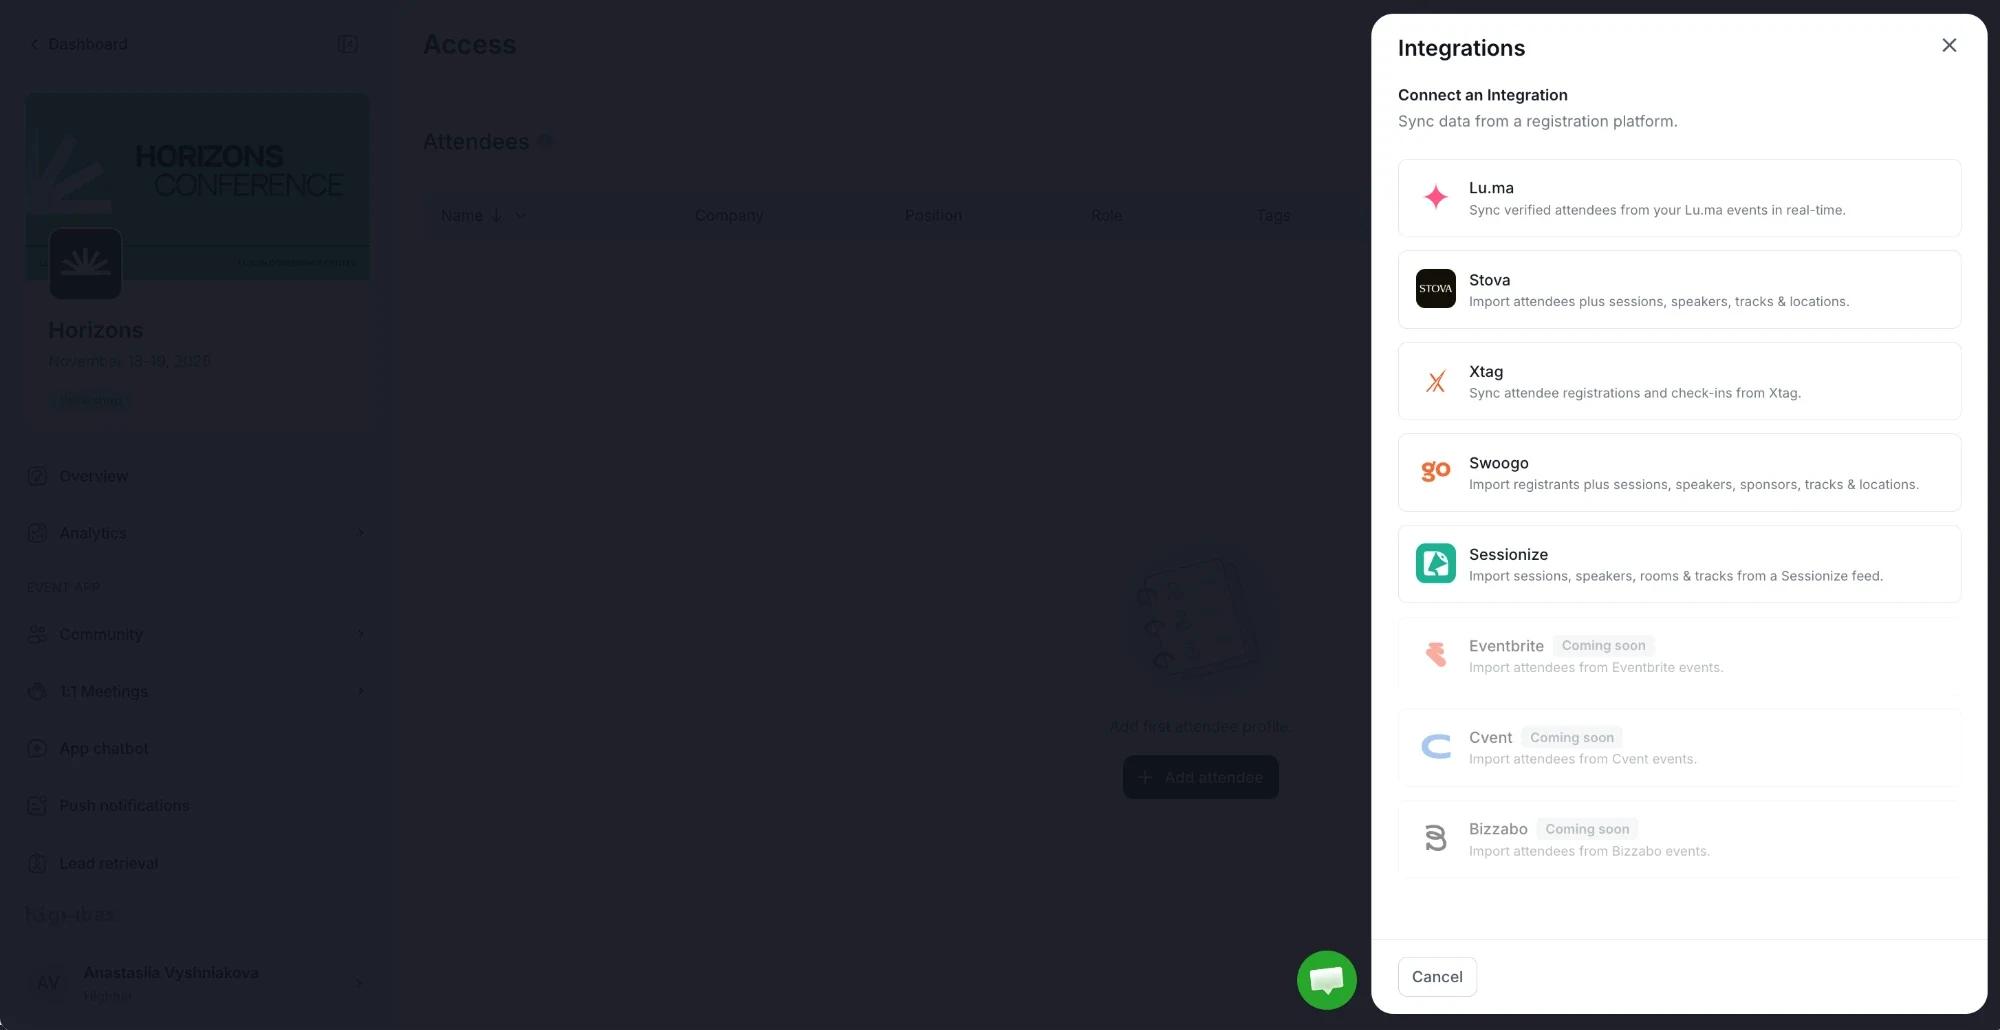
Connect a registration platform. Use the Integrations button to sync attendees from a platform such as Lu.ma, Swoogo or Stova. See Integrations.
-
Use Highbar Registration. People who register through a Highbar registration flow can be added to the app as soon as their registration is confirmed.
The attendee list
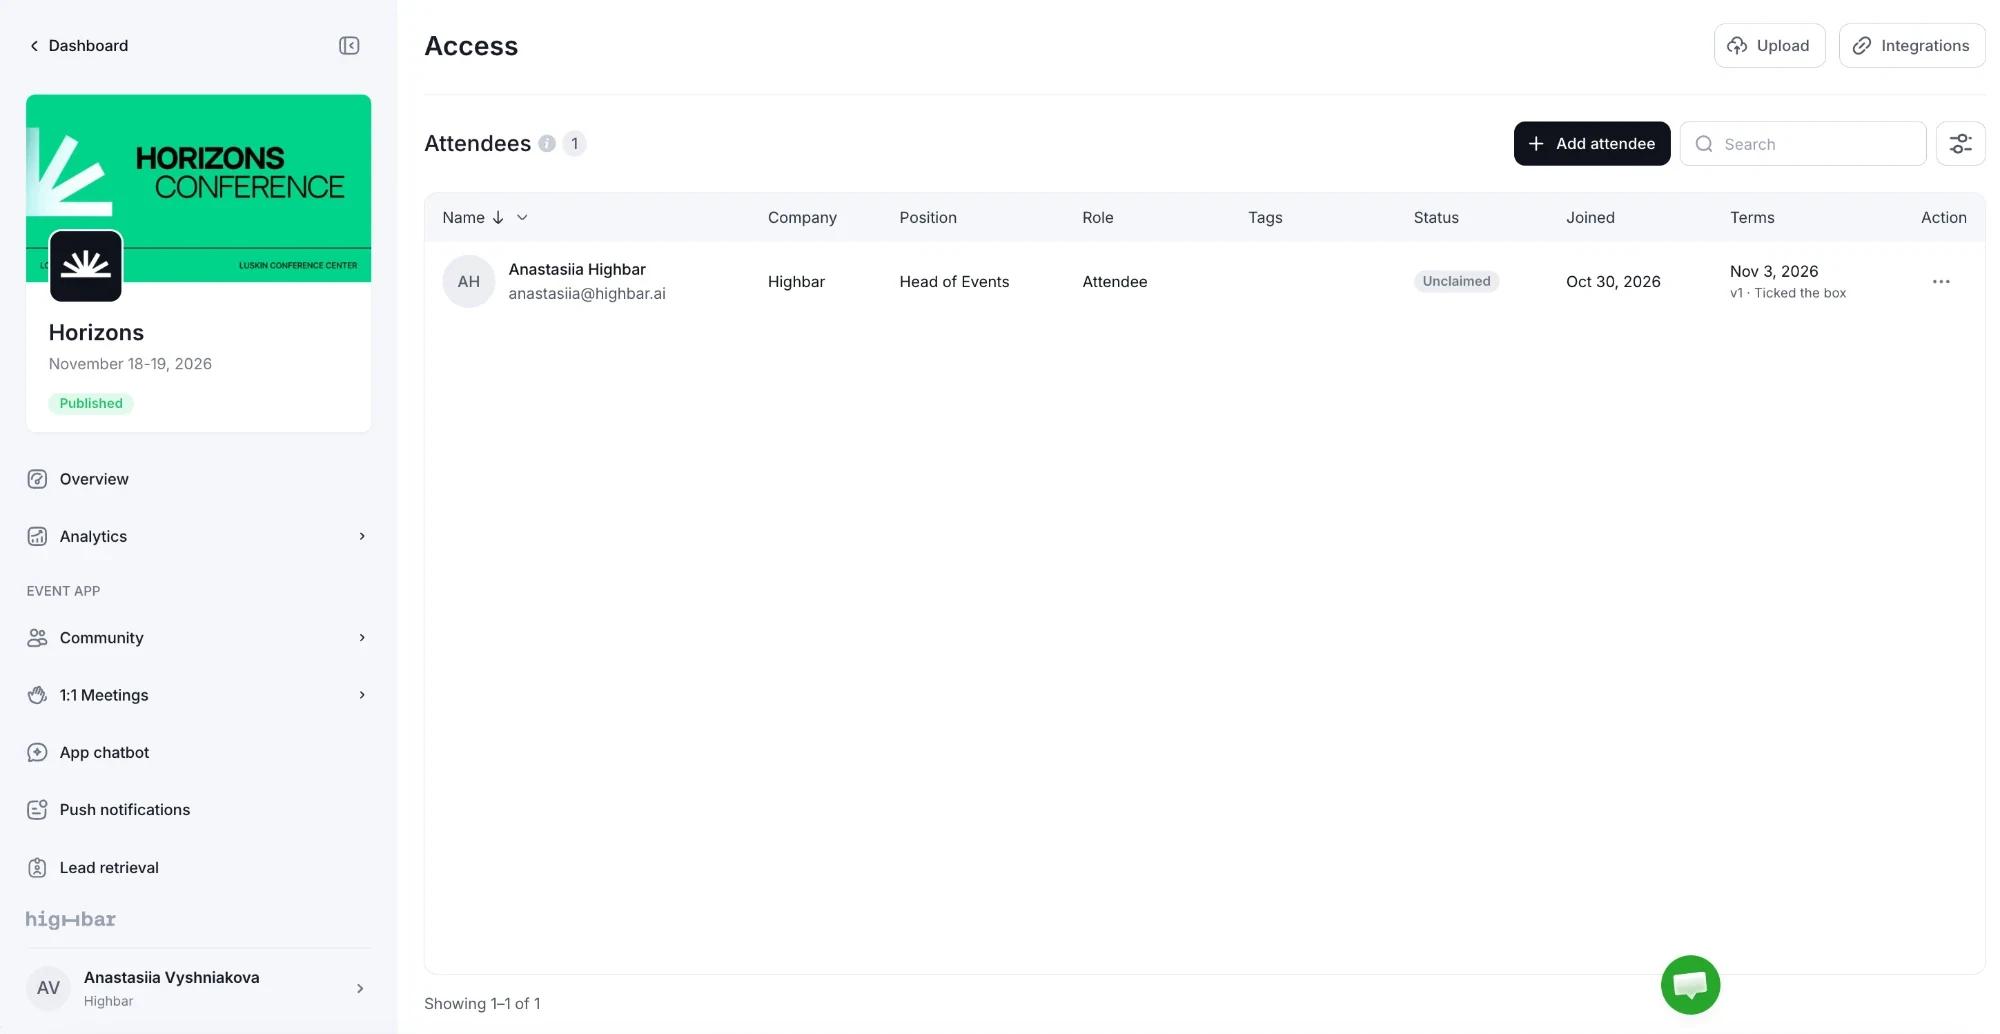
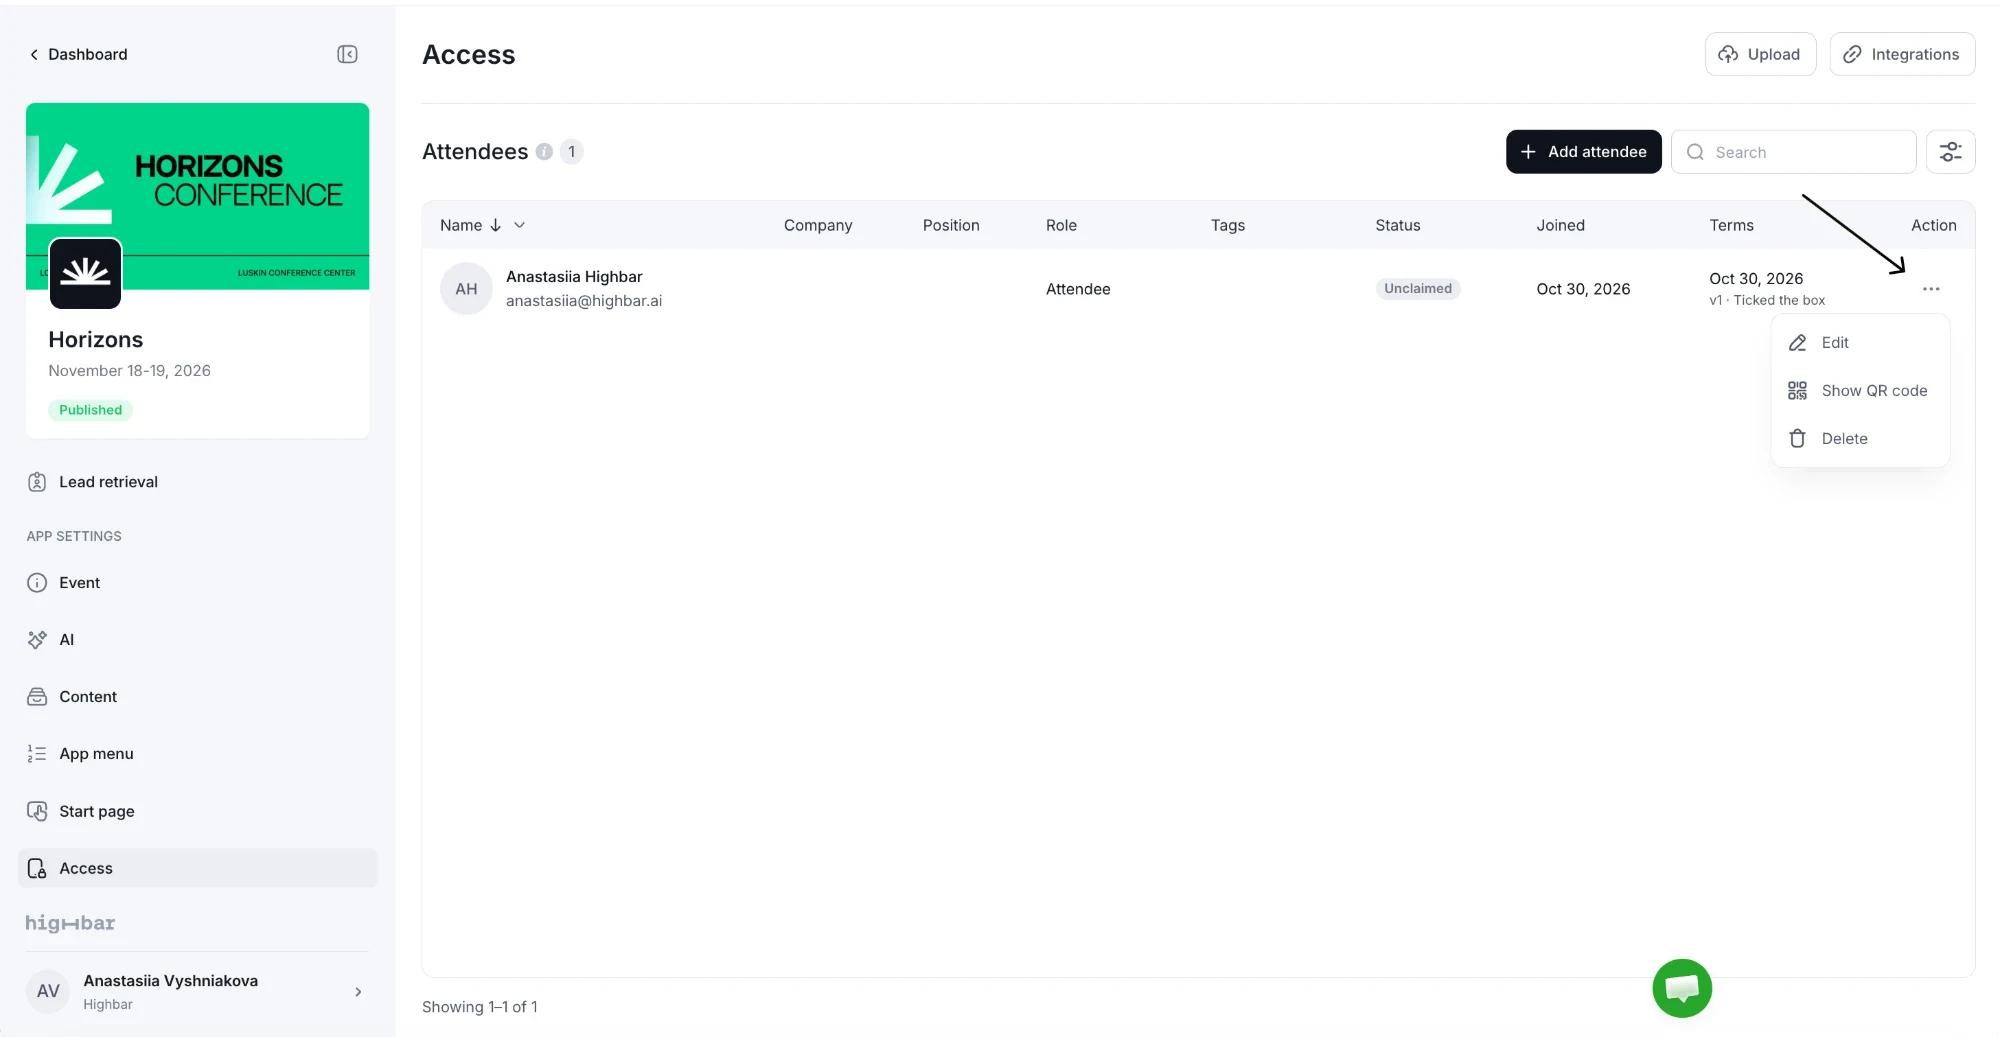
The list shows each person's Company, Position, Role and Tags, plus:
- Status: Claimed once they've signed in to the app and set up their profile, Unclaimed until then.
- Joined: the date they were added to the attendee list.
- Terms: if you've set up log in terms, when they accepted them and which version.
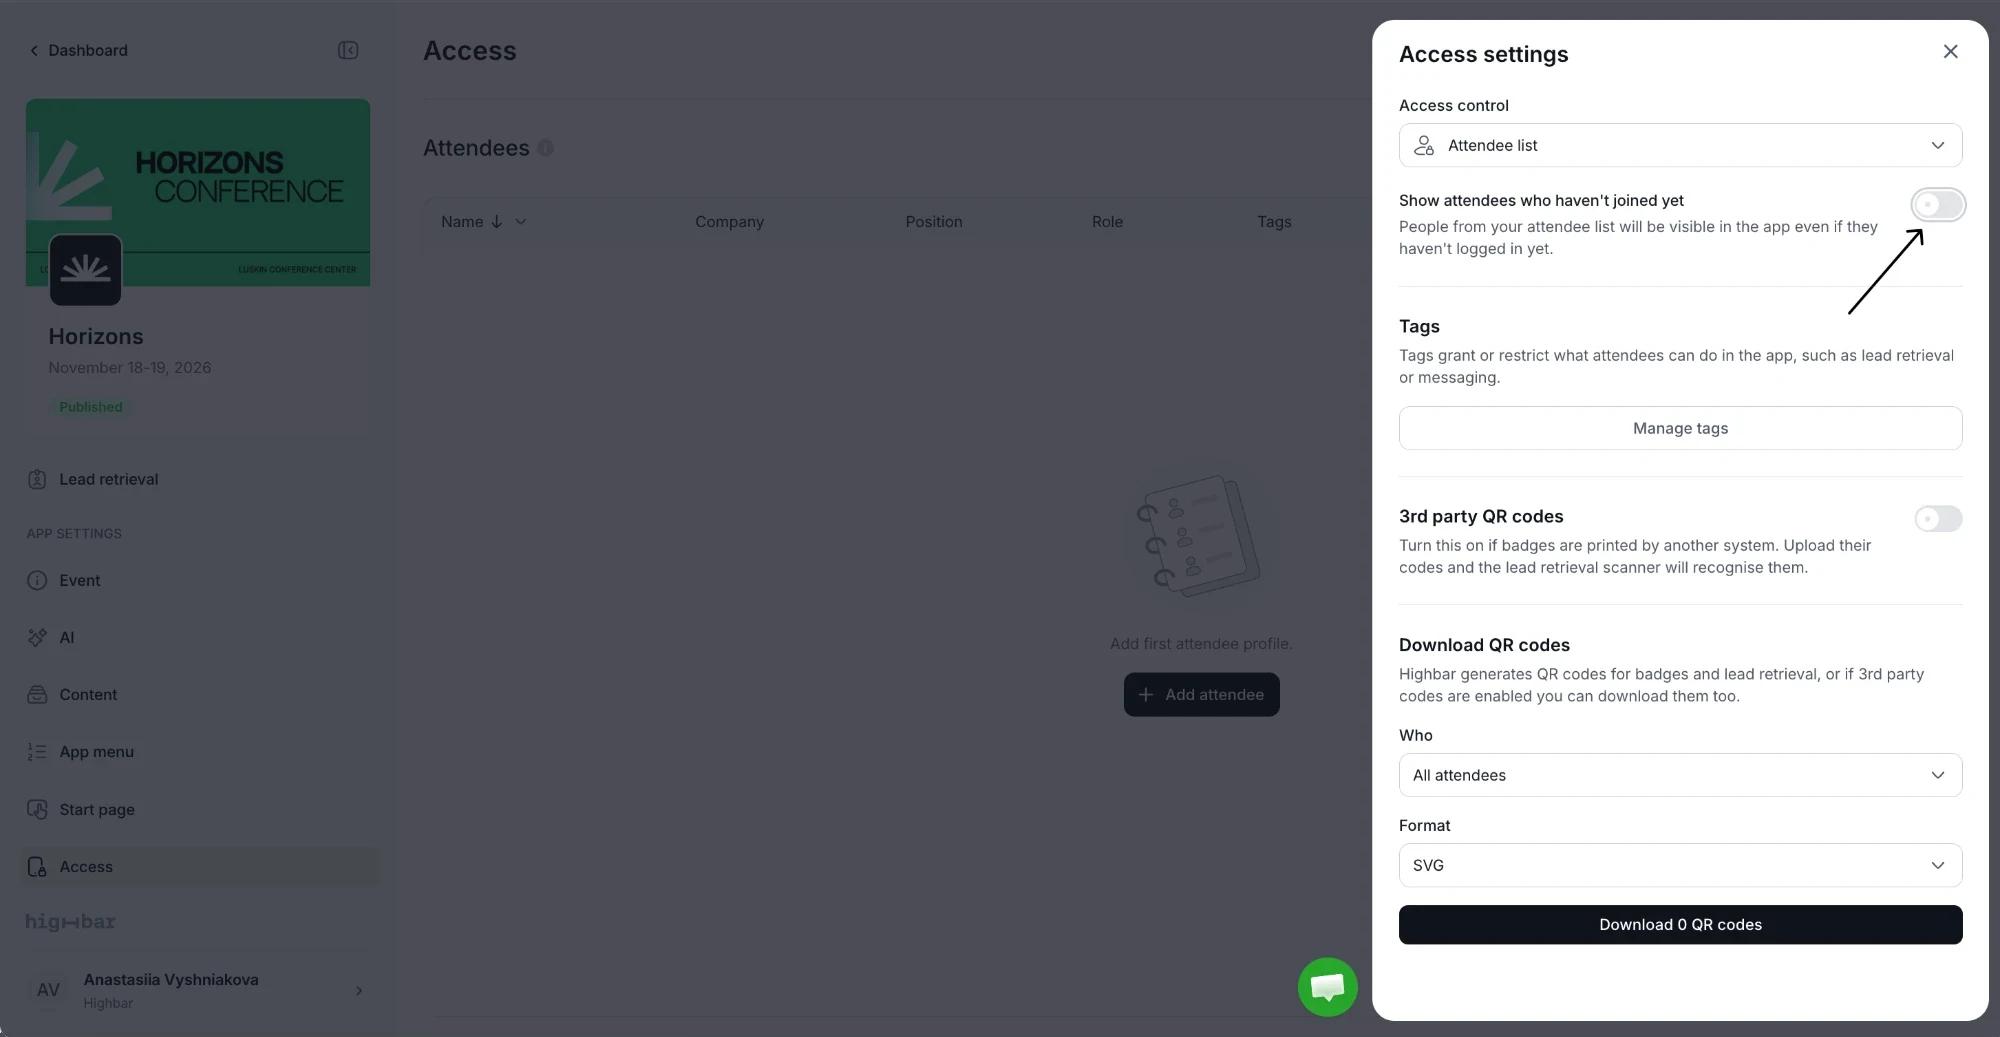
By default, people appear in the app's community list only after they've logged in once. To list everyone from the start, open Access settings and turn on Show attendees who haven't joined yet.
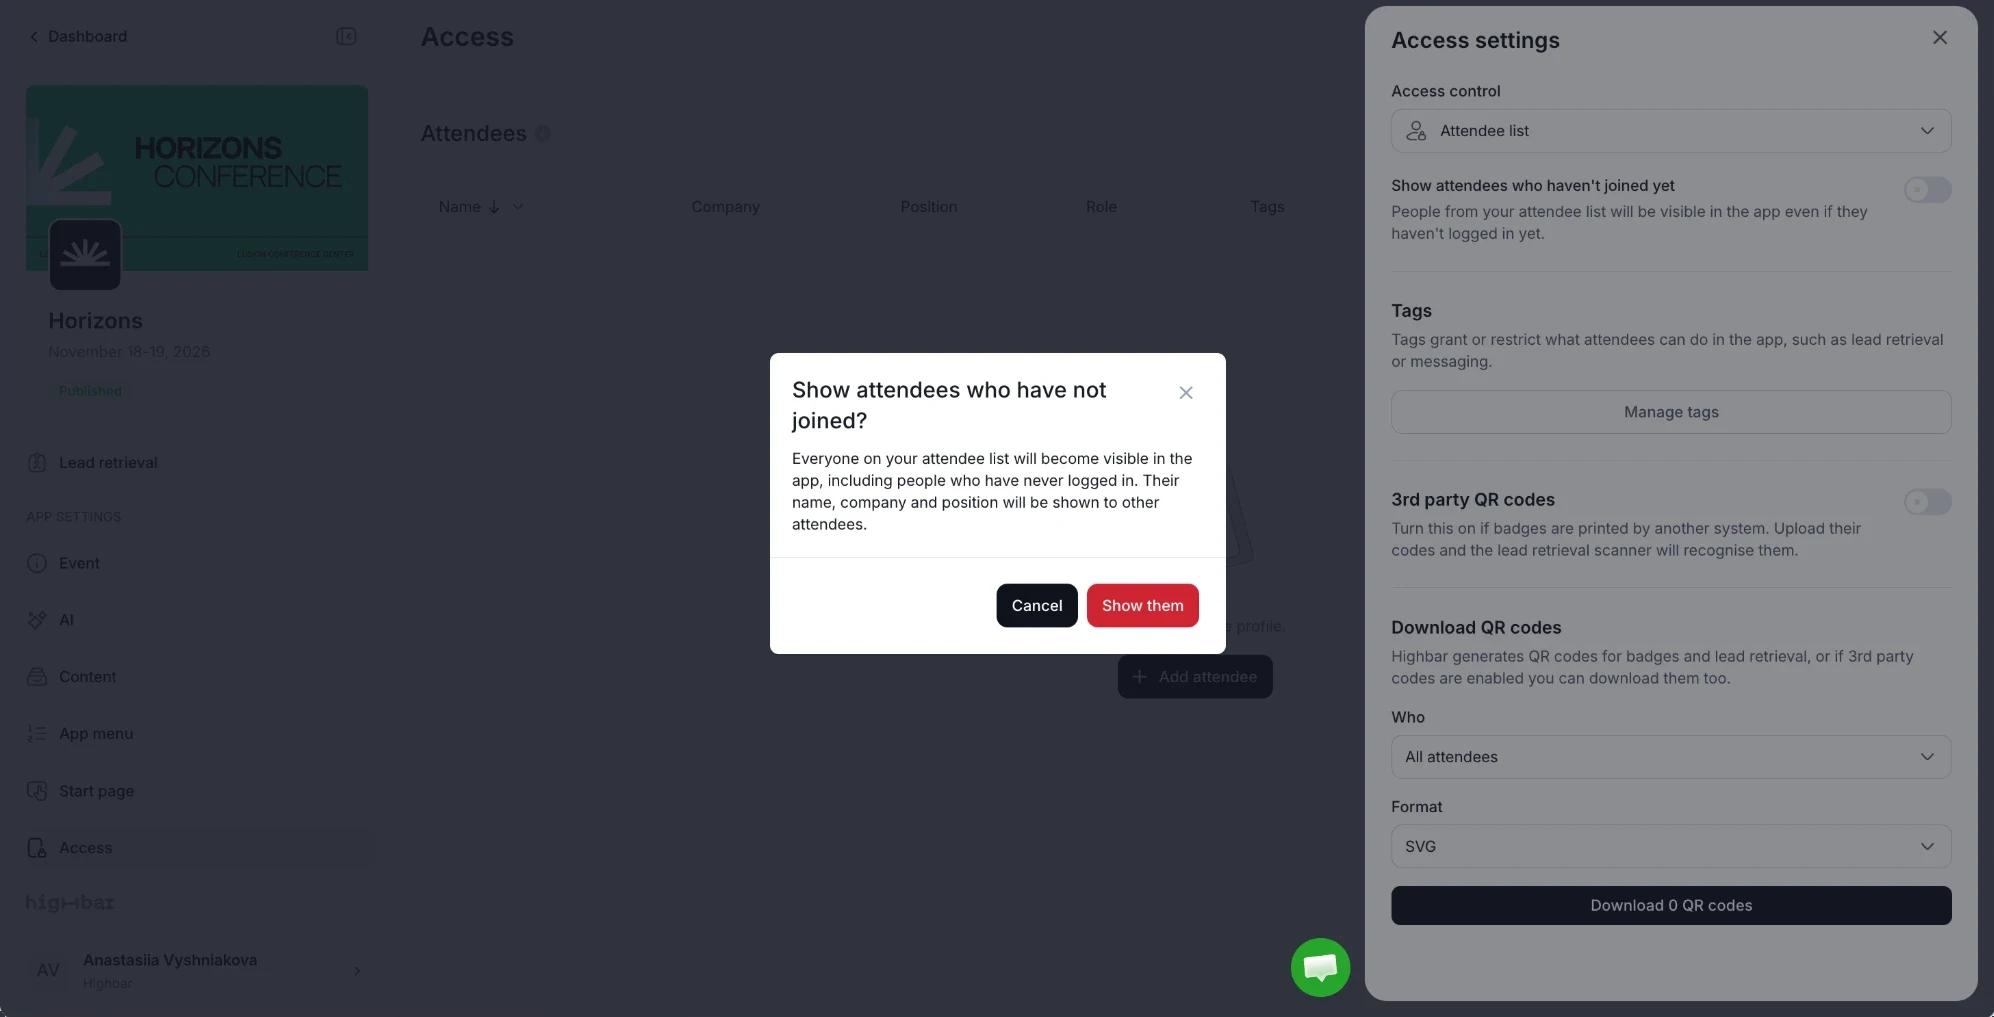
You're asked to confirm, because everyone's name, company and position becomes visible to other attendees, including people who have never logged in. Click Show them.
The ... menu at the end of each row has Edit, Show QR code and Delete. Deleting someone removes them from this list and from the app's community list.
Help someone who can't log in
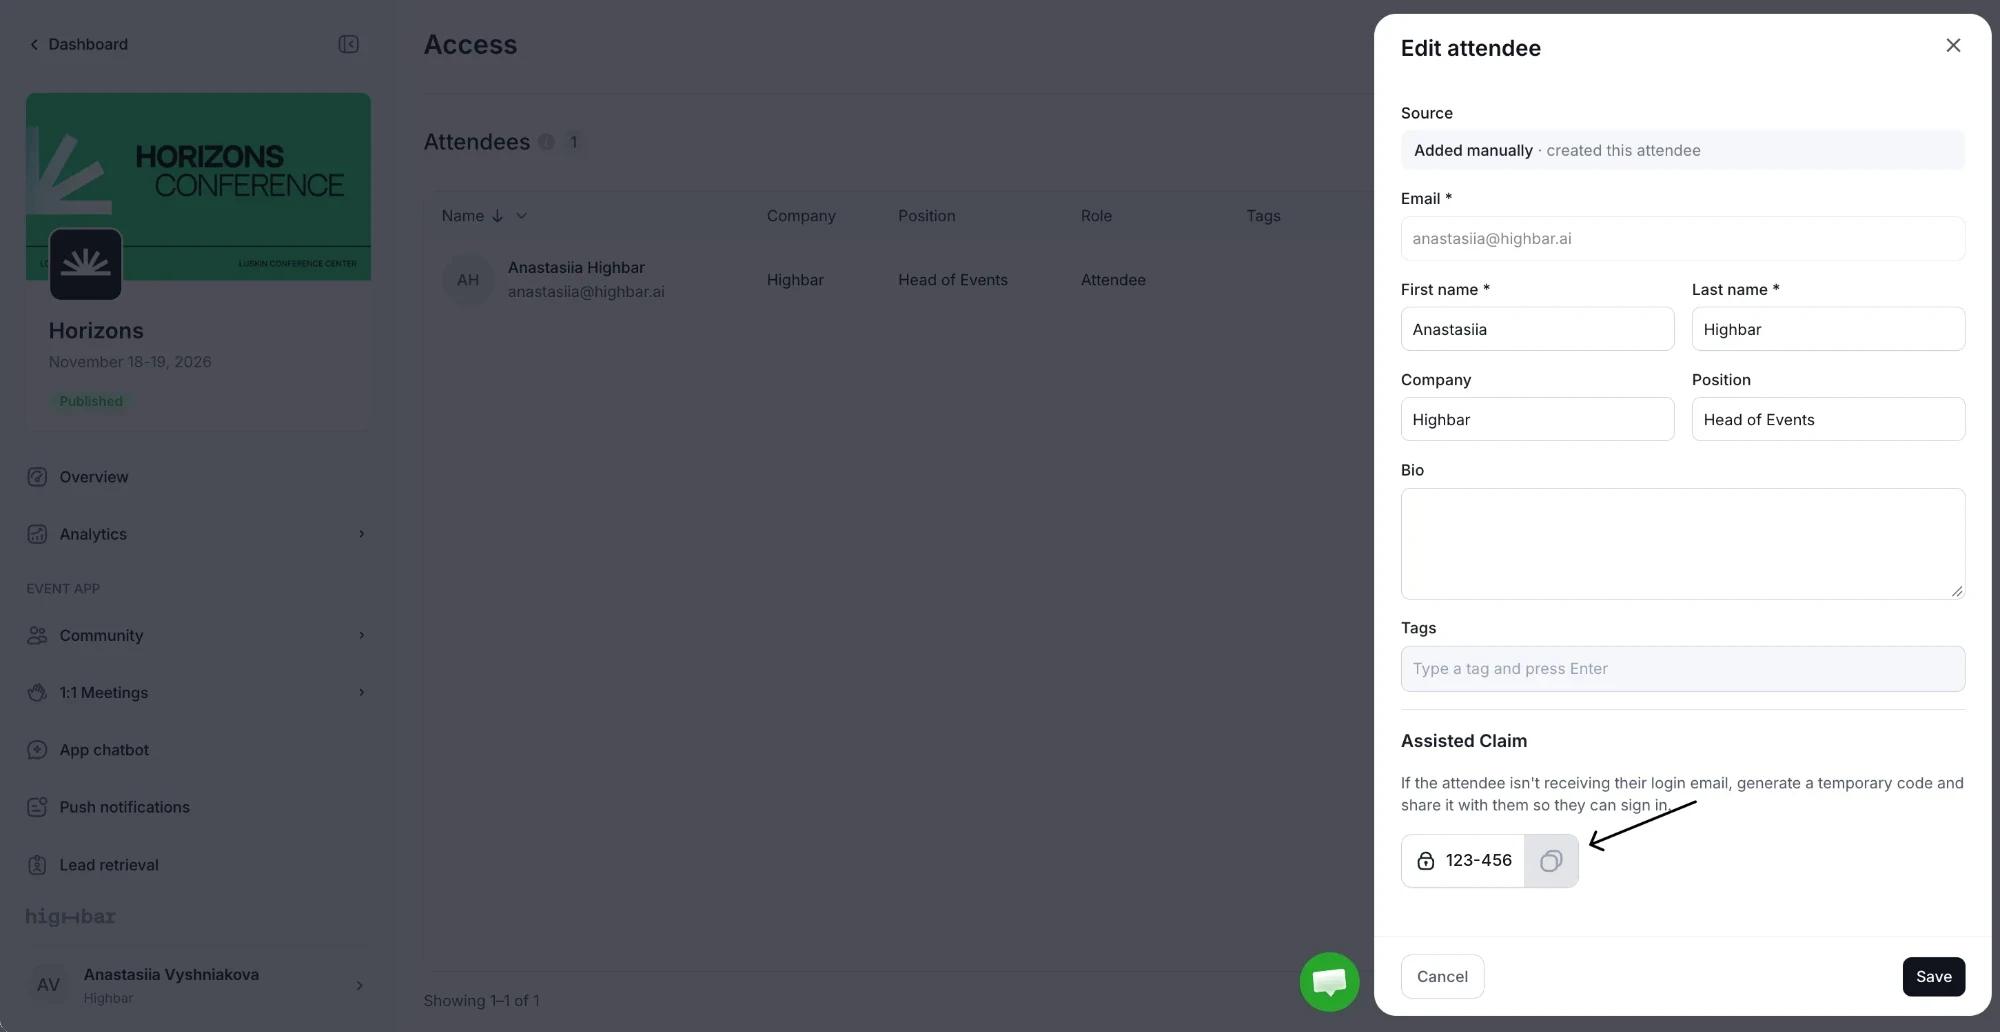
If an attendee isn't receiving the email with their code, you can give them a code yourself. This works once your app is launched, for anyone who hasn't joined yet.
Find the attendee on the Access page, open the ... menu on their row and choose Edit.
Under Assisted Claim, click Generate Code.
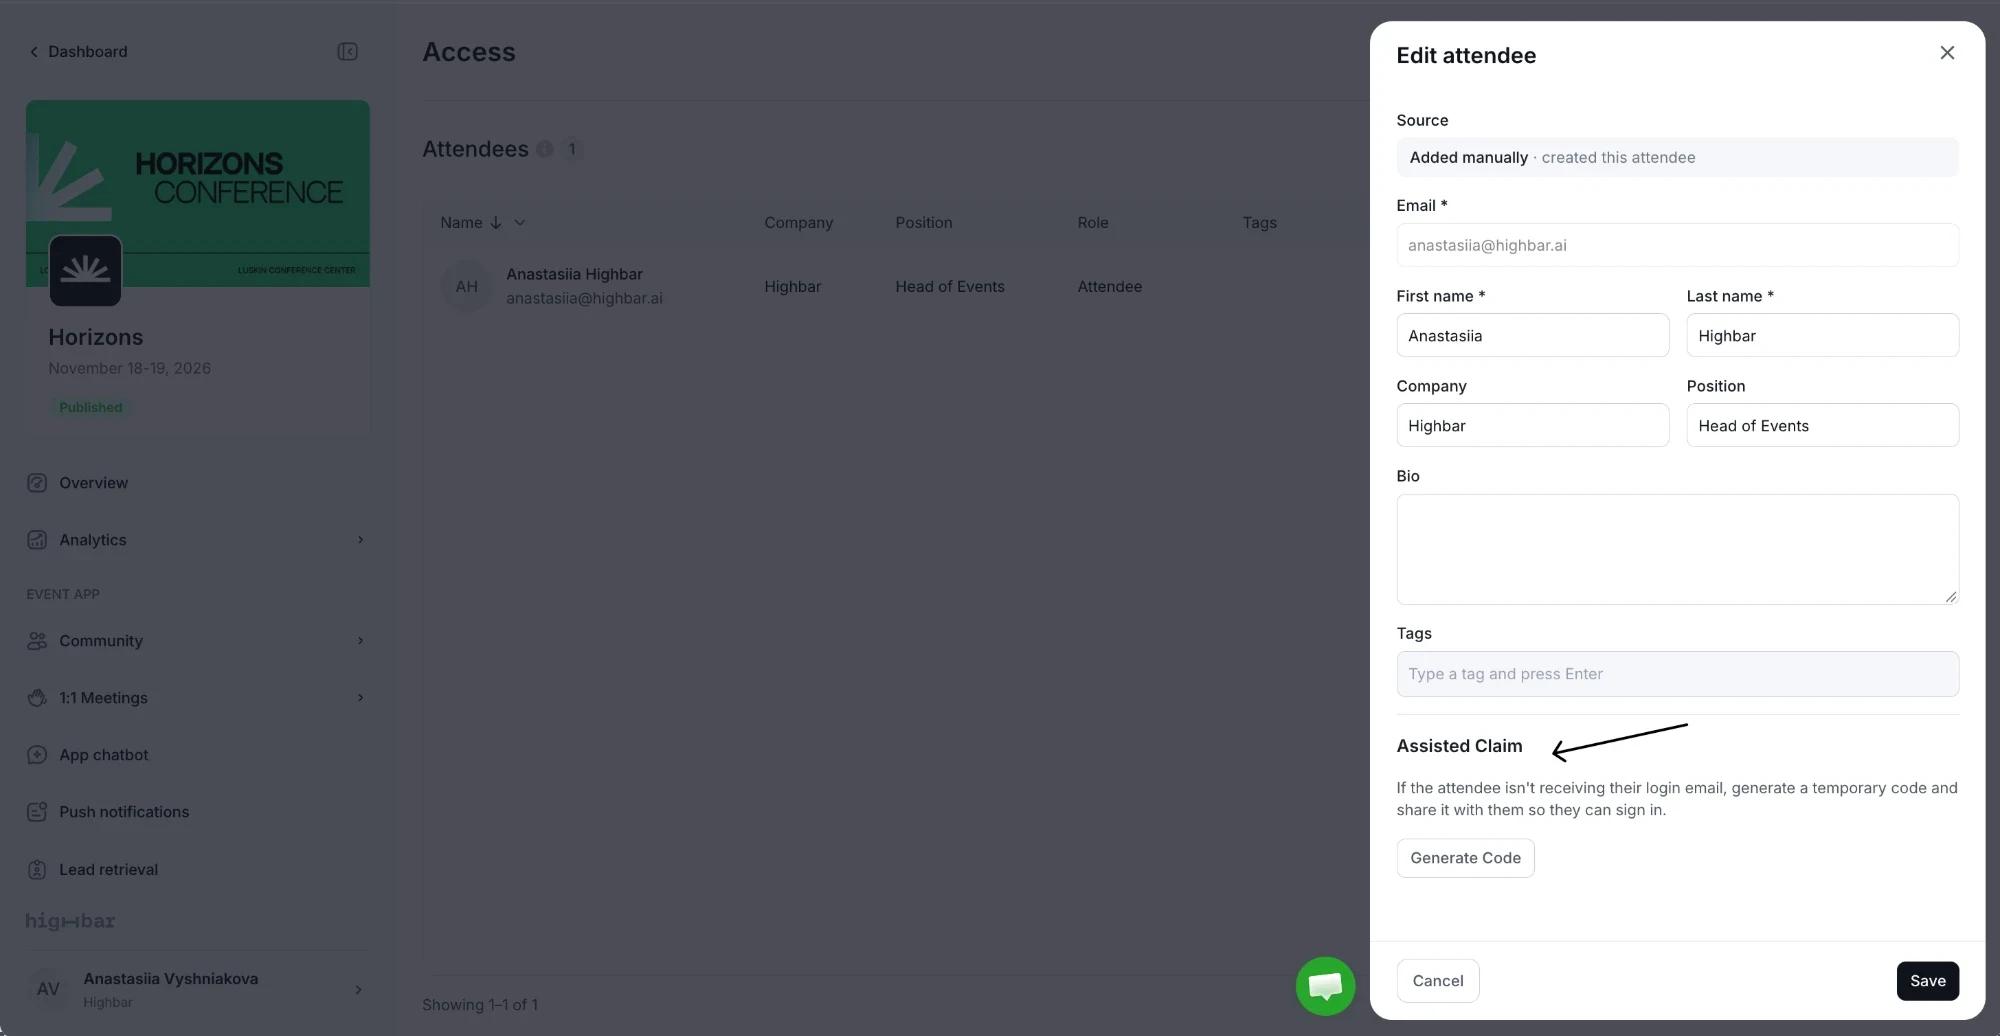
Copy the code with the button next to it and share it with them. They enter it in the app in place of the emailed code.
Control what people can do with tags
Tags group people (speakers, sponsors, staff, VIPs) and change what they can do in the app. Add tags when you create or edit an attendee, or open Access settings and choose Manage tags to create tags and tag many people at once by pasting their email addresses.
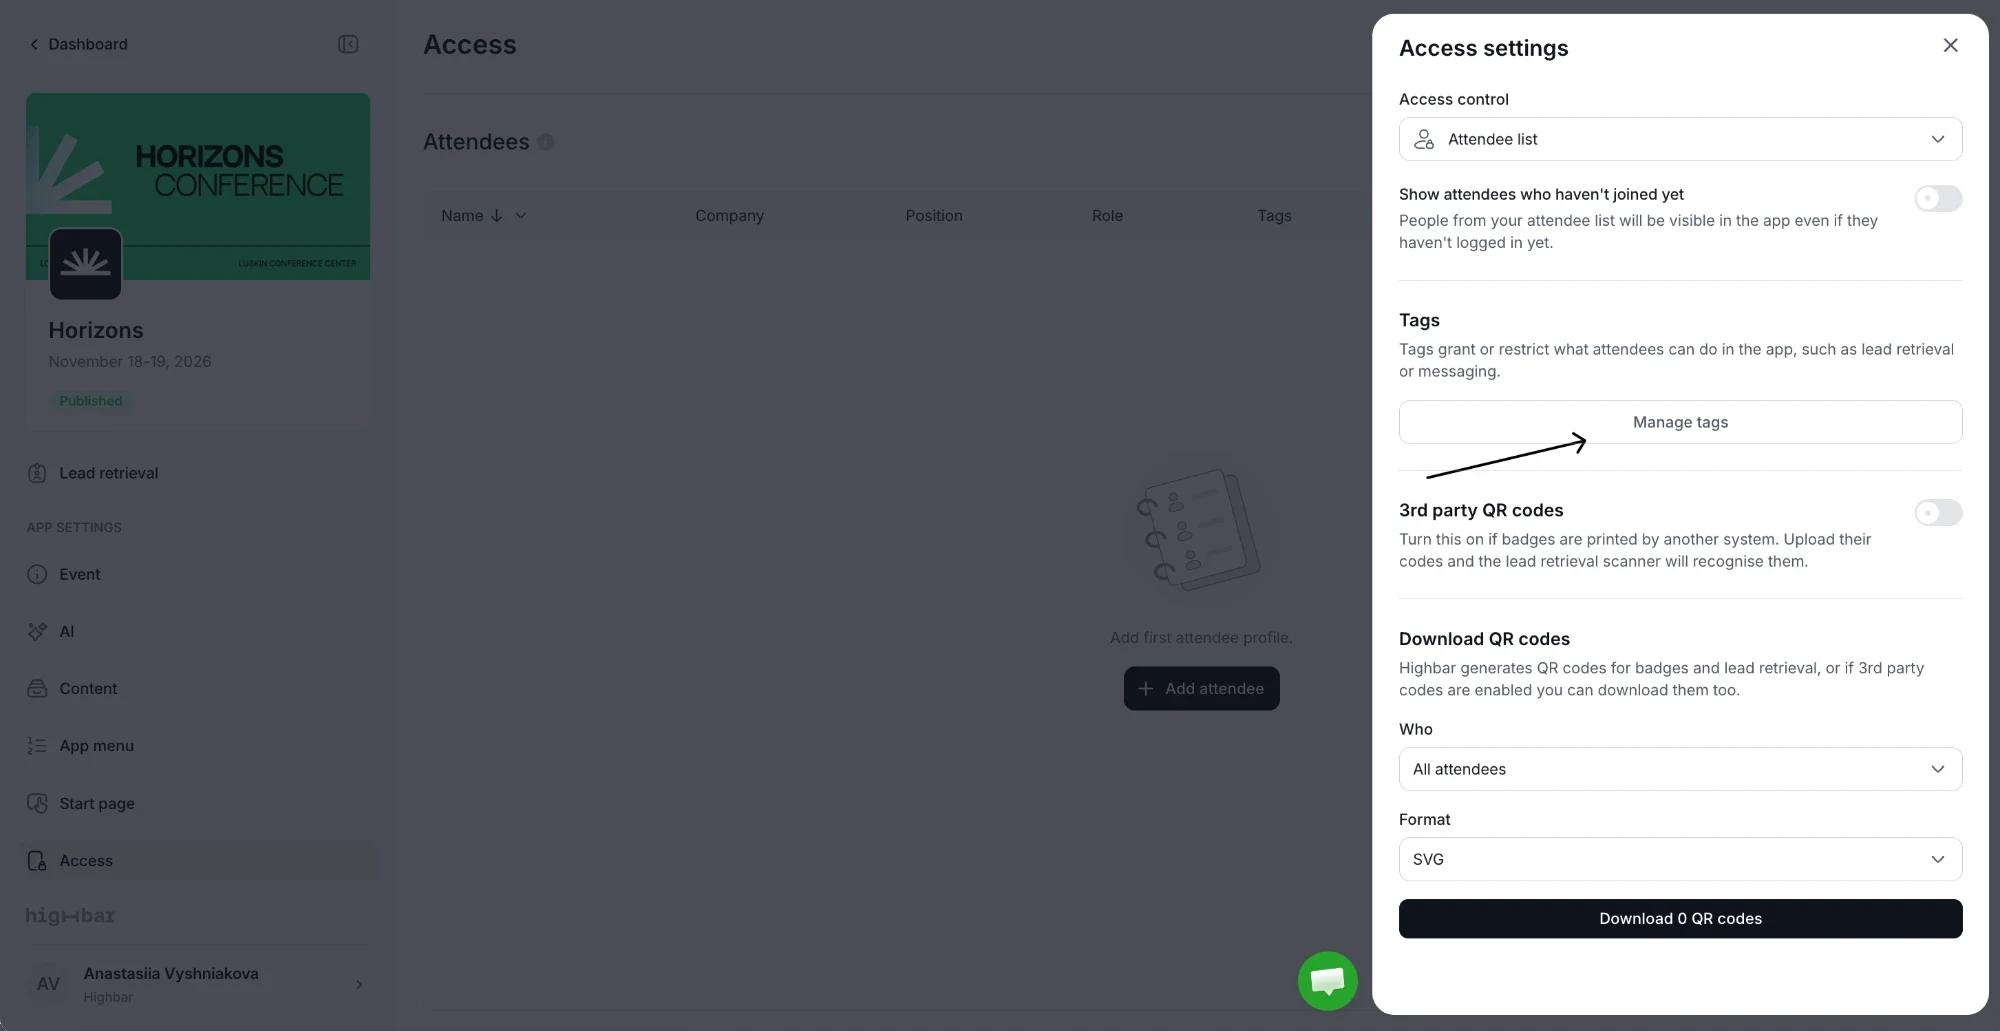
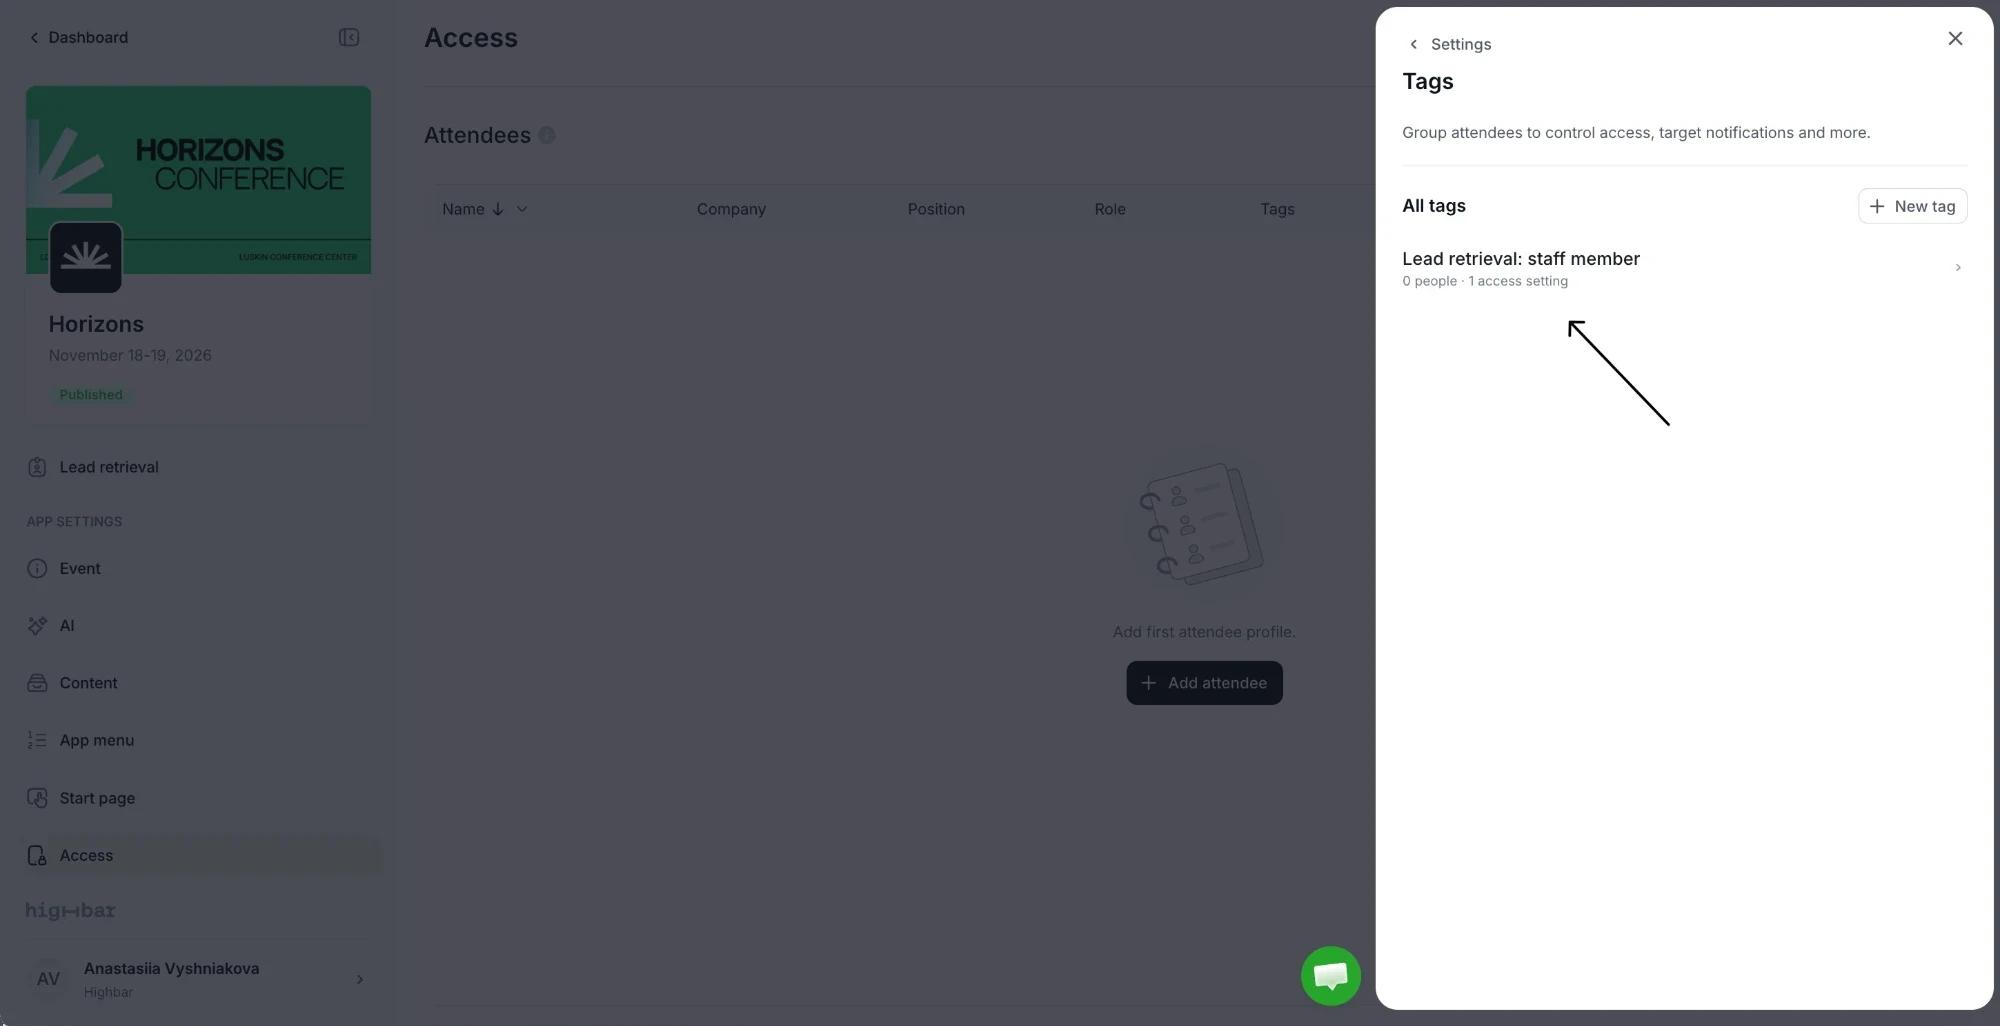
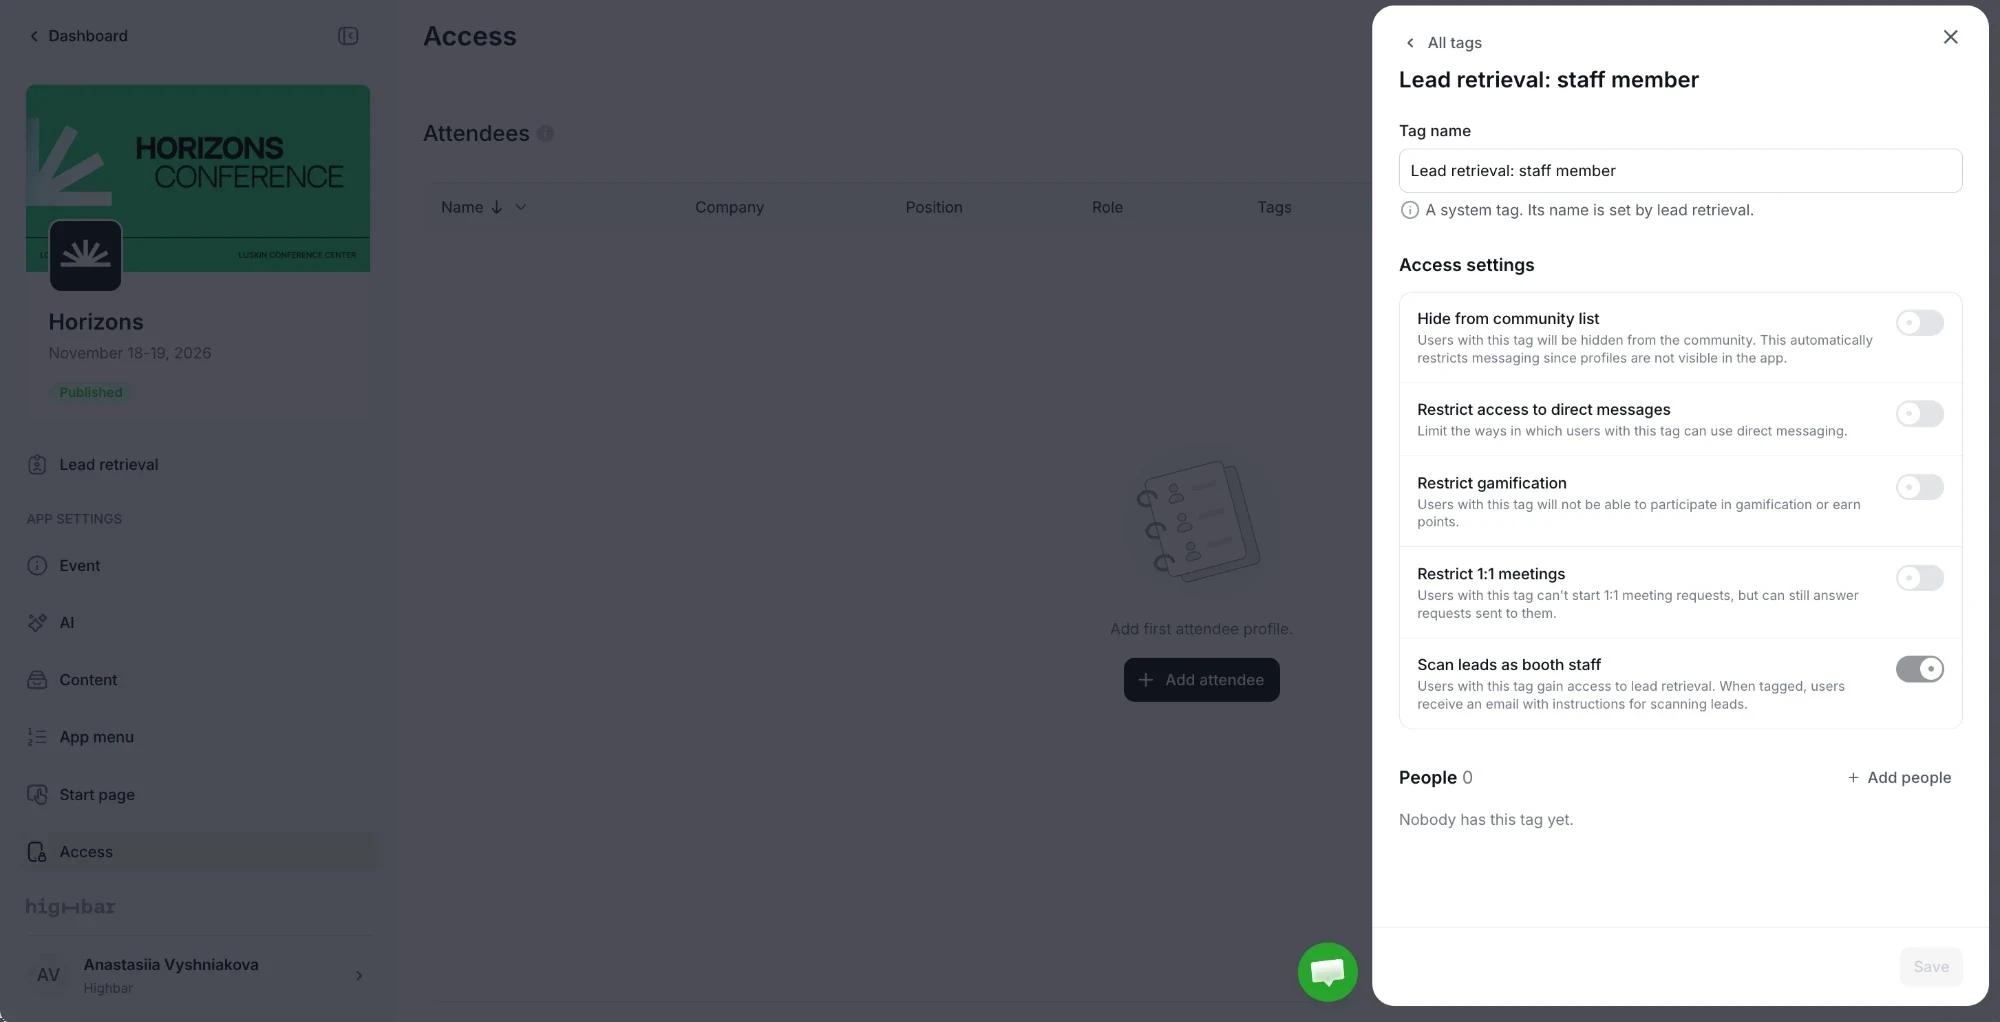
Manage tags lists all your tags with how many people have each. Click New tag to create one, or click a tag to change its settings and add people. Some tags, such as Lead retrieval: staff member, are system tags that Highbar creates; you can't rename them.
To create a tag, click New tag, enter a Tag name, turn on the Access settings it should have (below), and click Create tag.
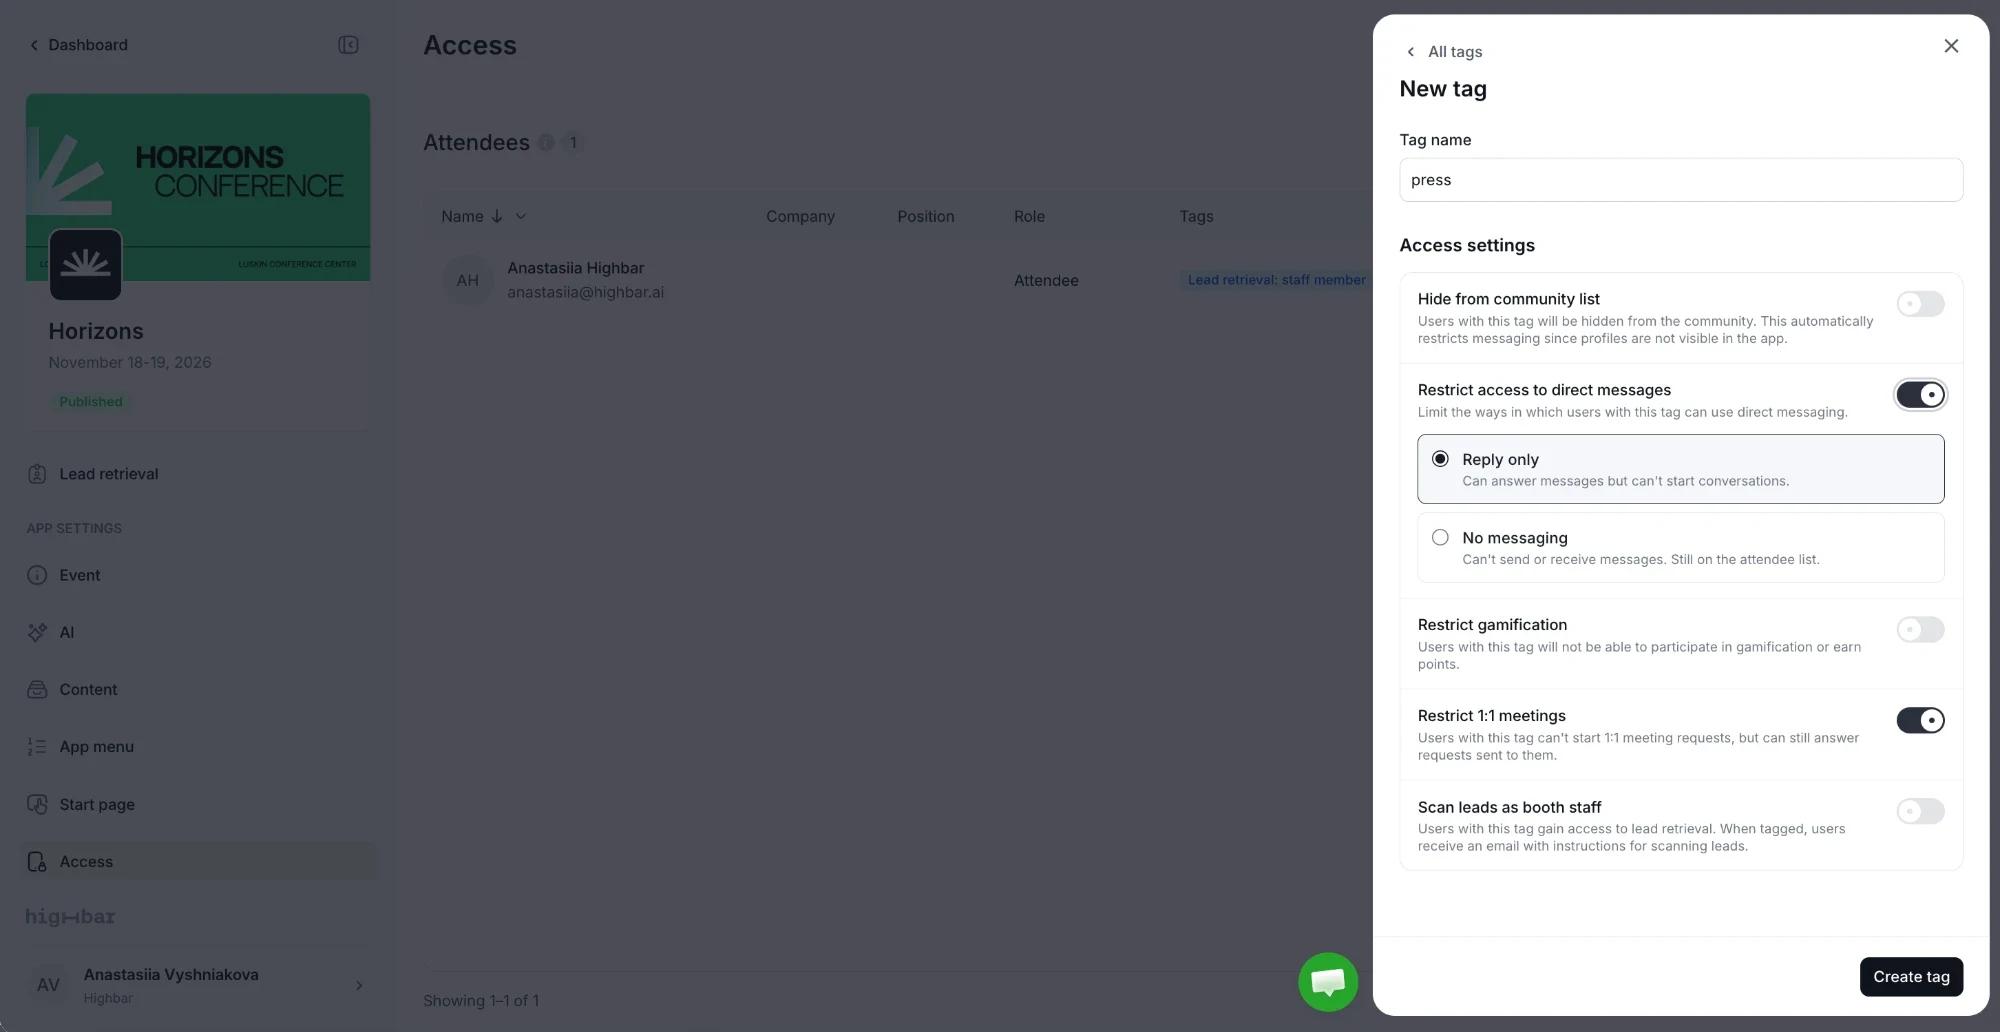
Each tag can turn on any of these settings:
| Setting | What it does |
|---|---|
| Hide from community list | Hides people with this tag from the community list. Because their profiles aren't visible, this also restricts messaging. |
| Restrict access to direct messages | Reply only: they can answer messages but can't start conversations. No messaging: they can't send or receive messages, but stay on the attendee list. |
| Restrict gamification | They can't take part in gamification or earn points. |
| Restrict 1:1 meetings | They can't start meeting requests, but can still answer requests sent to them. See 1:1 meetings. |
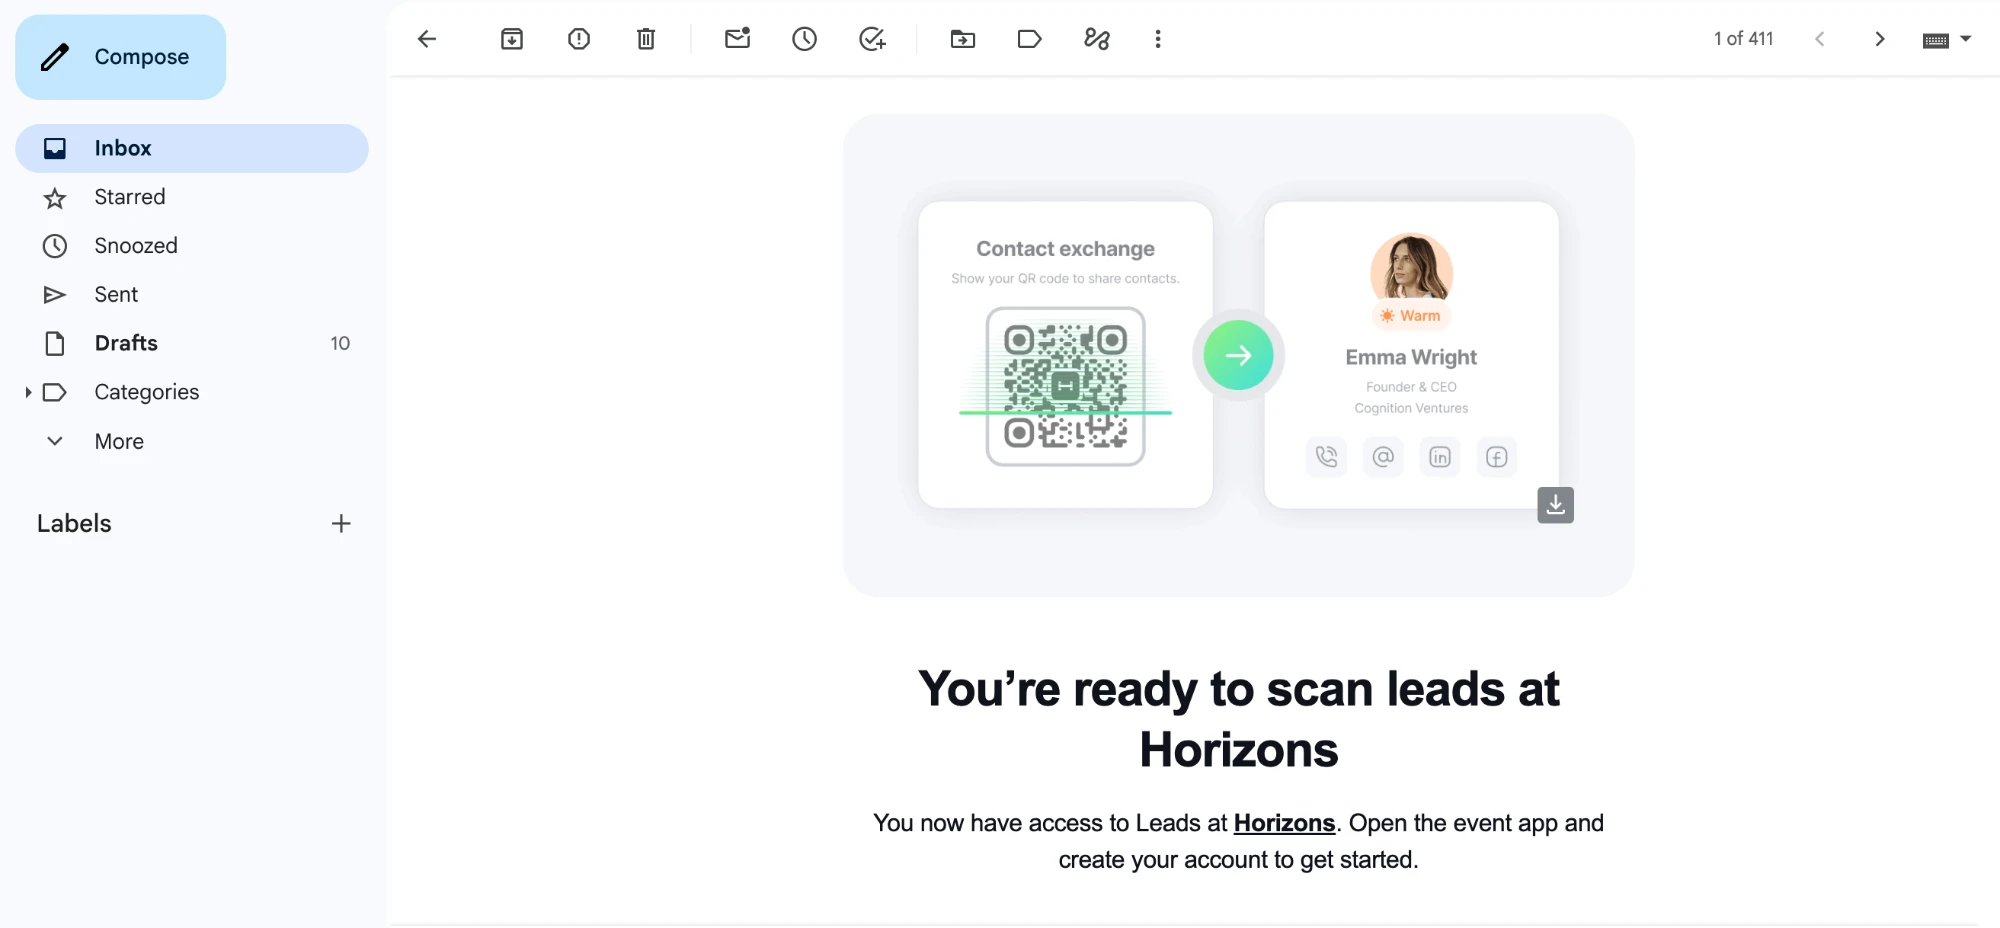
| Scan leads as booth staff | Gives them lead retrieval. They receive an email explaining how to scan leads. To link them to a sponsor, see Lead retrieval. |
Click a tag in the list to open it. You see its Access settings and, under People, everyone who has the tag.
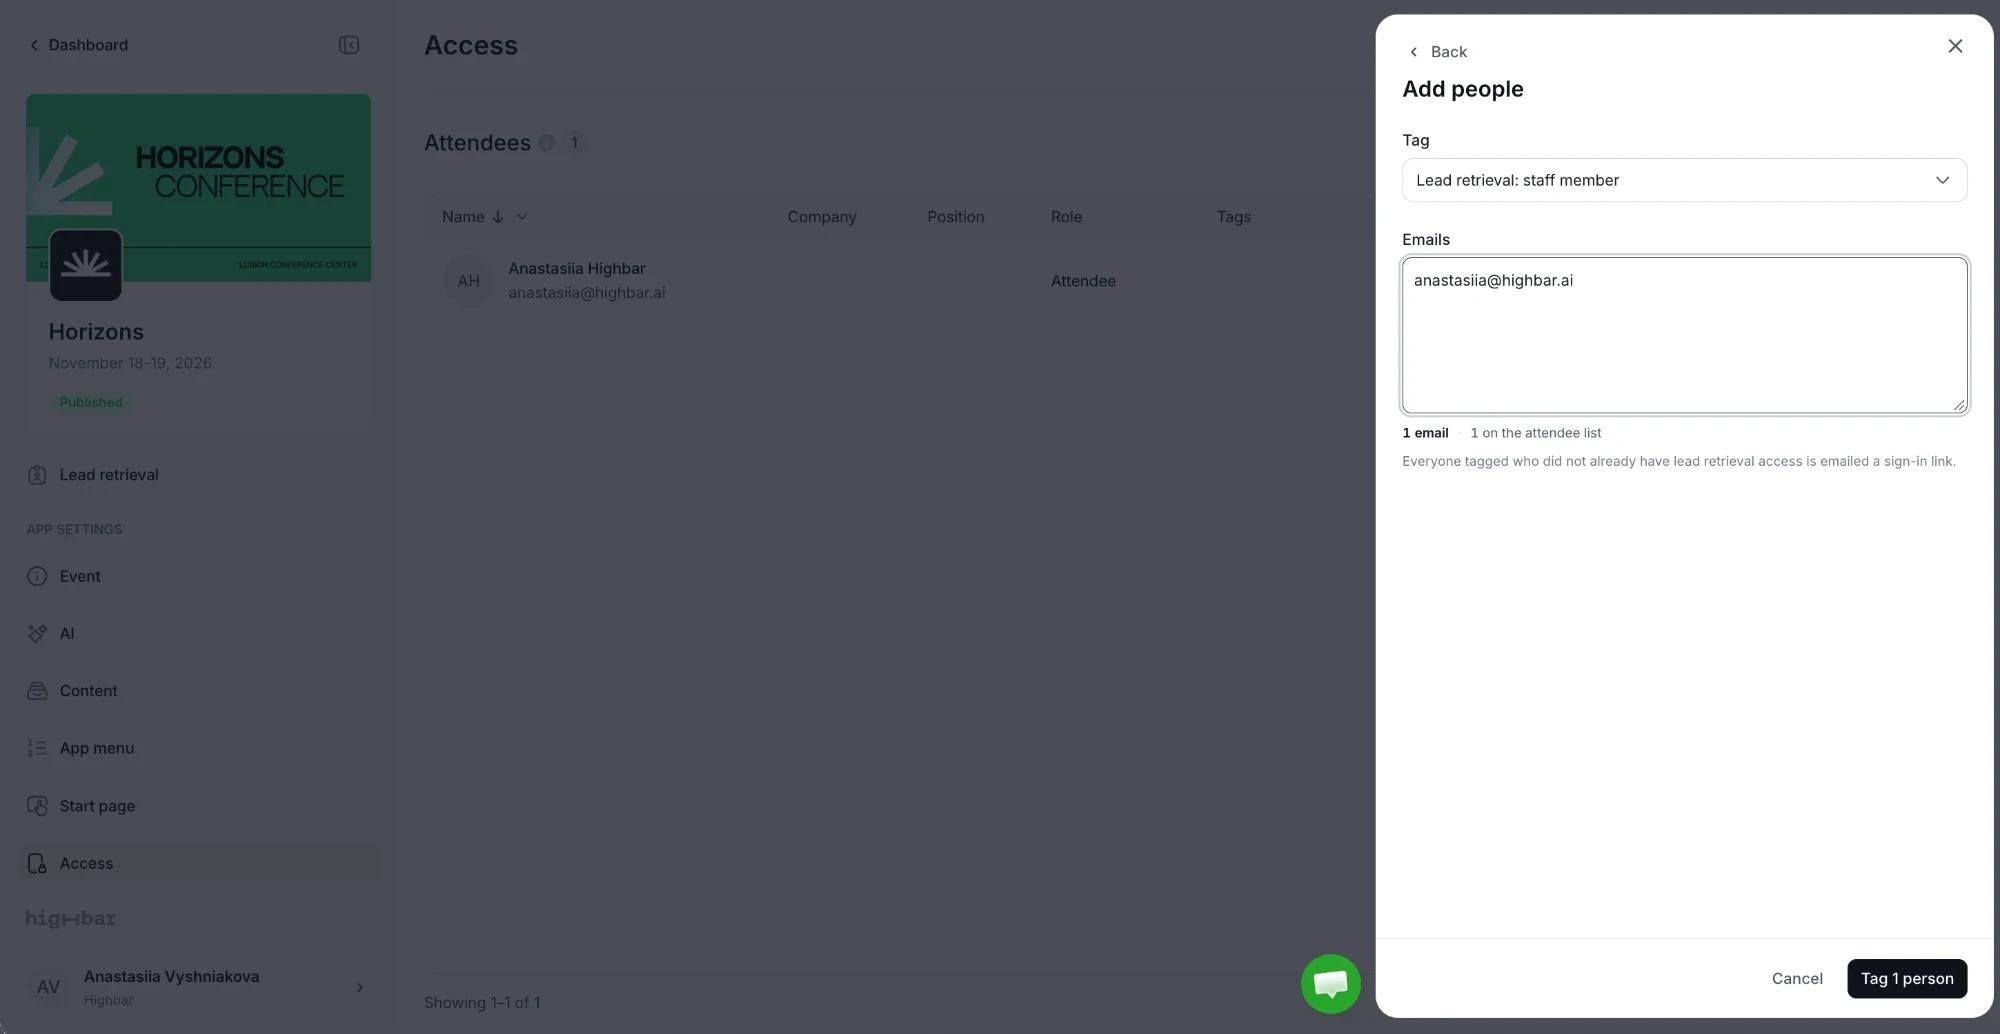
Under People, click Add people, paste the Emails of the people to tag (one per line, or separated by commas), and click the tag button (such as Tag 1 person). Below the box you see how many of those emails are on the attendee list.
Giving someone lead retrieval this way emails them a sign-in link with instructions:
Print QR codes on badges
Every attendee has a QR code, used for exchanging contacts and for lead retrieval at booths.
-
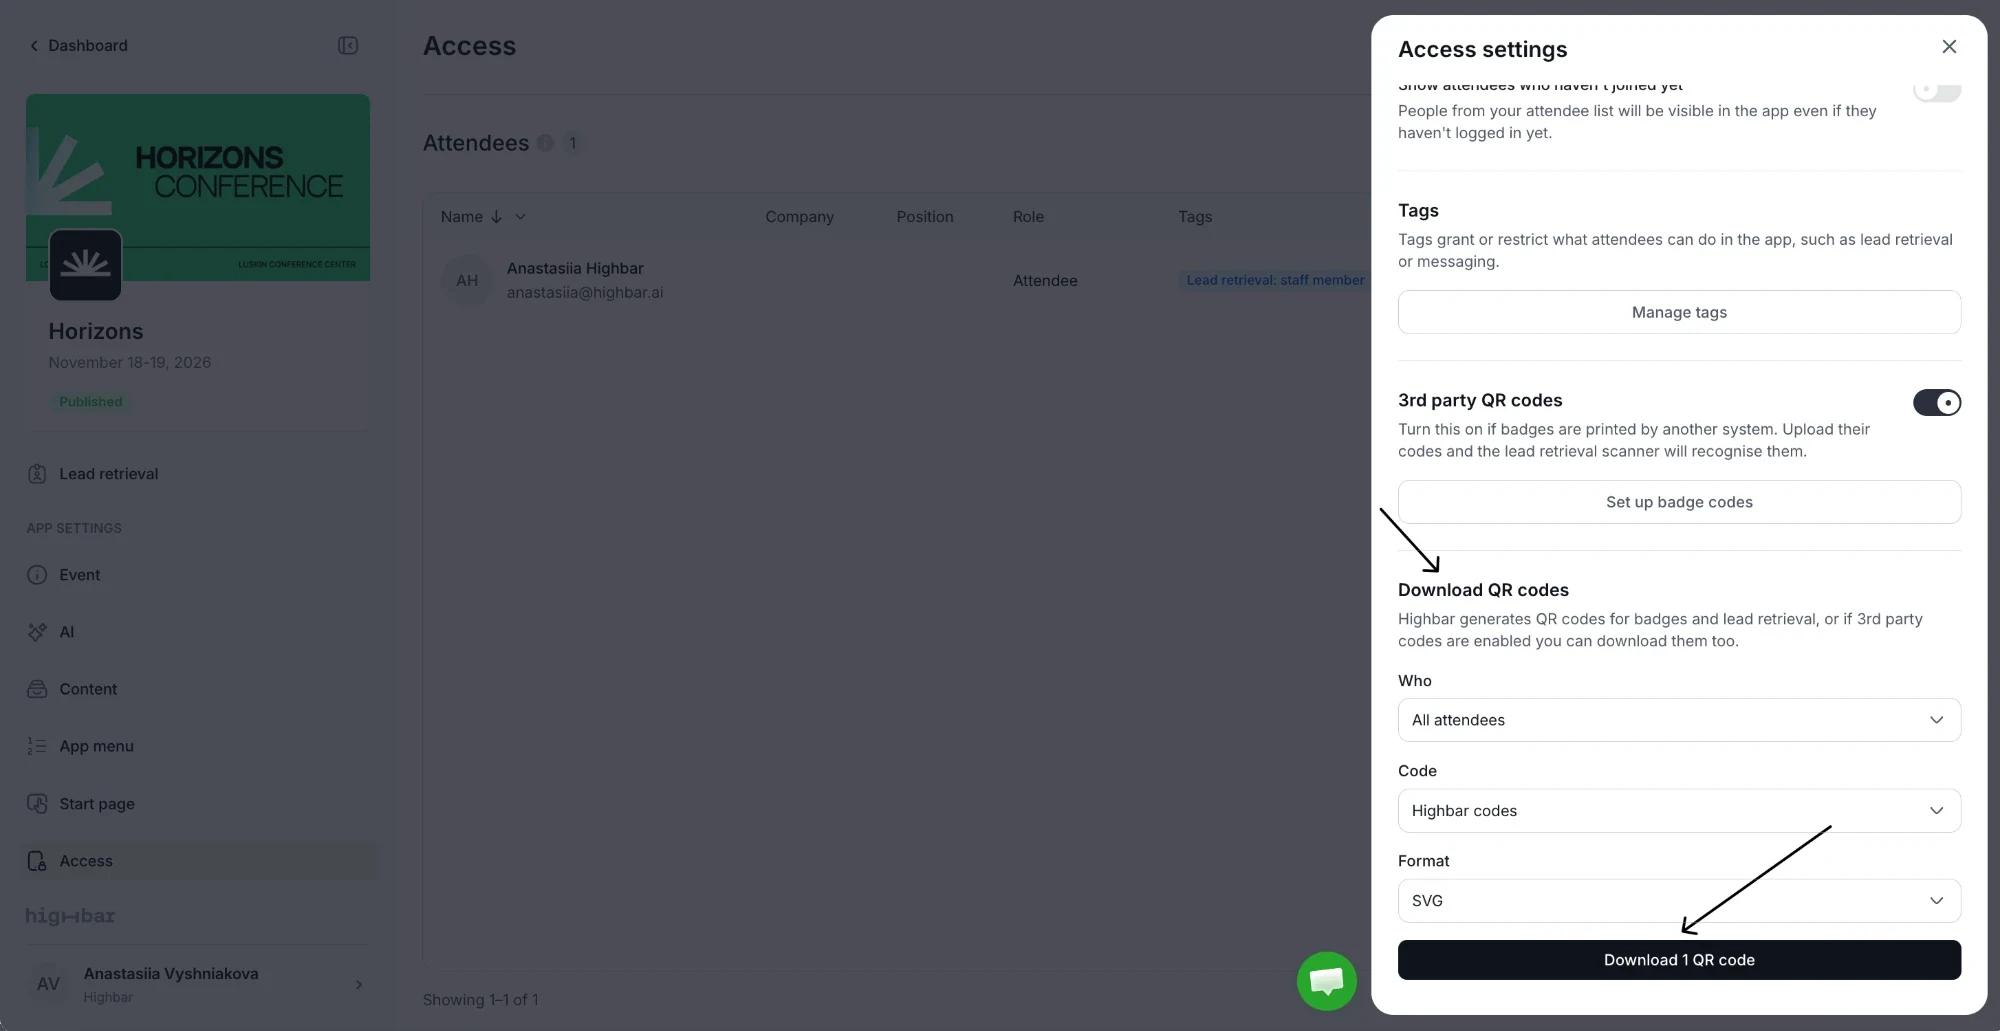
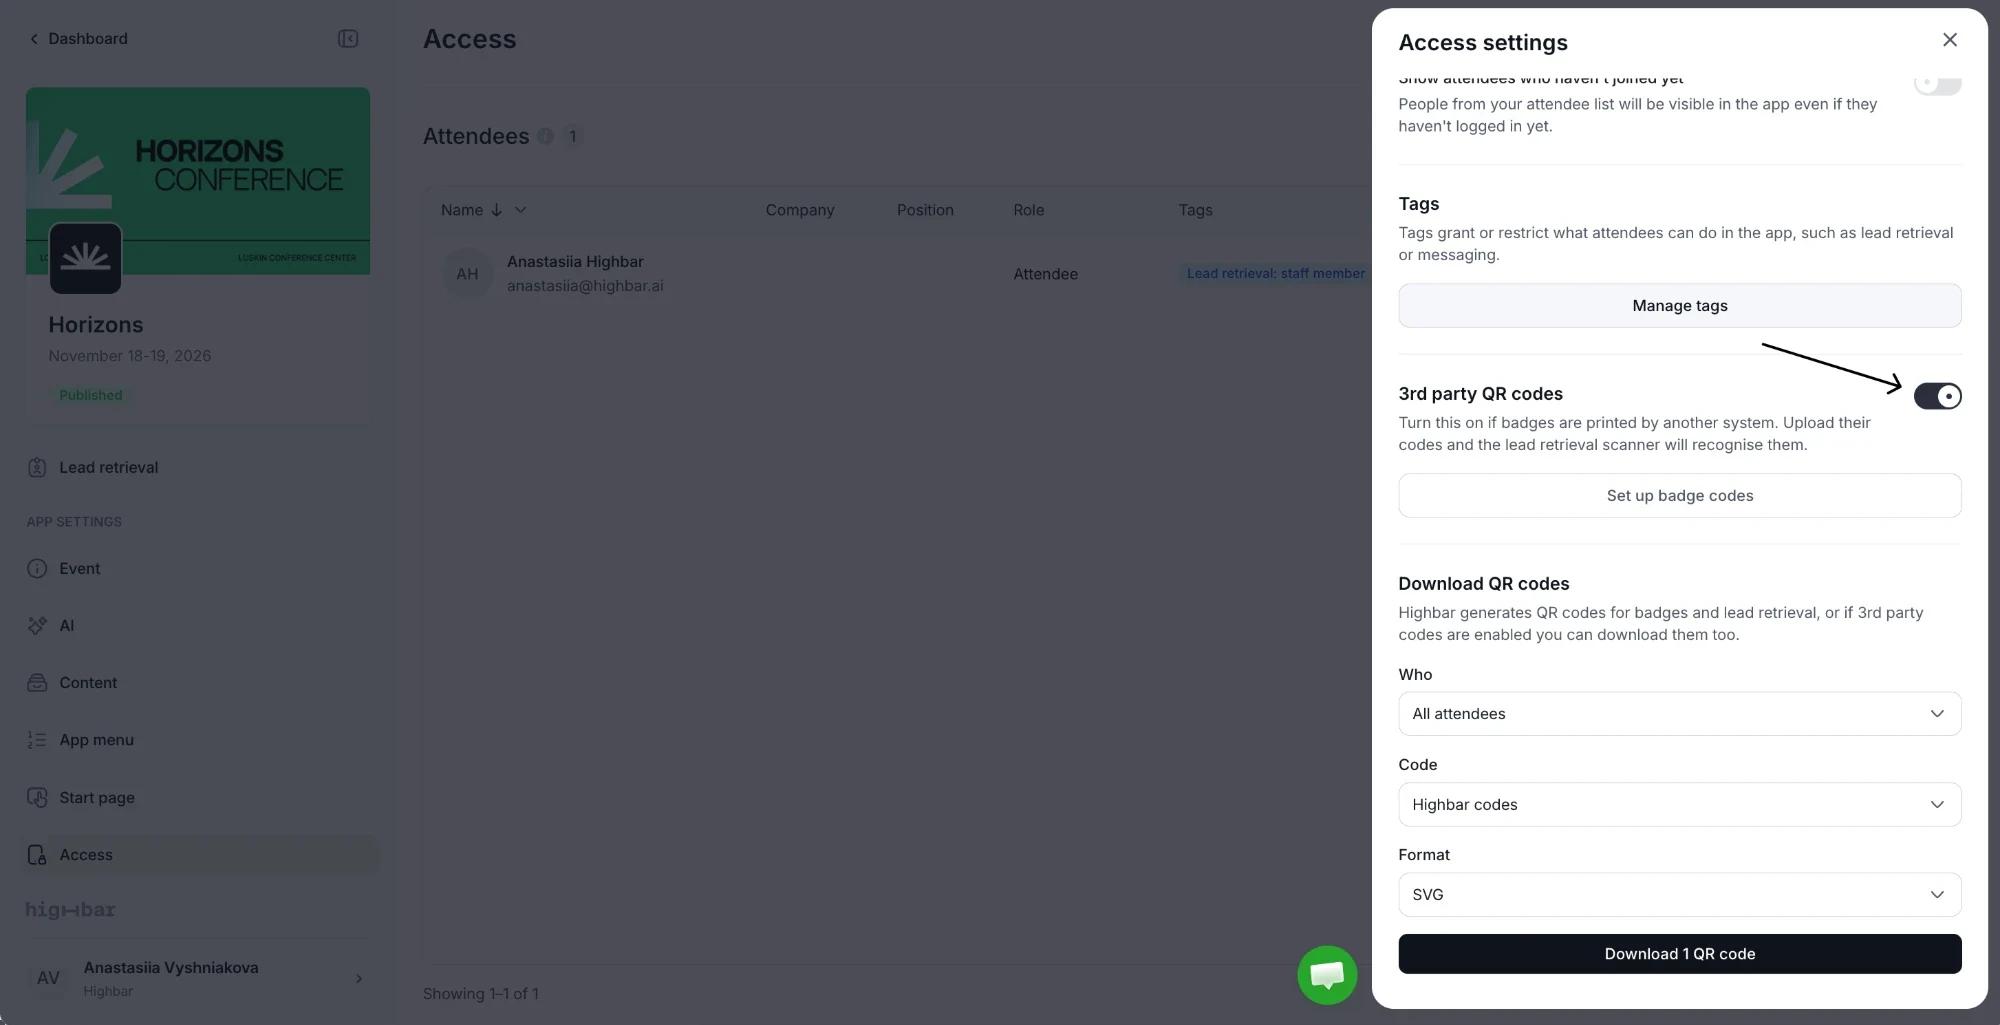
Download codes for badges. In Access settings, under Download QR codes, choose Who to include (all attendees, your current search and filters, people with certain tags, or individual people) and a Format (SVG or PNG), then click the download button, which shows how many codes you'll get (such as Download 120 QR codes).
-
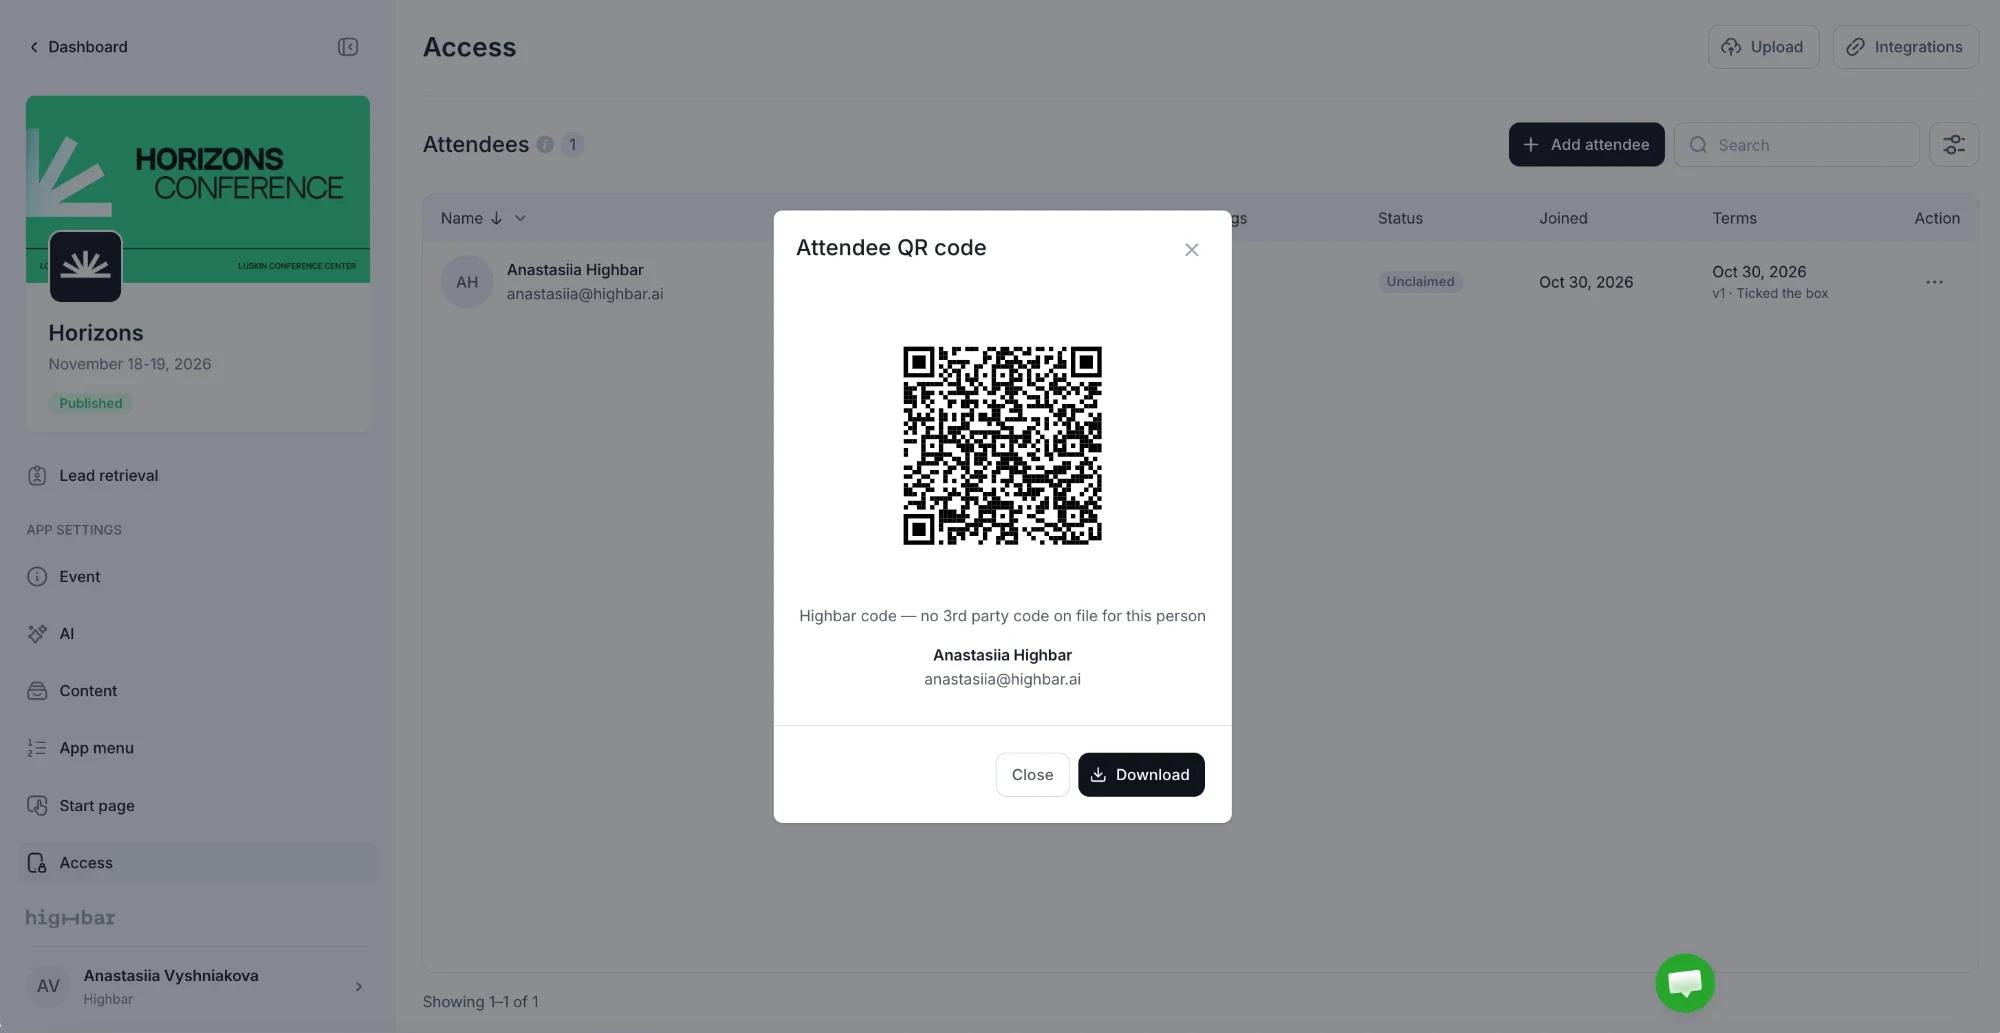
One person's code. Choose Show QR code from the ... menu on their row, click Download and choose Download as PNG or Download as SVG. If you've uploaded badge codes from another system, the person's own badge code is shown instead of Highbar's.
-
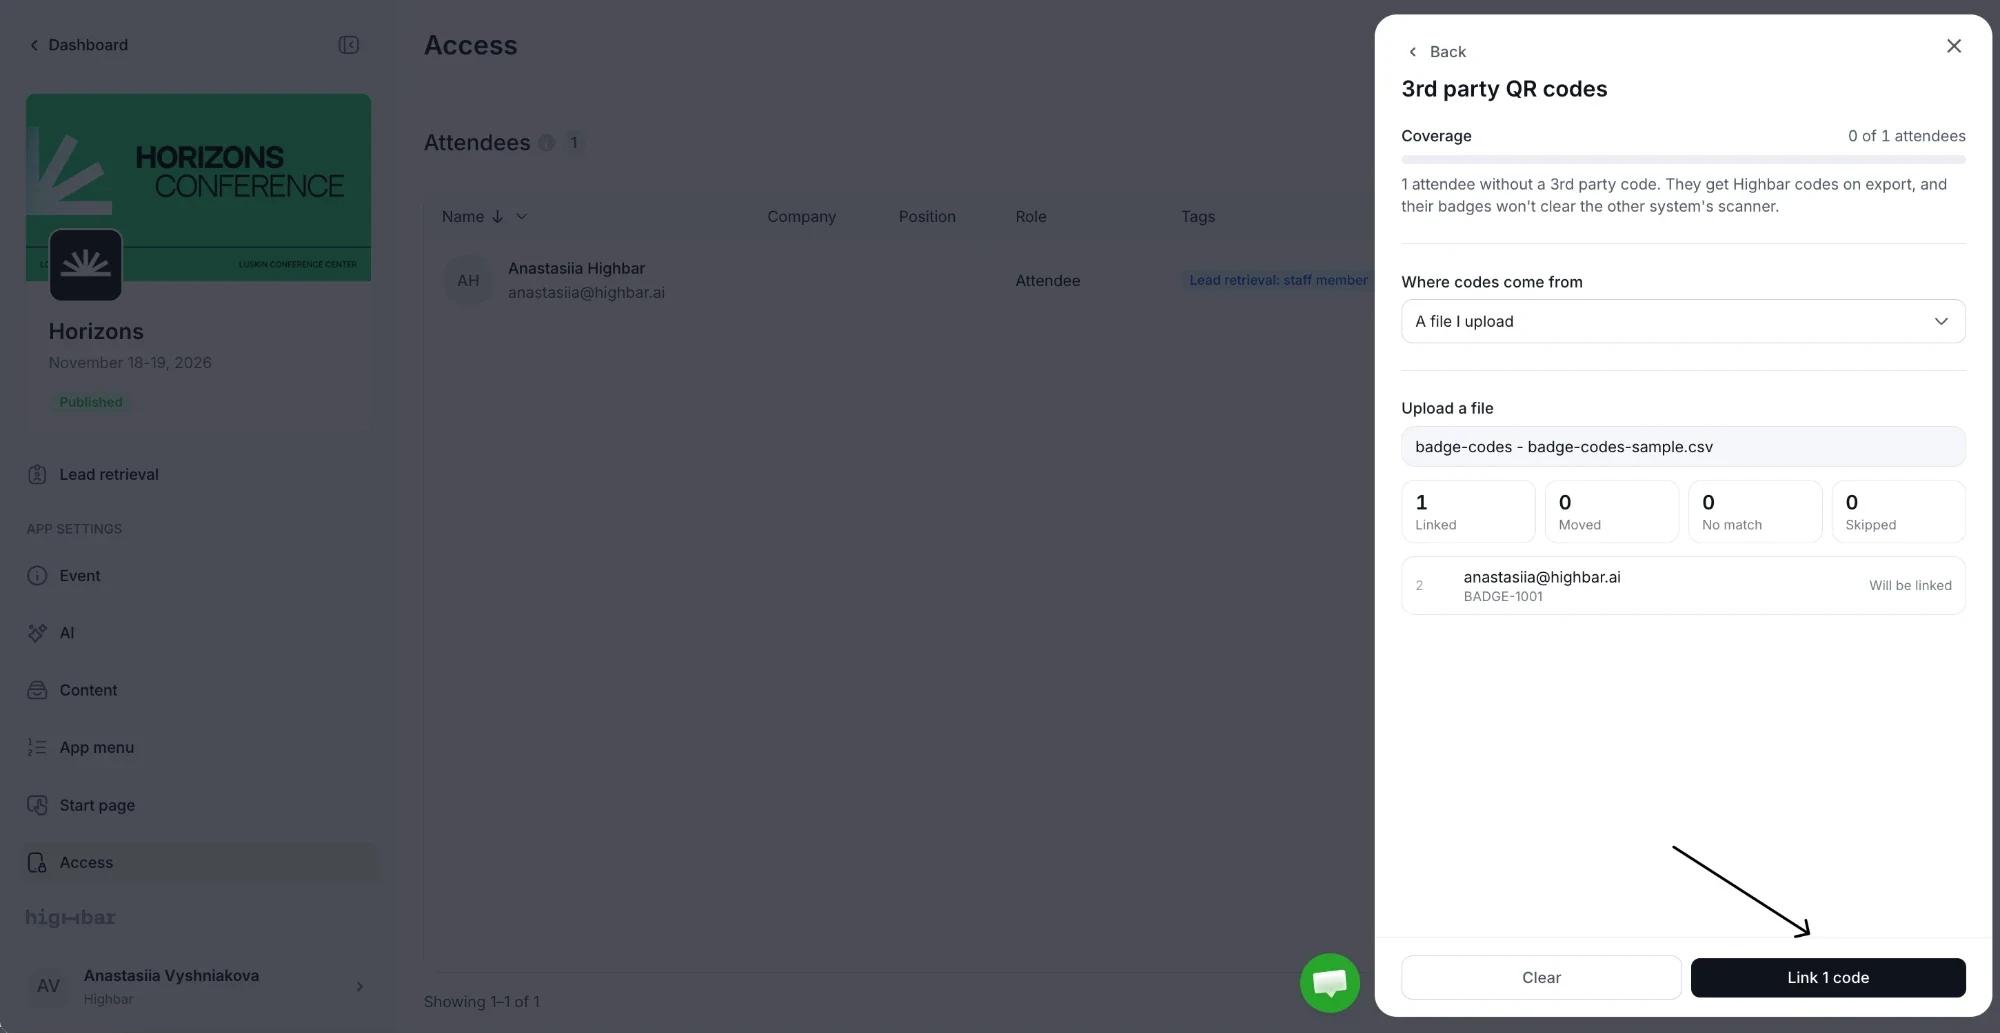
Badges printed by another system. Turn on 3rd party QR codes and click Set up badge codes. Under Where codes come from, choose A file I upload and drop in a file exported from the other system (it needs an email column and a code column, in any order; Download a sample file shows the layout), or A connected integration. Coverage shows how many attendees have a code. The lead retrieval scanner then recognises the printed badges, and when downloading codes you can choose Highbar codes or 3rd party codes under Code. Attendees without a 3rd party code get Highbar's.
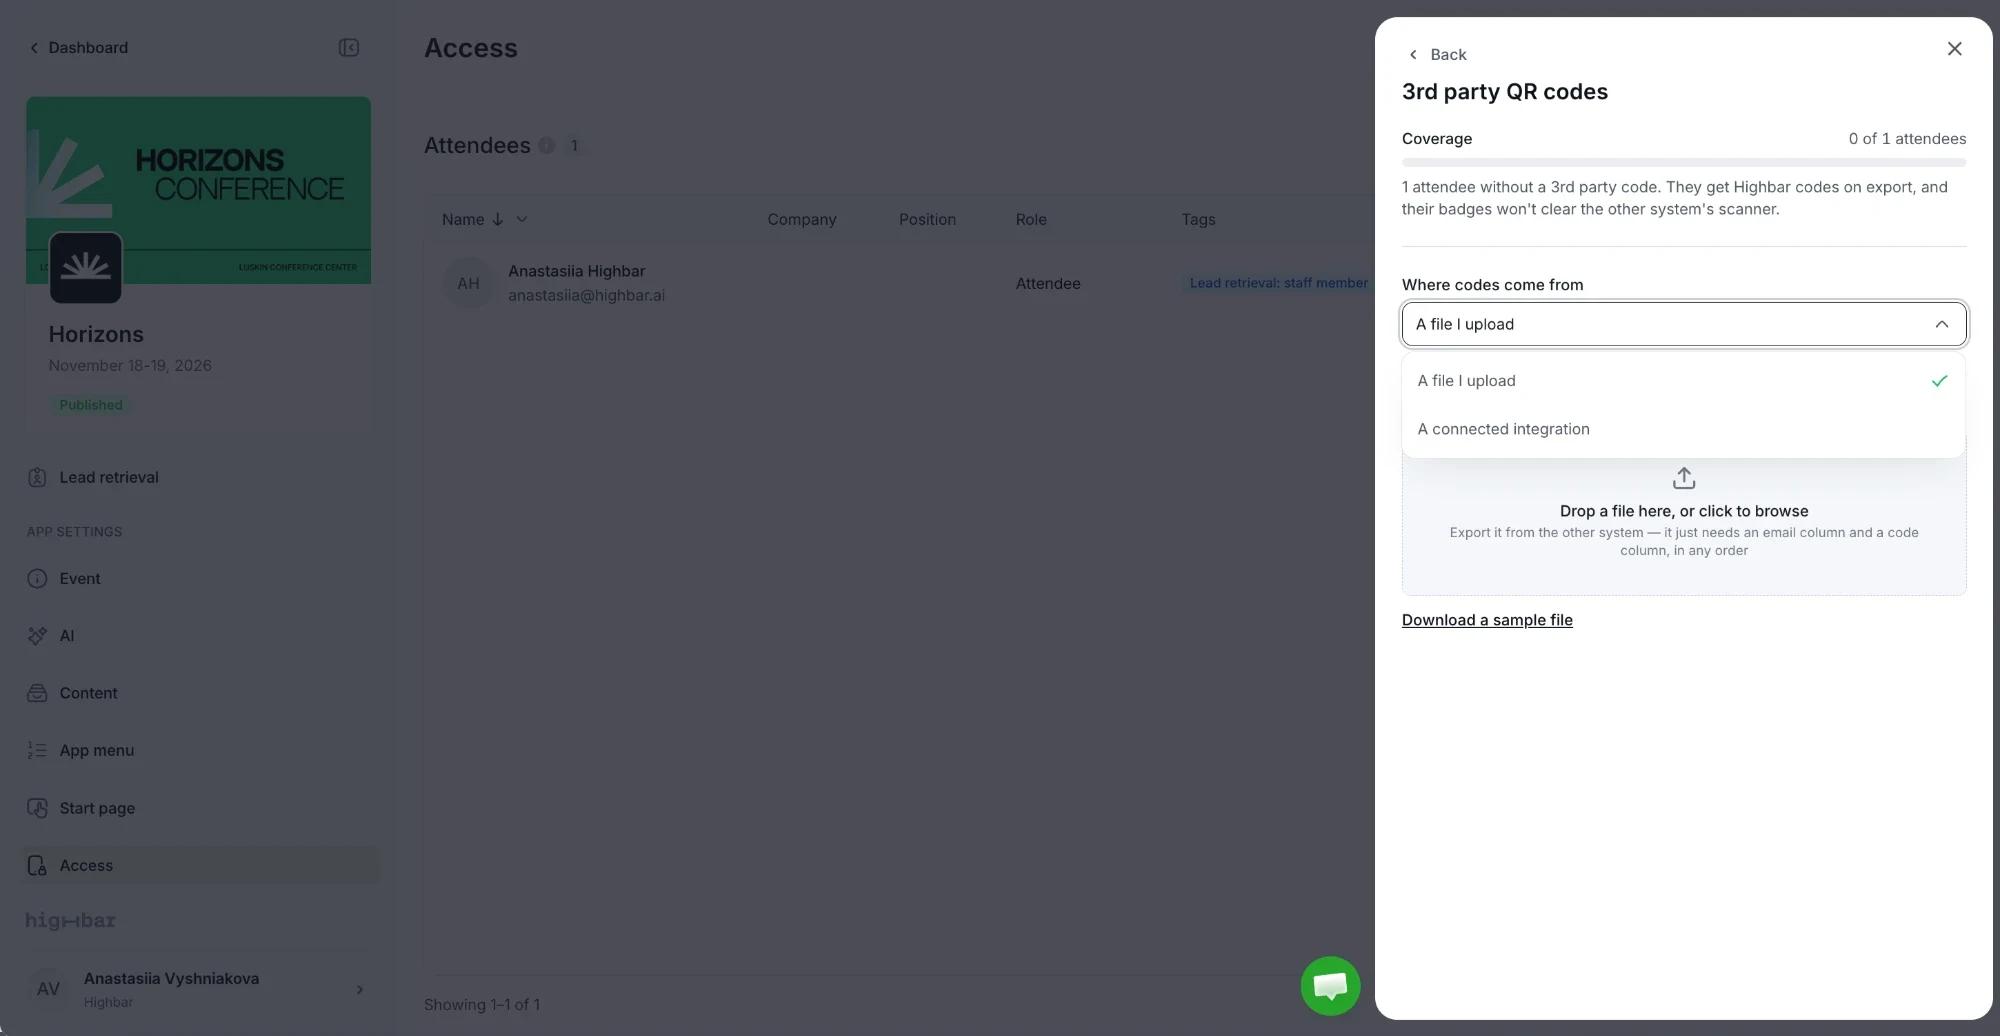
After you upload the file, Highbar shows how many codes will be Linked to attendees, Moved from one attendee to another, have No match (no attendee with that email) or are Skipped, with each row's outcome. Click Link (such as Link 1 code) to save them, or Clear to start again.