1:1 meetings
Let attendees book one-to-one meetings with each other in the event app, at the times and places you choose.
With 1:1 meetings, attendees can ask to meet someone from their profile or from their AI matches, pick a time and place, and get a confirmation when the other person accepts. You set the days, hours, slot length and meeting spots, and can limit who meets whom.
You'll find 1:1 Meetings in the event sidebar after launch, in the Event app group. It has three pages: Overview, Meetings and Settings.
Set up meetings
Set up first, then turn meetings on, so attendees only ever see times and places that work. The setup is on Settings, in three tabs: General, Availability and Locations. The Set up cards on Overview open the same tabs. Each tab has Save changes and Discard at the top right: click Save changes before you leave a tab.
General settings
Open Settings > General.
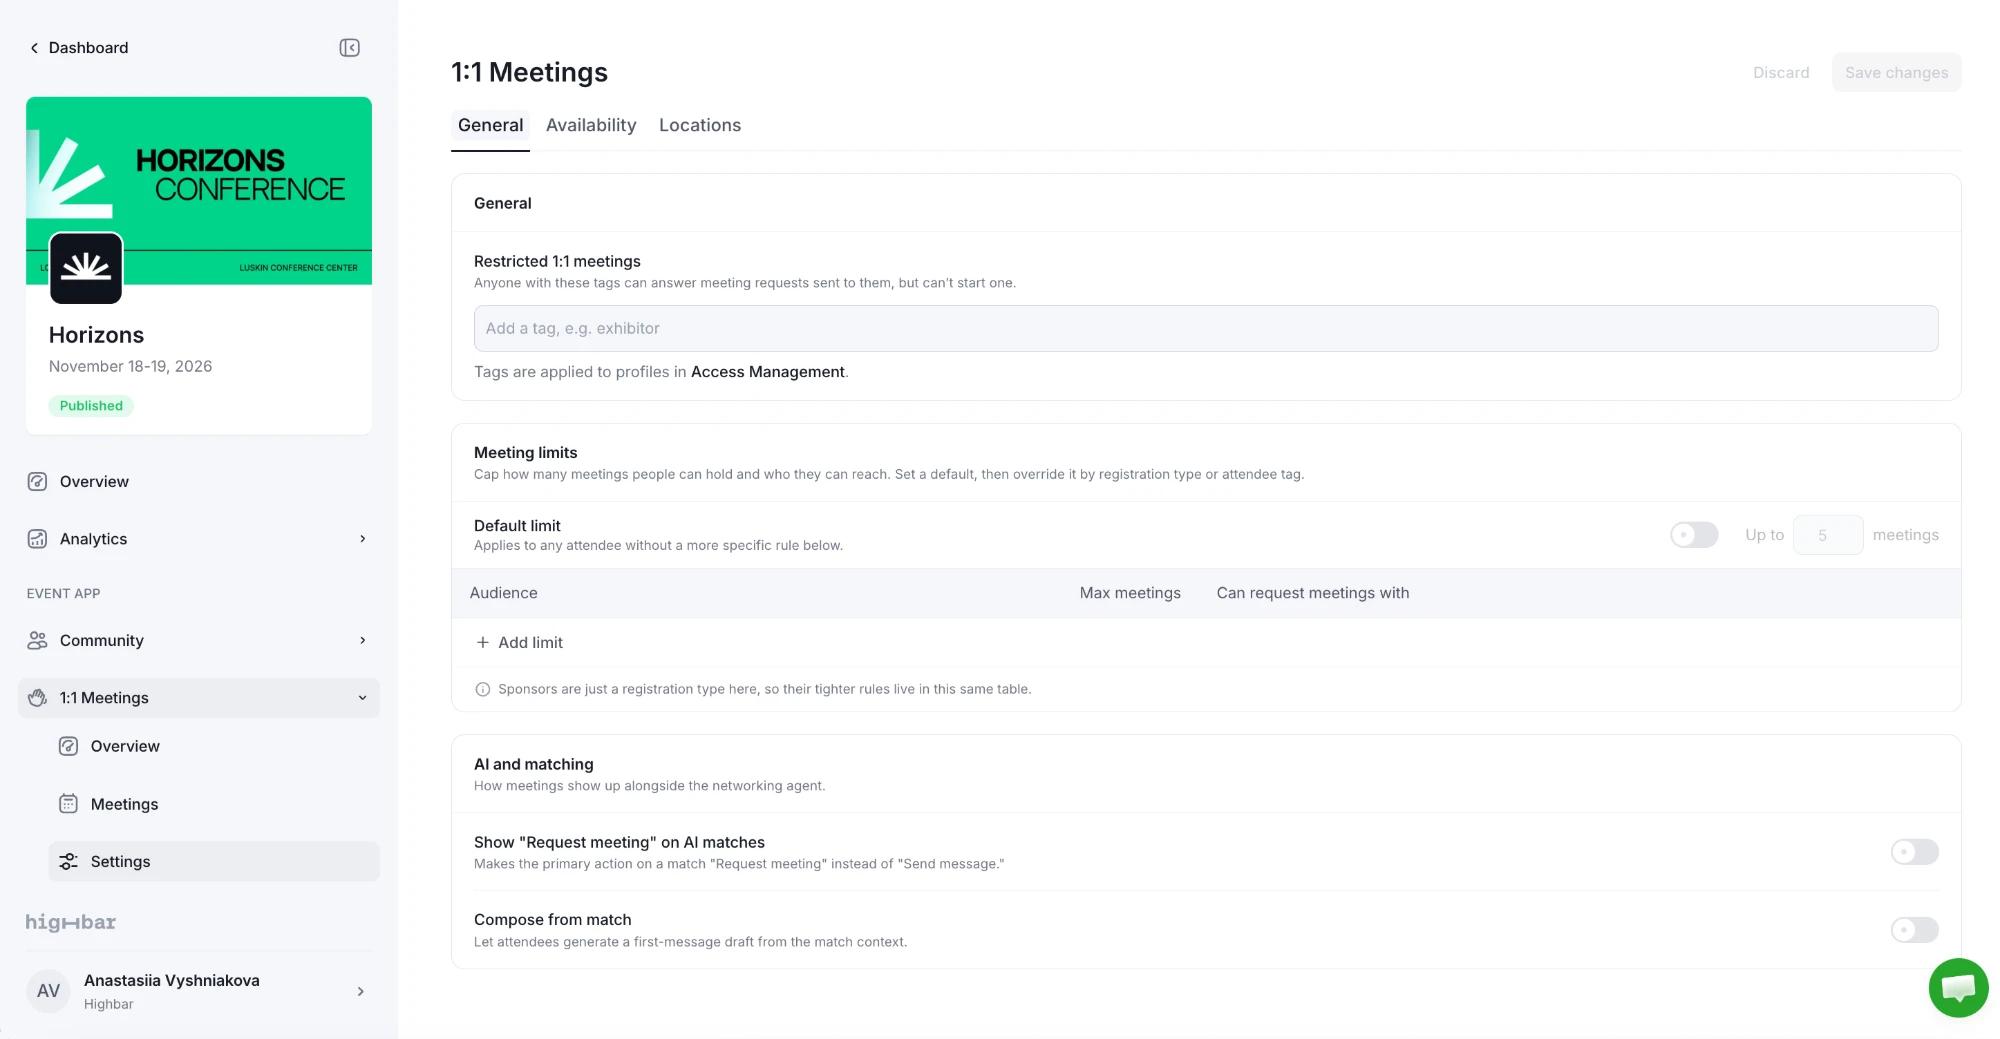
- Restricted 1:1 meetings: attendees with these tags can answer meeting requests but can't send them. Useful for exhibitors or VIPs. Add up to 25 tags. You can also set this per tag on the Access page (Restrict 1:1 meetings).
- Meeting limits: turn on Default limit to cap how many meetings each attendee can have (5 unless you change it). Click Add limit to set a different maximum for a registration type or tag, and choose who they Can request meetings with: All attendees, Speakers and sponsors or Same registration type. Pending and accepted meetings count towards the limit. If several rules apply to someone, the lowest maximum wins.
- AI and matching: Show "Request meeting" on AI matches makes requesting a meeting the main button on an attendee's AI matches. Compose from match lets attendees generate a first message from the match.
Availability
Open Settings > Availability.
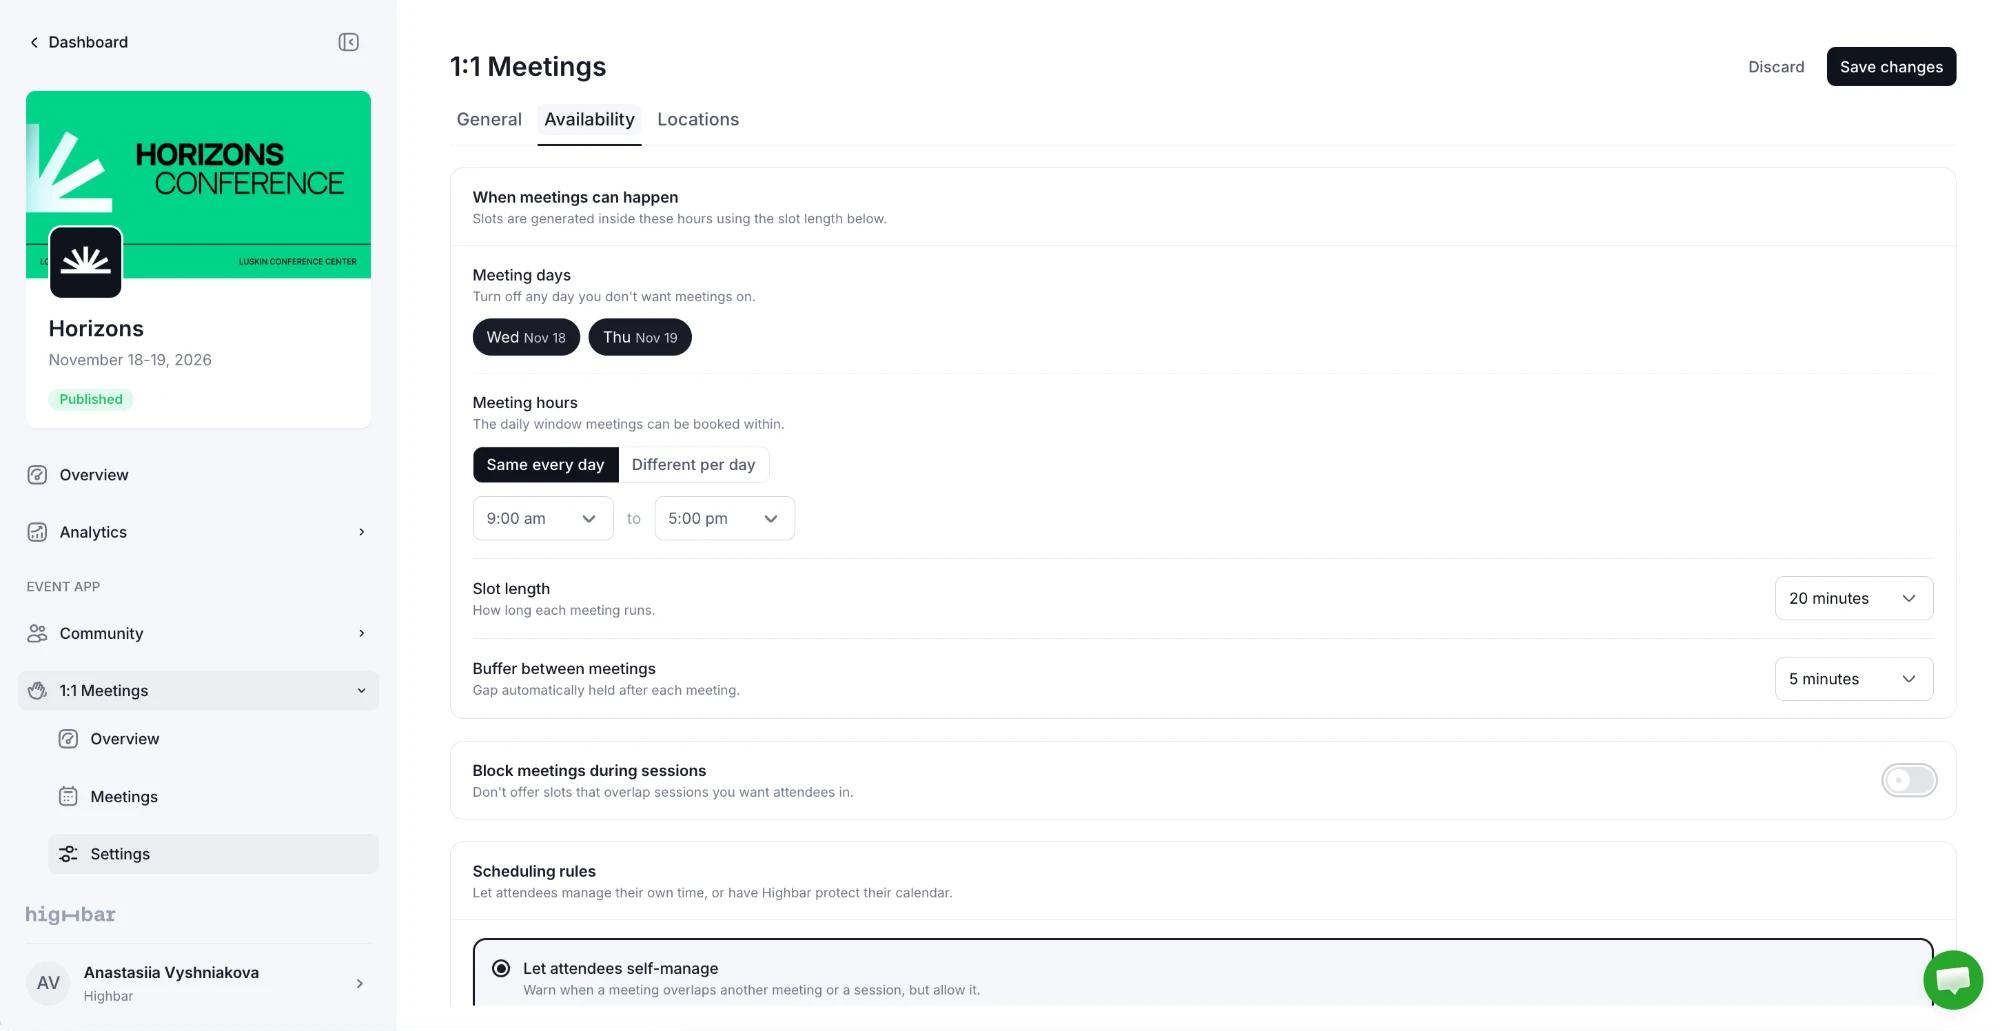
- Meeting days: every event day is on. Turn off days without meetings.
- Meeting hours: the earliest and latest times meetings can be booked each day, 9:00 am to 5:00 pm unless you change them. Same every day uses one start and end time for every day. Different per day lets you give each day its own start and end time, for example later hours on the first day for an evening reception.
- Slot length: how long each meeting runs: 15, 20, 30, 45 or 60 minutes. The default is 20.
- Buffer between meetings: a gap held after each meeting, from No buffer to 15 minutes. The default is 5.
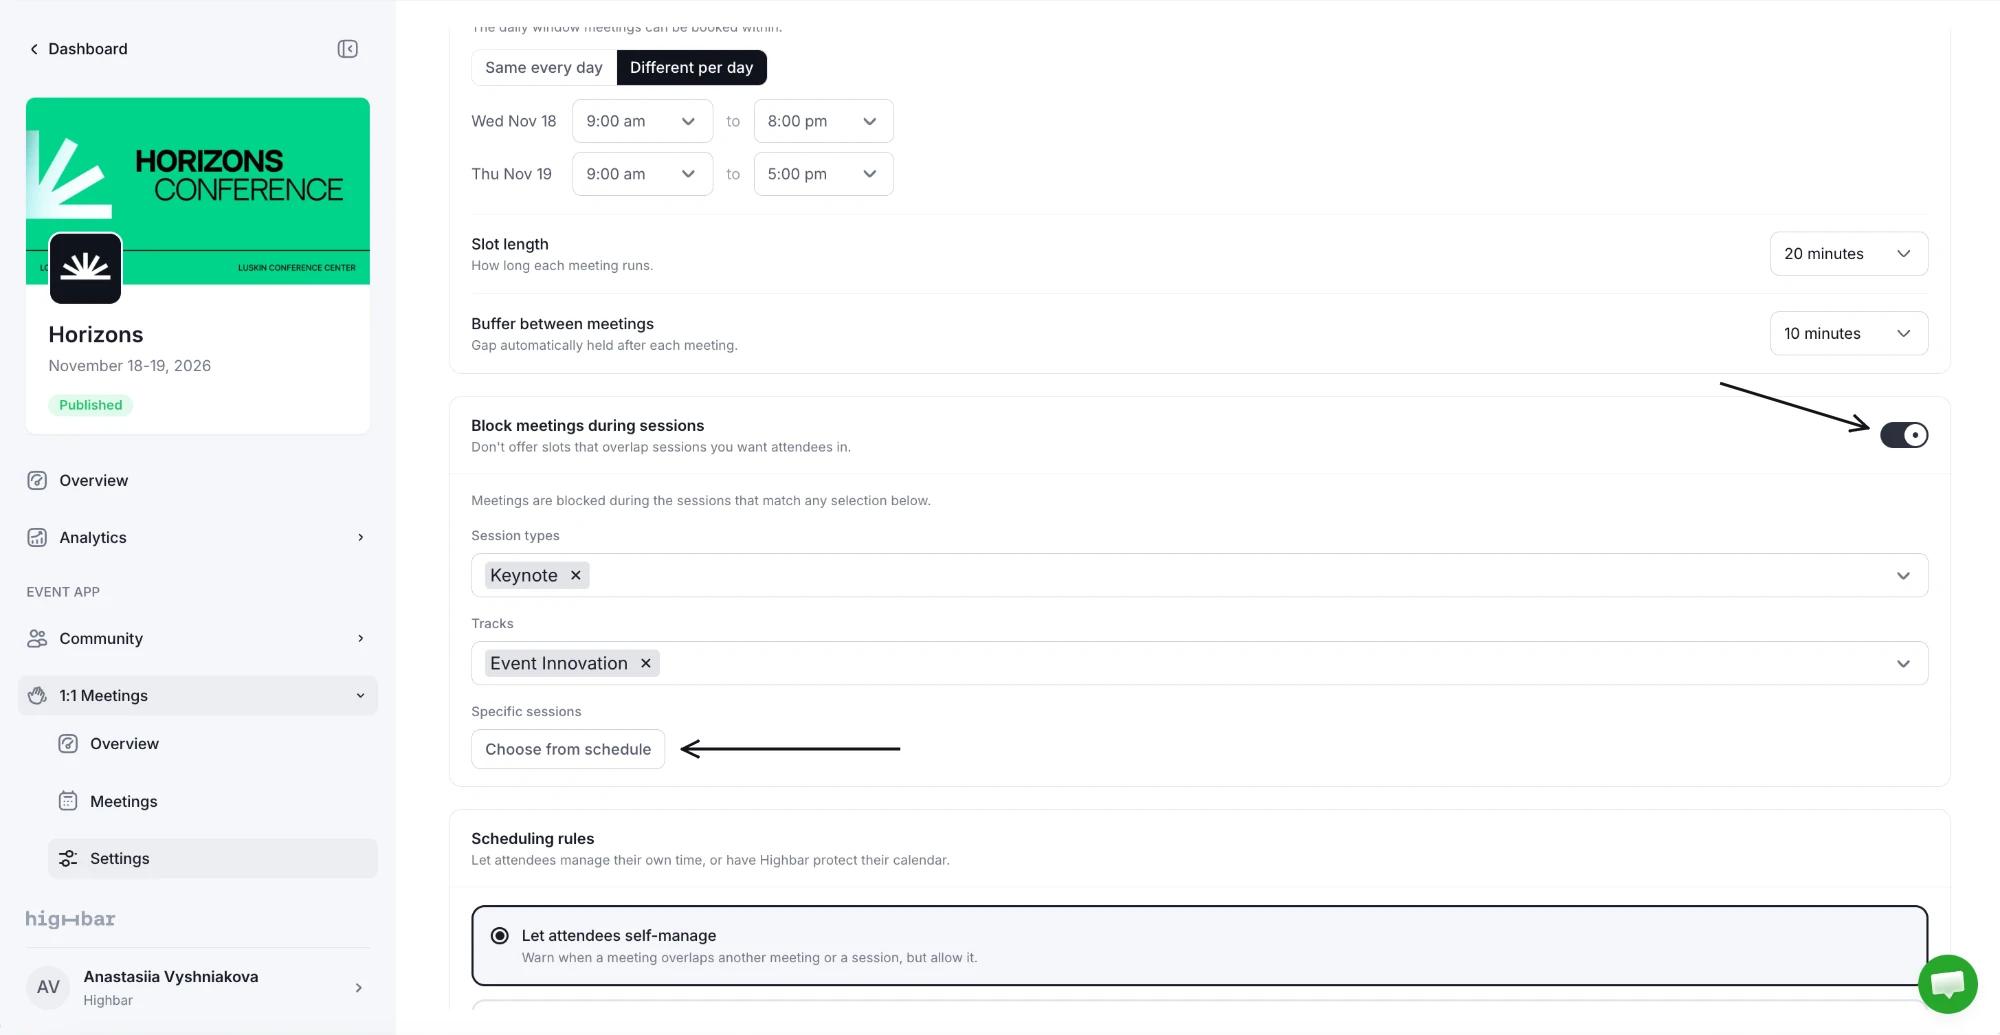
- Block meetings during sessions: stops meetings from being booked over sessions. Pick Session types, Tracks or Specific sessions to block only those. With nothing picked, every session blocks meetings.
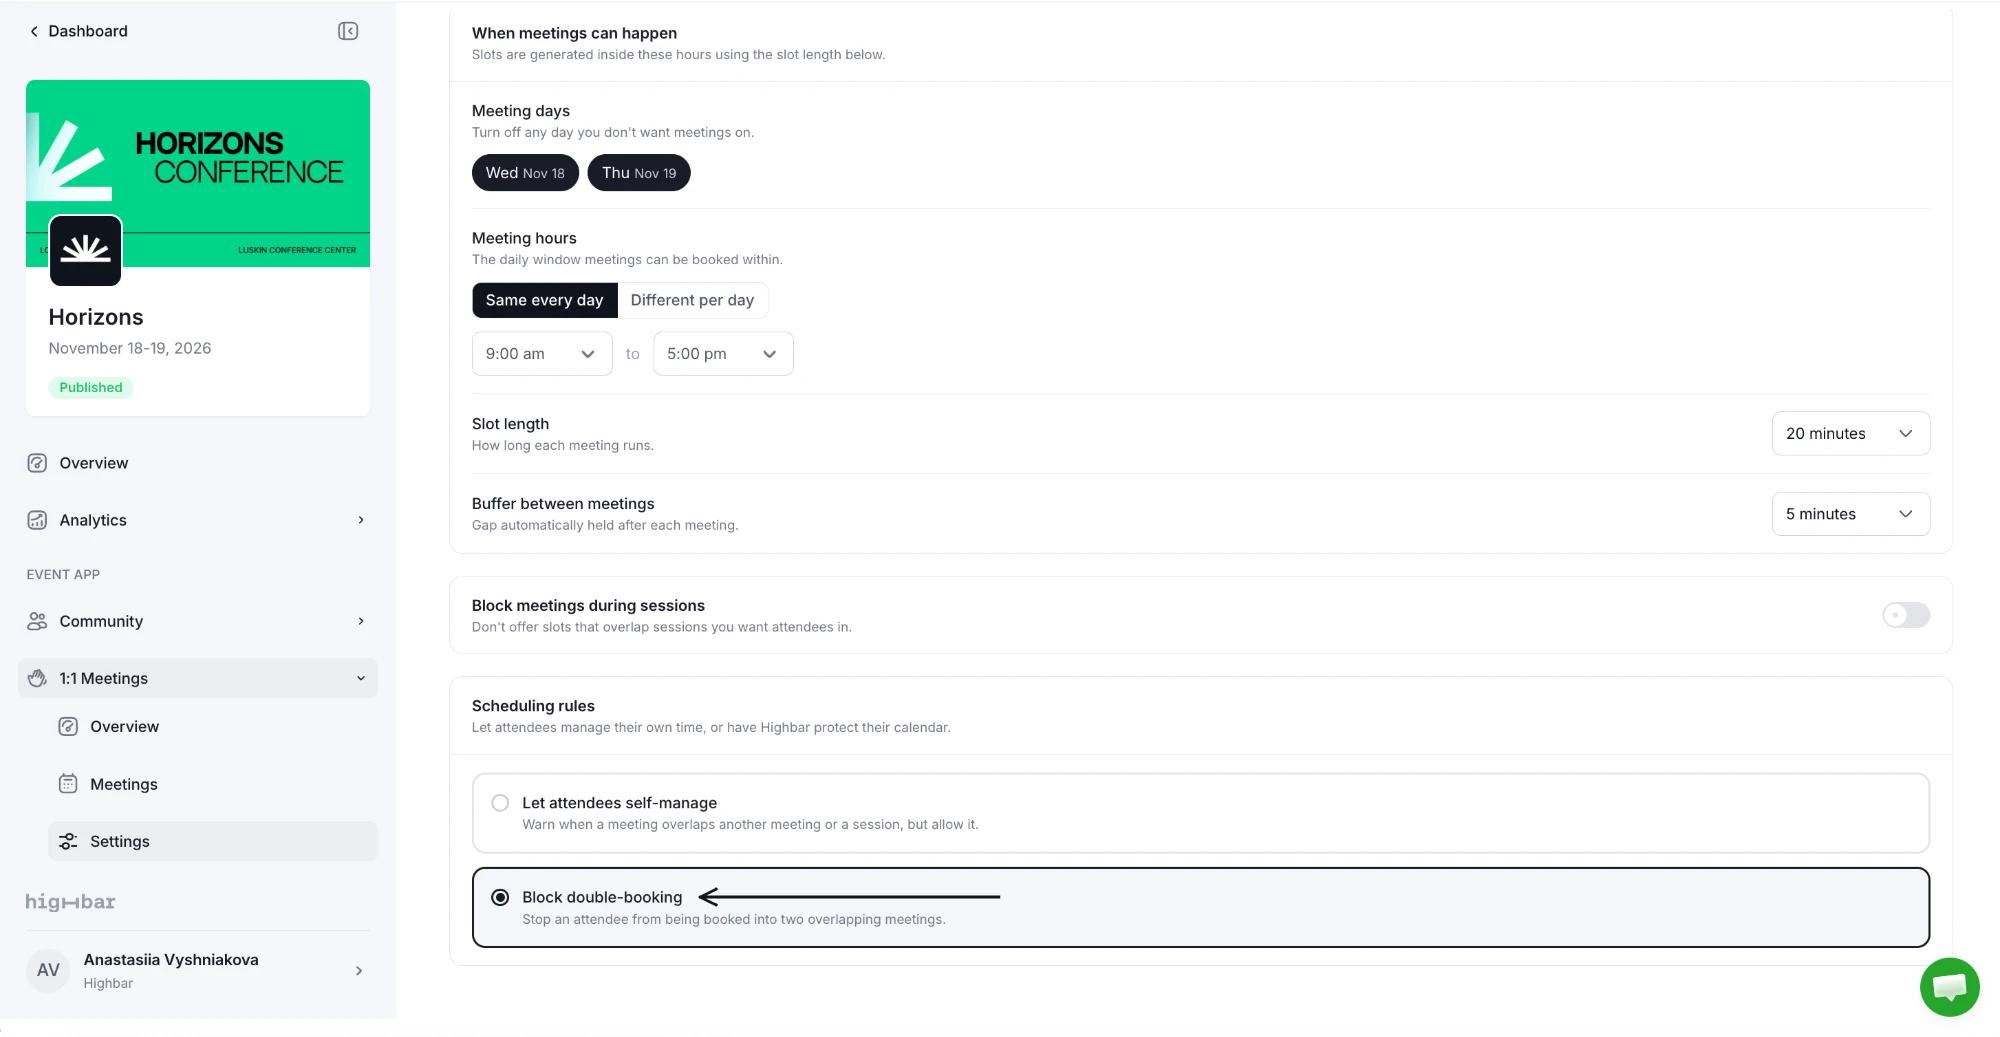
- Scheduling rules: Let attendees self-manage warns attendees when a meeting overlaps another meeting or a session but allows it. Block double-booking stops anyone being booked into two overlapping meetings.
With Different per day, each day gets its own hours.
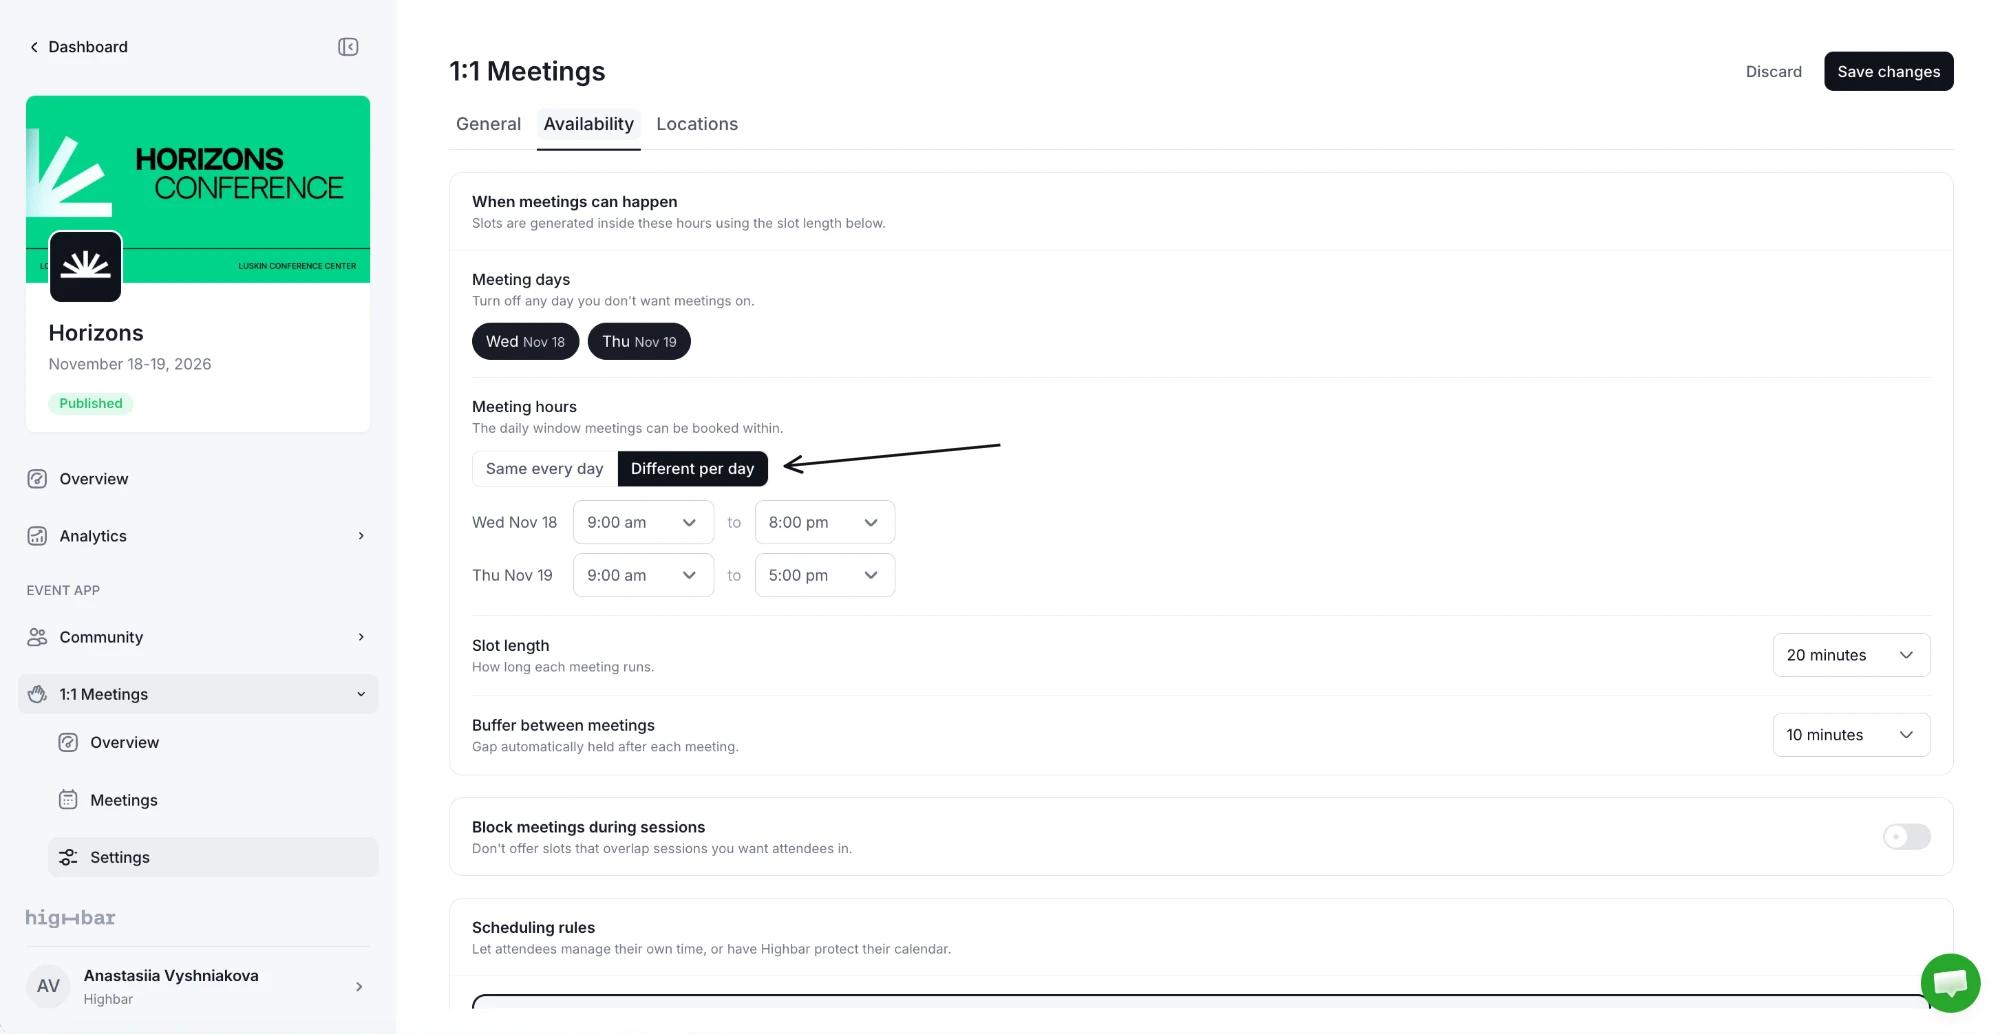
To block meetings during only some sessions, turn on Block meetings during sessions, then pick Session types or Tracks, or click Choose from schedule under Specific sessions.
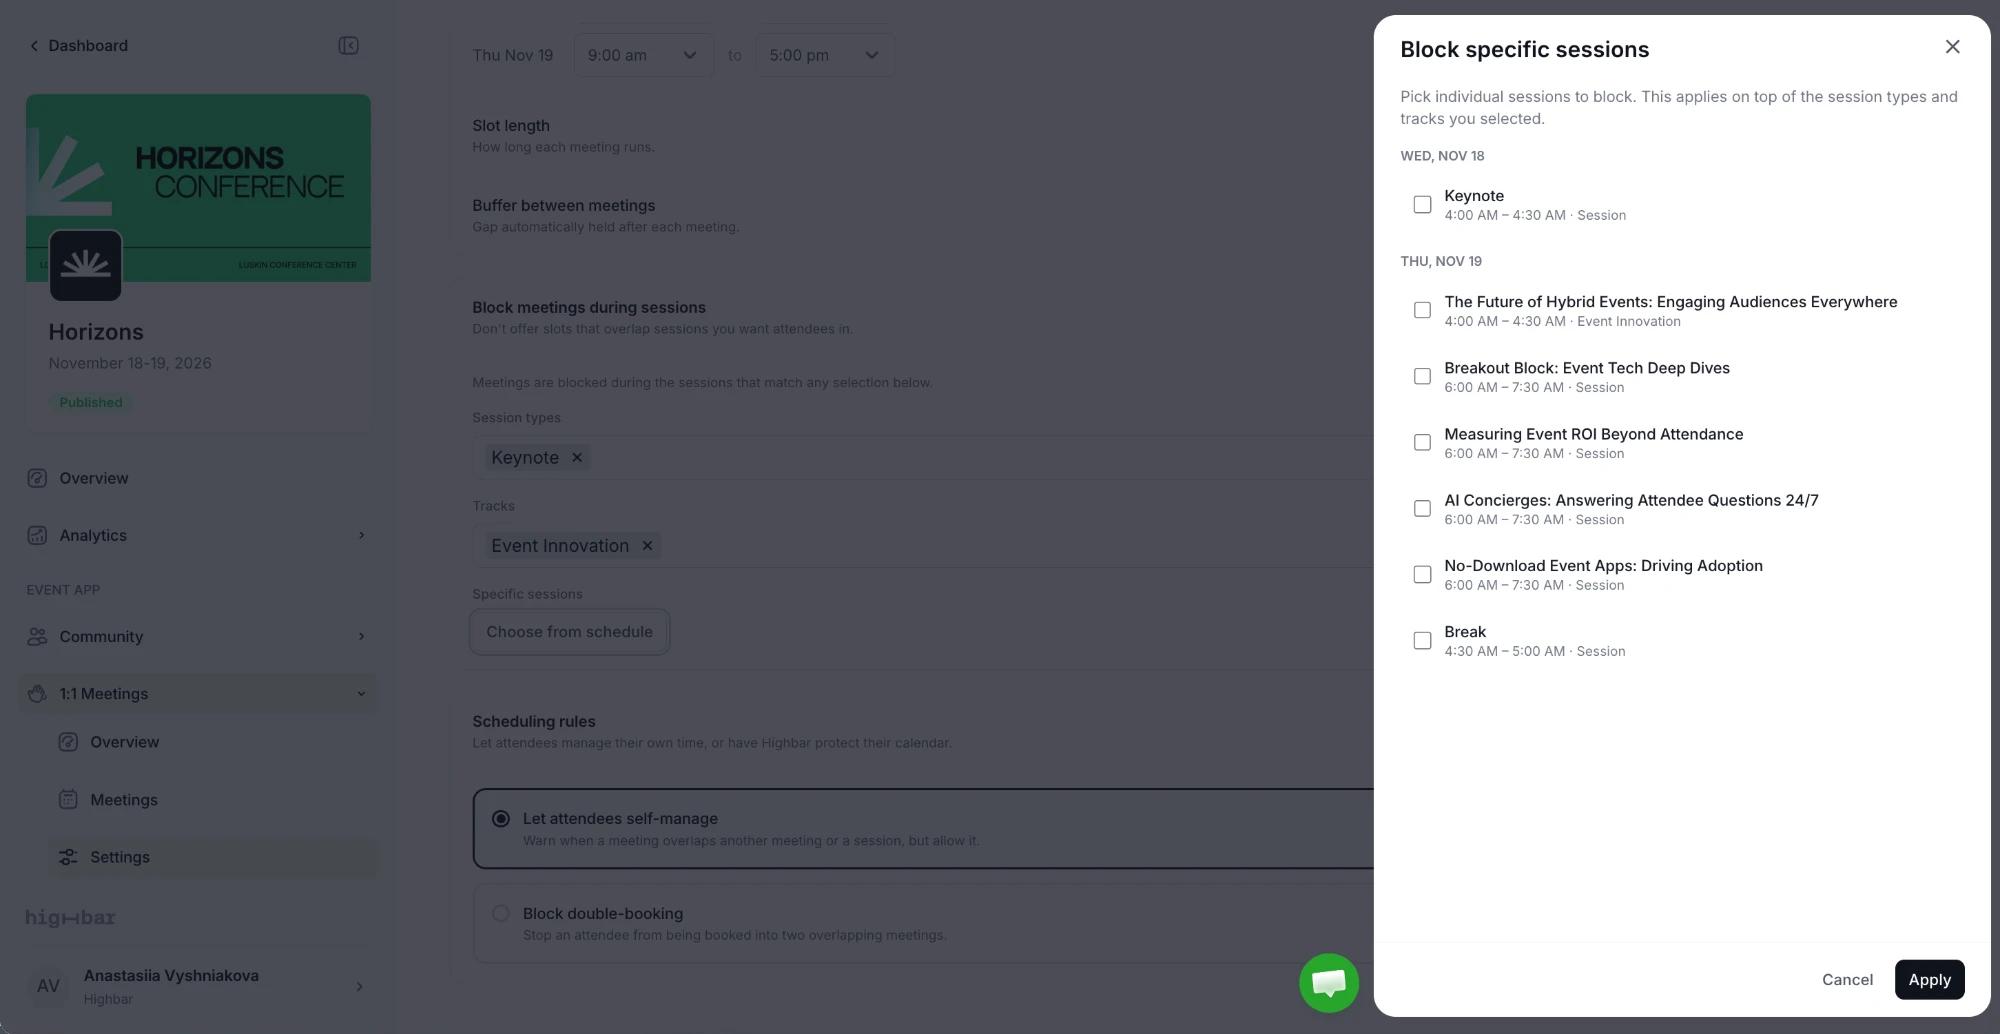
Choose from schedule opens Block specific sessions, with your sessions listed by day. Tick the ones to block, on top of the types and tracks you picked, and click Apply.
Under Scheduling rules, choose Block double-booking if attendees shouldn't be booked into overlapping meetings.
Locations
Attendees choose a location when they request a meeting, so add at least one.
Open Settings > Locations and click Add location.
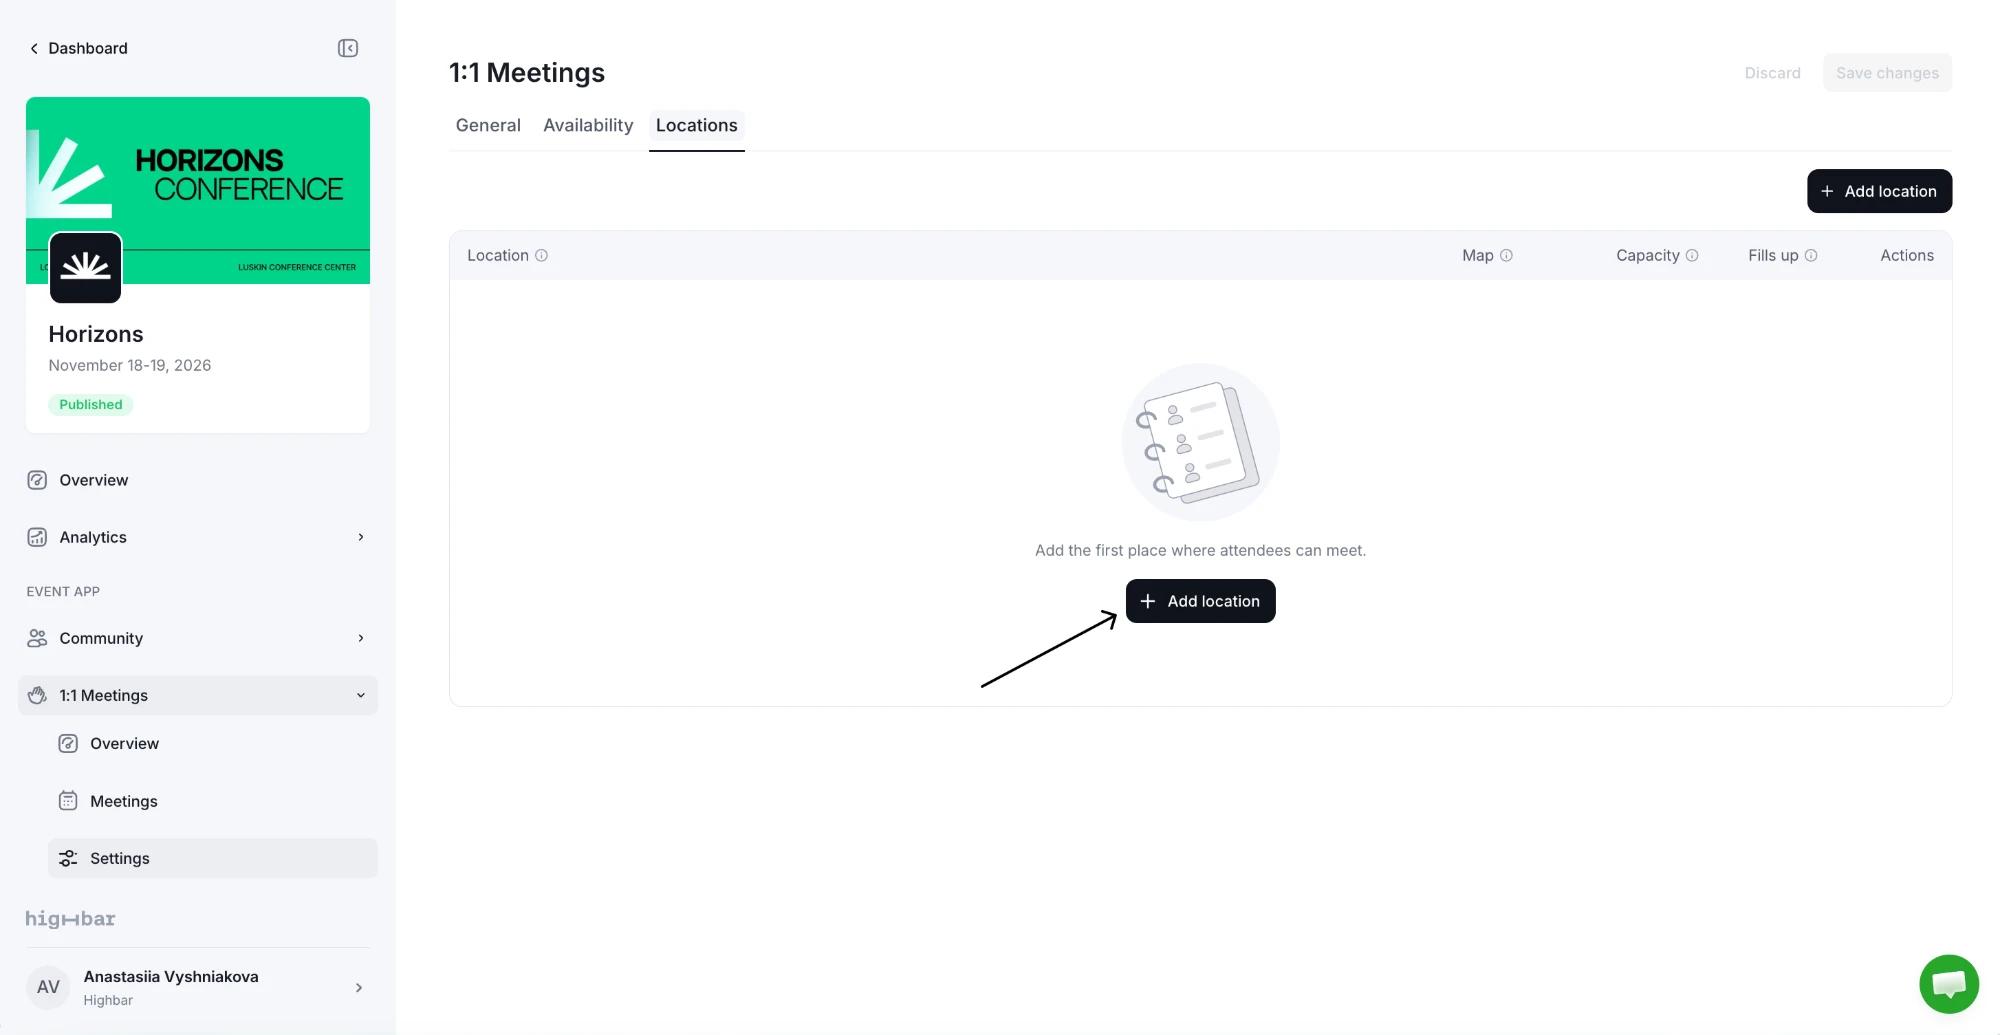
Under Location, pick one of your event's locations, or type a new name. If the location has a pin on an interactive map, attendees can find it from their meeting.
Optionally add an Area, such as a table, room or floor. To book tables separately, add the location once per table.
Set the Capacity: how many meetings can happen there at the same time. Then choose how it Fills up: Hard stops bookings once the location is full, Soft still books, with a warning.
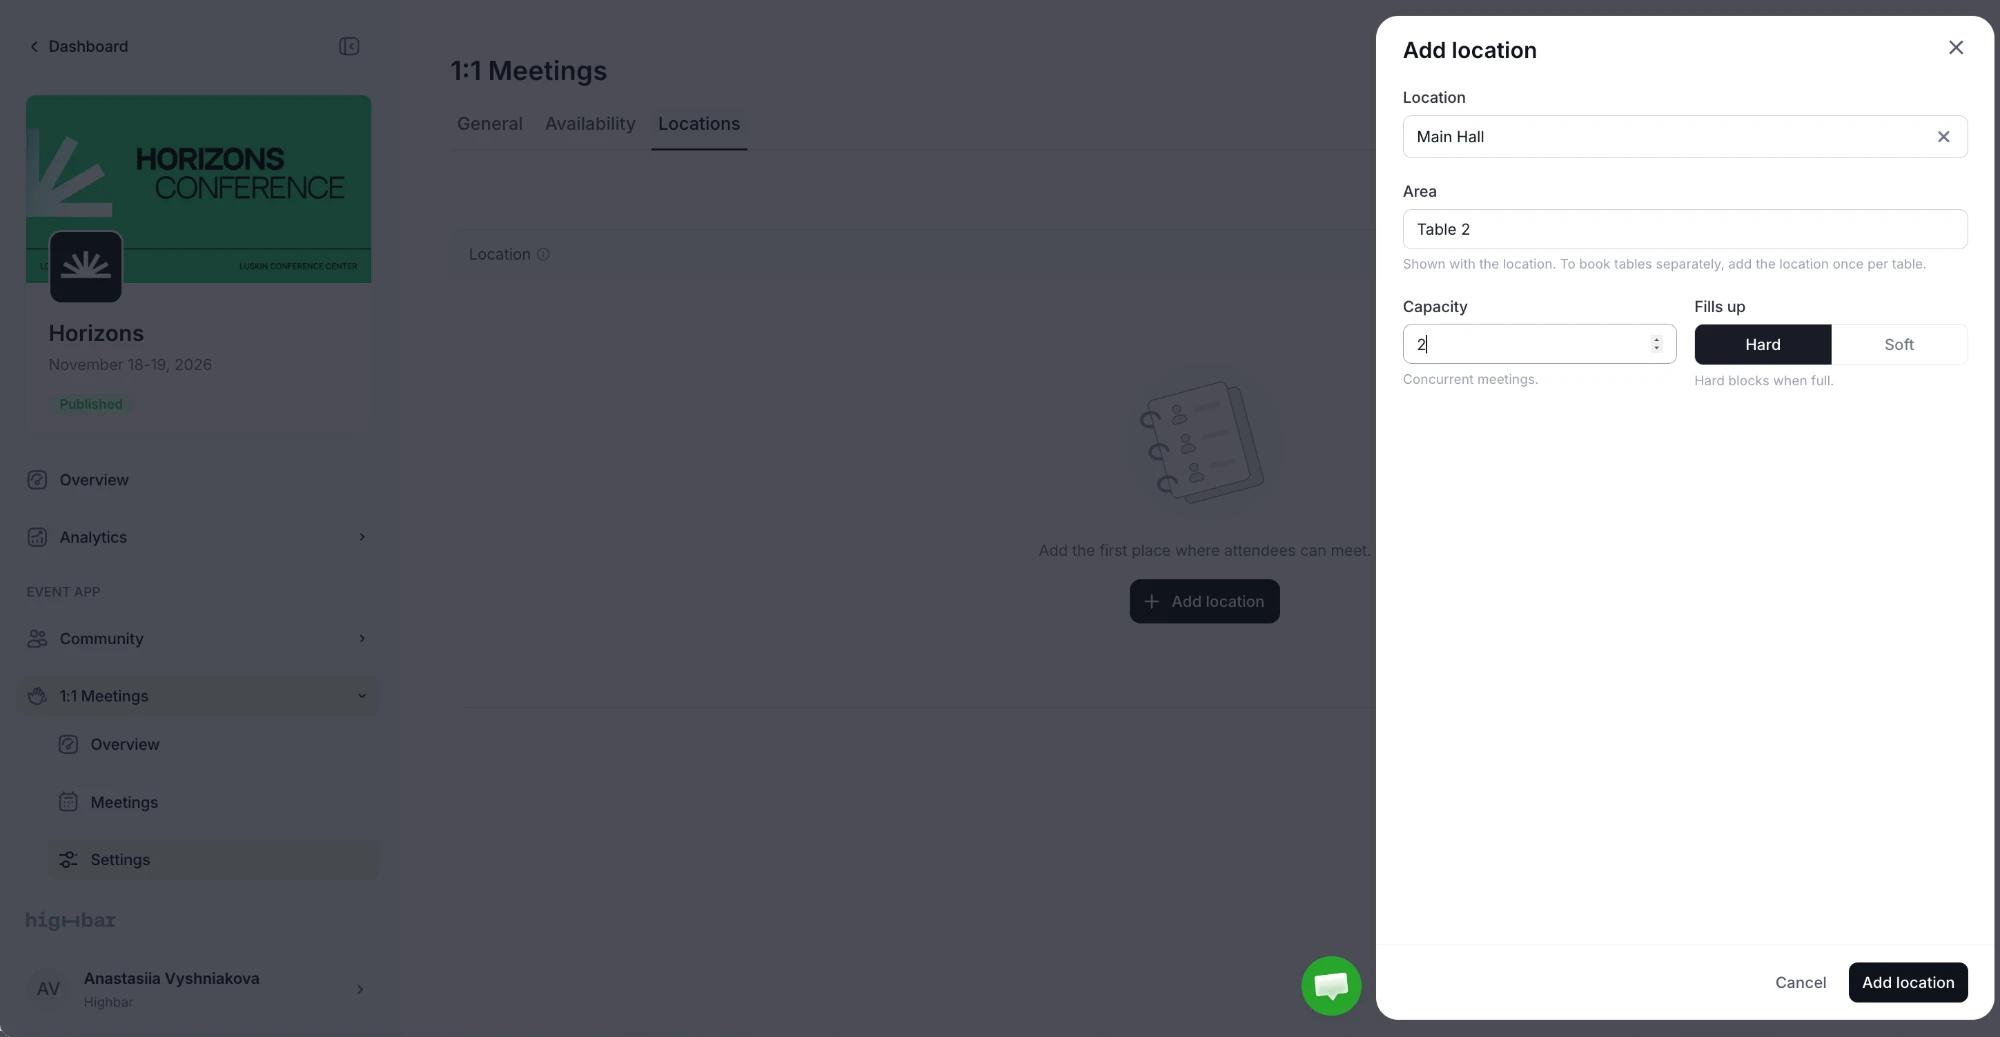
Click Add location, then Save changes.
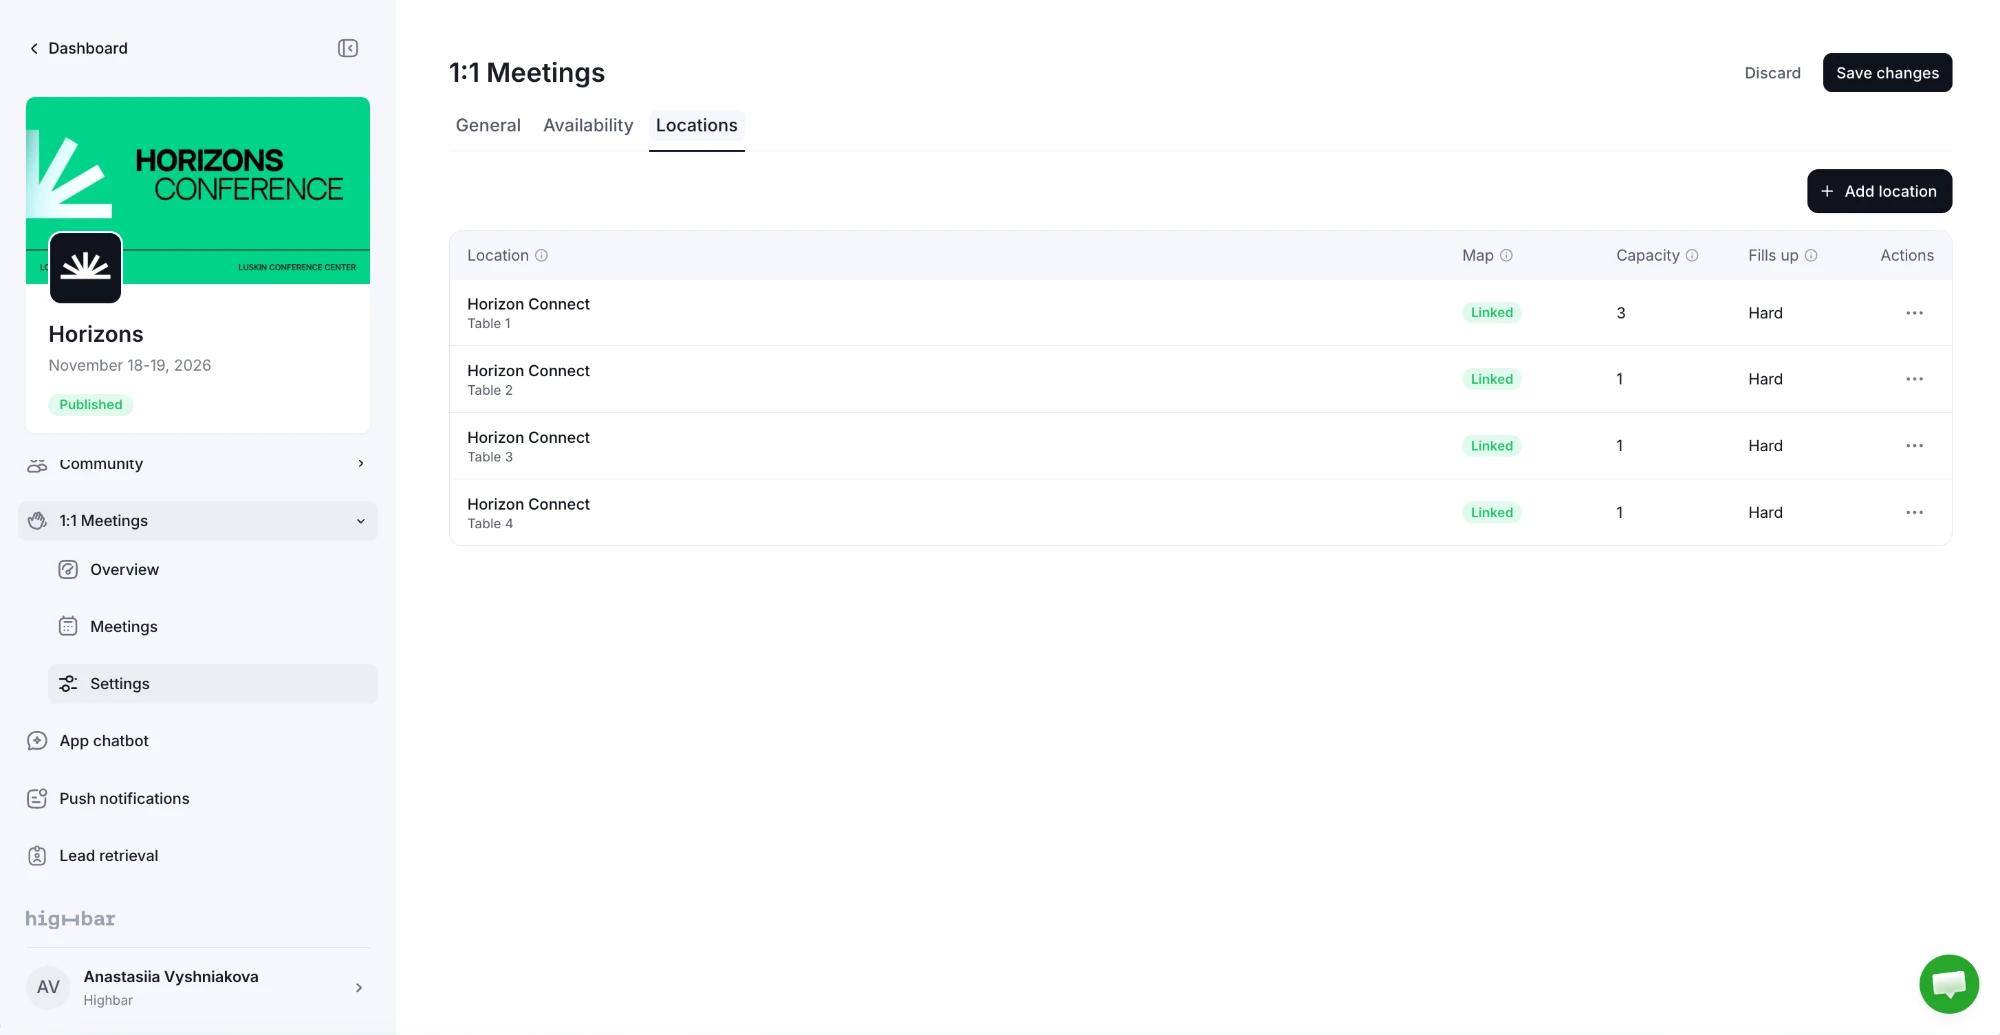
Each location appears in the list with its Capacity and how it Fills up. Map shows Linked when the location has a pin on one of your interactive maps, so attendees can find it from their meeting, or Not linked. Use a location's ... menu to Edit or Remove it, then click Save changes.
Turn meetings on
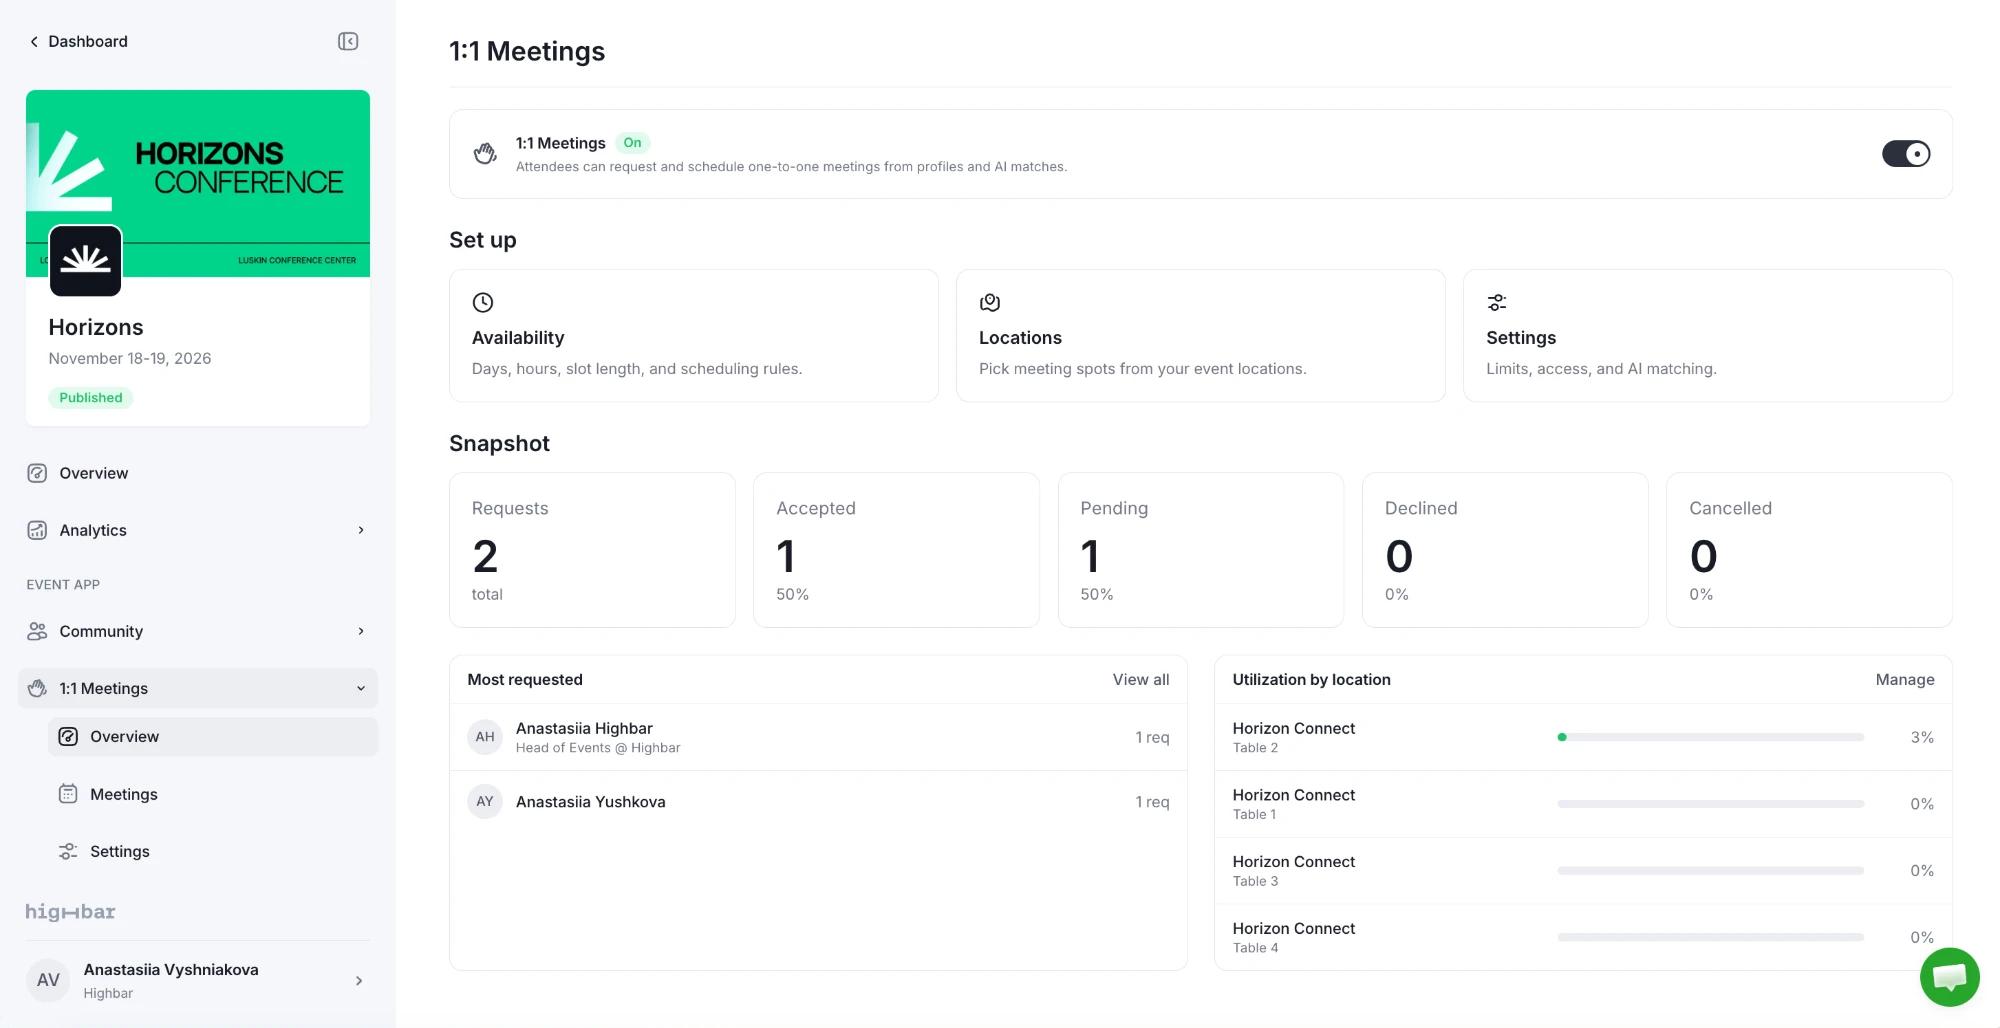
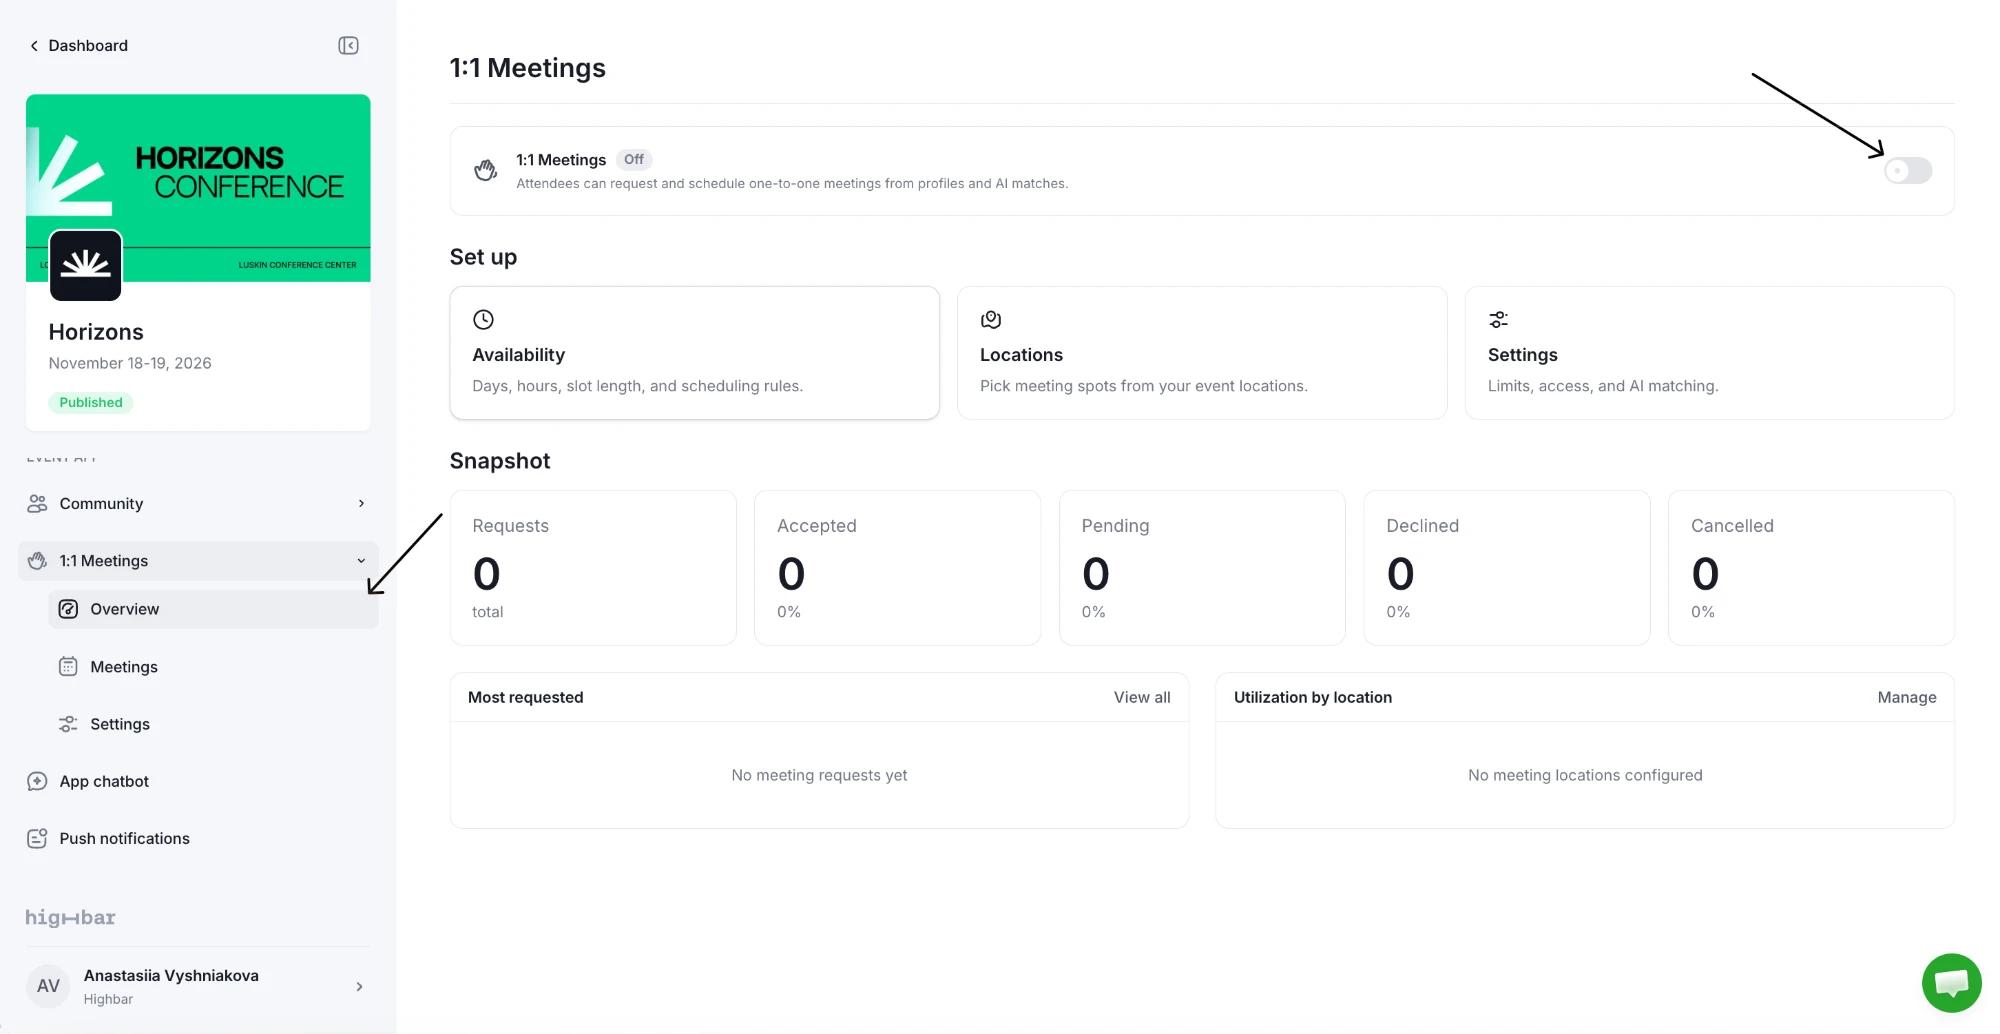
On Overview, switch on 1:1 Meetings at the top of the page (see the first screenshot above). It's off for new events, marked Off next to the title, which changes to On. Attendees see Request meeting on other attendees' profiles straight away. Turn it off again to stop new requests.
How attendees use it
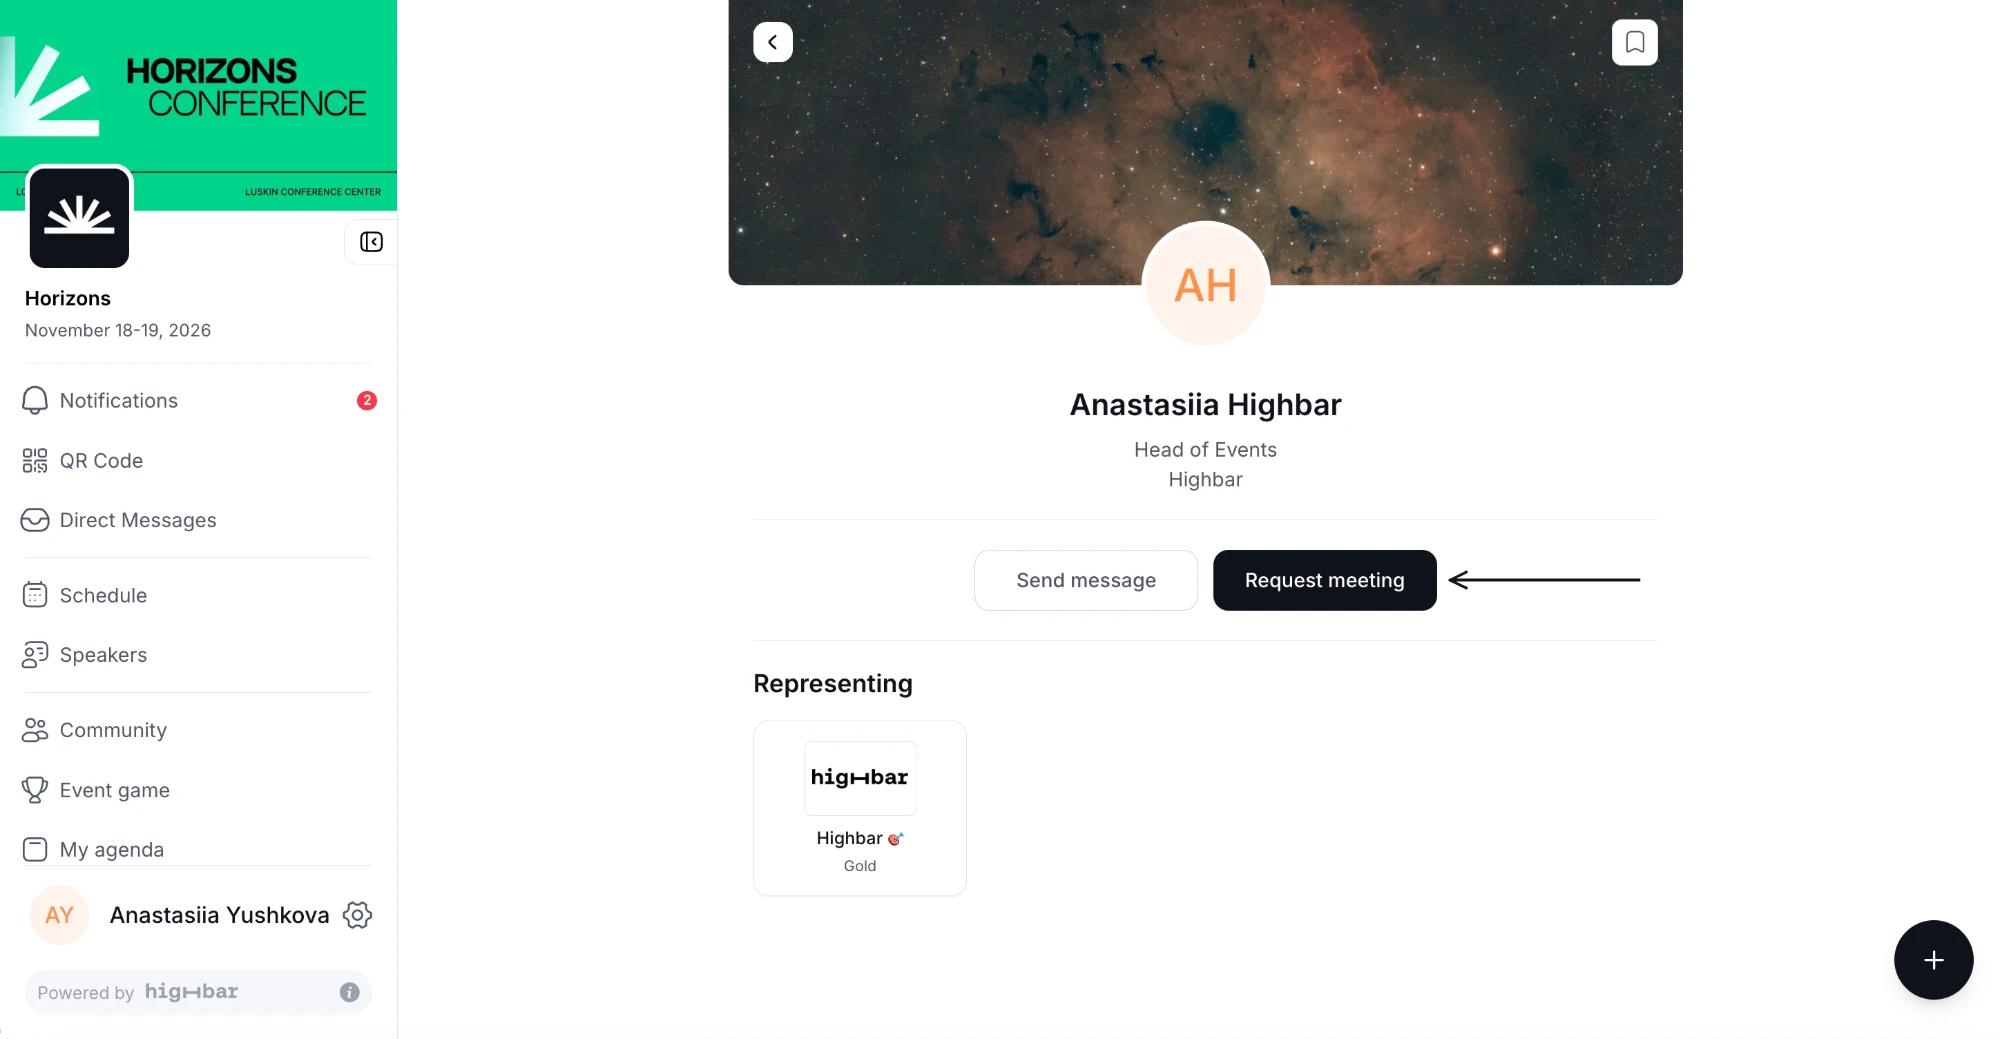
An attendee opens someone's profile (or one of their AI matches) and taps Request meeting.
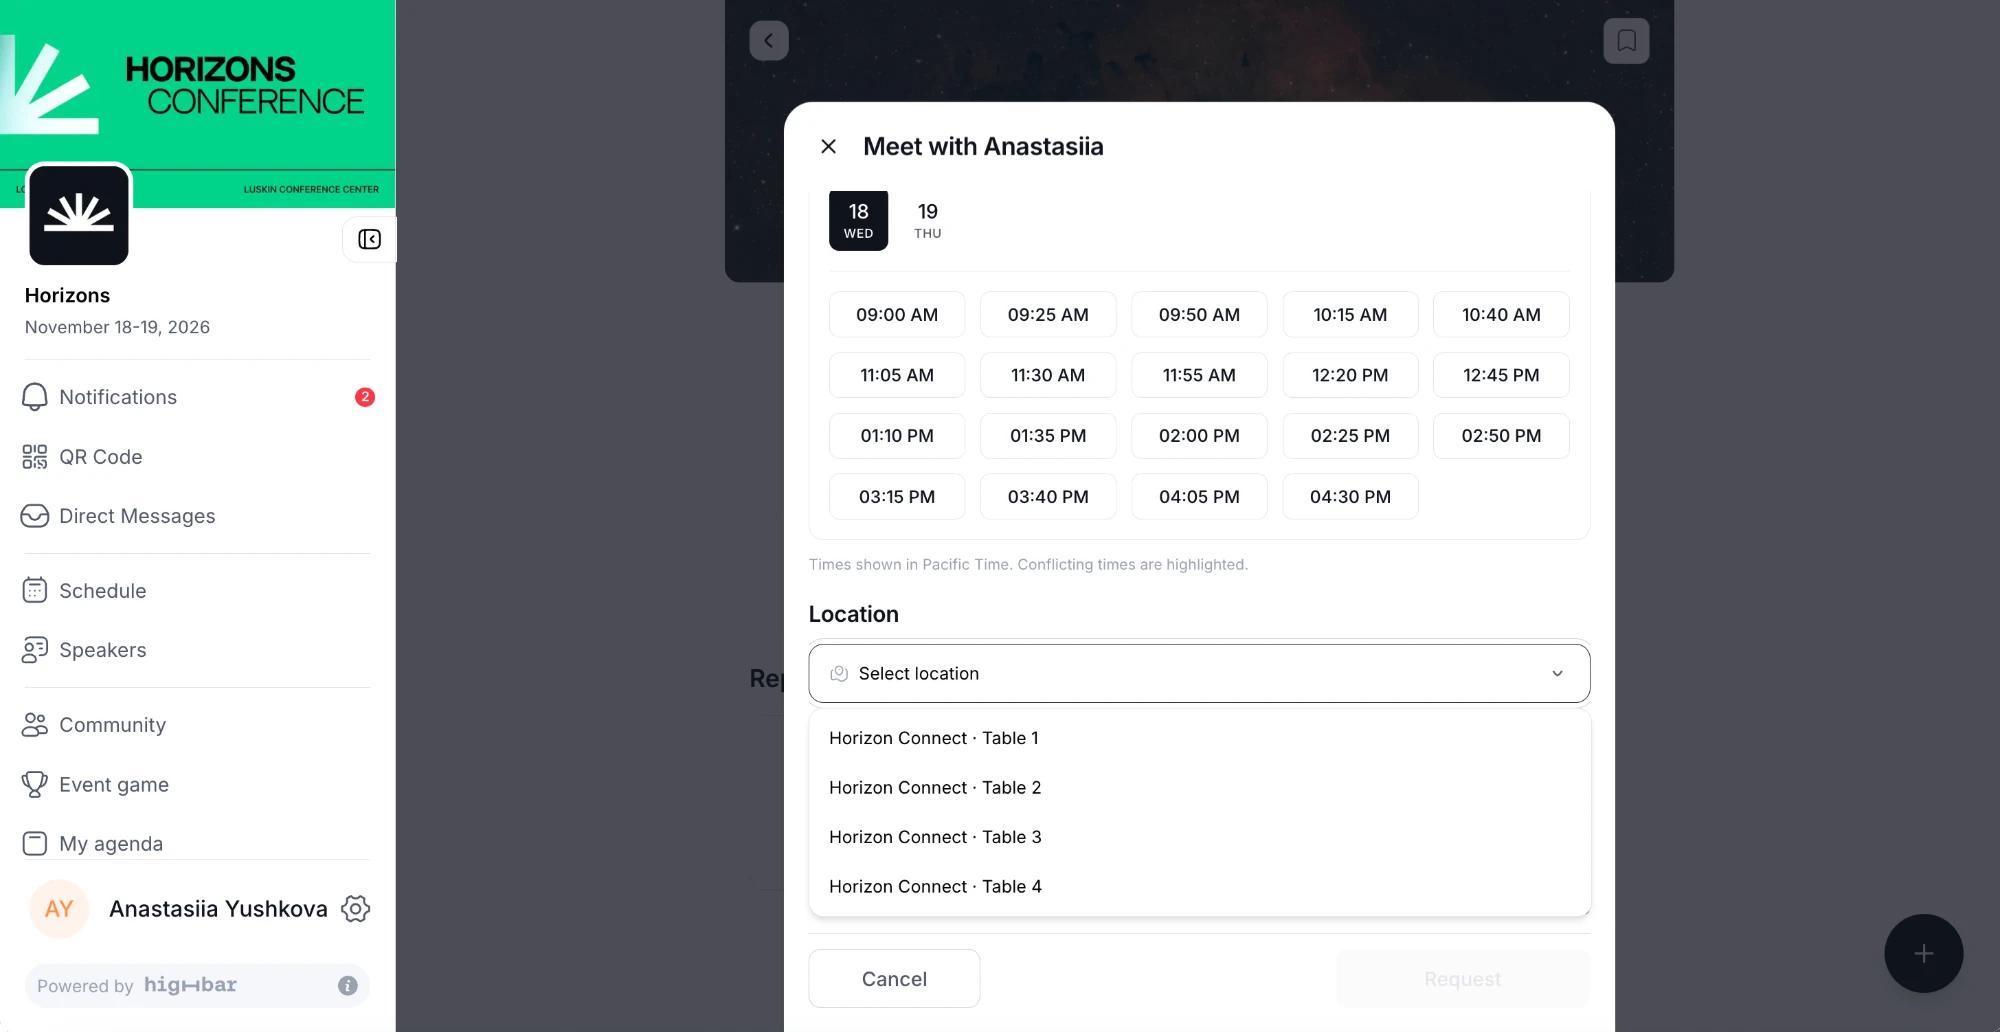
In Meet with, they pick a day and a time under Select date & time. Load more times shows later slots. Times are in the event's time zone, and times that clash with their own plans are highlighted.
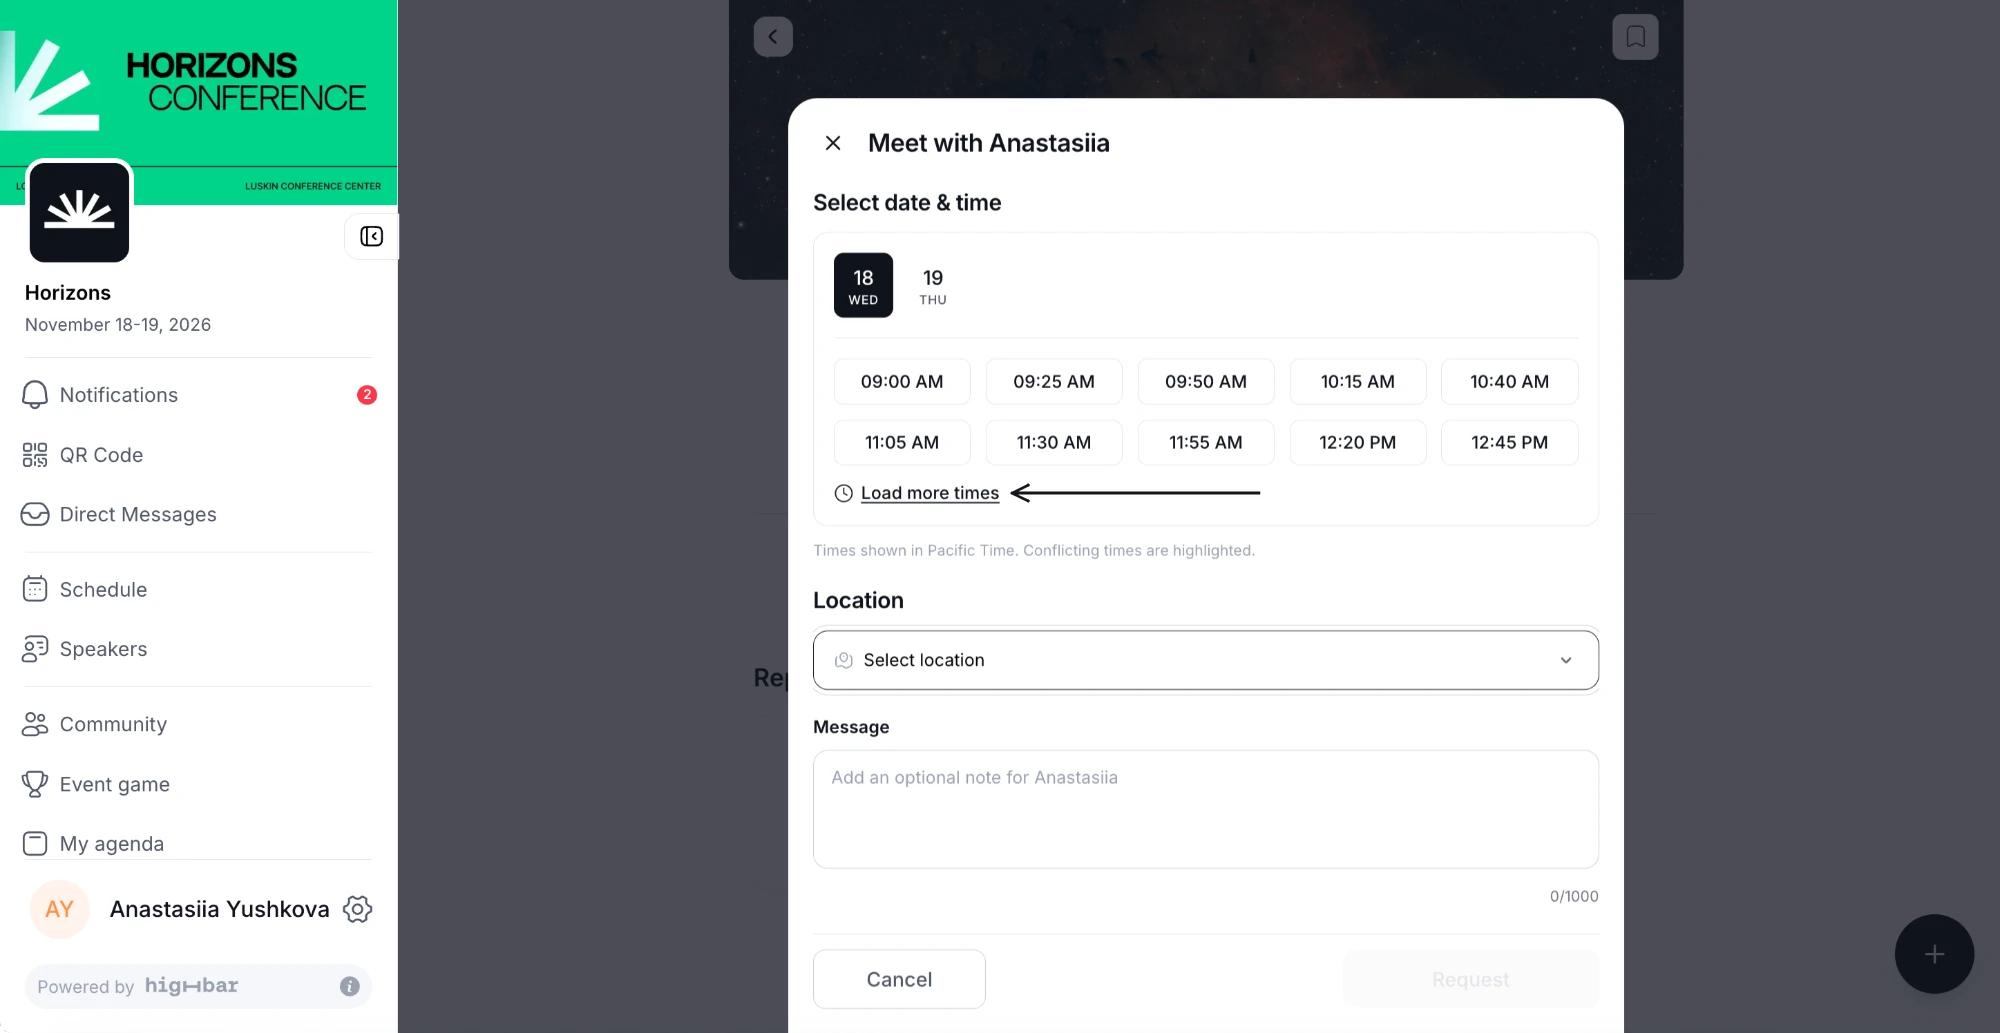
They choose a Location from the ones you added, write an optional Message (up to 1,000 characters) and tap Request.
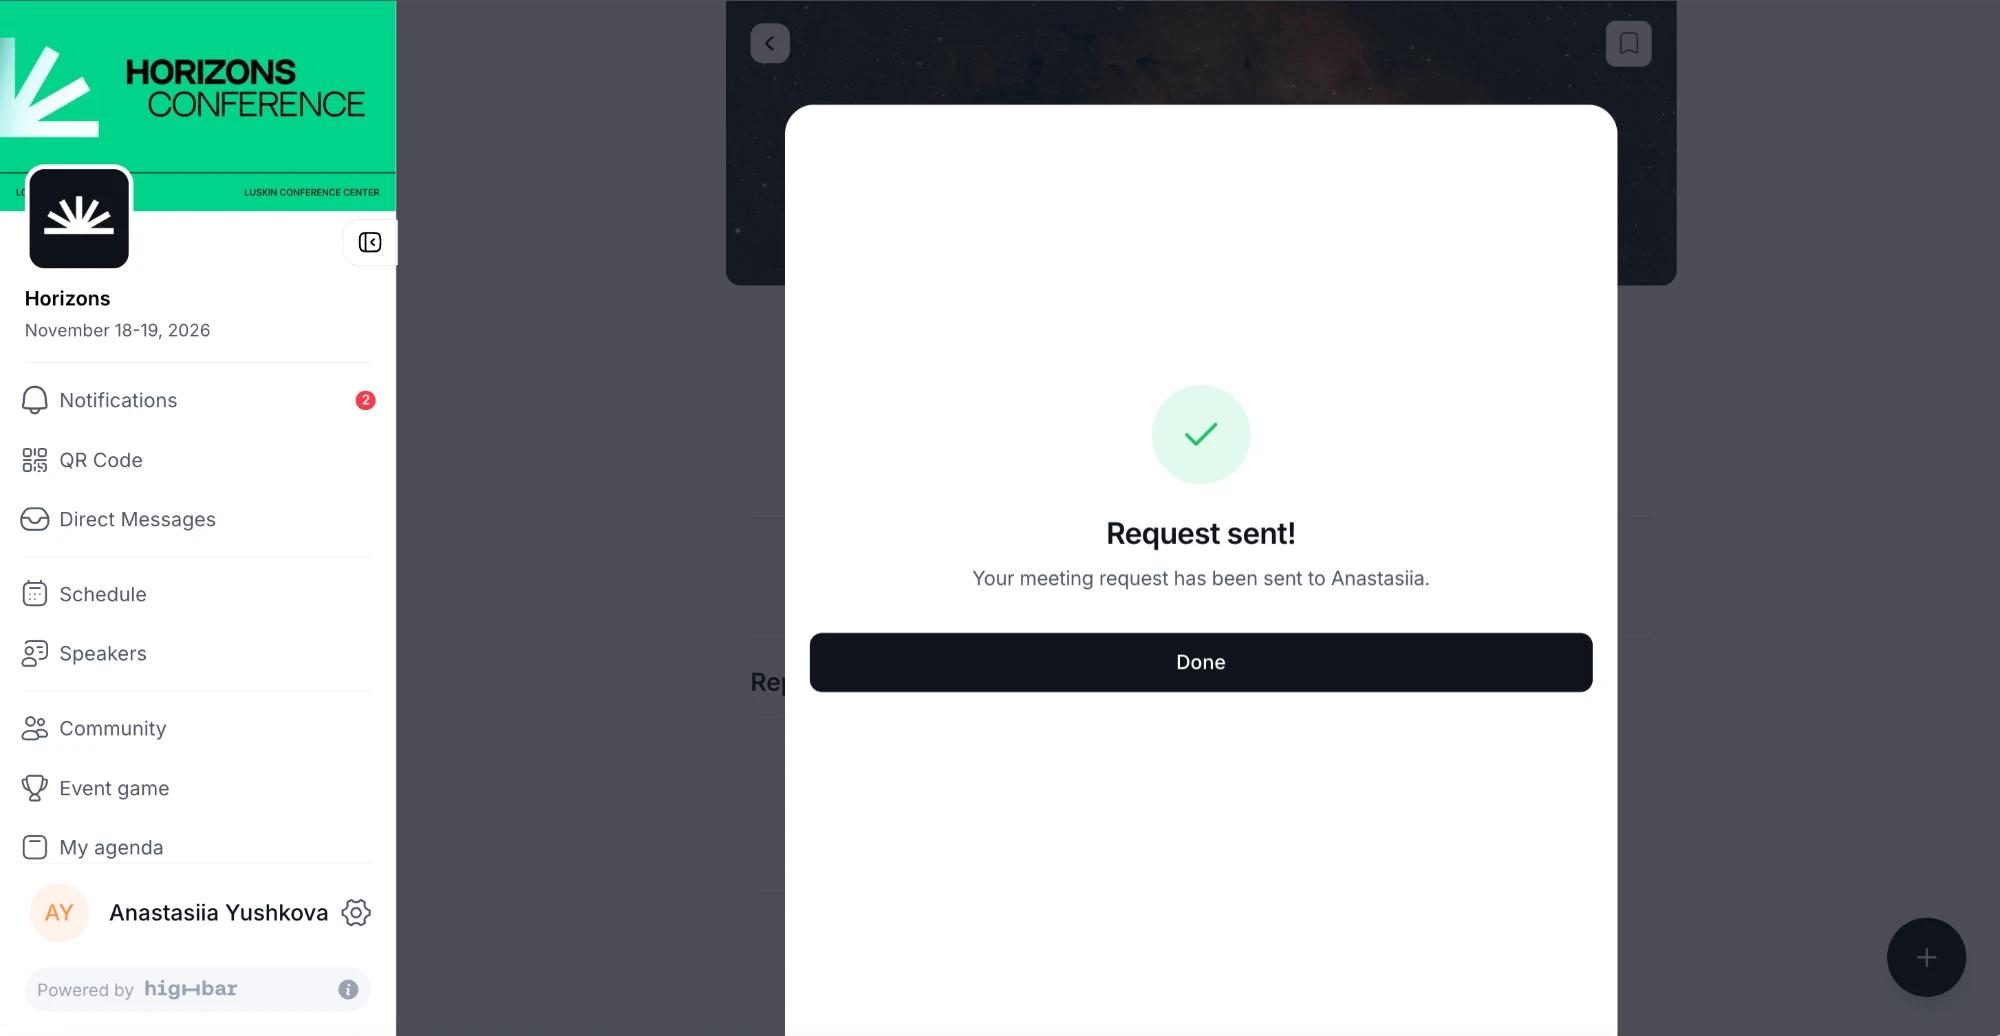
Request sent! confirms it. They tap Done.
Then:
-
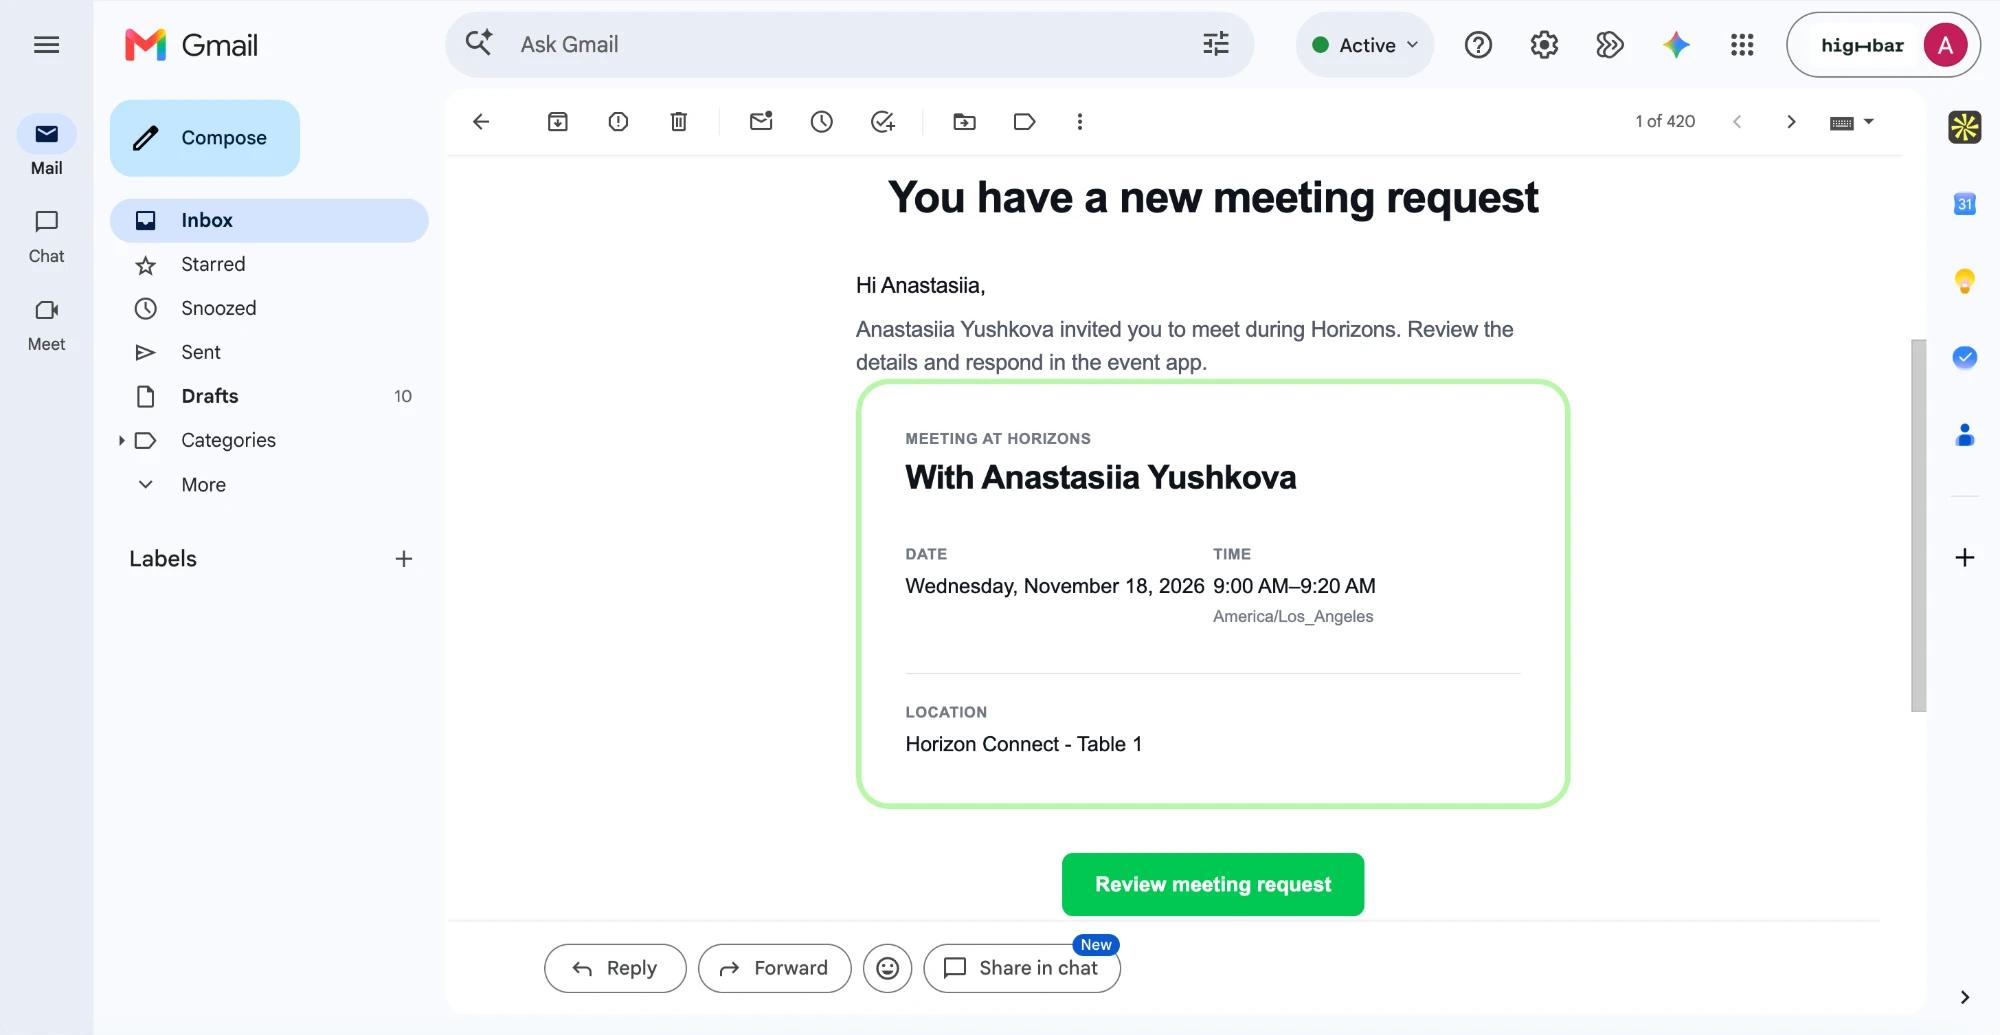
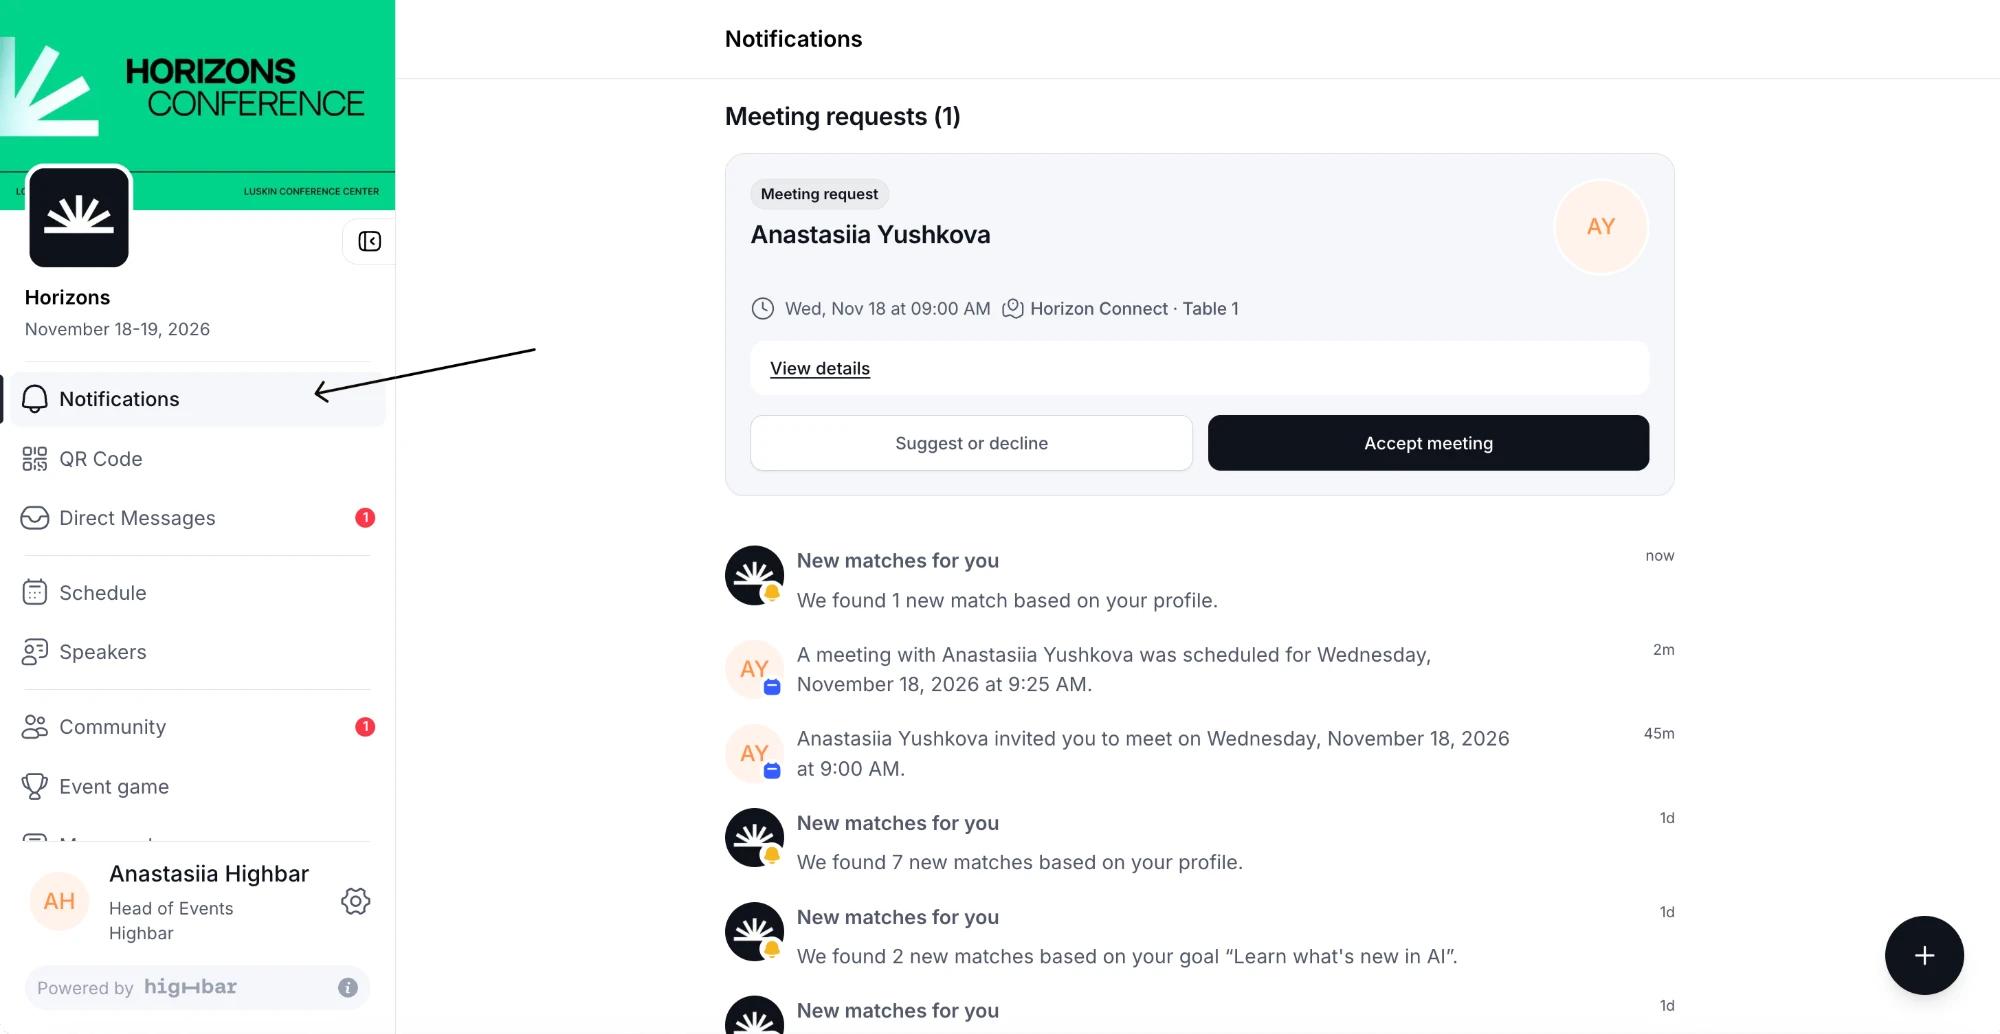
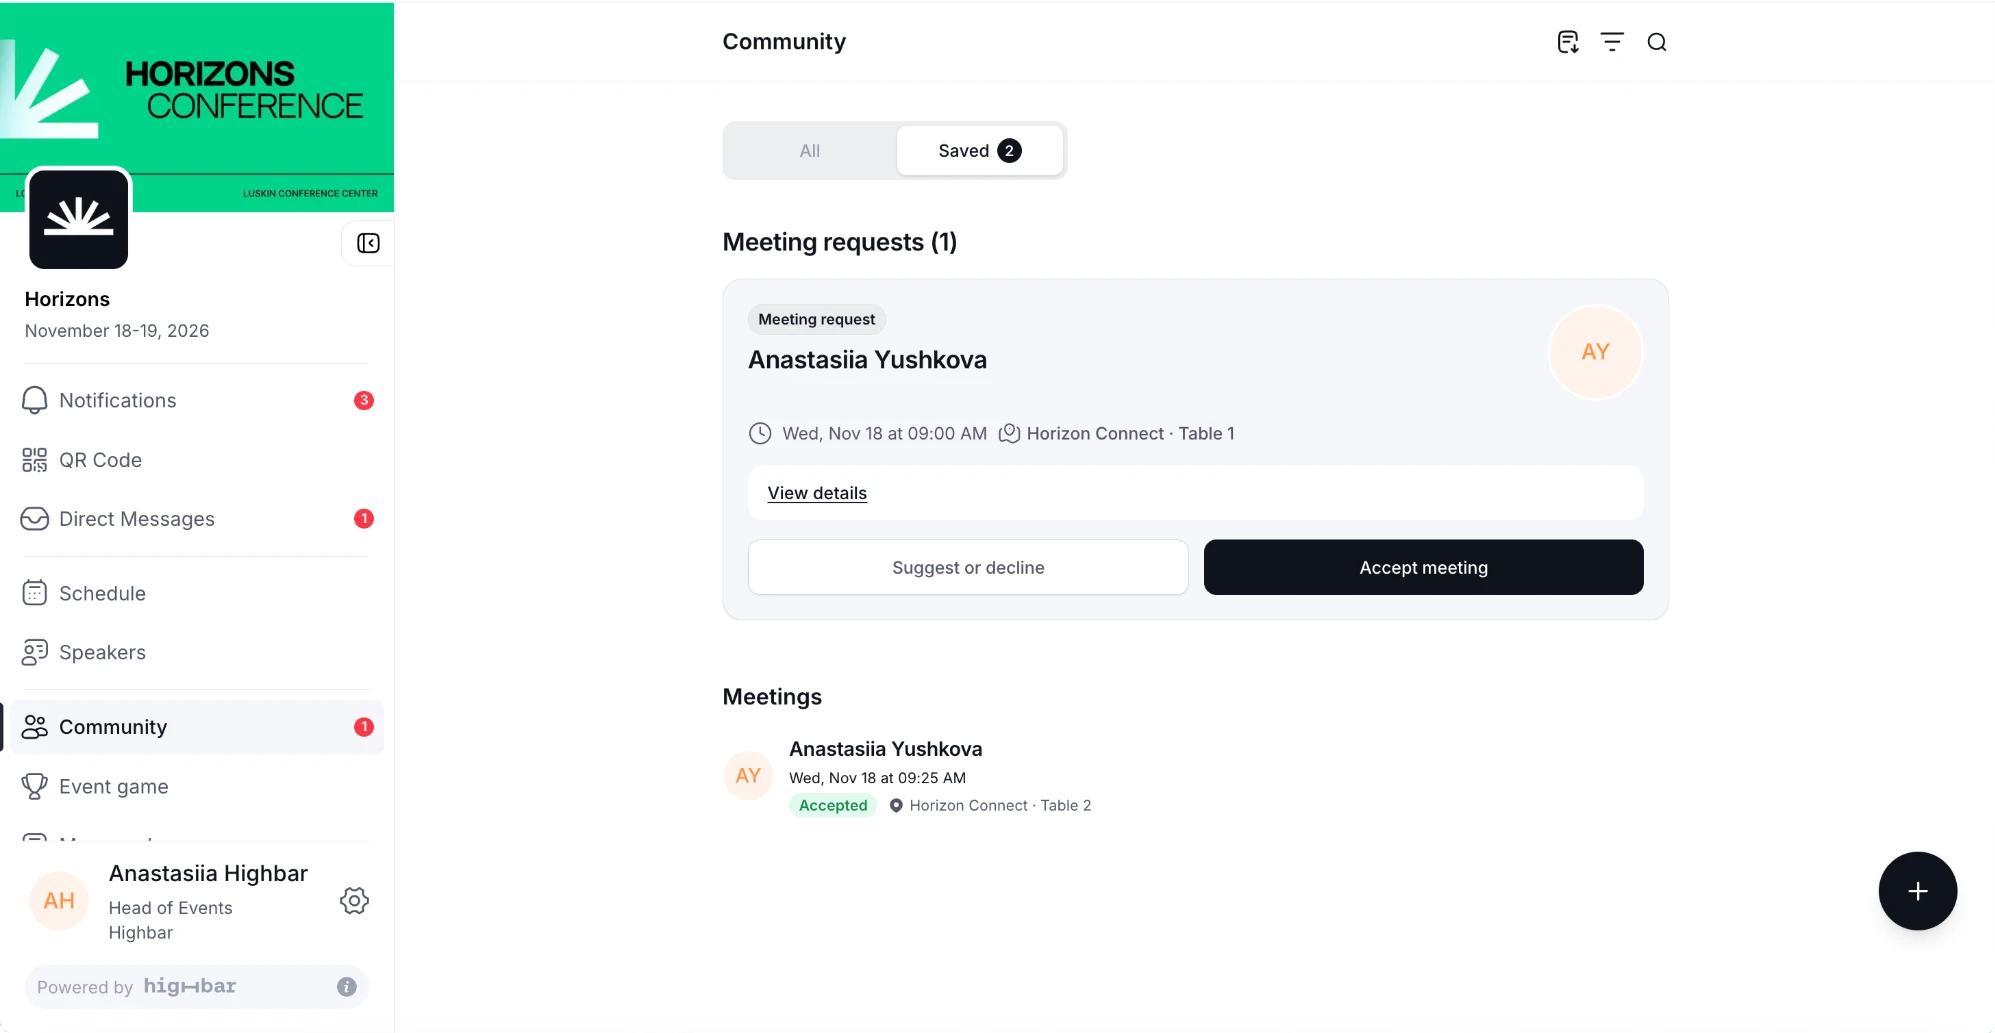
The other person gets a notification in the app, a push notification and an email. The request waits for them at the top of Notifications and under Community > Saved. They tap Accept meeting, or Suggest or decline to decline it or suggest a different time or place. View details shows the full request. Each meeting can be countered once.
-
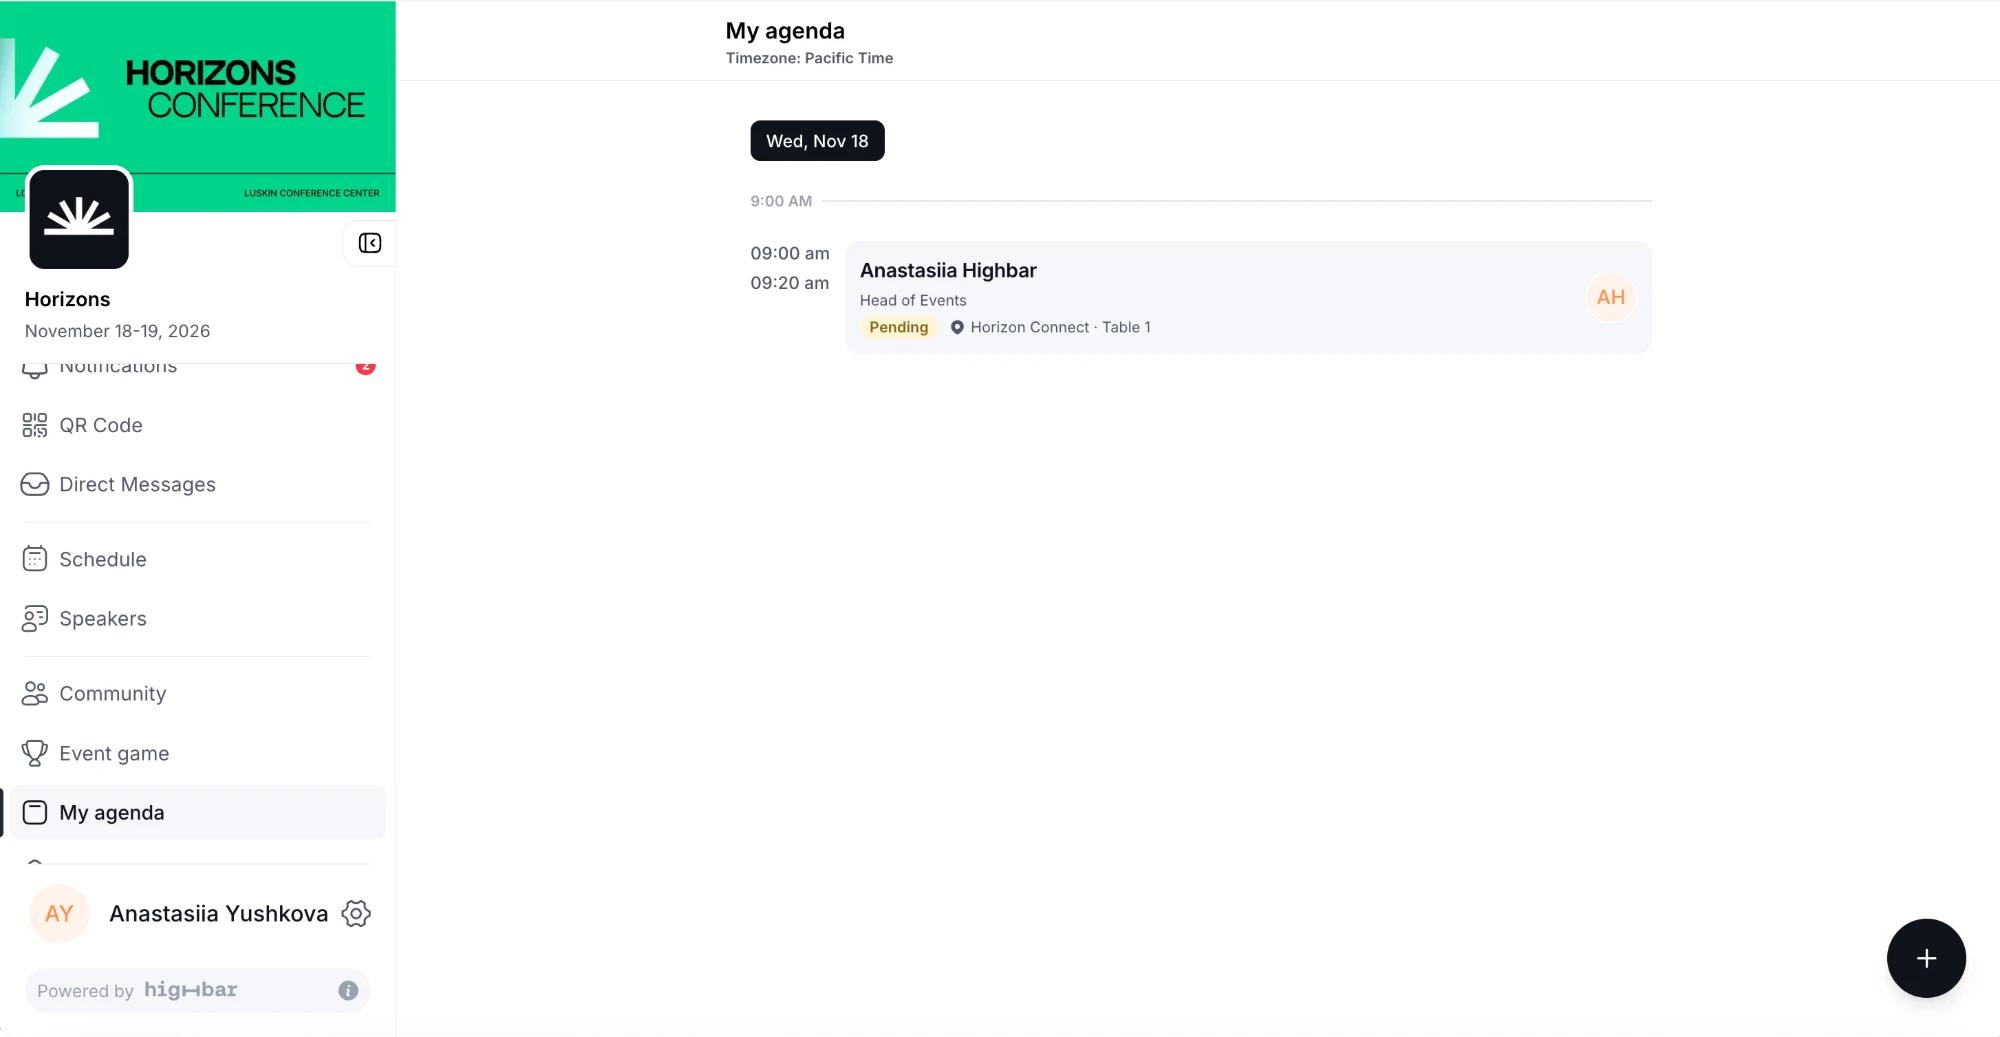
Meetings appear in My agenda, with the time and location, marked Pending until they're accepted. Someone with requests to answer also sees "You have 1 meeting request" there, with Review. Meetings are listed under Community > Saved > Meetings too.
-
After the meeting, each person can rate it and mark a no-show. Finished meetings move down to Earlier in Saved, and meetings marked as a no-show leave their lists.
Attendees can't cancel a meeting. If one needs cancelling, you can do it (see below). To share the attendee side with your attendees, link to Meetings in the attendee help.
Track and manage meetings
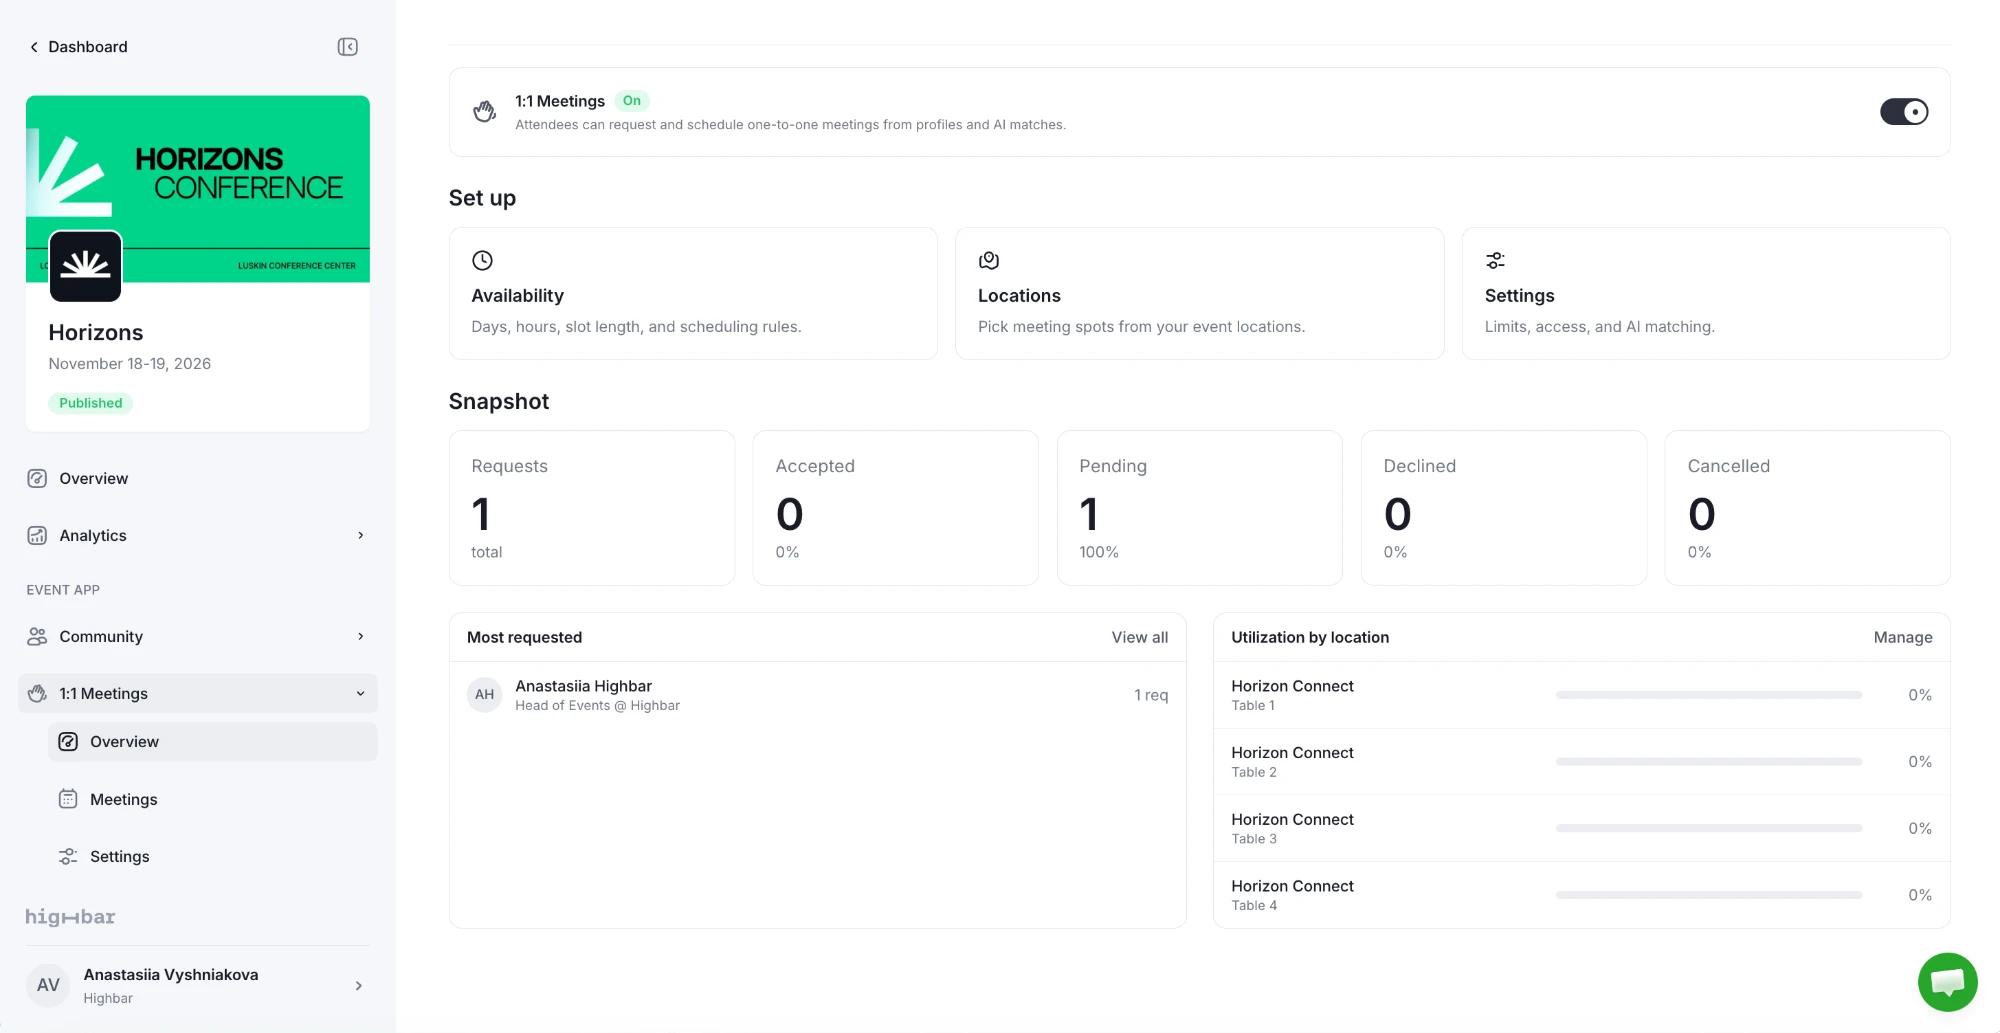
Overview shows a Snapshot of all Requests (Accepted, Pending, Declined, Cancelled), who is Most requested, and Utilization by location: the share of each location's meeting slots filled by accepted meetings. Needs attention appears when something needs you: no-shows, requests waiting at least 24 hours, and locations close to capacity. Dismiss an item once you've dealt with it.
Meetings lists every meeting. Search by name or location, filter by Status, Day or Location, and click Export to download the filtered list as a CSV. Click a meeting to see who's meeting, when and where, the invite message and its history.
To cancel a pending or accepted meeting, open it and click Cancel meeting. Both people are notified. You can't move a meeting to another time: cancel it and book a new one.
For how many requests turned into meetings, see the Meeting Funnel on Event impact.
Book a meeting for attendees
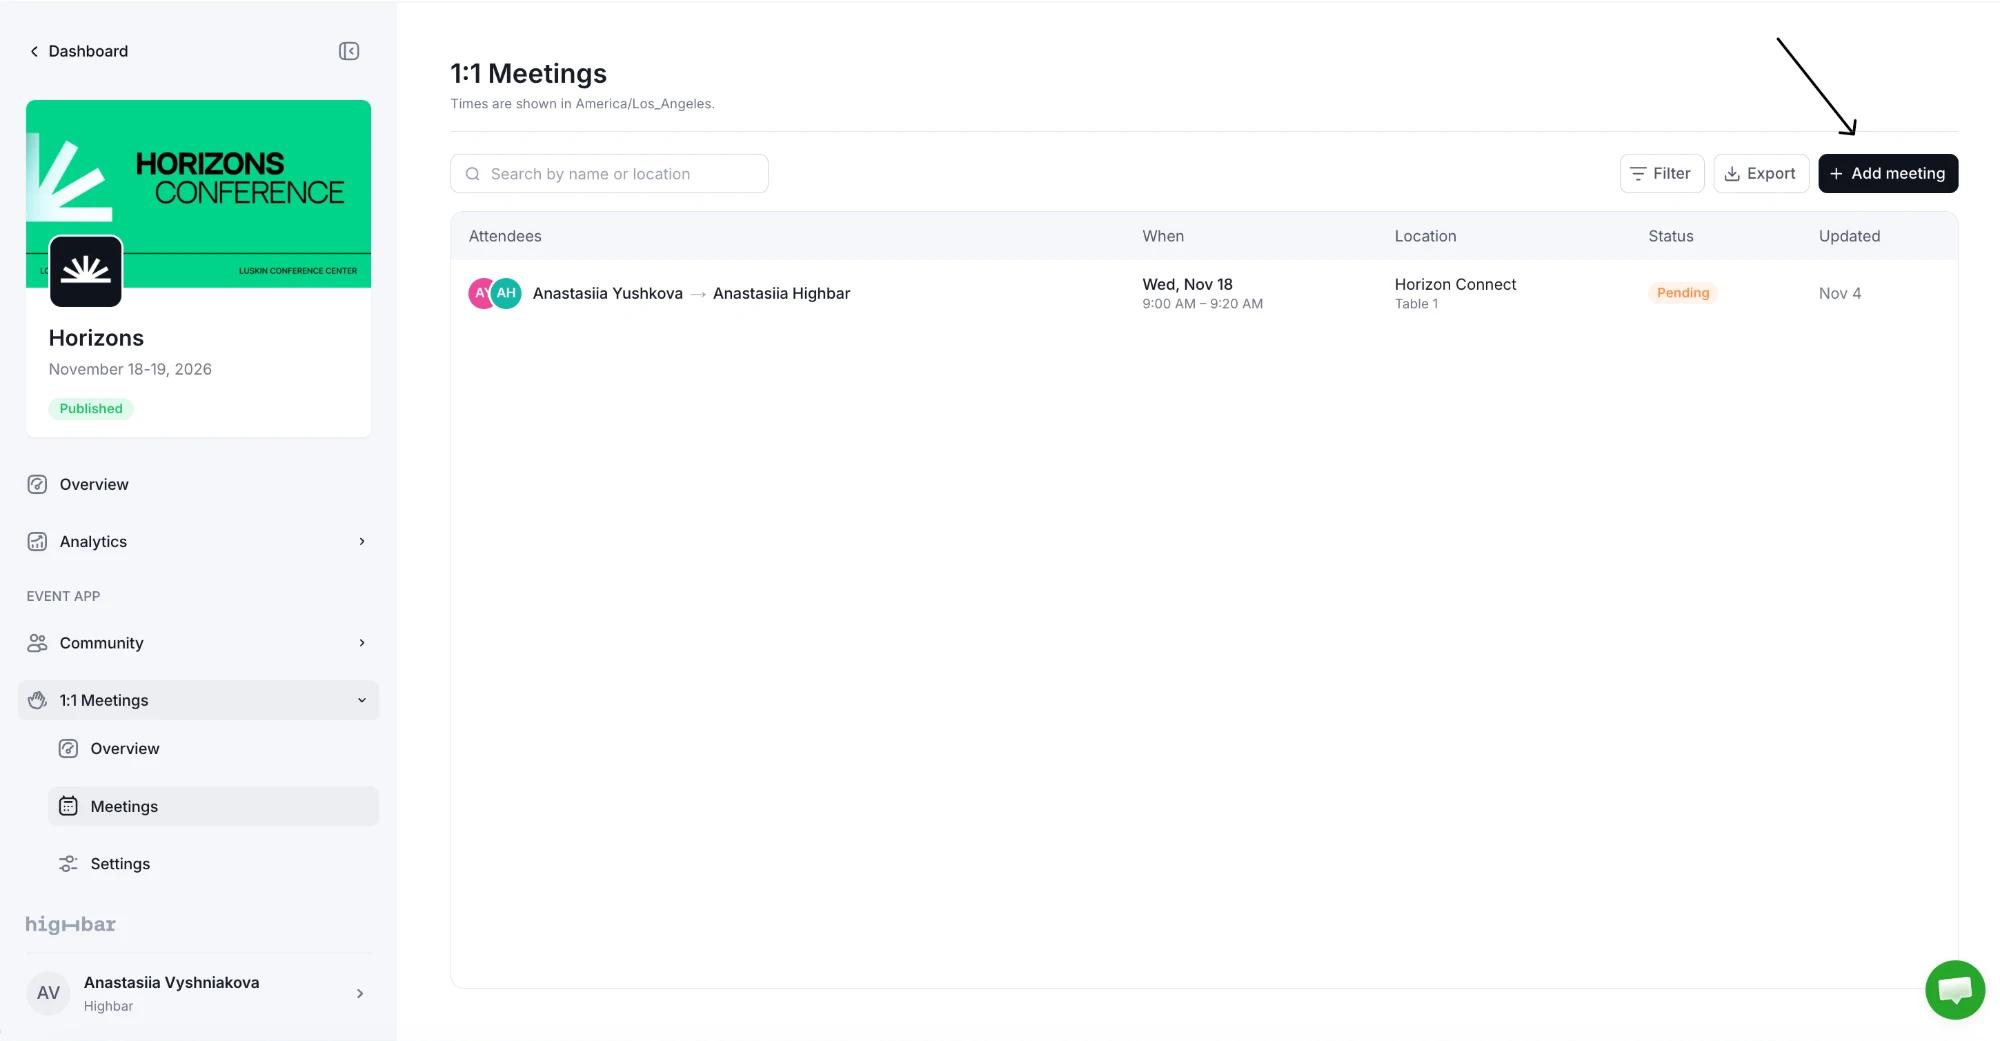
On Meetings, click Add meeting. The Create meeting drawer opens.
Choose the Requester and Recipient, then the Date, Time and Place.
Choose a Status. Accepted (the default) books it and notifies both people. Pending sends the recipient a request to accept. Completed records a meeting that already happened, without notifying anyone.
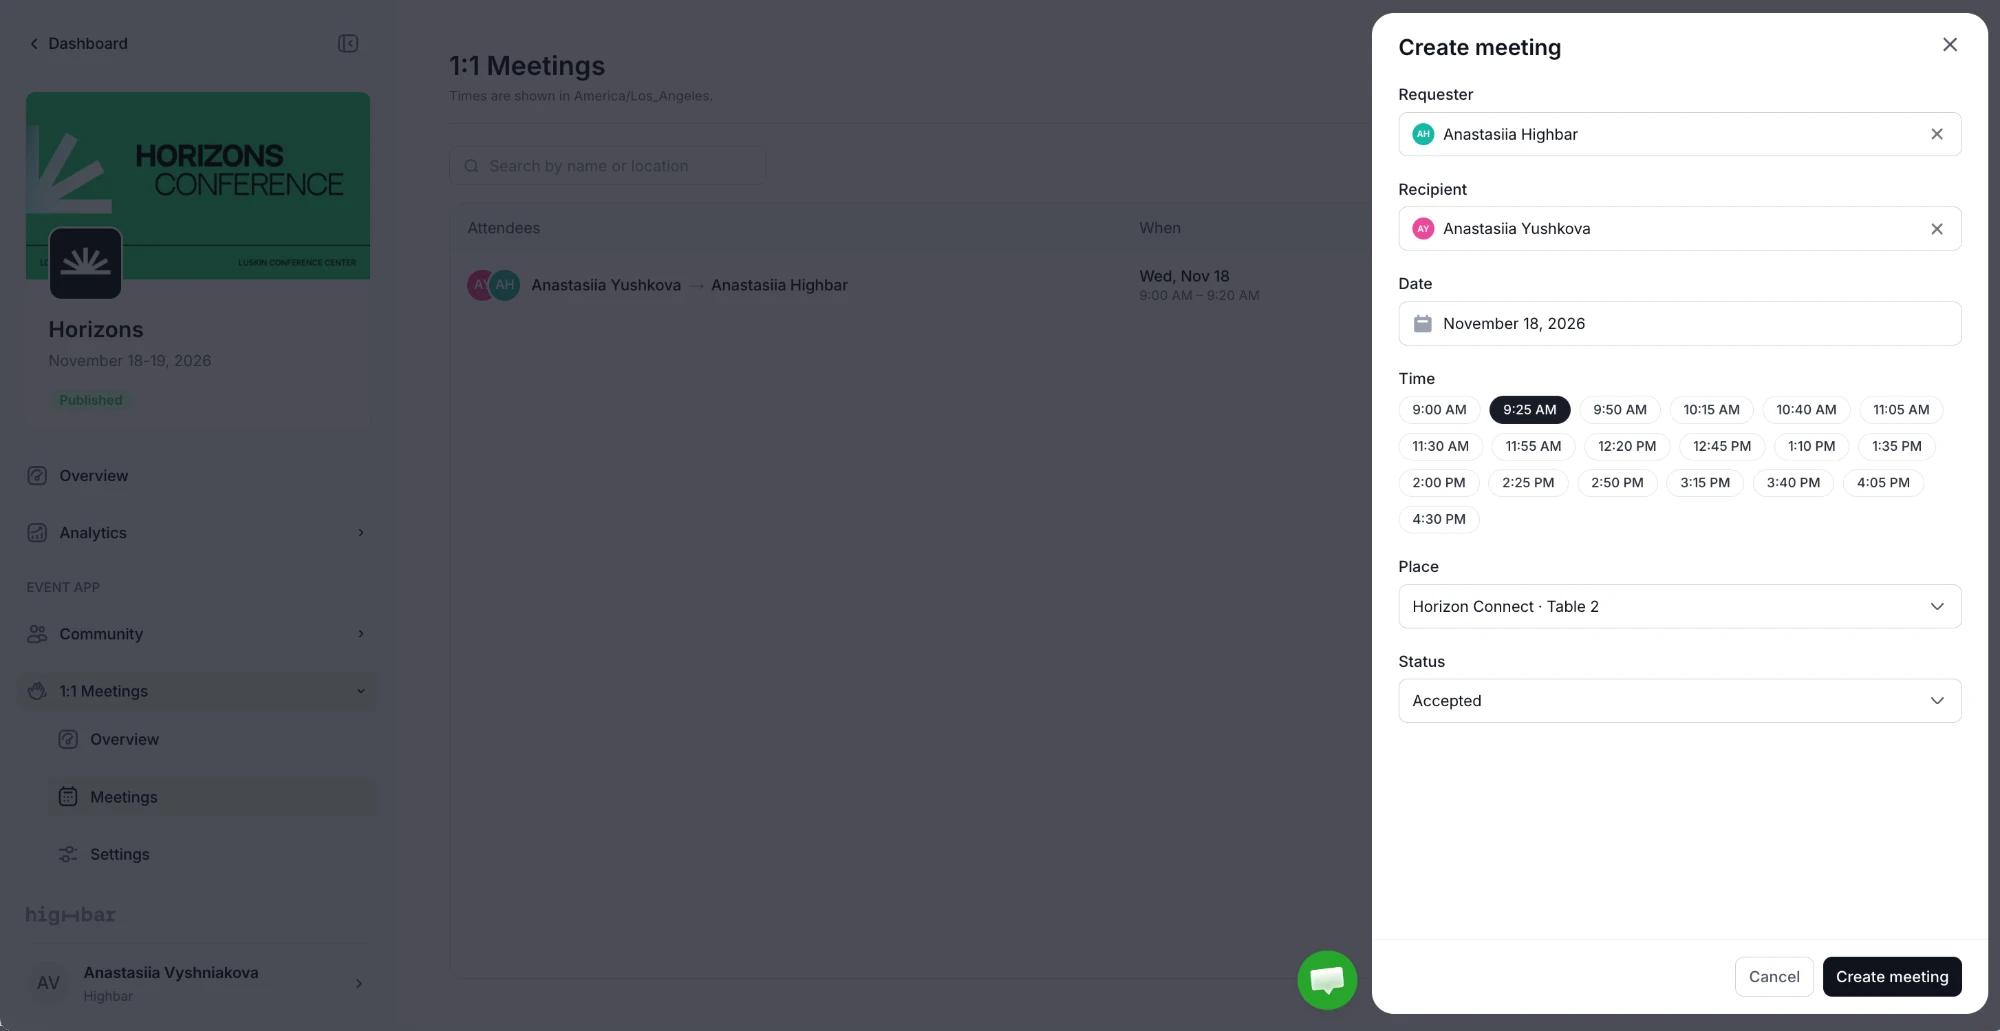
Click Create meeting. If it breaks one of your rules (such as a meeting limit or a full location), you see why. For some rules you can give a Reason for override and click Create with override to book it anyway.
The meeting is added to Meetings with its status.
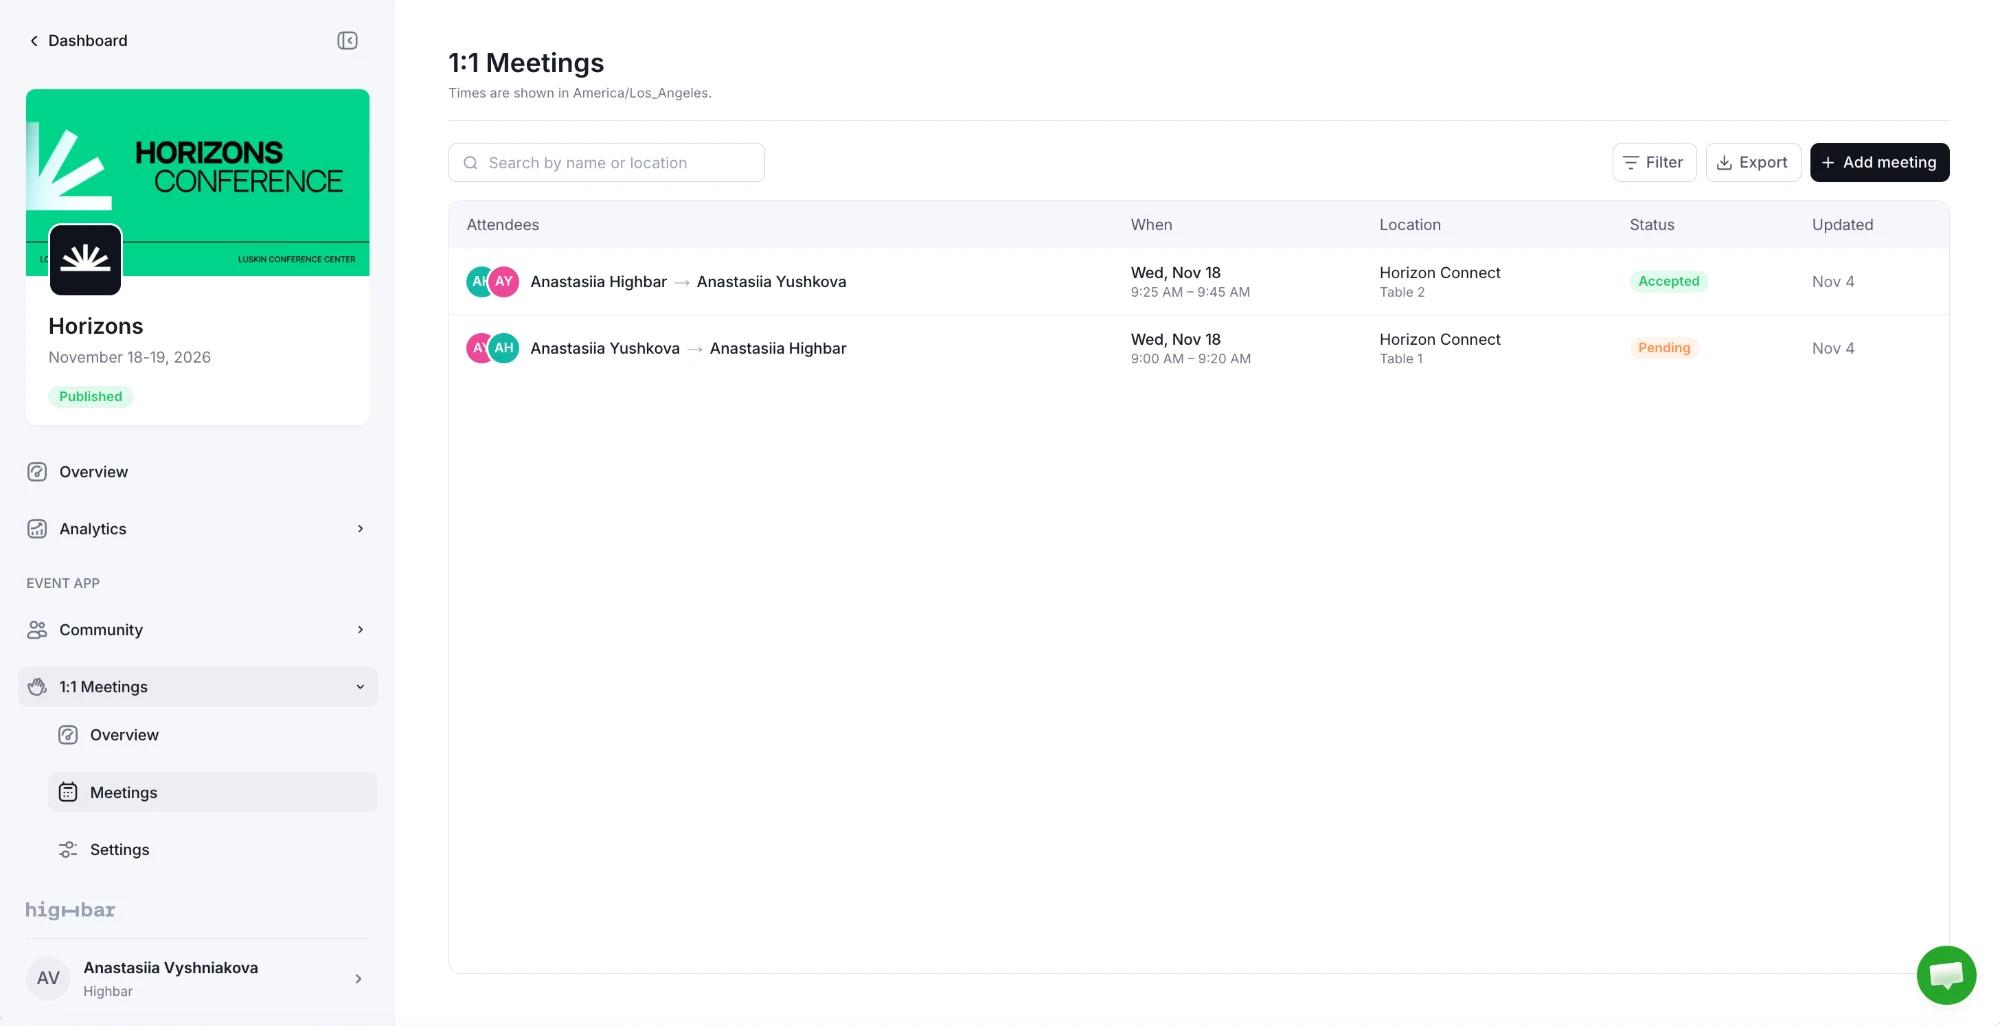
Overview counts it too: the Snapshot shows 2 requests, 1 accepted and 1 pending, and Table 2's utilization goes up.