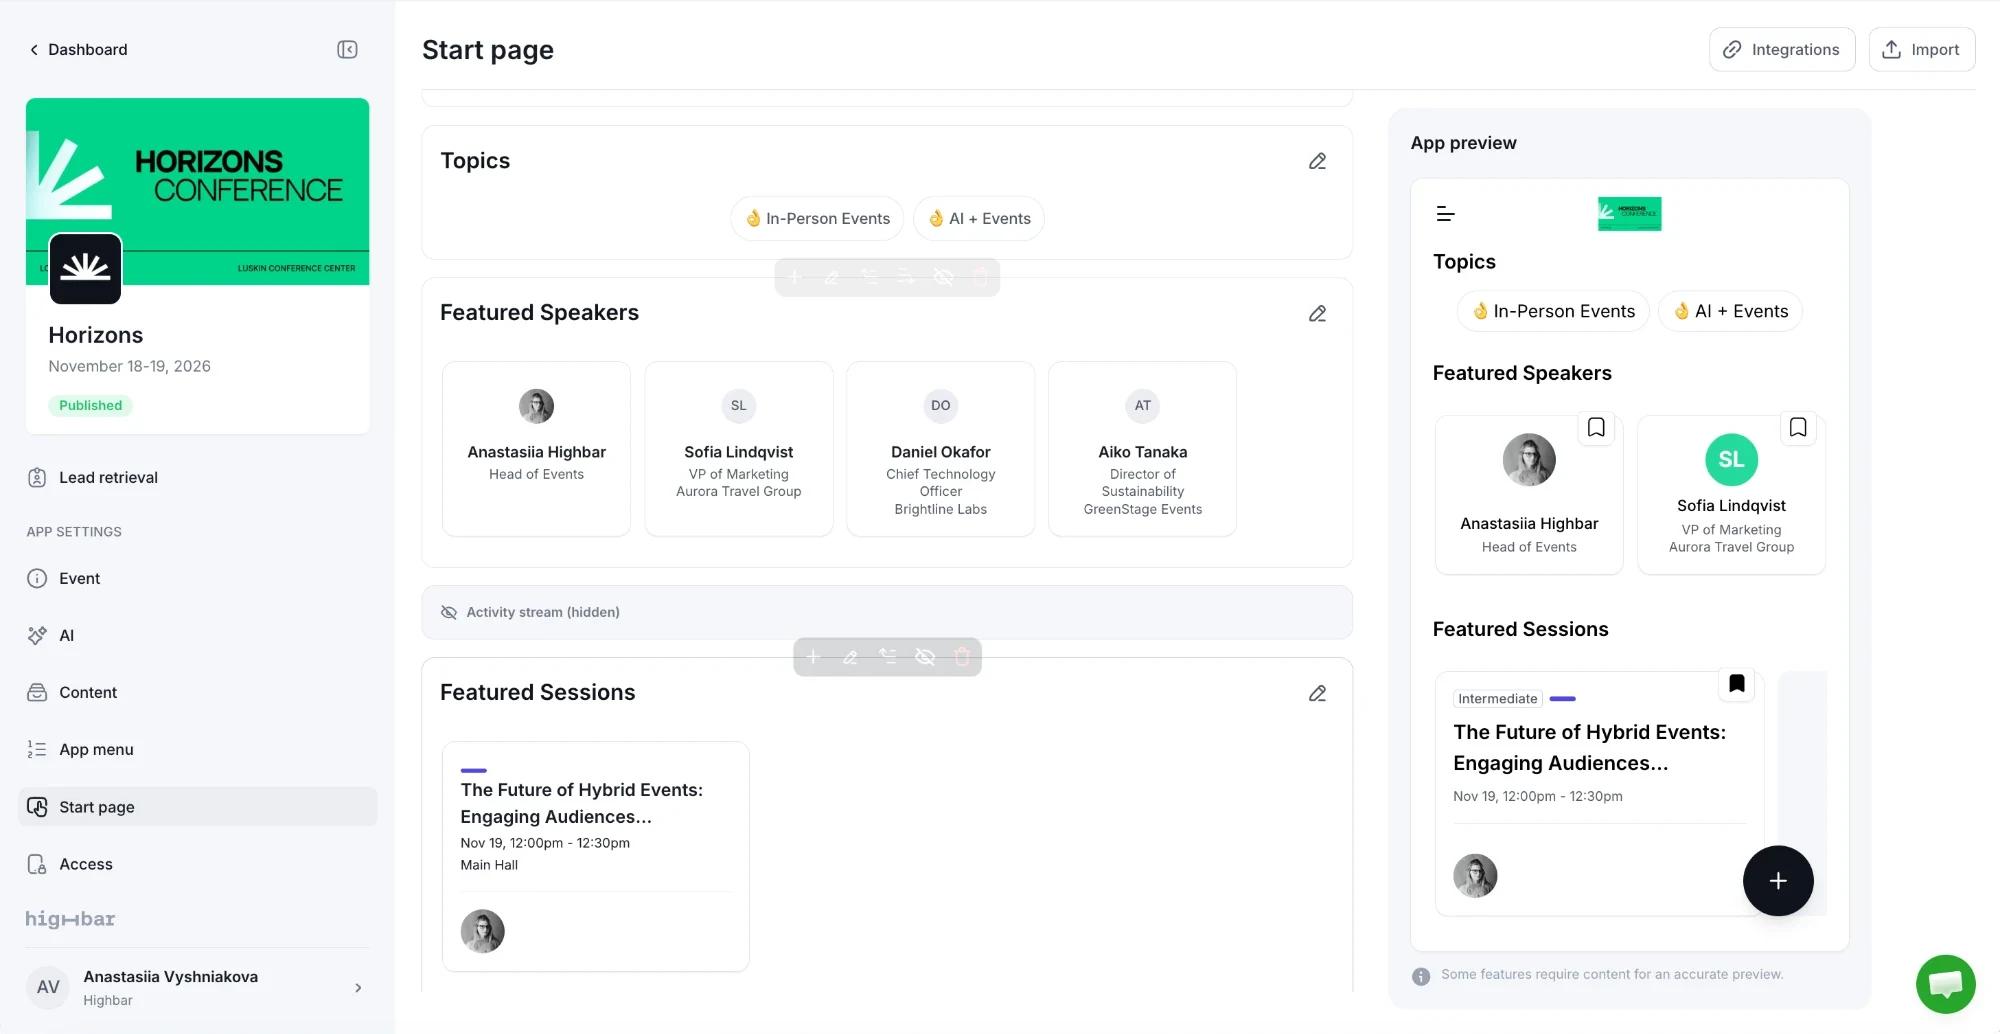
Start page
Build the home page attendees see after they log in, from sections such as a welcome message, an AI summary, shortcuts and featured content.
The start page is the first screen attendees see after logging in. In the app's menu it's called Home page. Build it in the Start page step of the event sidebar (after launch, under App settings). It never blocks launch.
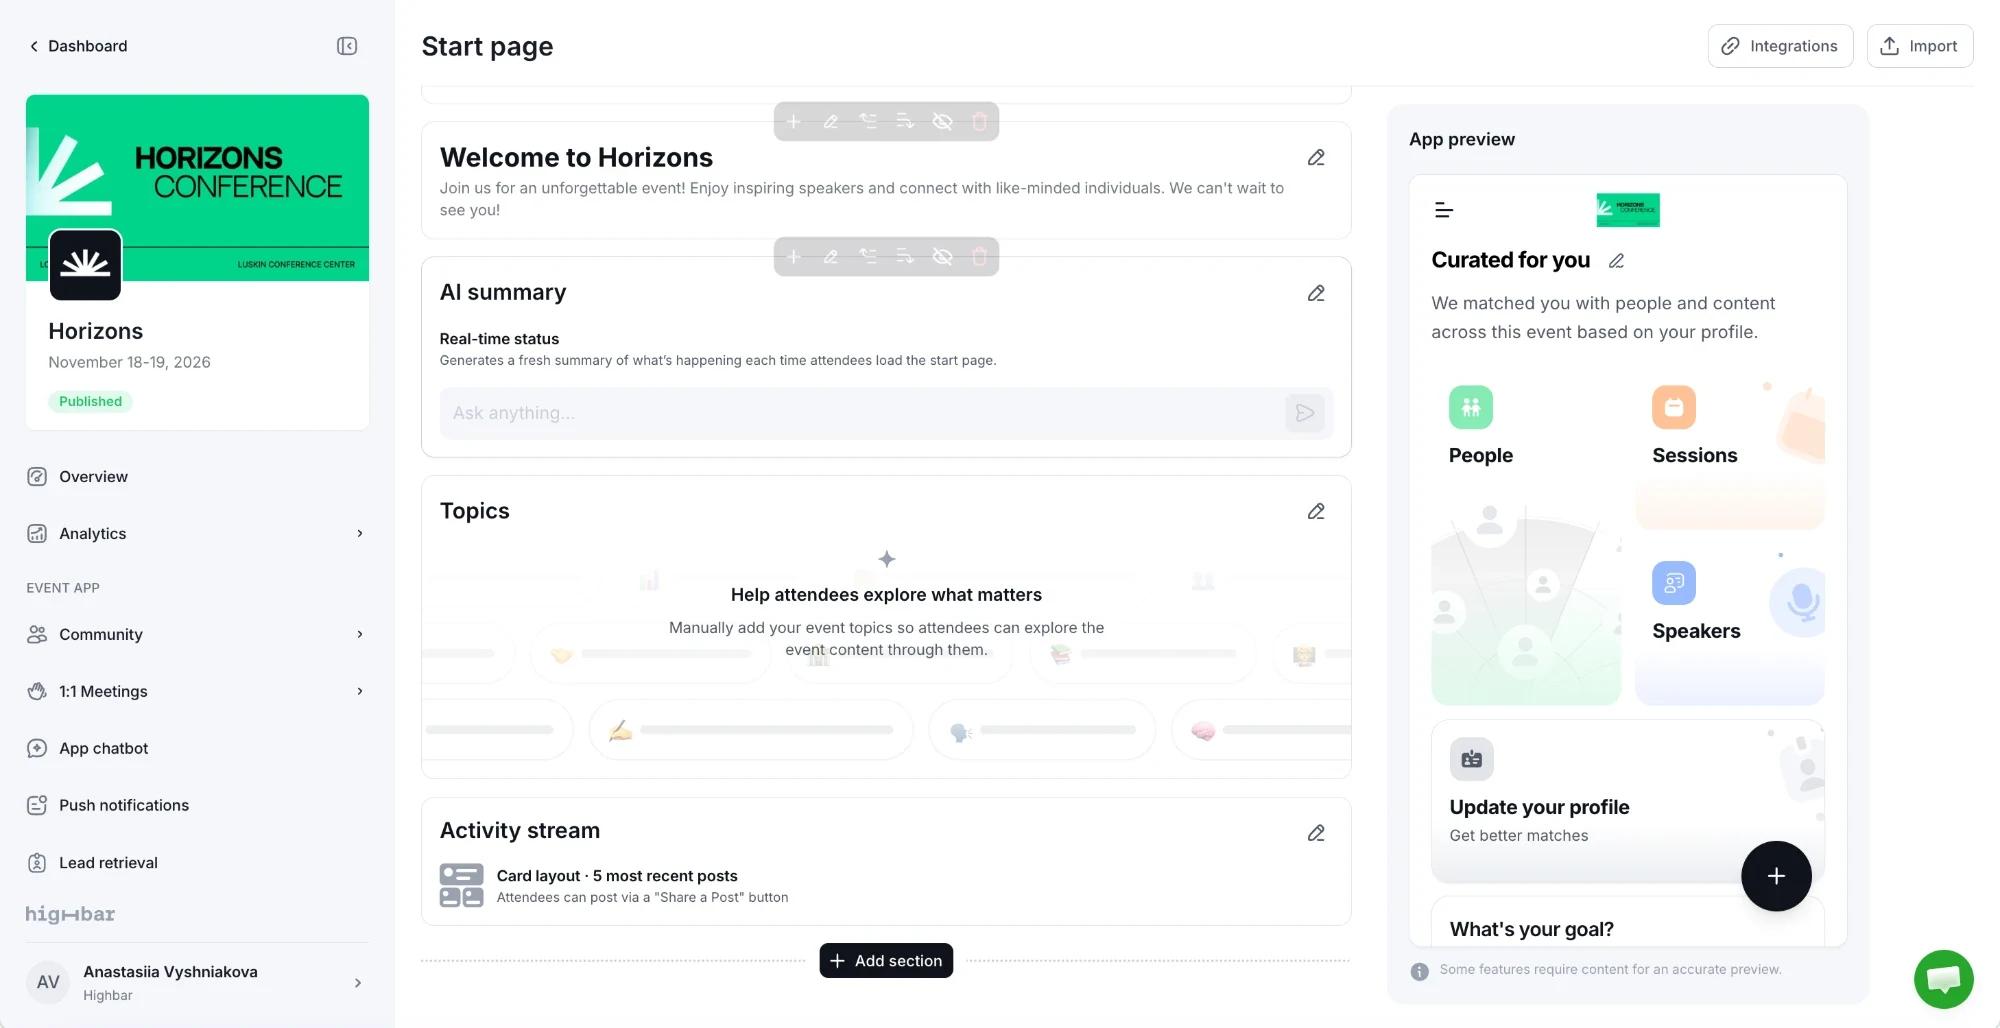
New events start with a cover image, Curated for You, a welcome message, a live summary (named "AI summary") and topics, plus an activity stream that appears after launch. The cover image and topics start empty, so attendees don't see them until you fill them in.
Work with sections
- Add a section: click Add section at the bottom of the page, or the + in a section's toolbar to insert one above it.
- Edit a section: hover over it and click Edit, make your changes, then click Save. Most sections have a Label: the heading attendees see.
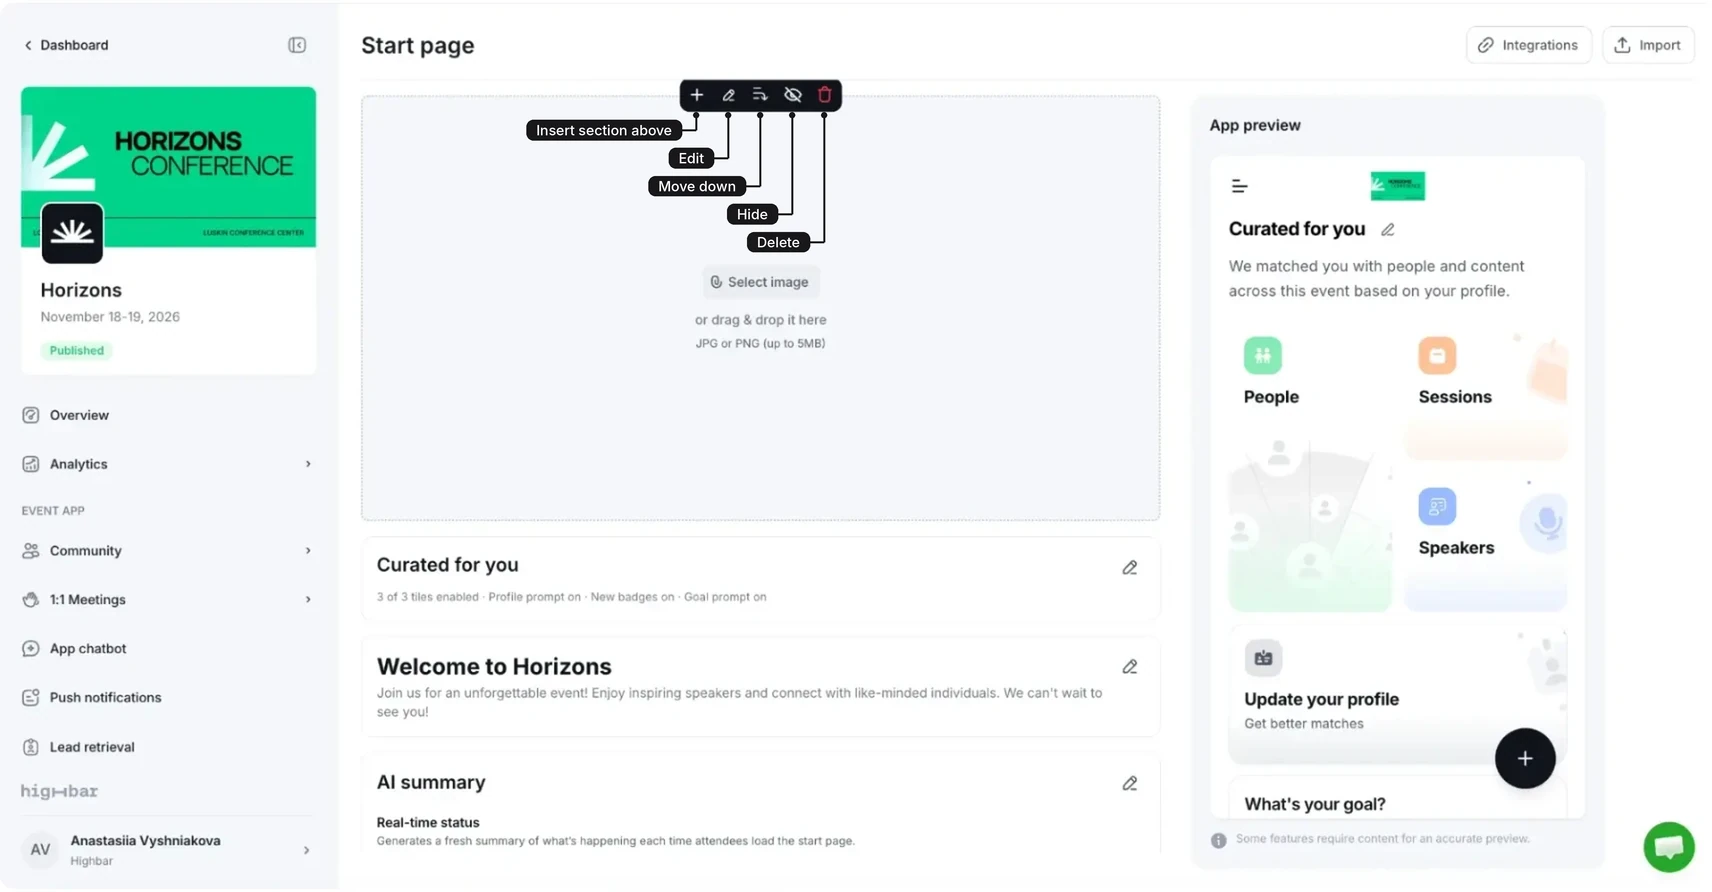
- Rearrange: use Move up and Move down in the toolbar.
- Hide or delete: Hide keeps a section on this page but removes it from the app until you click Show. A hidden section shrinks to one line here, such as "Activity stream (hidden)". Delete removes it for good.
The App preview beside the page shows the result. The Add section menu sorts sections into four groups, each covered below: Basics, AI summaries, Social and Featured content.
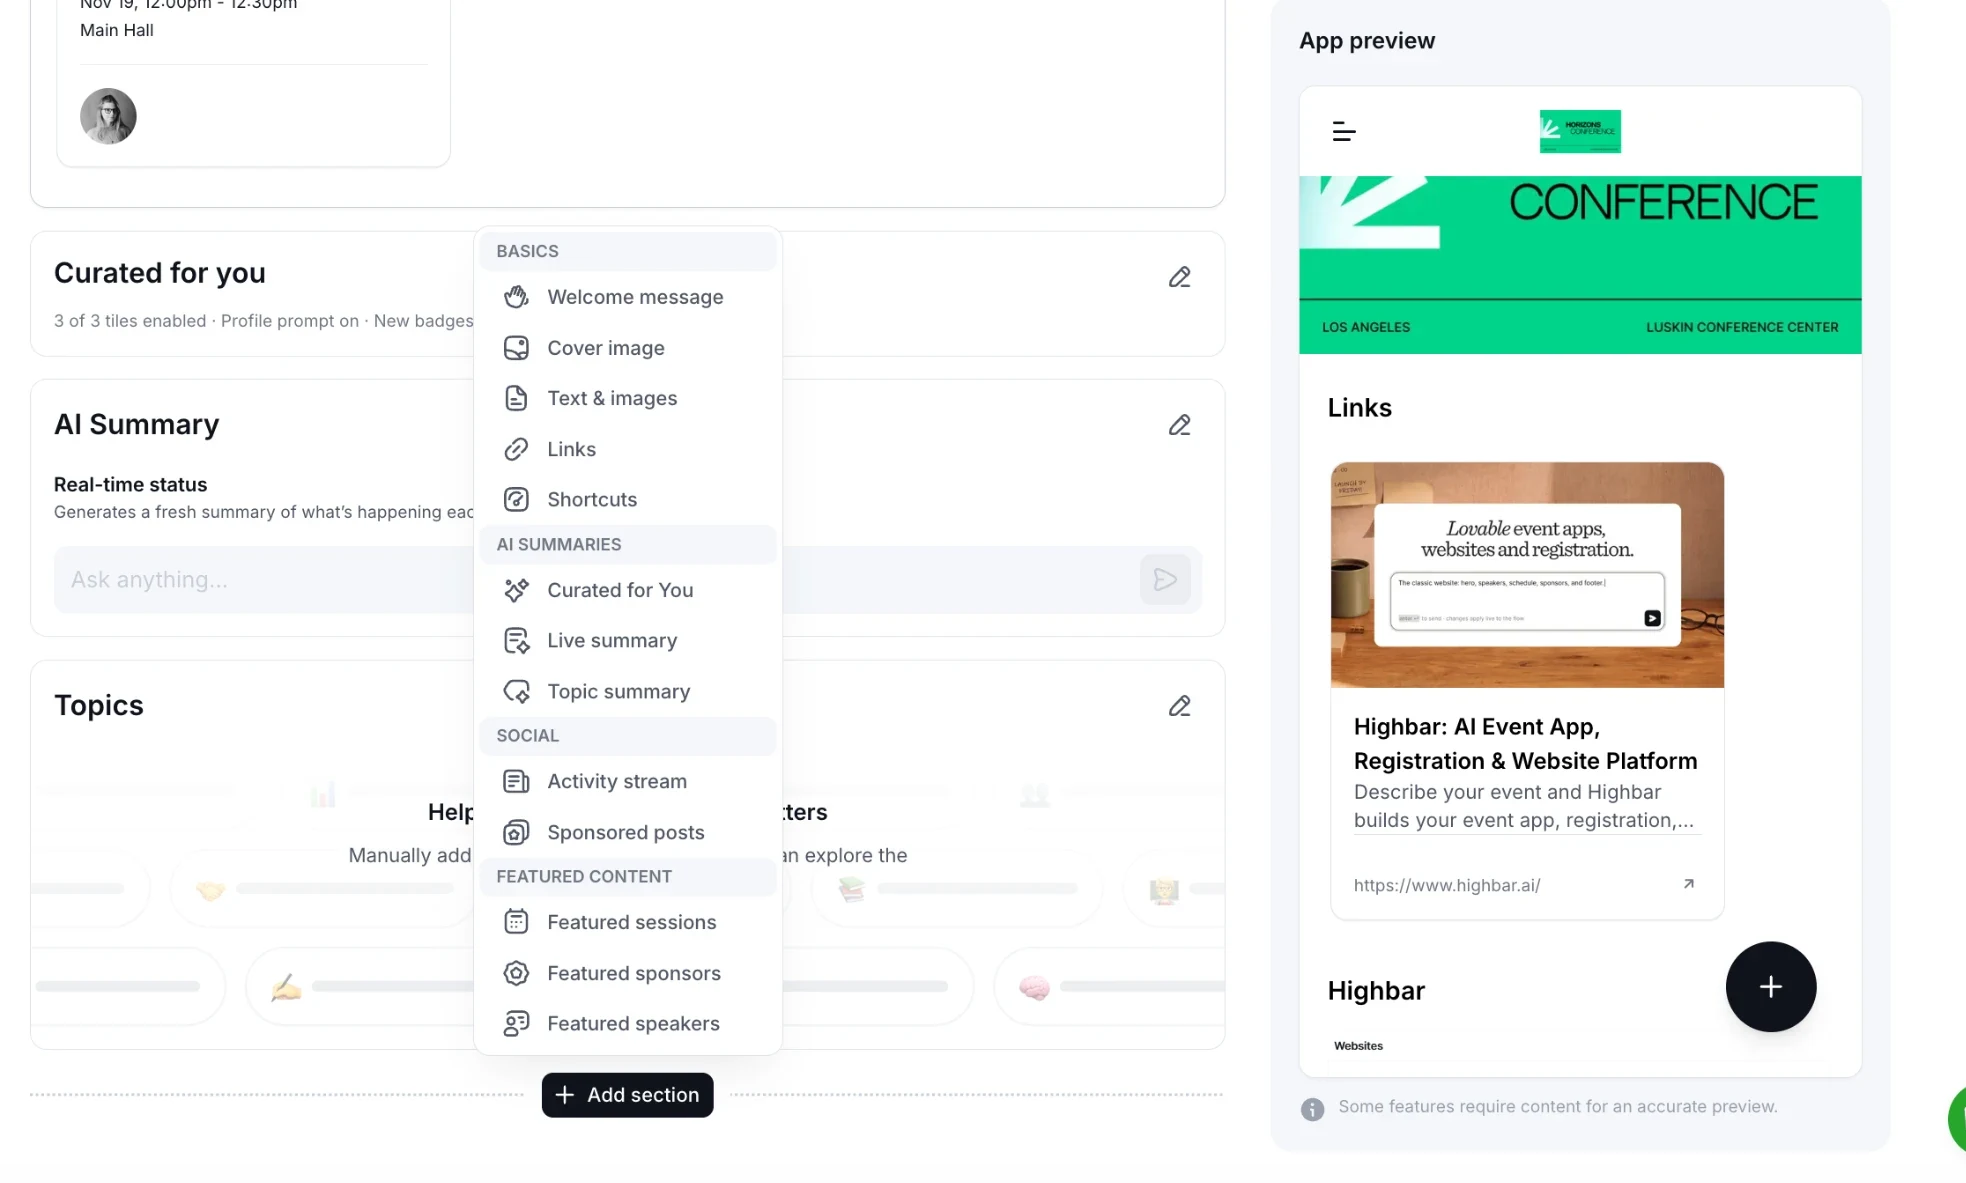
Some sections need content first, and stay greyed out in the menu until you've added it on the Content page. Hover over one to see what's missing:
- Sponsored posts and Featured sponsors: at least one sponsor ("Add at least one sponsor in the content").
- Featured sessions: at least one session.
- Featured speakers: at least one speaker.
Activity stream isn't in the menu at all until your app is launched and the activity stream is on.
Basics
Welcome message
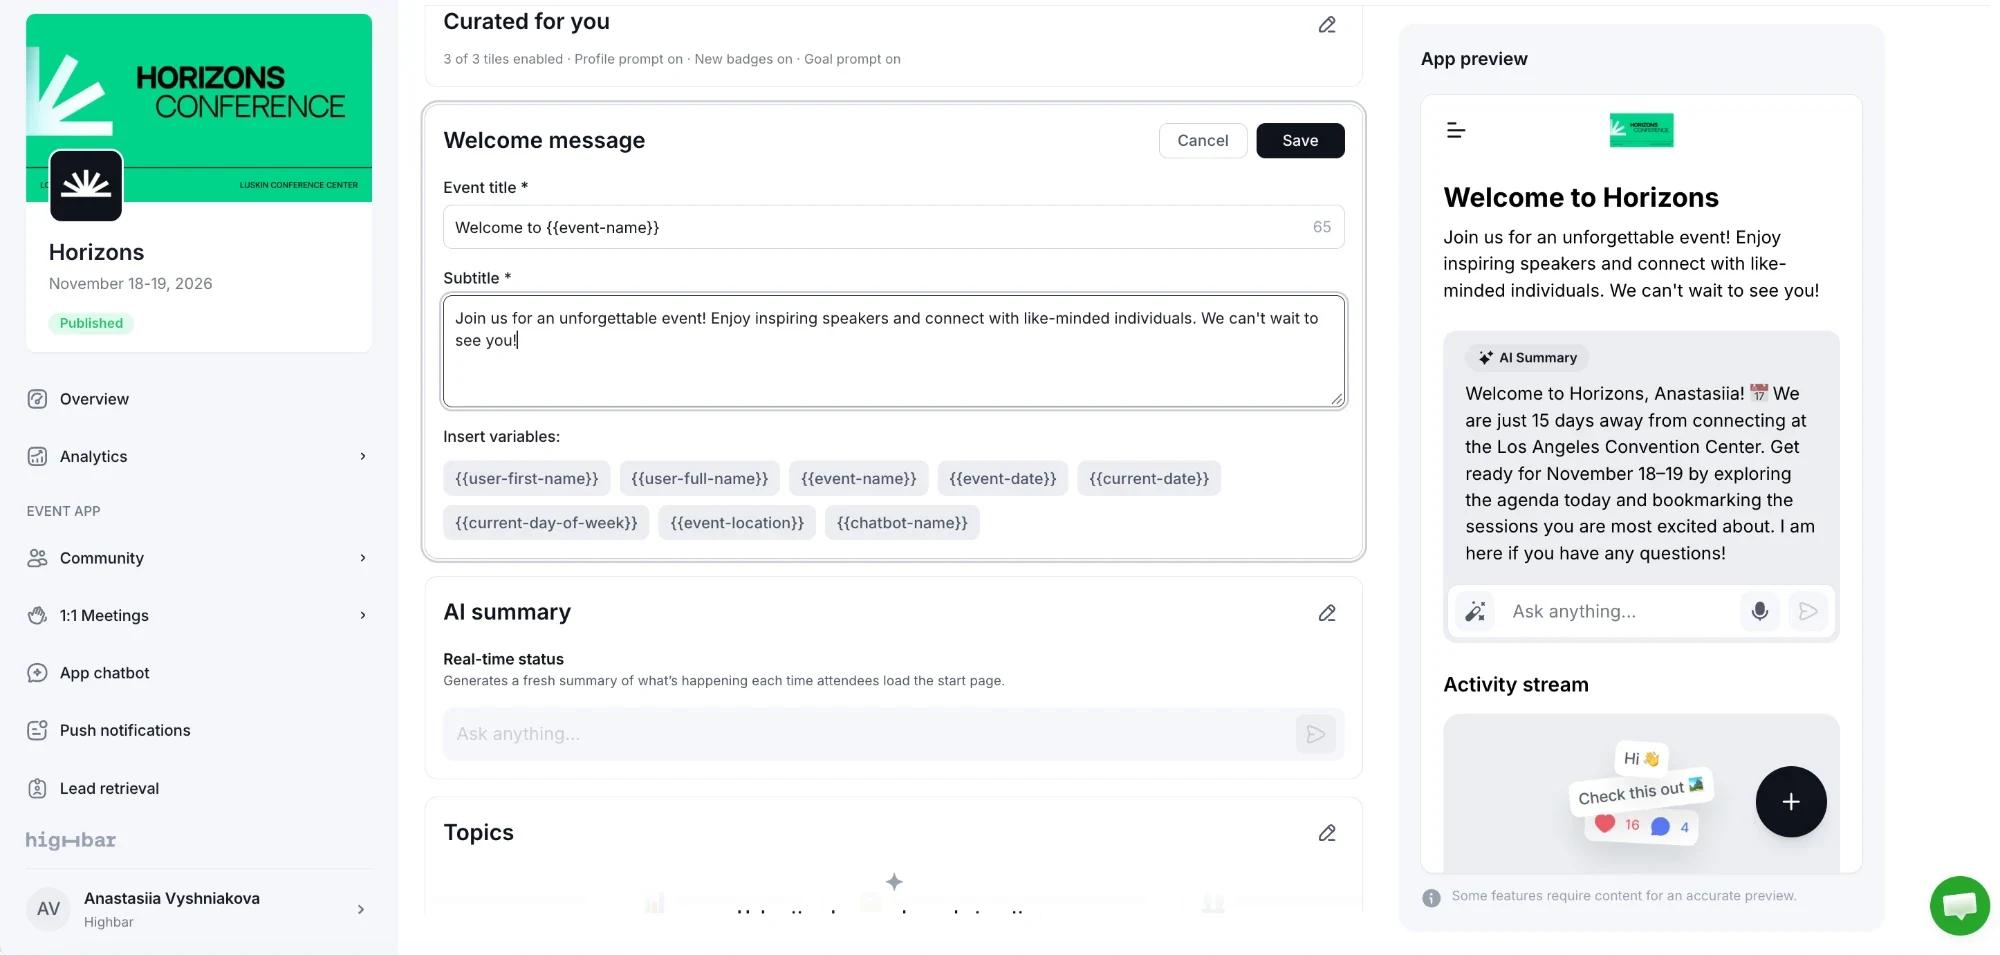
A heading and a short line of text, usually at the top of the page. Edit the Event title and Subtitle, and click a variable under Insert variables to personalize them: {{user-first-name}} and {{user-full-name}} show each attendee's own name, and others add the event name, date and location, today's date and day of the week, or your AI Concierge's name.
Cover image
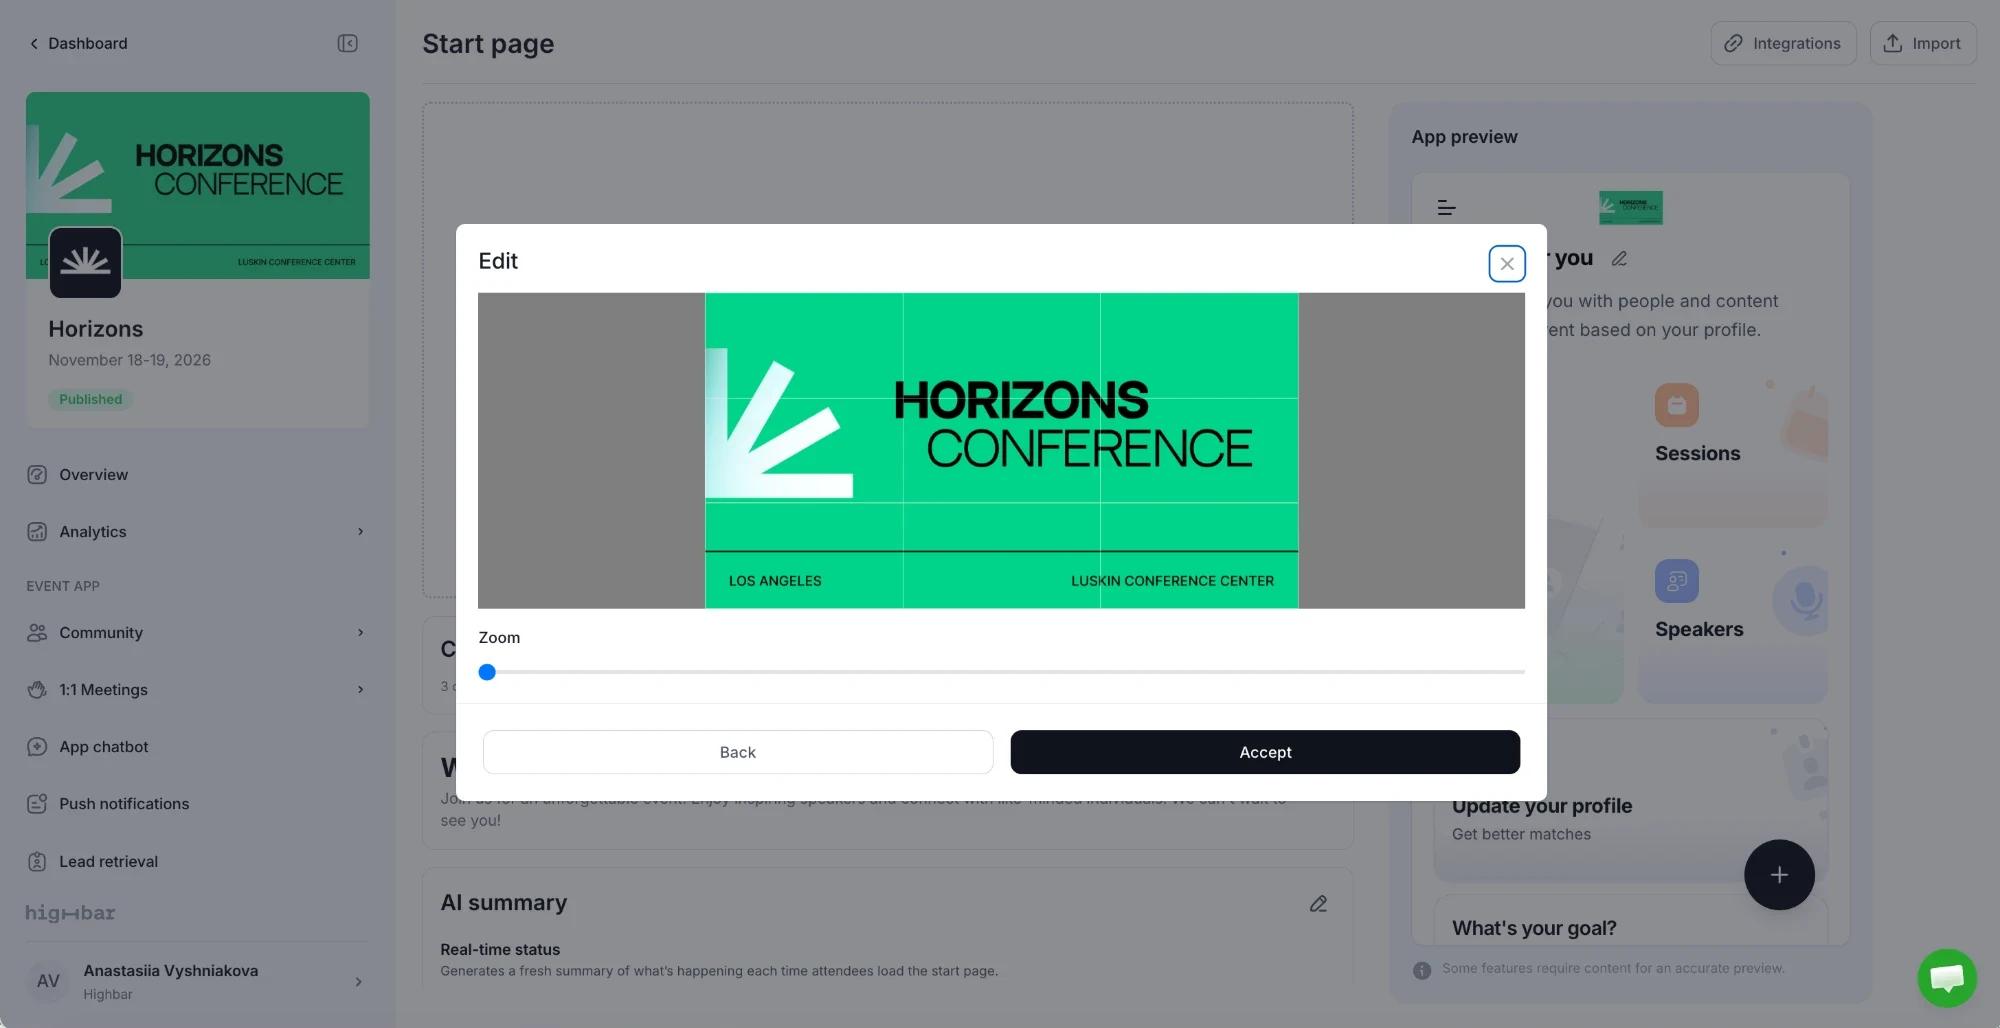
A full-width image. Click Select image and upload a JPG or PNG of up to 5 MB, then drag and Zoom to frame it and click Accept. It's separate from the event cover on Appearance.
Text & images
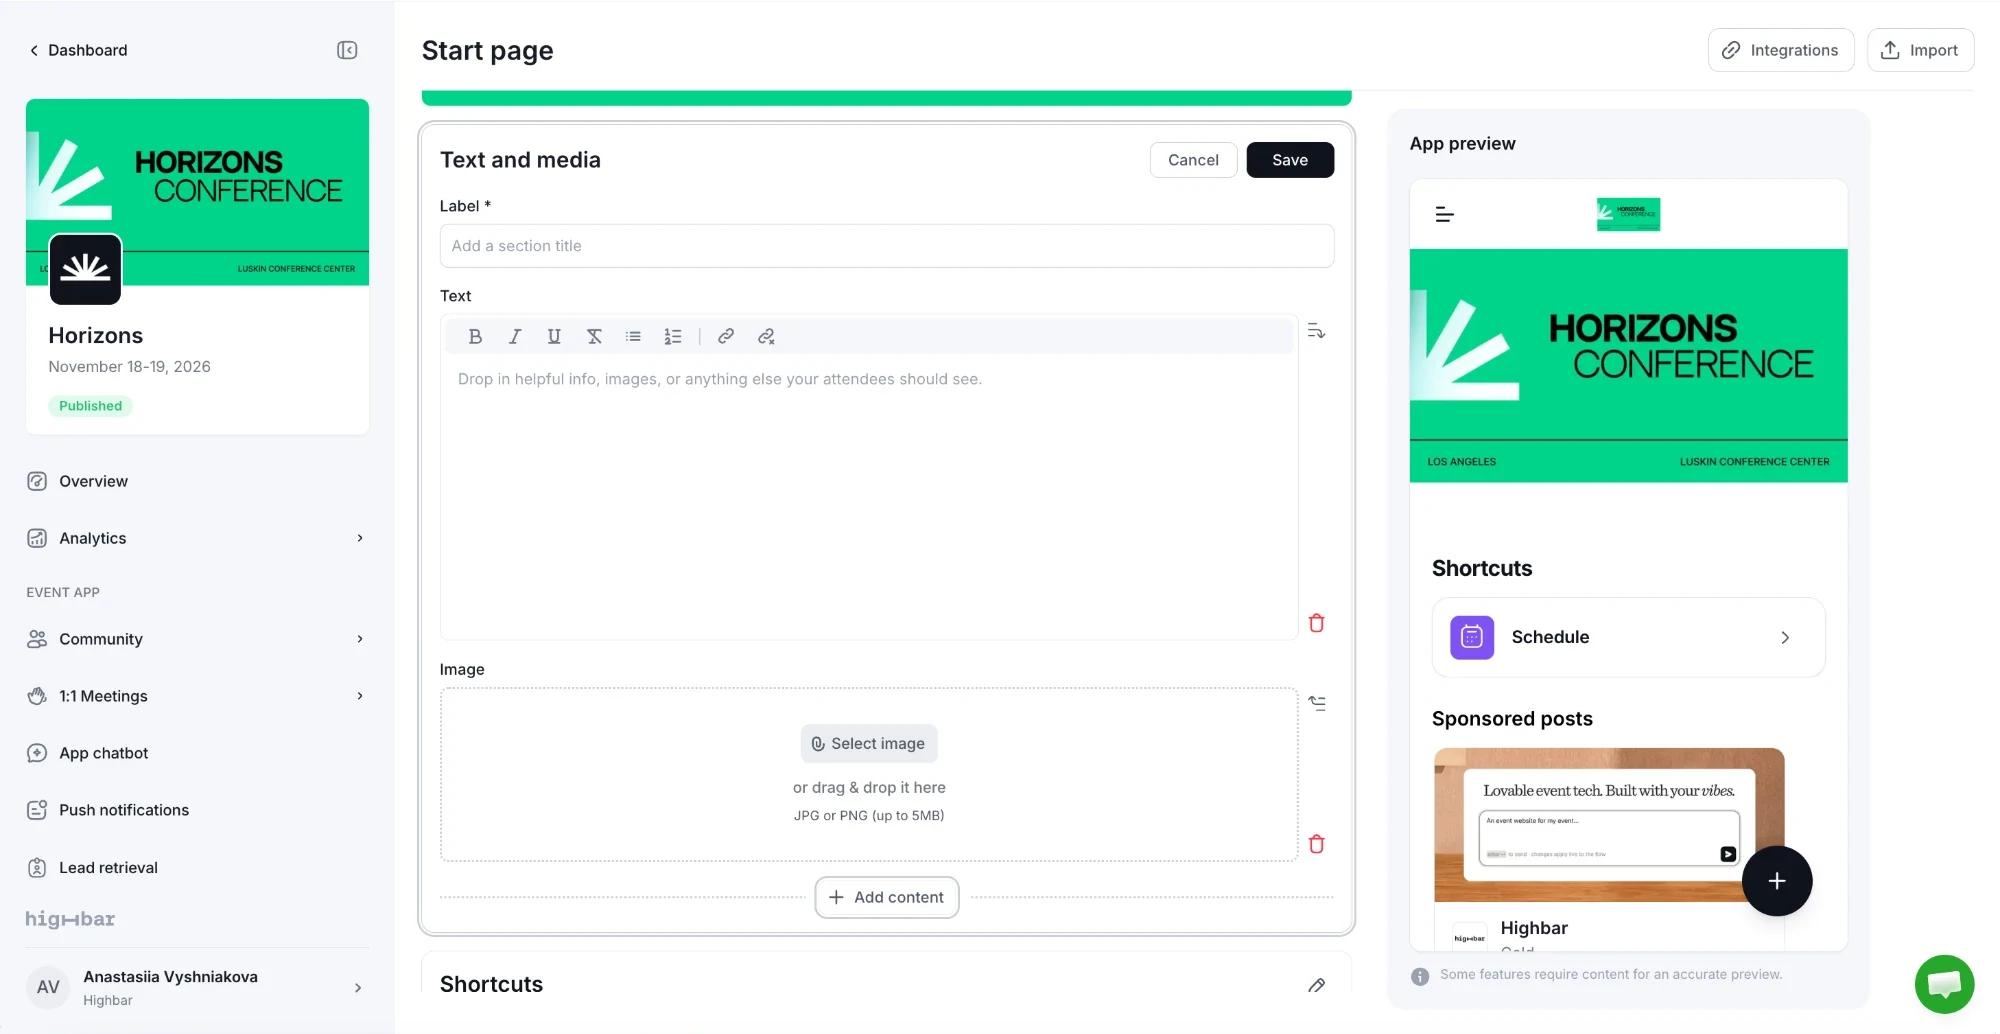
Your own content, such as a note from the organizers or a venue photo. Give the section a Label, then use Add content to add Text and Image blocks in the order you want. Each block has buttons to move or delete it. (The editor is titled Text and media.)
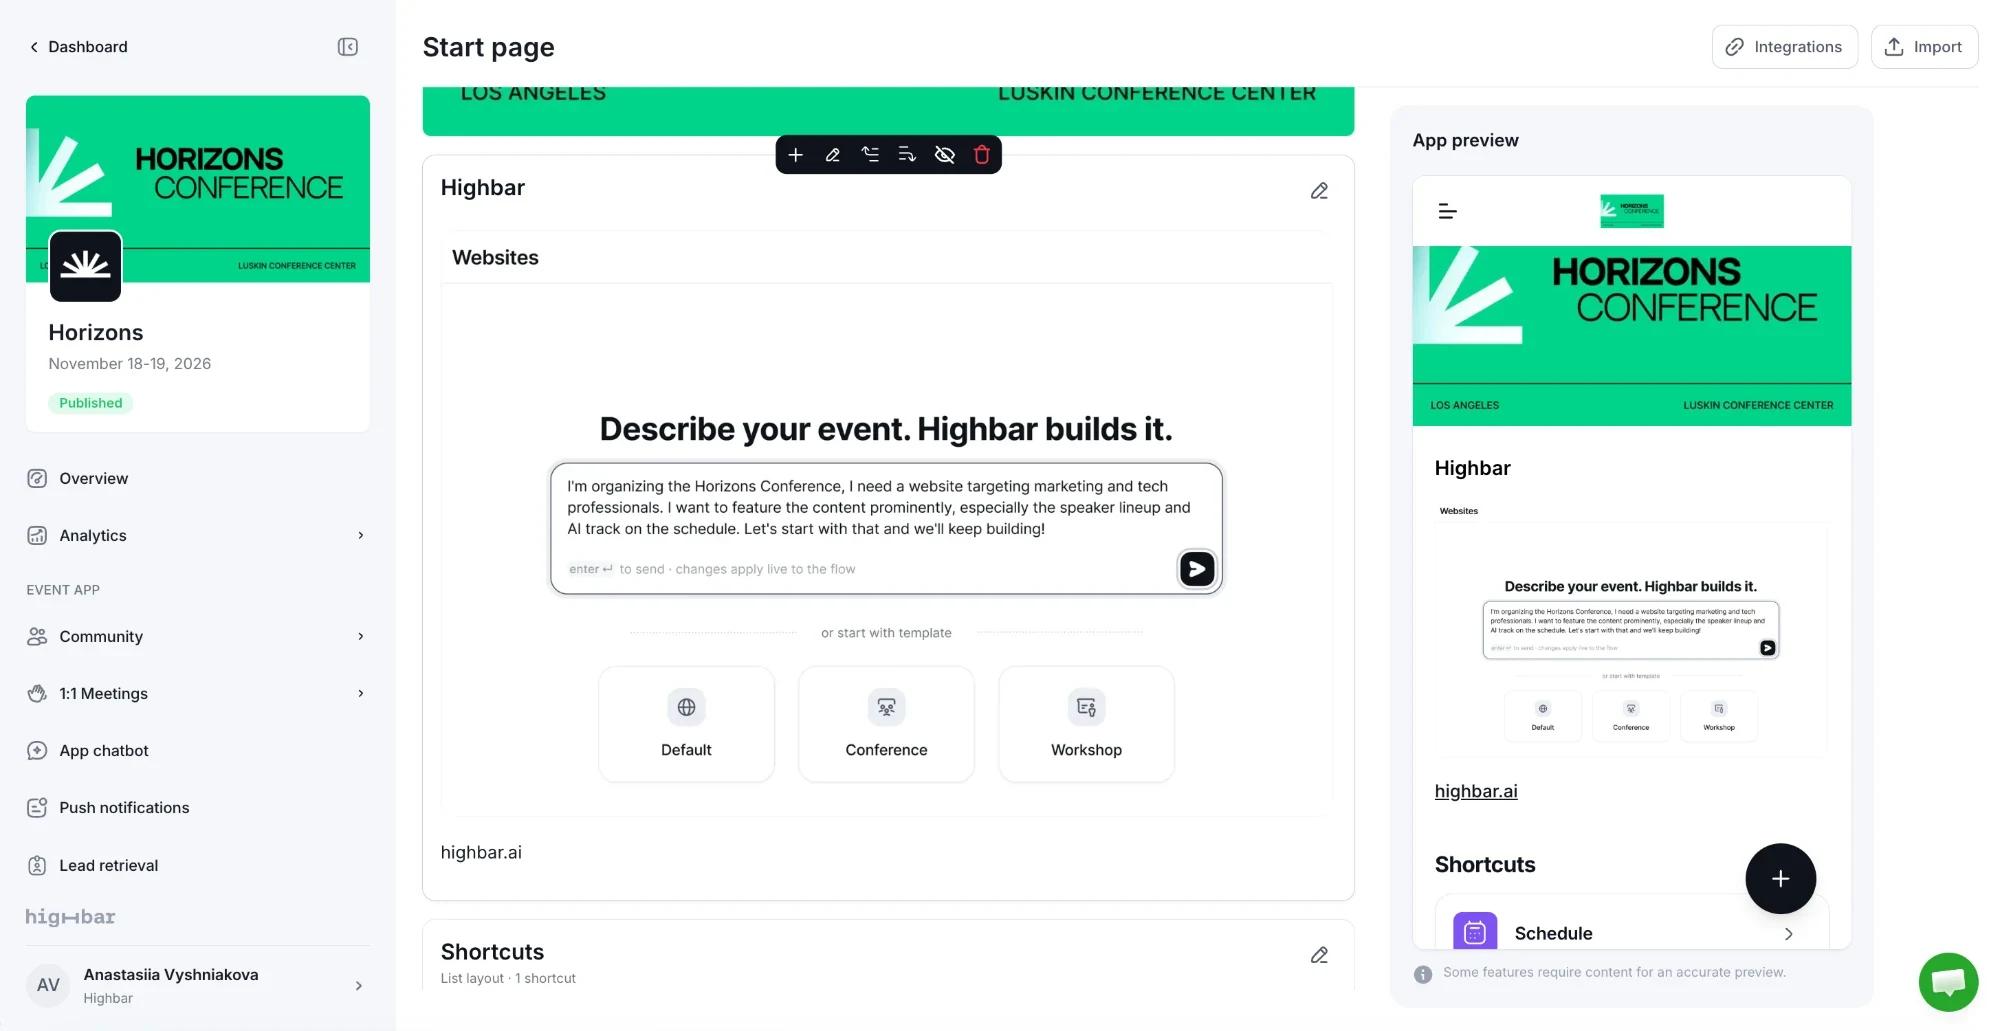
Links
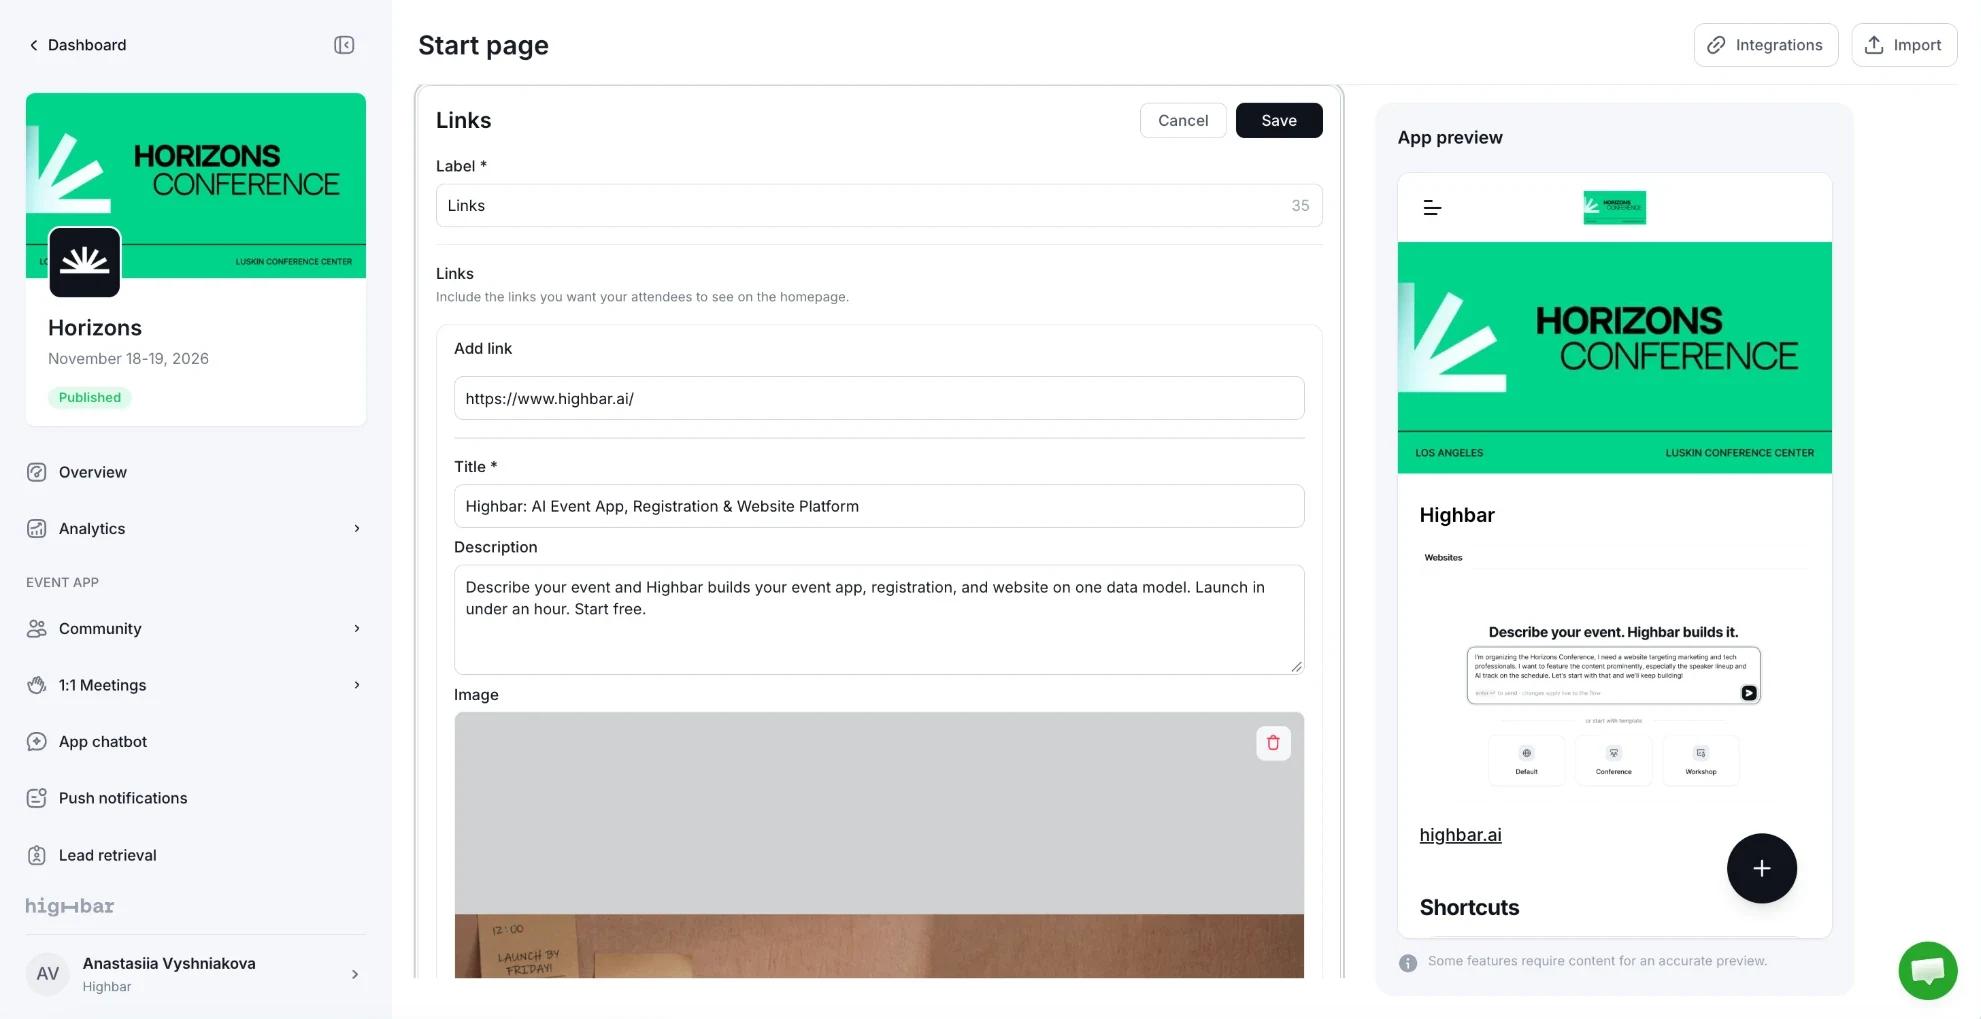
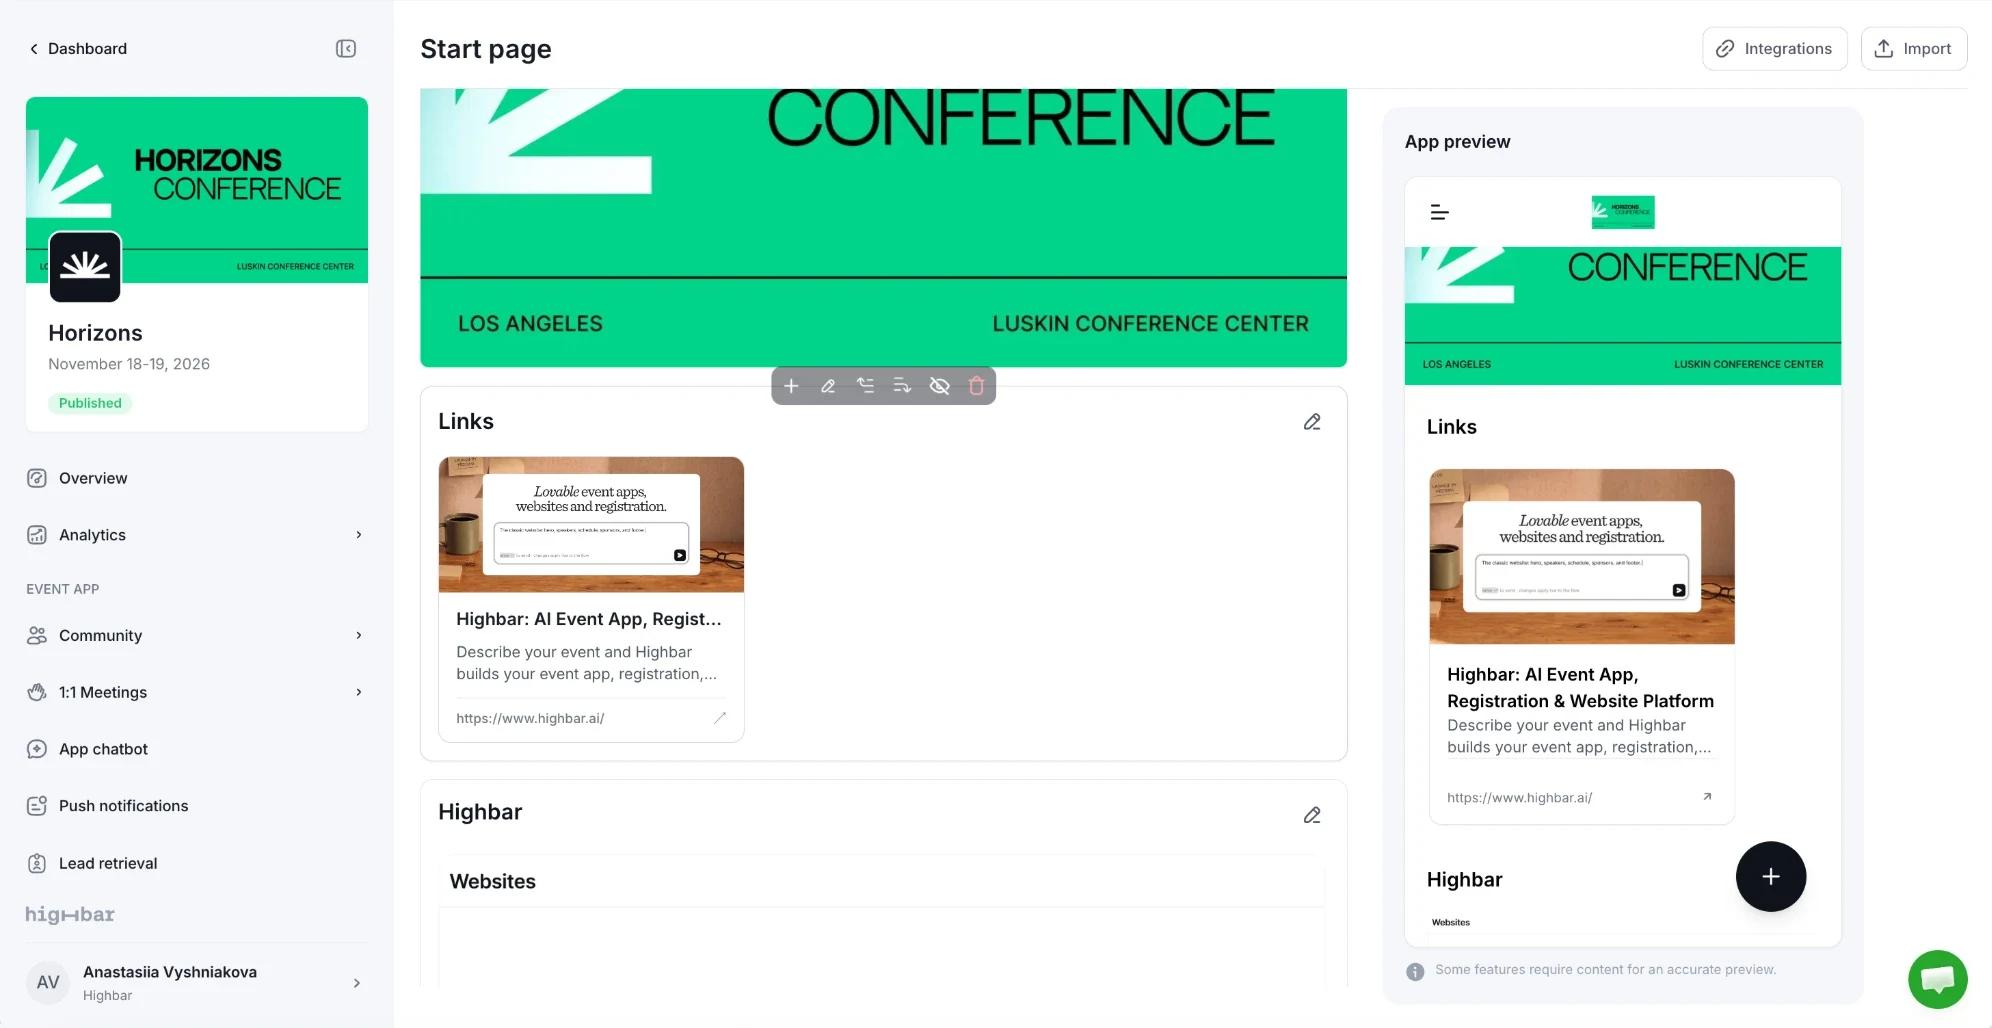
Cards that open web pages. Paste an address under Add link, and the Title, Description and Image fill in from the page; you can change them. The app shows the first four links.
Shortcuts
Up to 12 buttons that open part of your app. Choose a Layout: List (rows in one card) or Grid (cards side by side). Then, under New shortcut, pick what it Links to (a content section or the AI Concierge), and give it a Title, an optional Subtitle, an Icon and a Background color.
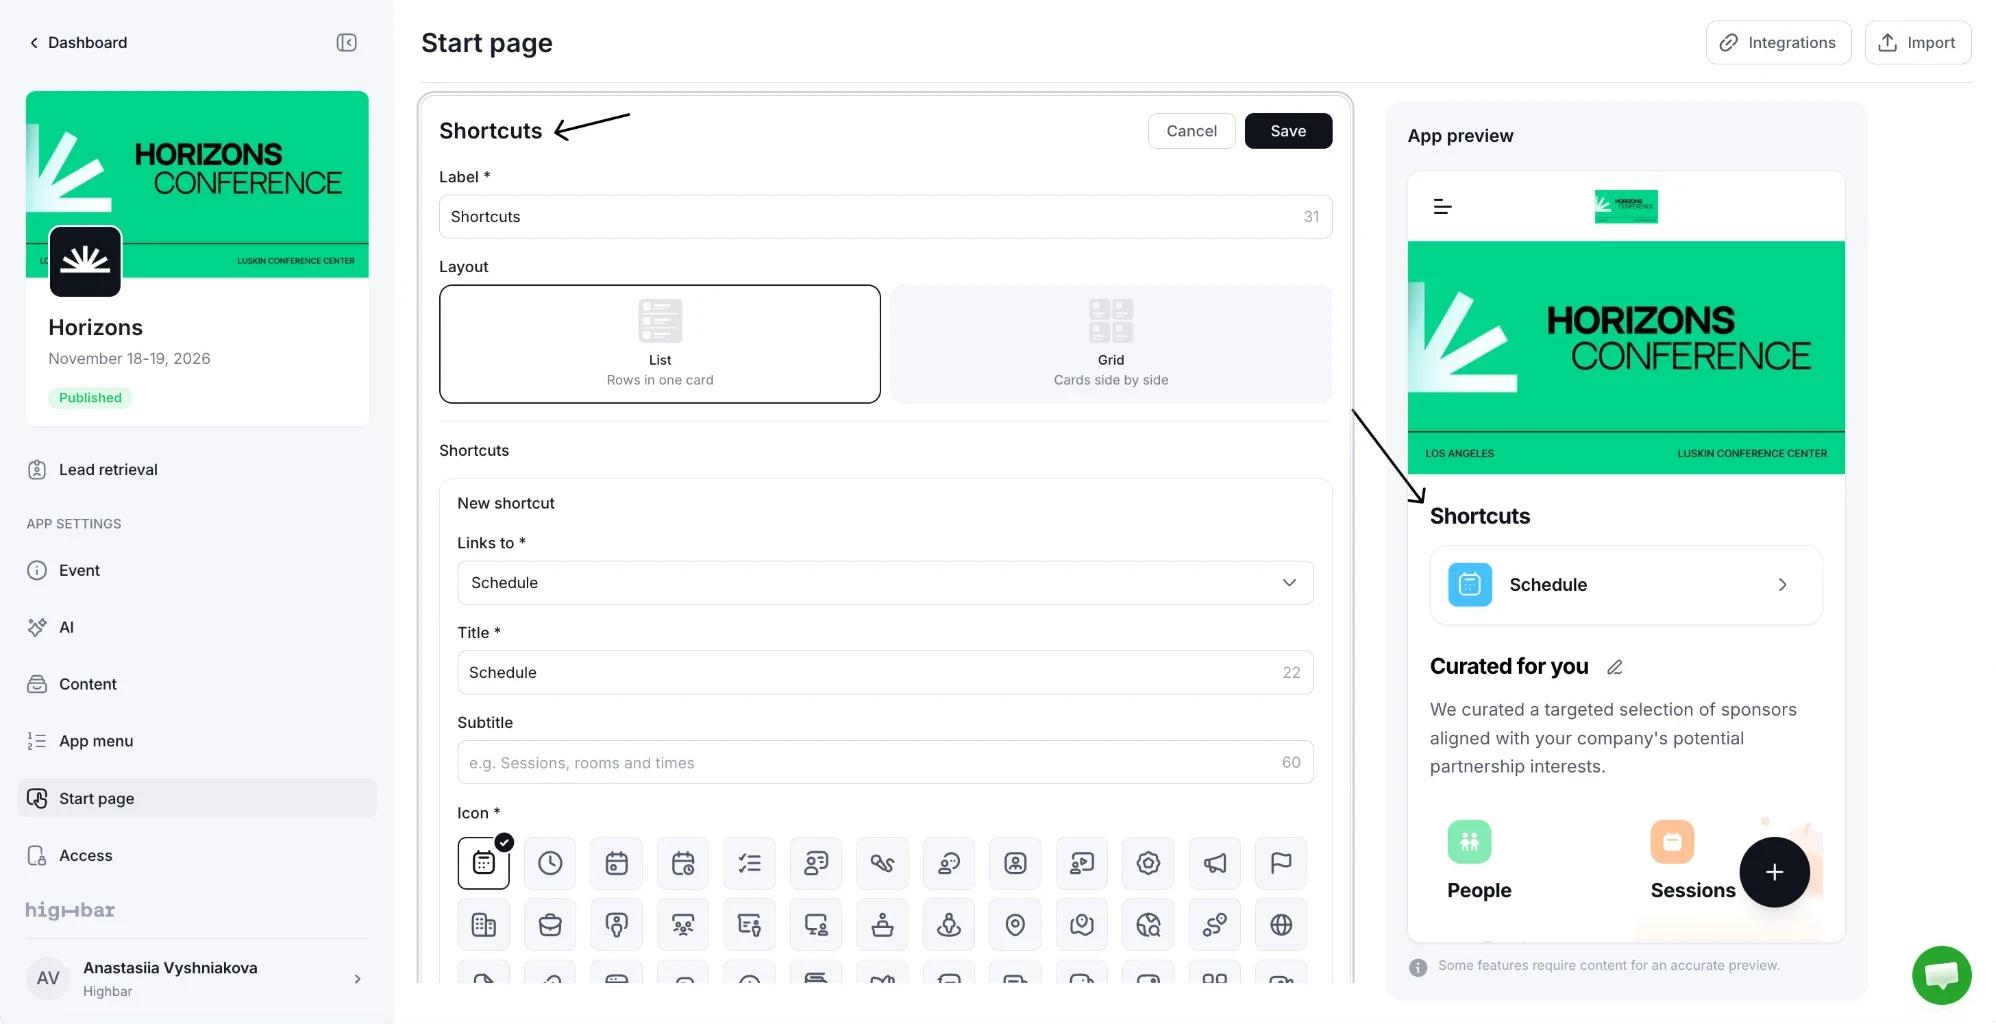
A shortcut to a hidden section, or to the AI Concierge while it's switched off, is hidden from attendees until its target is back.
AI summaries
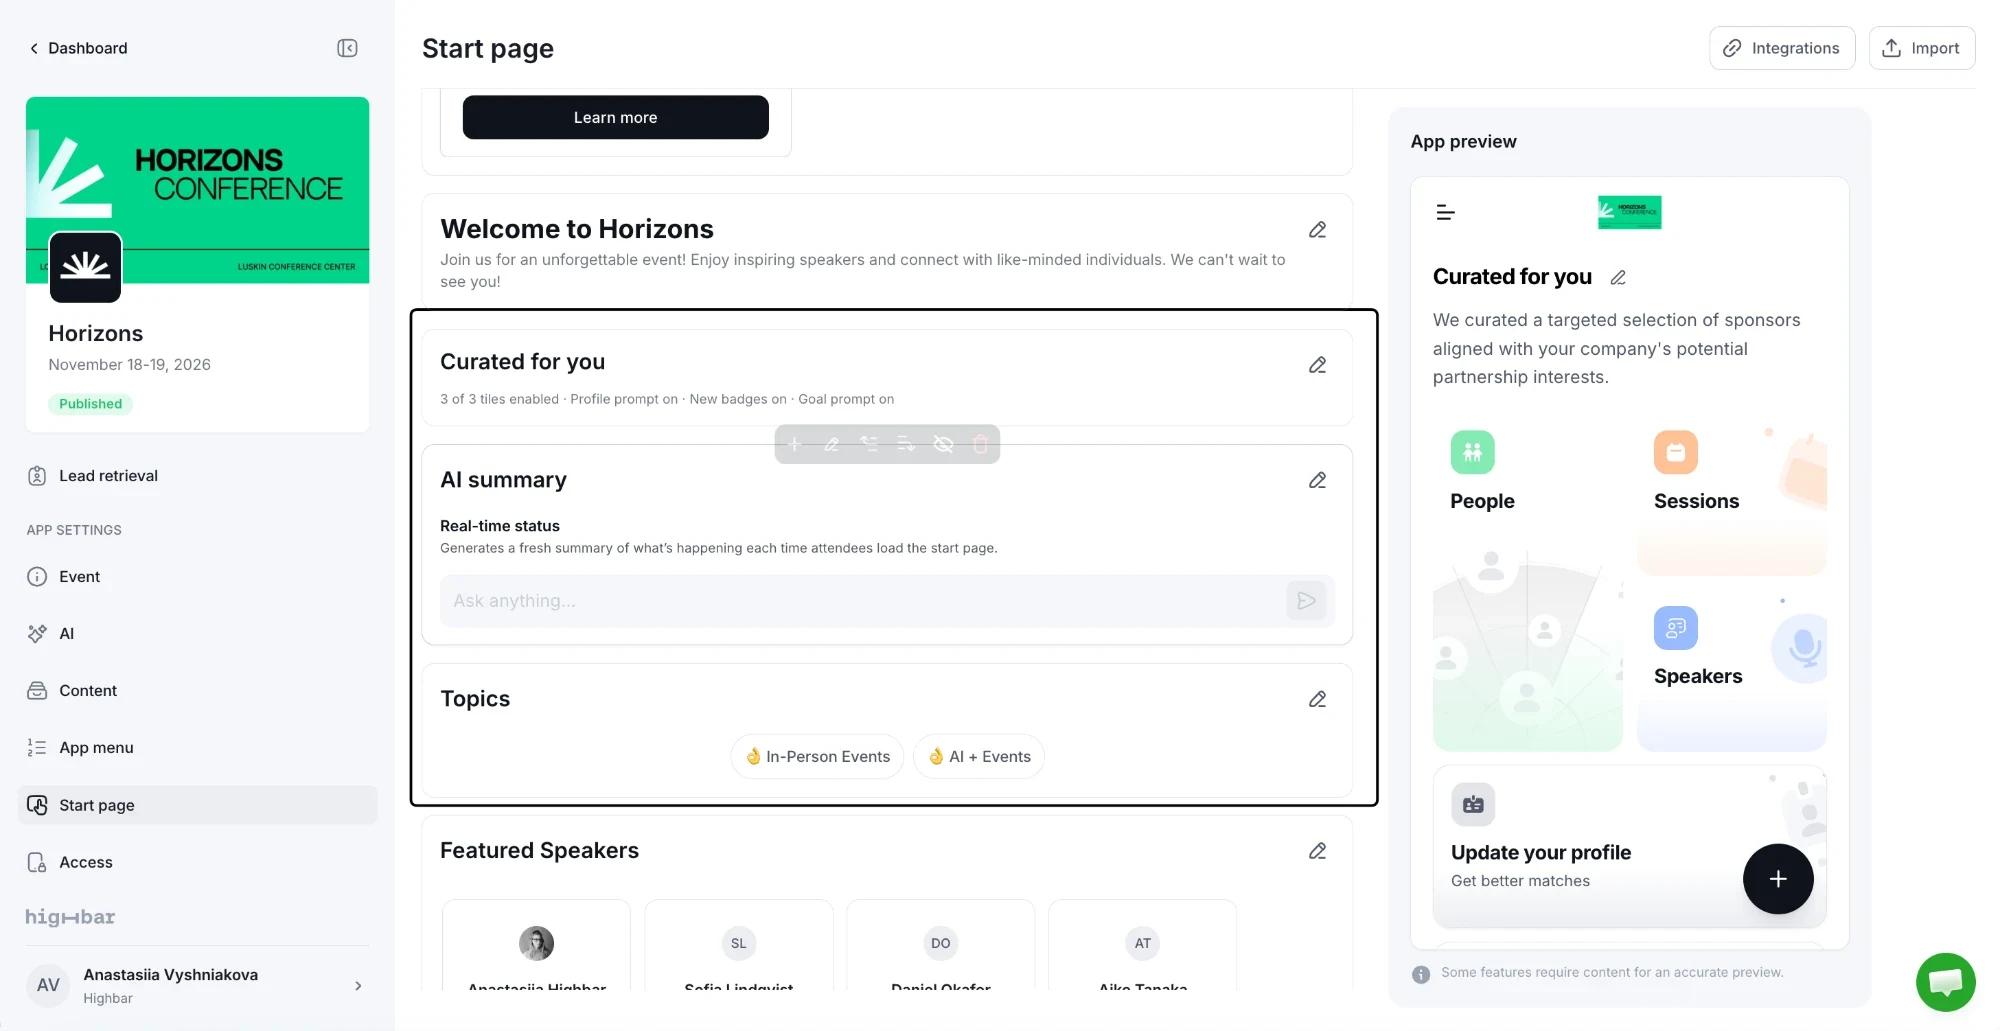
Curated for You
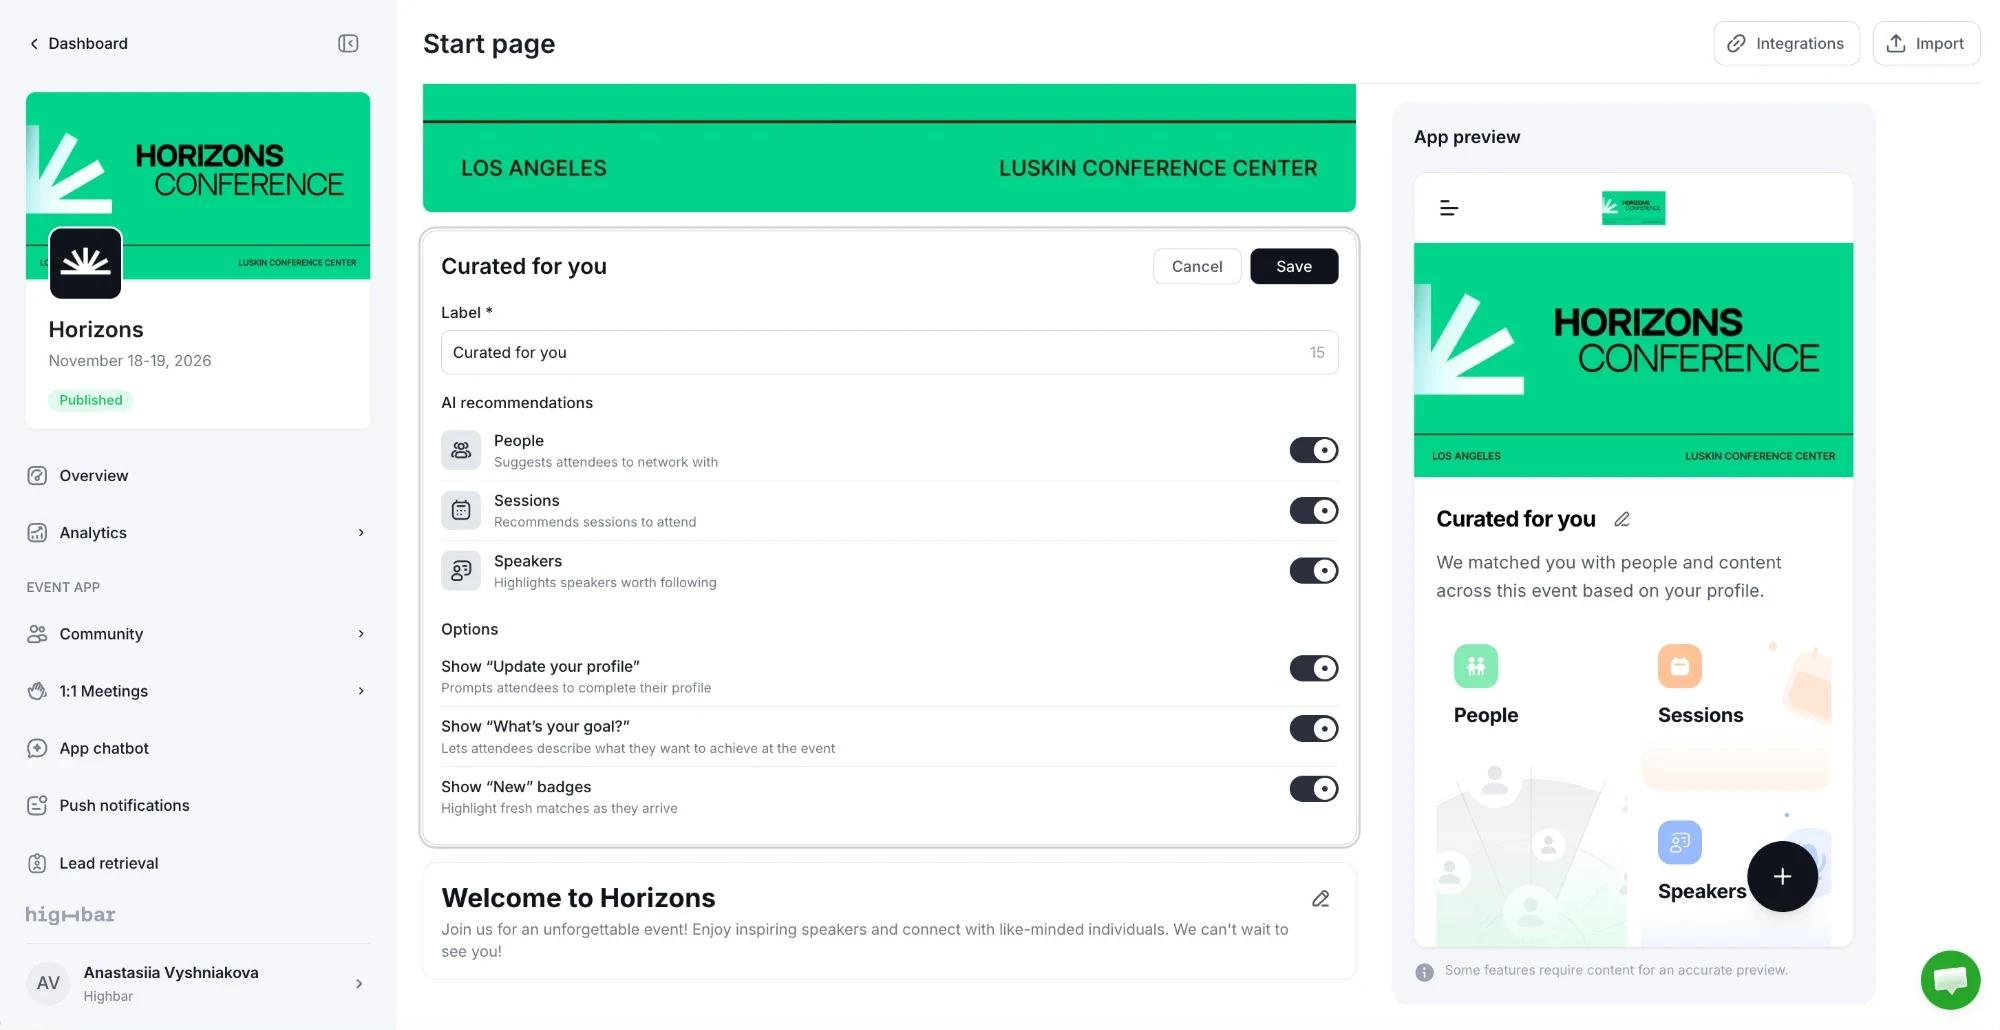
Personal picks for each attendee: people to meet, sessions, speakers and sponsors. It needs AI Curation switched on in the AI step.
Under AI recommendations, each type you turned on in AI Curation (People, Sessions, Speakers and Sponsors) has its own switch. Under Options, choose whether to Show "Update your profile", Show "What's your goal?" and Show "New" badges on fresh matches.
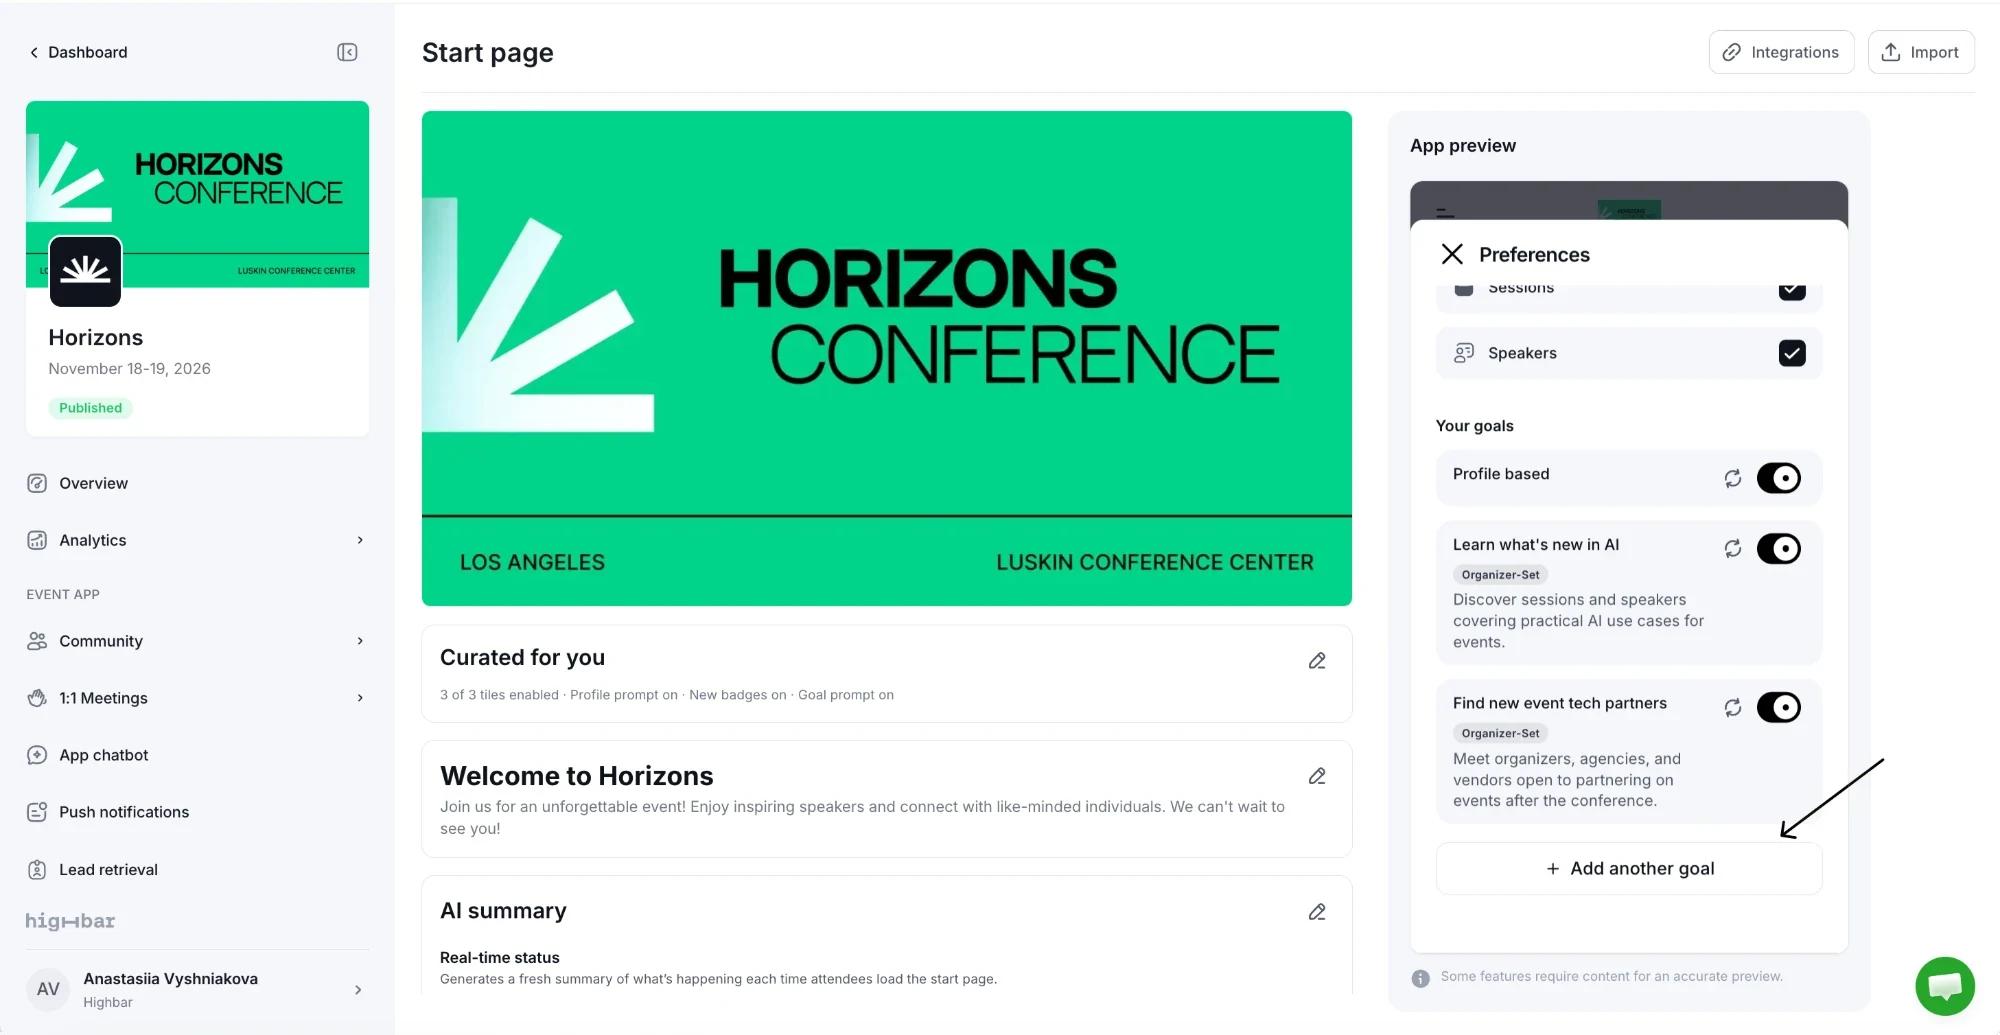
In the app, attendees tap the pencil next to Curated for You to open Preferences. There they choose which kinds of picks they want and which goals to match on. Profile based uses their profile; goals you set in AI Curation are marked Organizer-Set. Attendees can switch any goal off, or tap its refresh button for new matches.
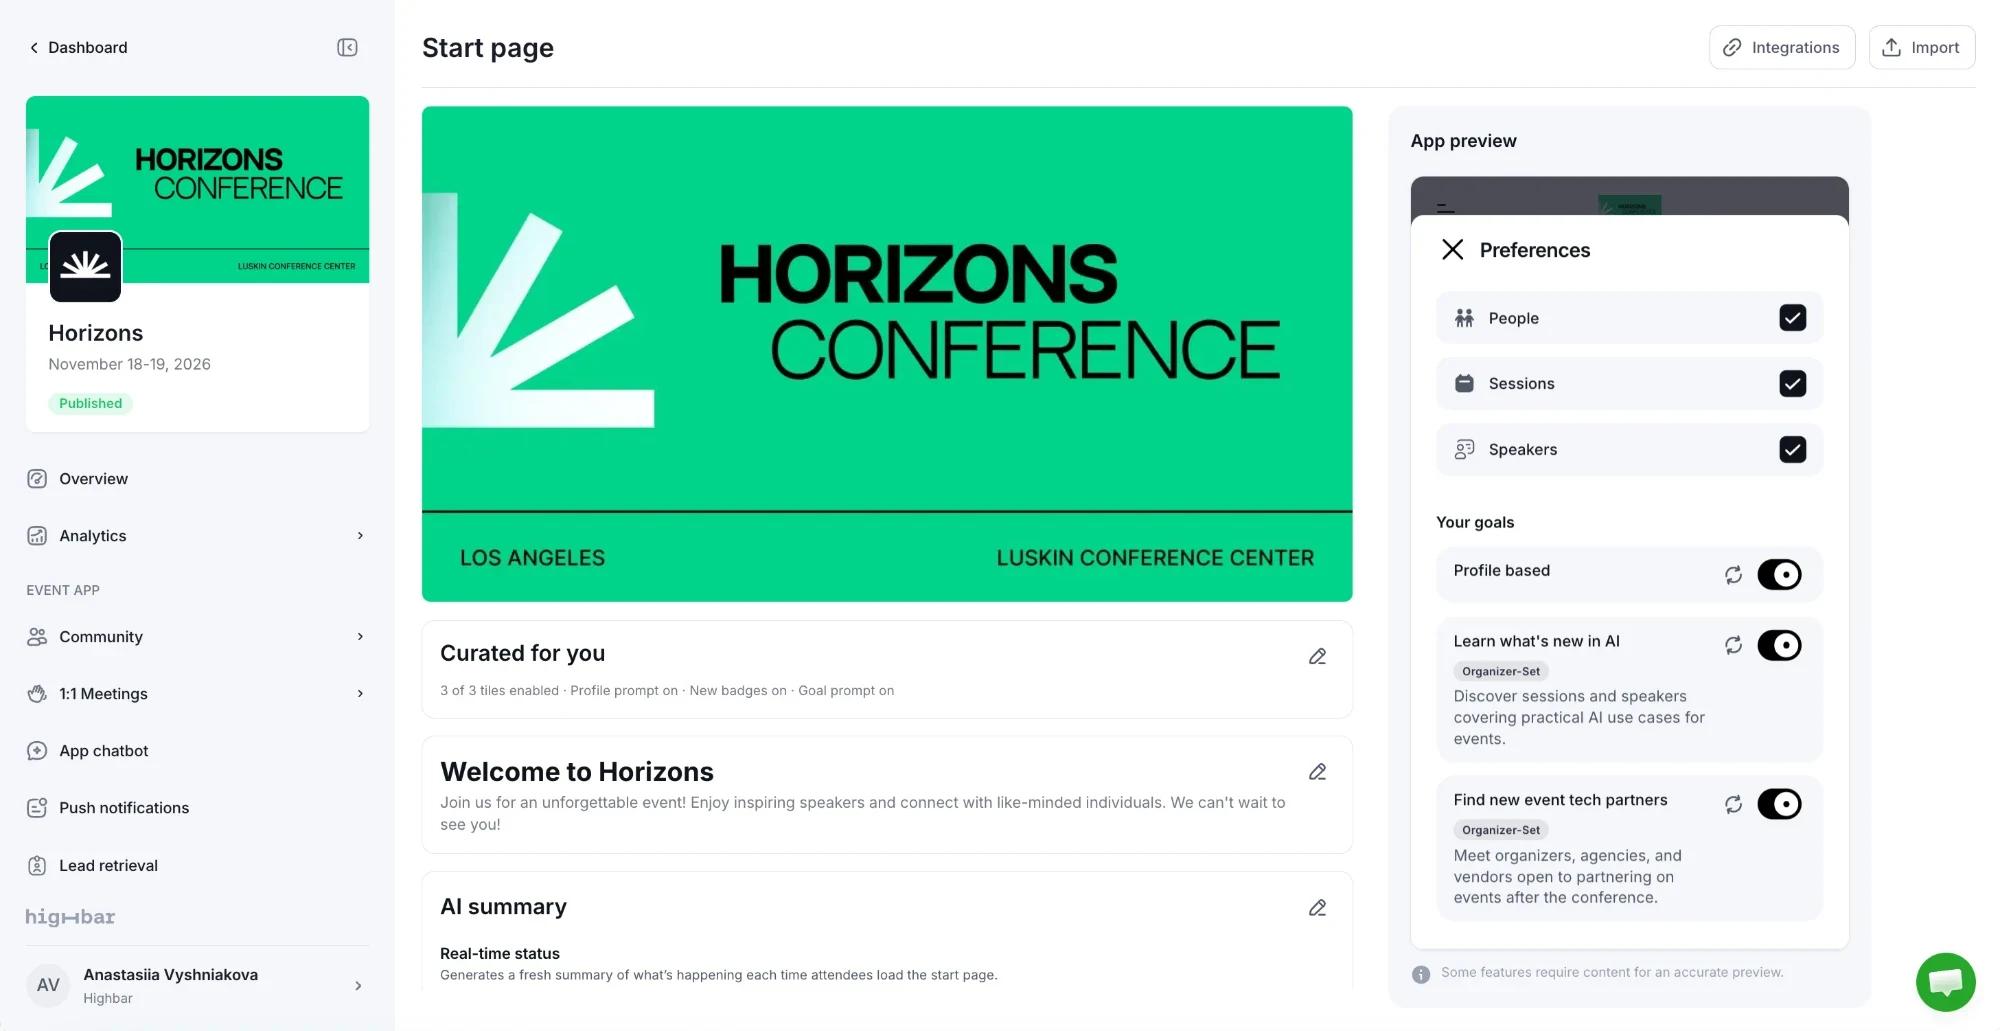
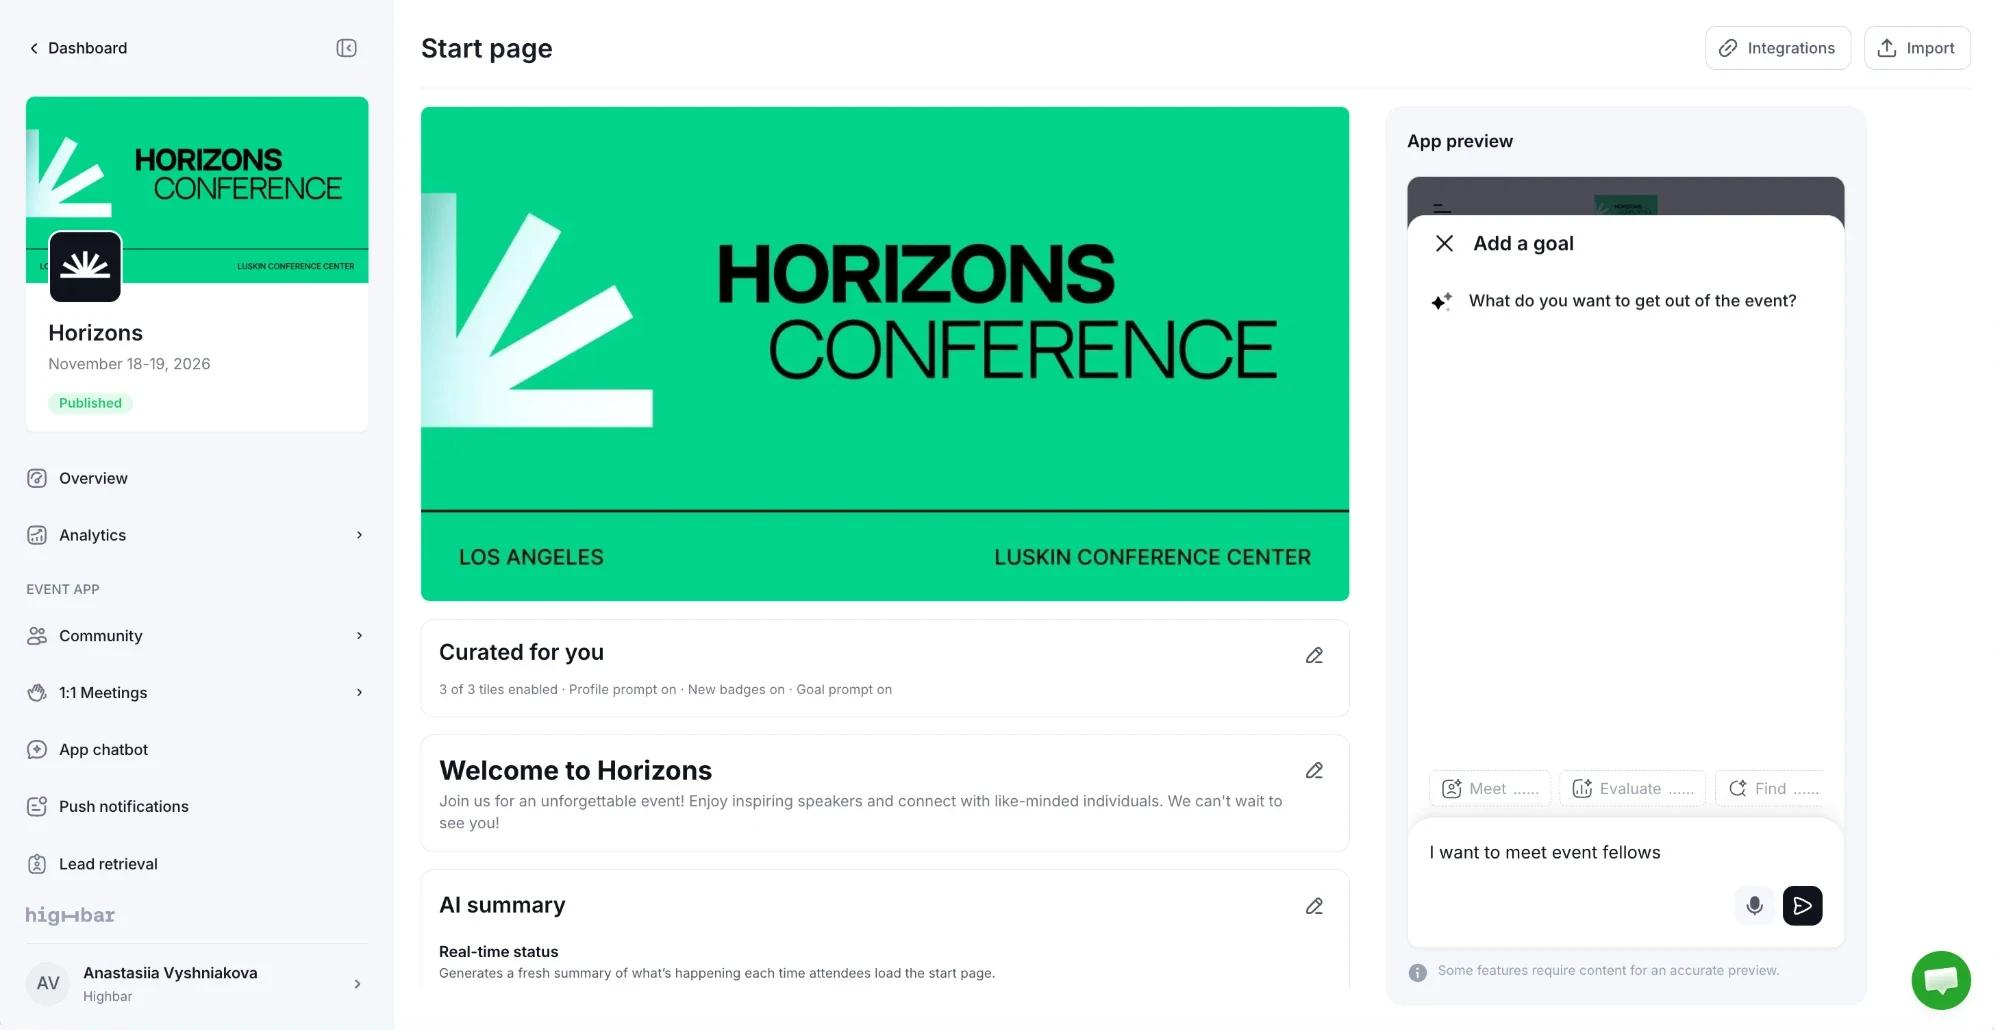
To add their own goal, they tap Add another goal and describe it in their own words, such as "I want to meet event fellows". Their own goals can be deleted; yours can only be switched off.
Live summary
A short AI-written update with an AI Summary badge, and below it the Ask anything... box that opens the AI Concierge. On the page it's labelled "AI summary".
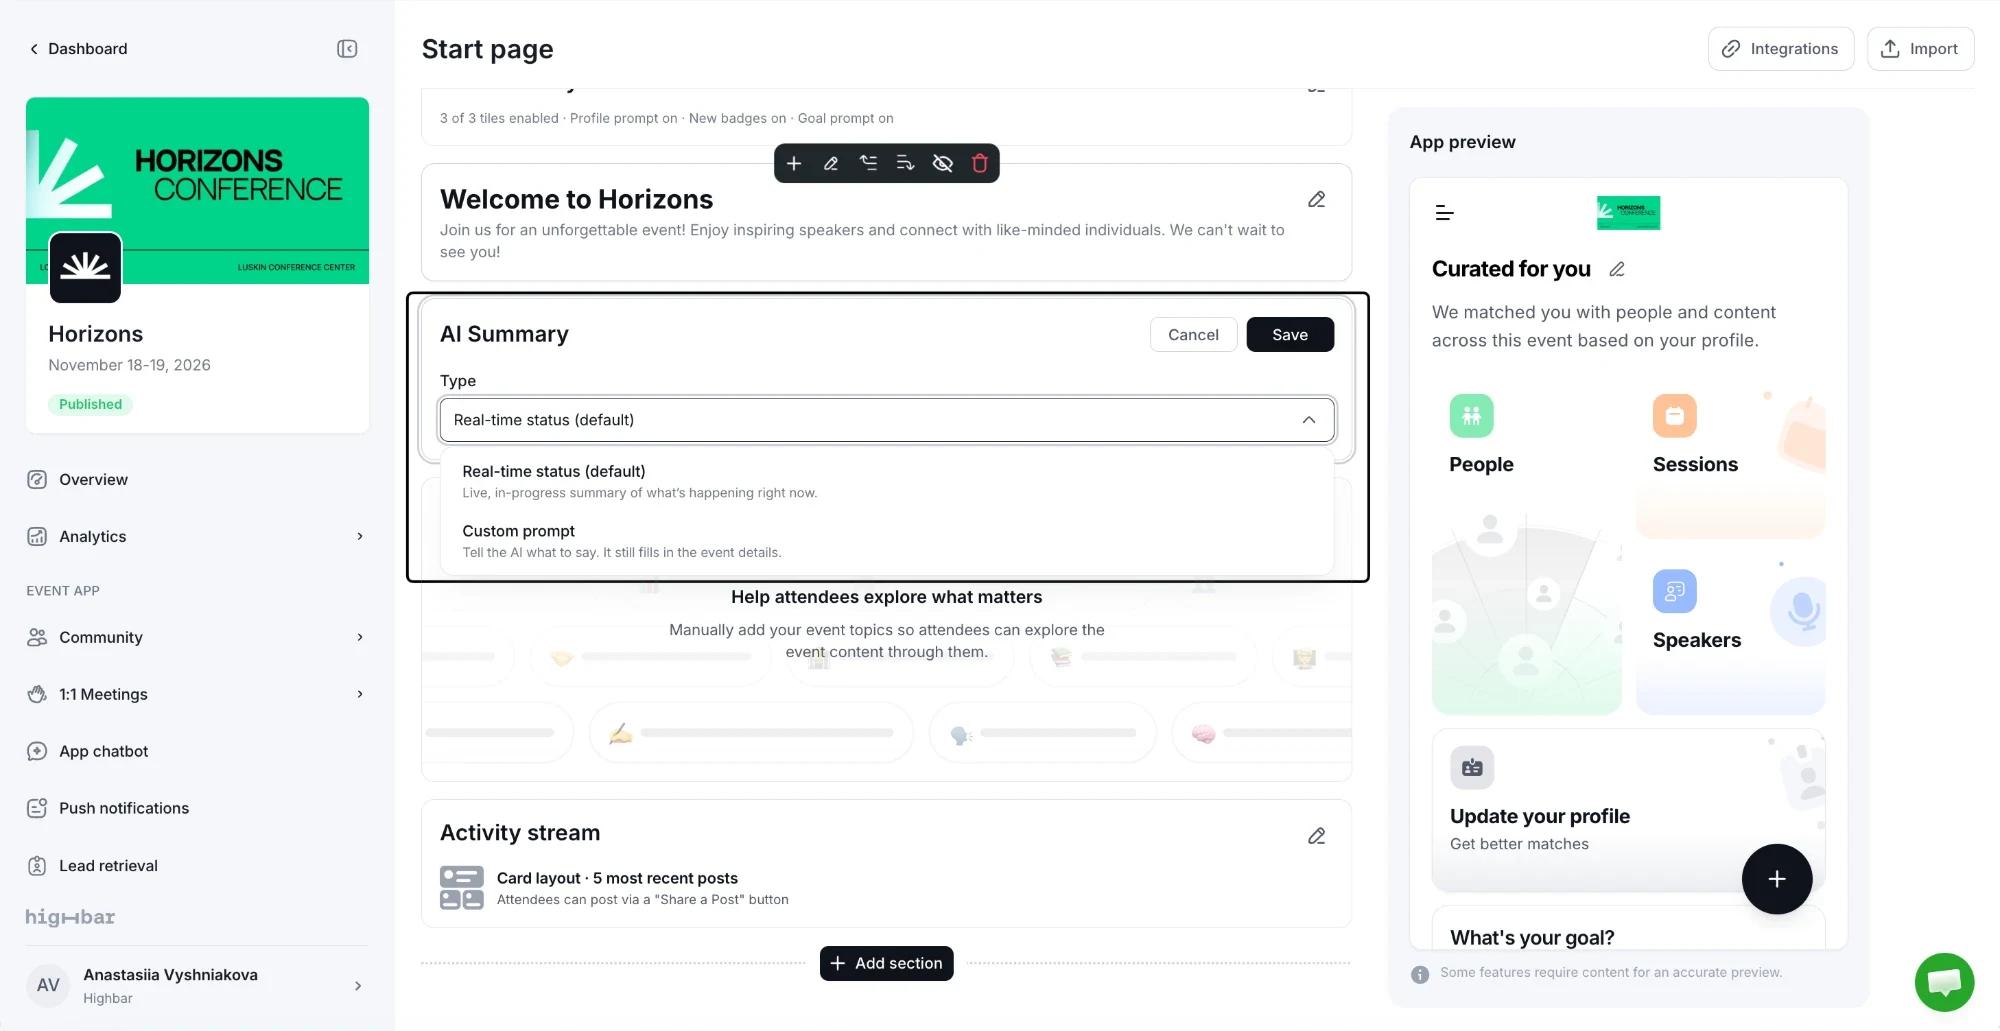
Under Type, keep Real-time status (default) for an automatic update on what's happening, or choose Custom prompt and tell the AI what to say (up to 500 characters).
The summary knows only the event name, dates and venue, the attendee's first name and what's on next, so write any other facts you want mentioned, such as shuttle times, into your prompt. All attendees share one summary (only their name changes), refreshed every few minutes.
The Ask anything... box is part of the Live summary section. If you remove the section, attendees can still reach the AI Concierge with Ask in the app's quick-action button. With the AI Concierge switched off, the box, topic buttons and chat shortcuts disappear.
Topic summary
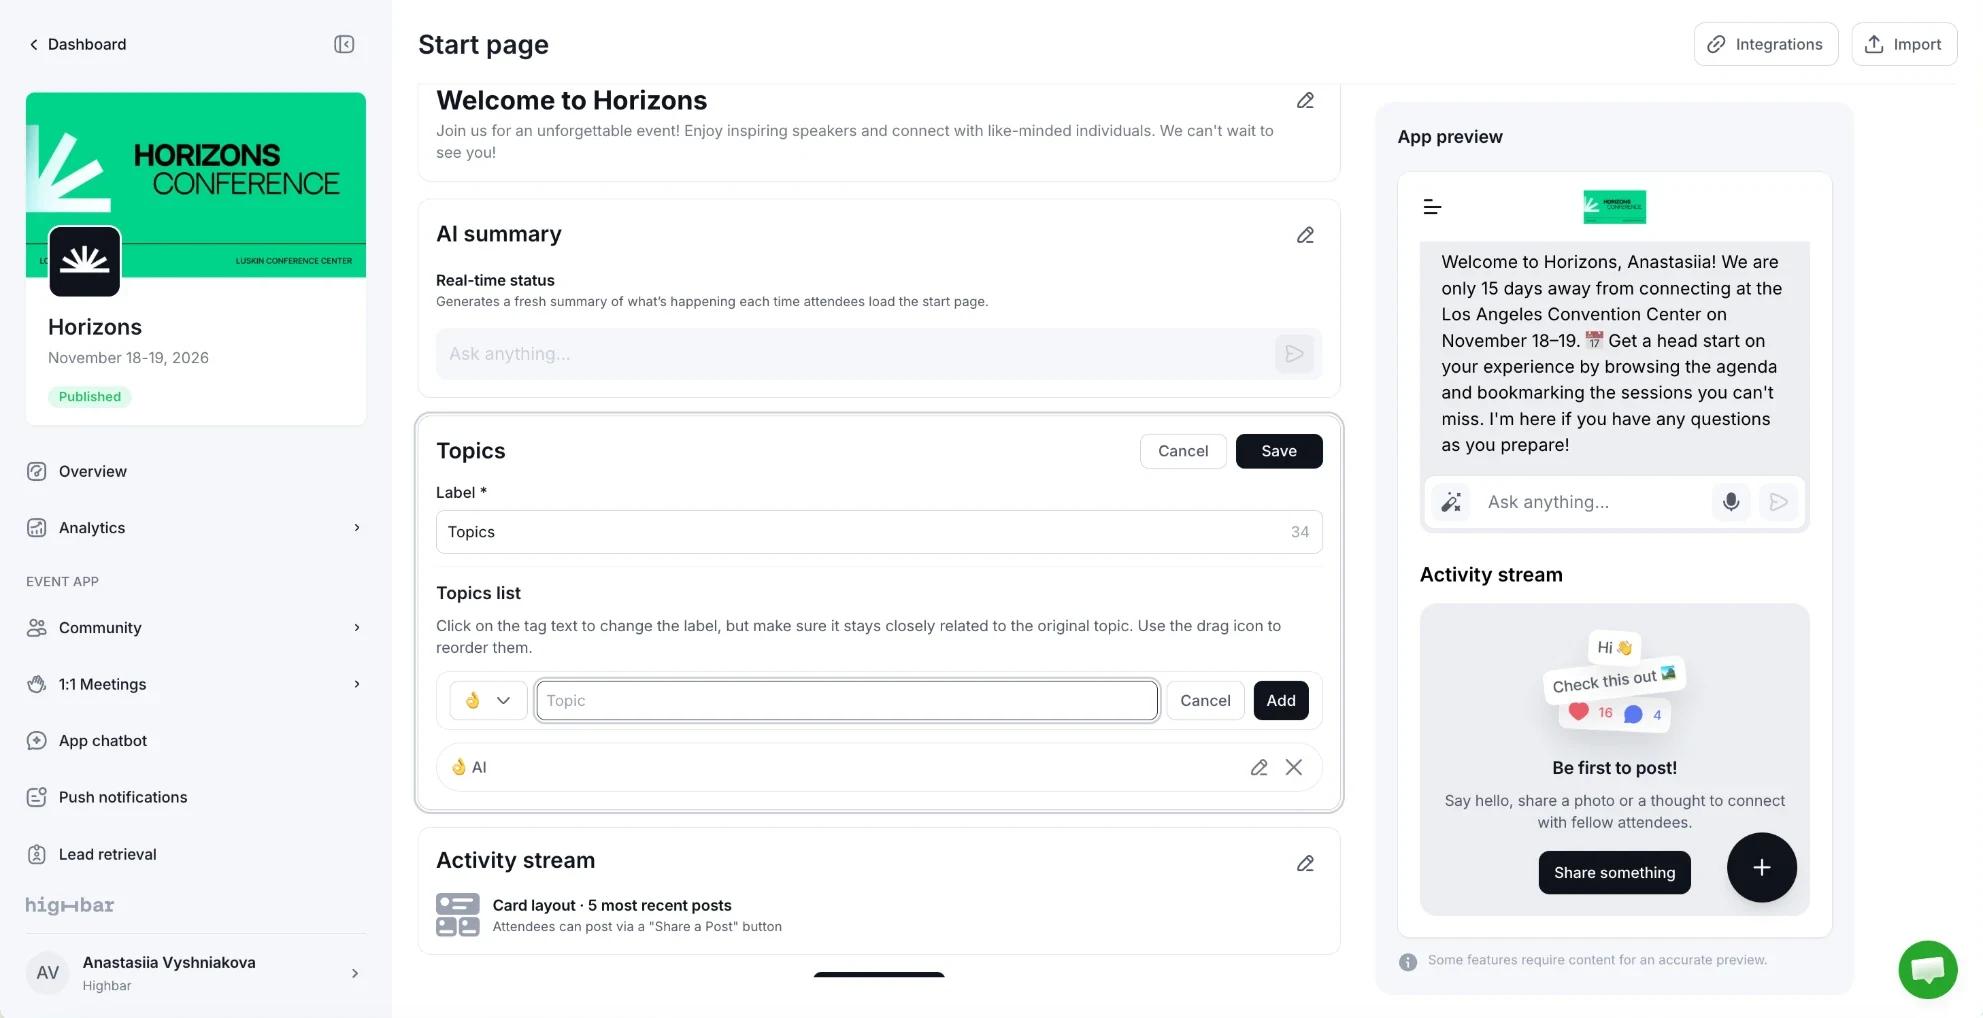
A row of topic buttons, each an emoji and up to 30 characters. Tapping one asks the AI Concierge "Tell me more about" that topic. On the page it's labelled "Topics".
Under Topics list, pick an emoji, type the topic and click Add. Click a topic's text to rename it, and drag topics to reorder them.
Social
Activity stream
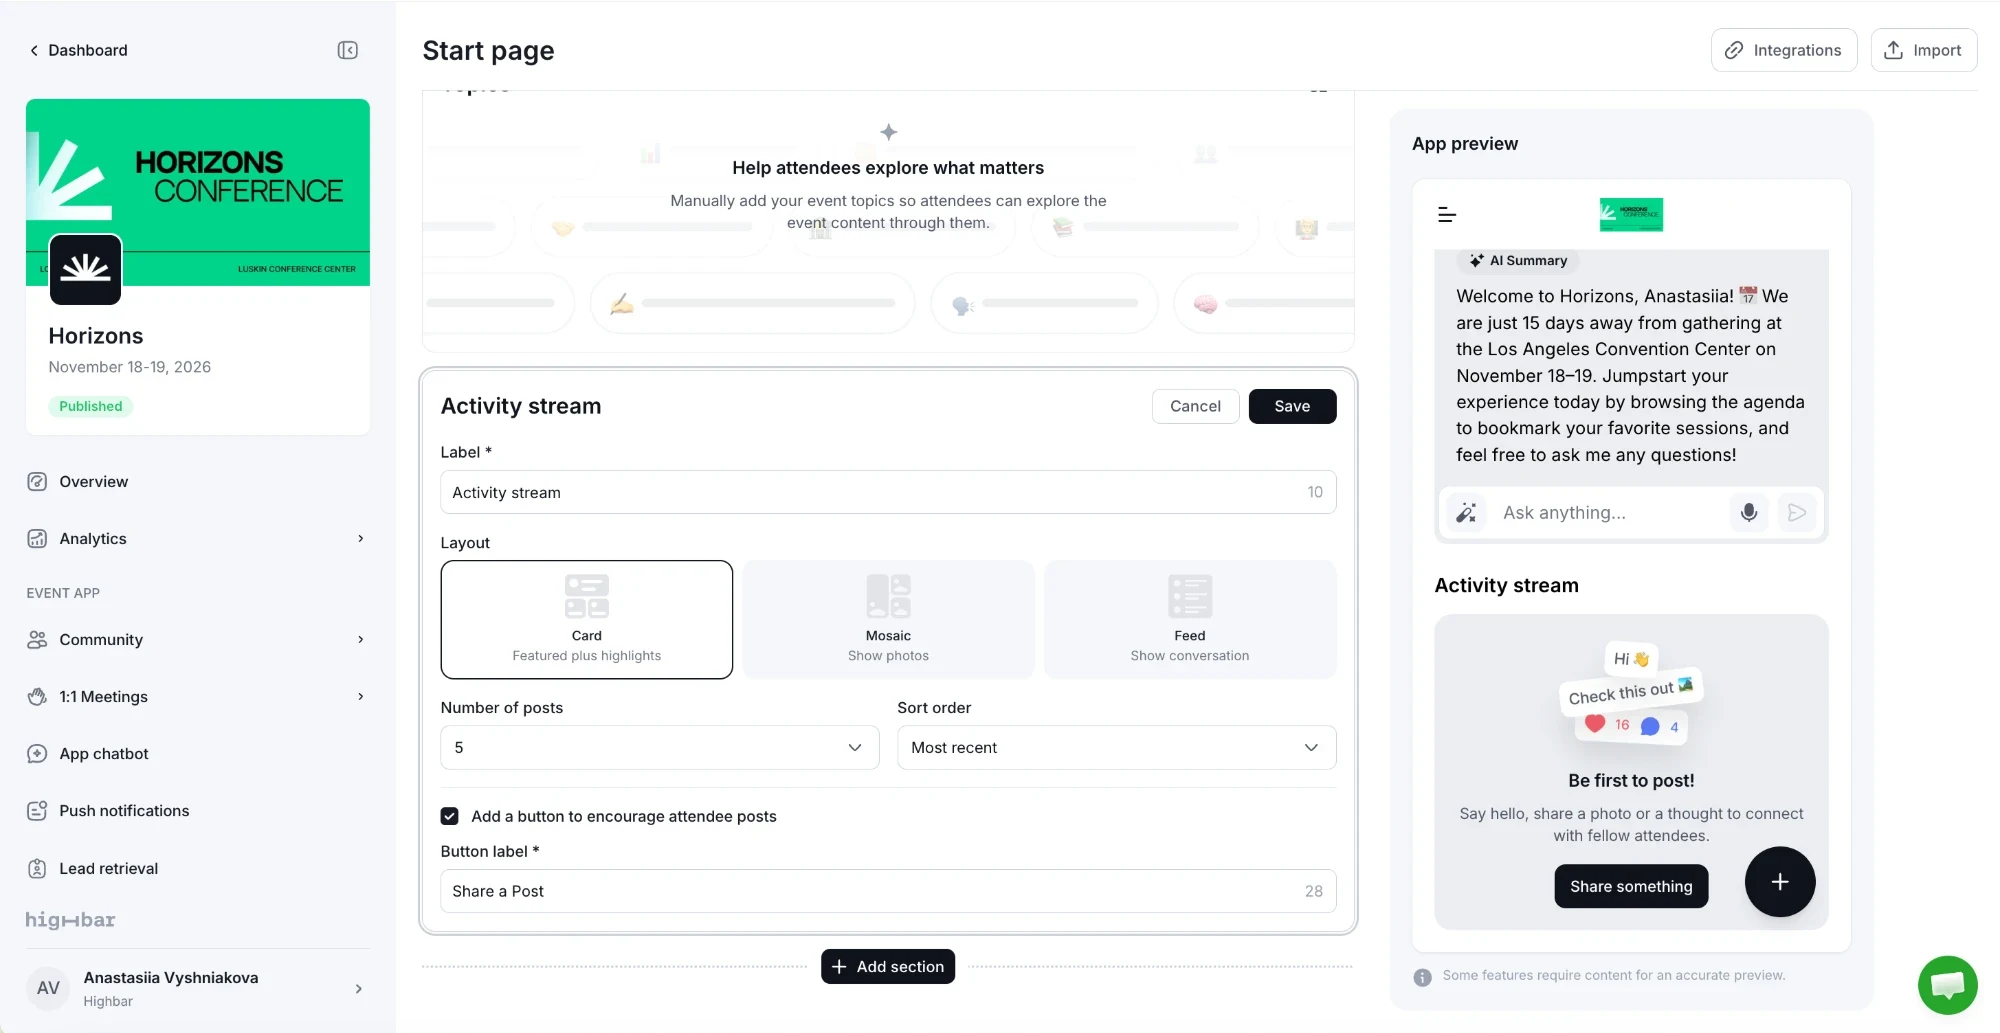
The latest attendee posts from the activity stream. It's in the Add section menu once your app is launched, and shows while the activity stream is on.
- Layout: Card (featured plus highlights), Mosaic (photos) or Feed (conversation).
- Number of posts: 2 to 5.
- Sort order: Most recent or Most popular.
- Add a button to encourage attendee posts: shows a button inviting attendees to post, with the Button label you choose ("Share a Post" by default).
Sponsored posts
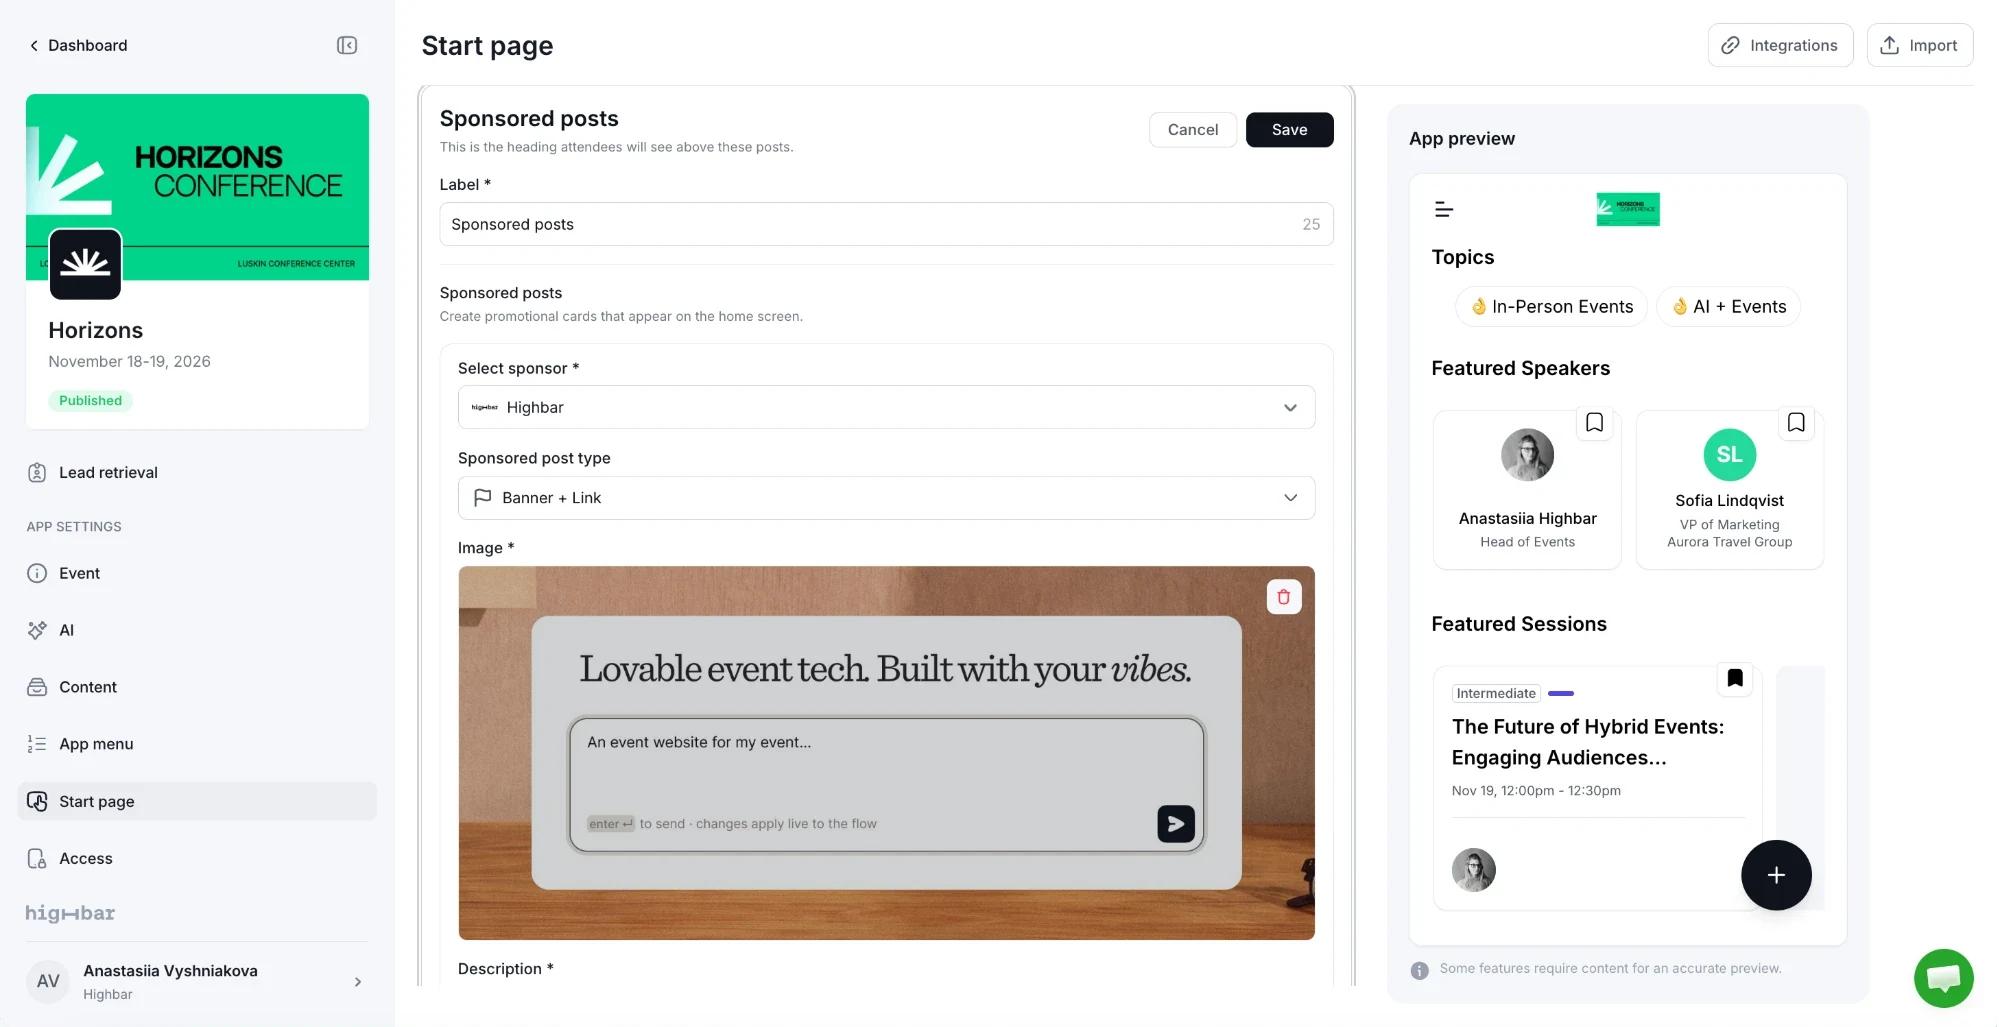
Promotional cards for your sponsors. The section's Label is the heading attendees see above the posts.
Under Select sponsor, start typing a sponsor's name and pick it.
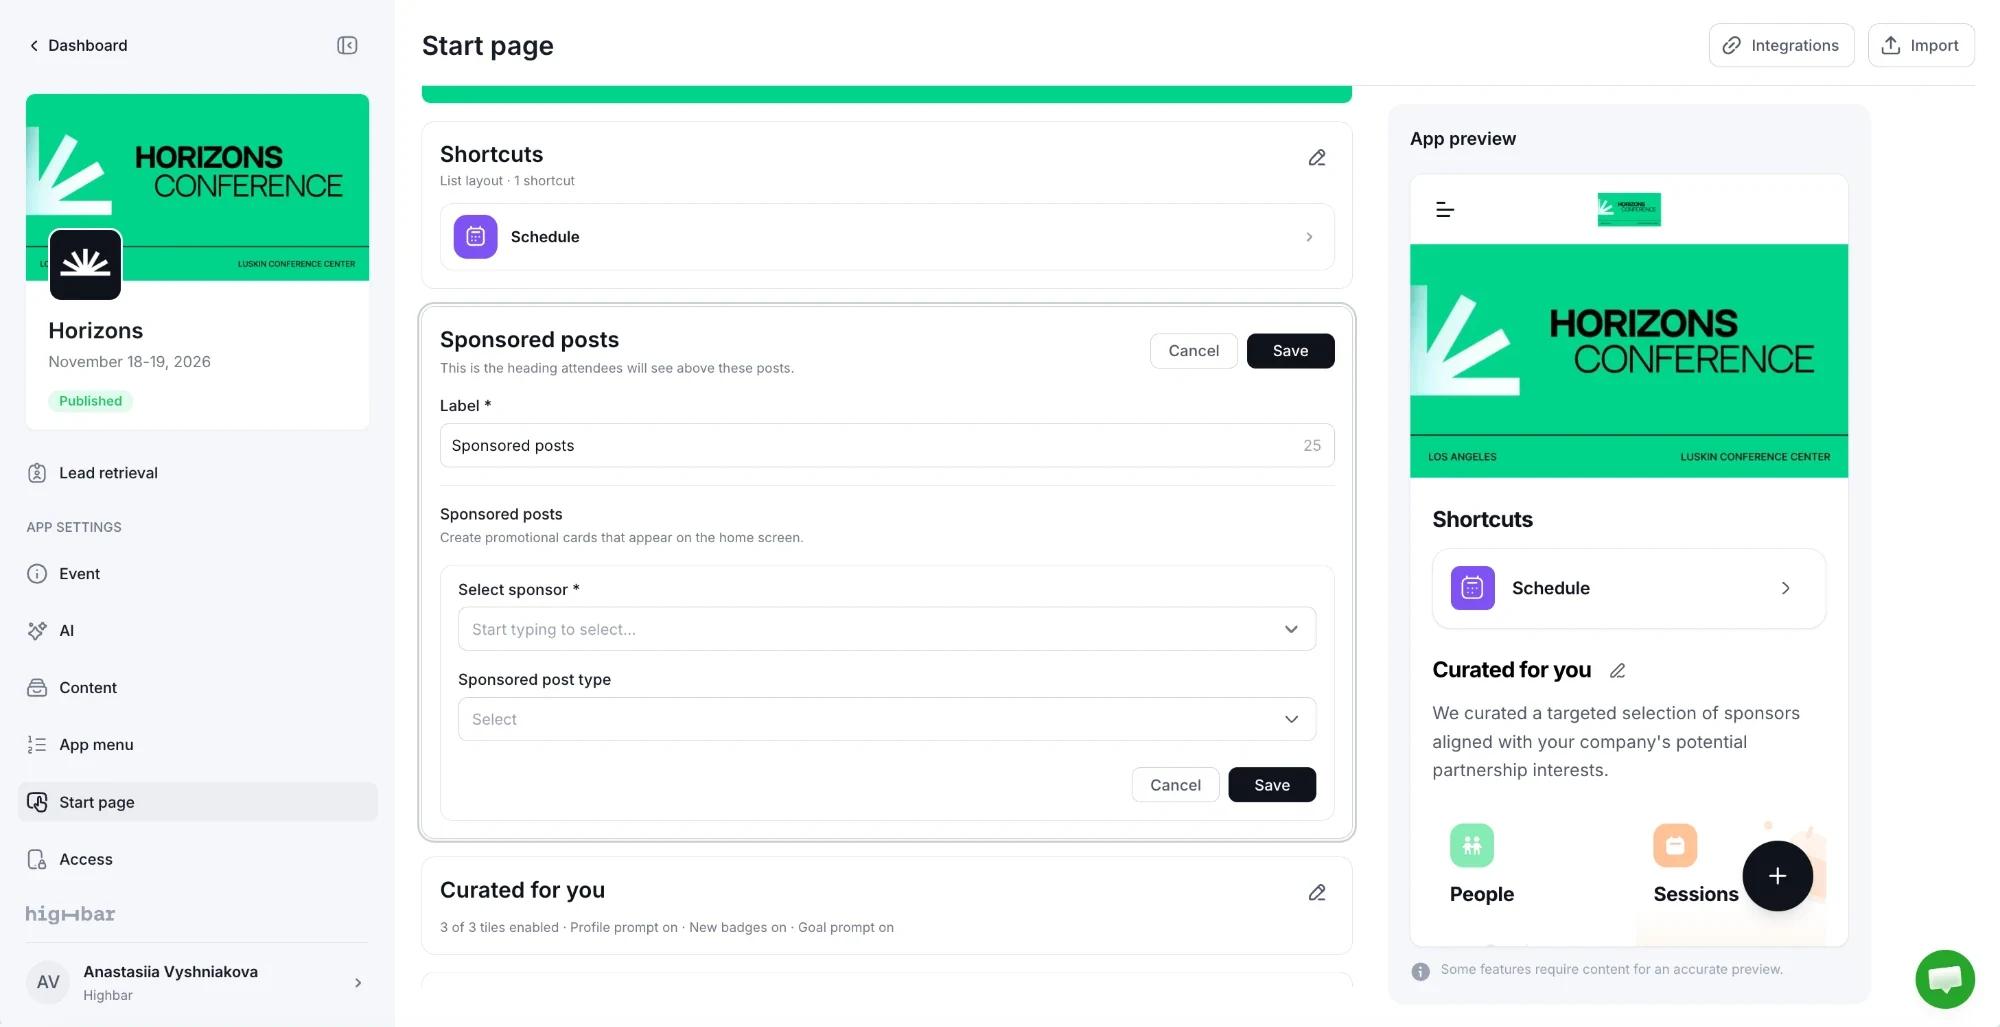
Choose a Sponsored post type: Banner + Link sends attendees to a website with a bold image, Product or Offer promotes a product or deal, File Download shares a guide or brochure, App Download links to the App Store or Google Play, and Session Spotlight highlights one session.
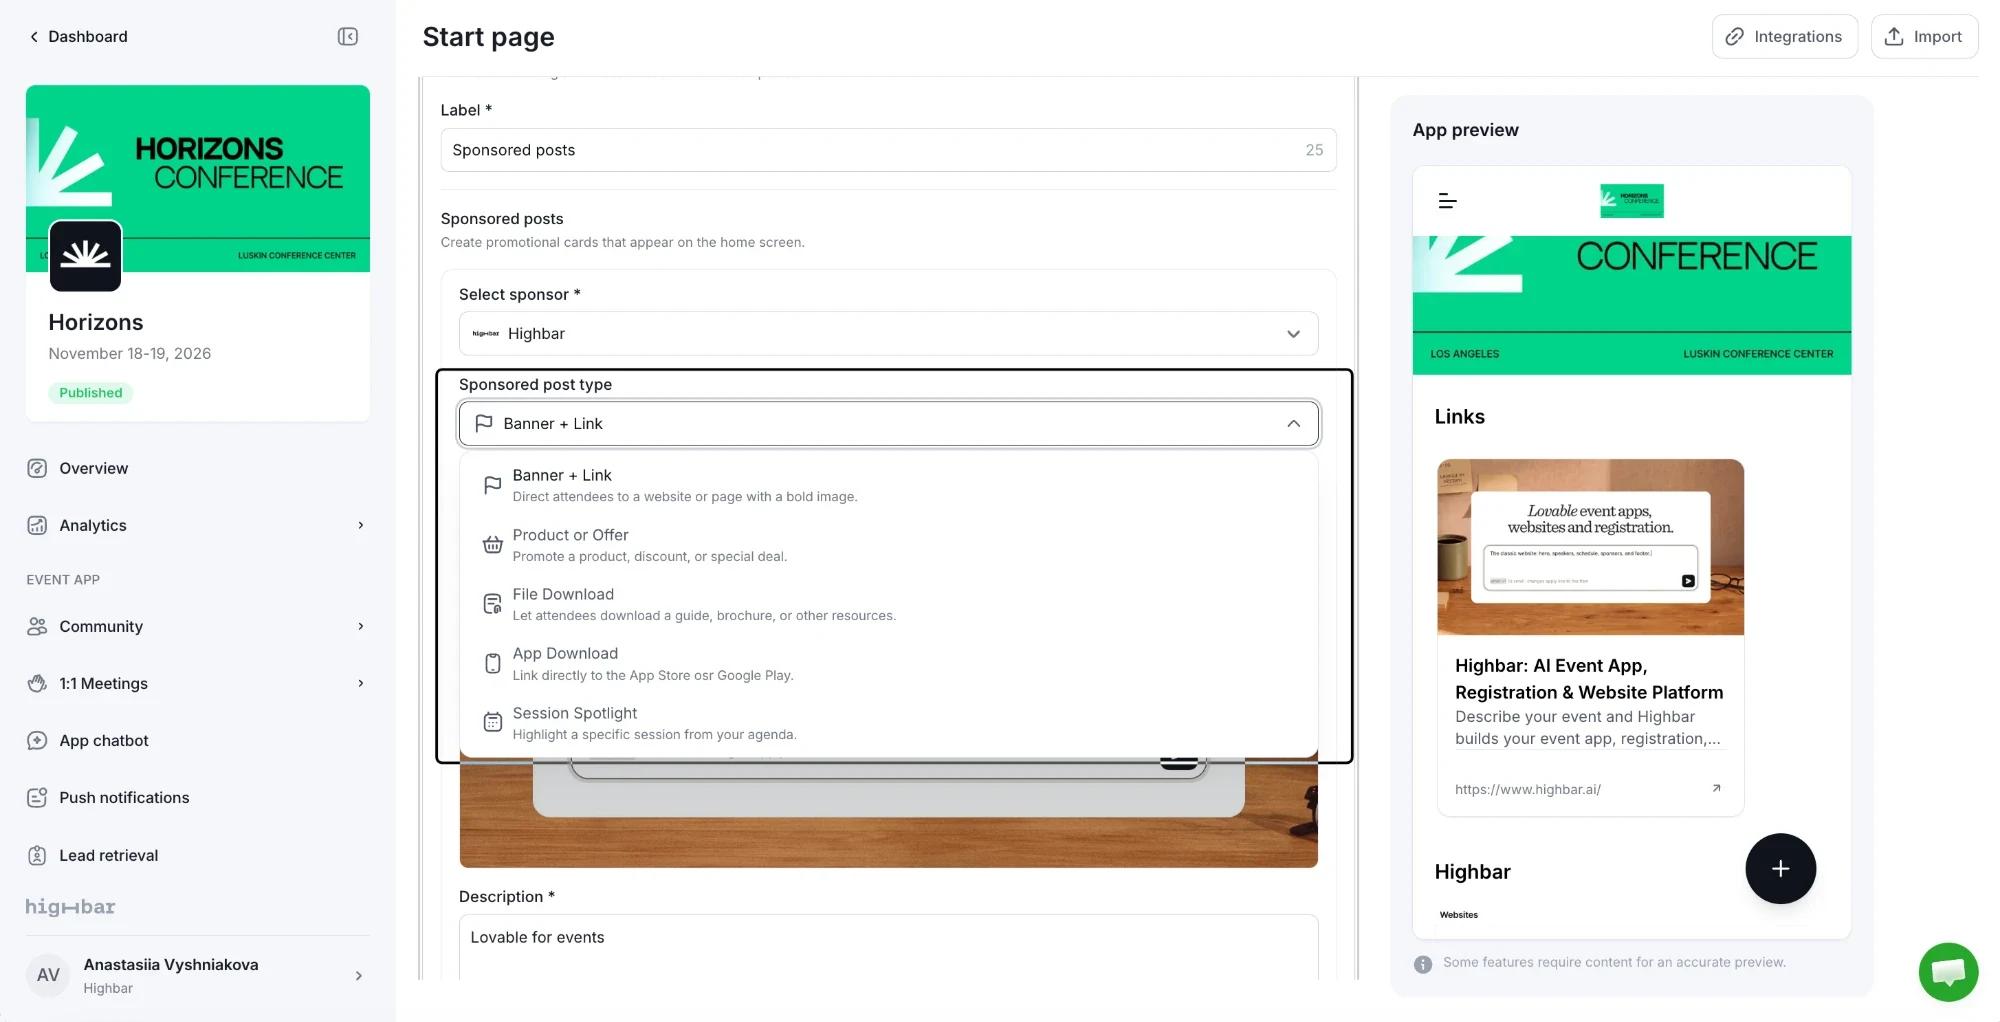
Fill in the fields for that type. A Banner + Link post needs an Image and a Description.
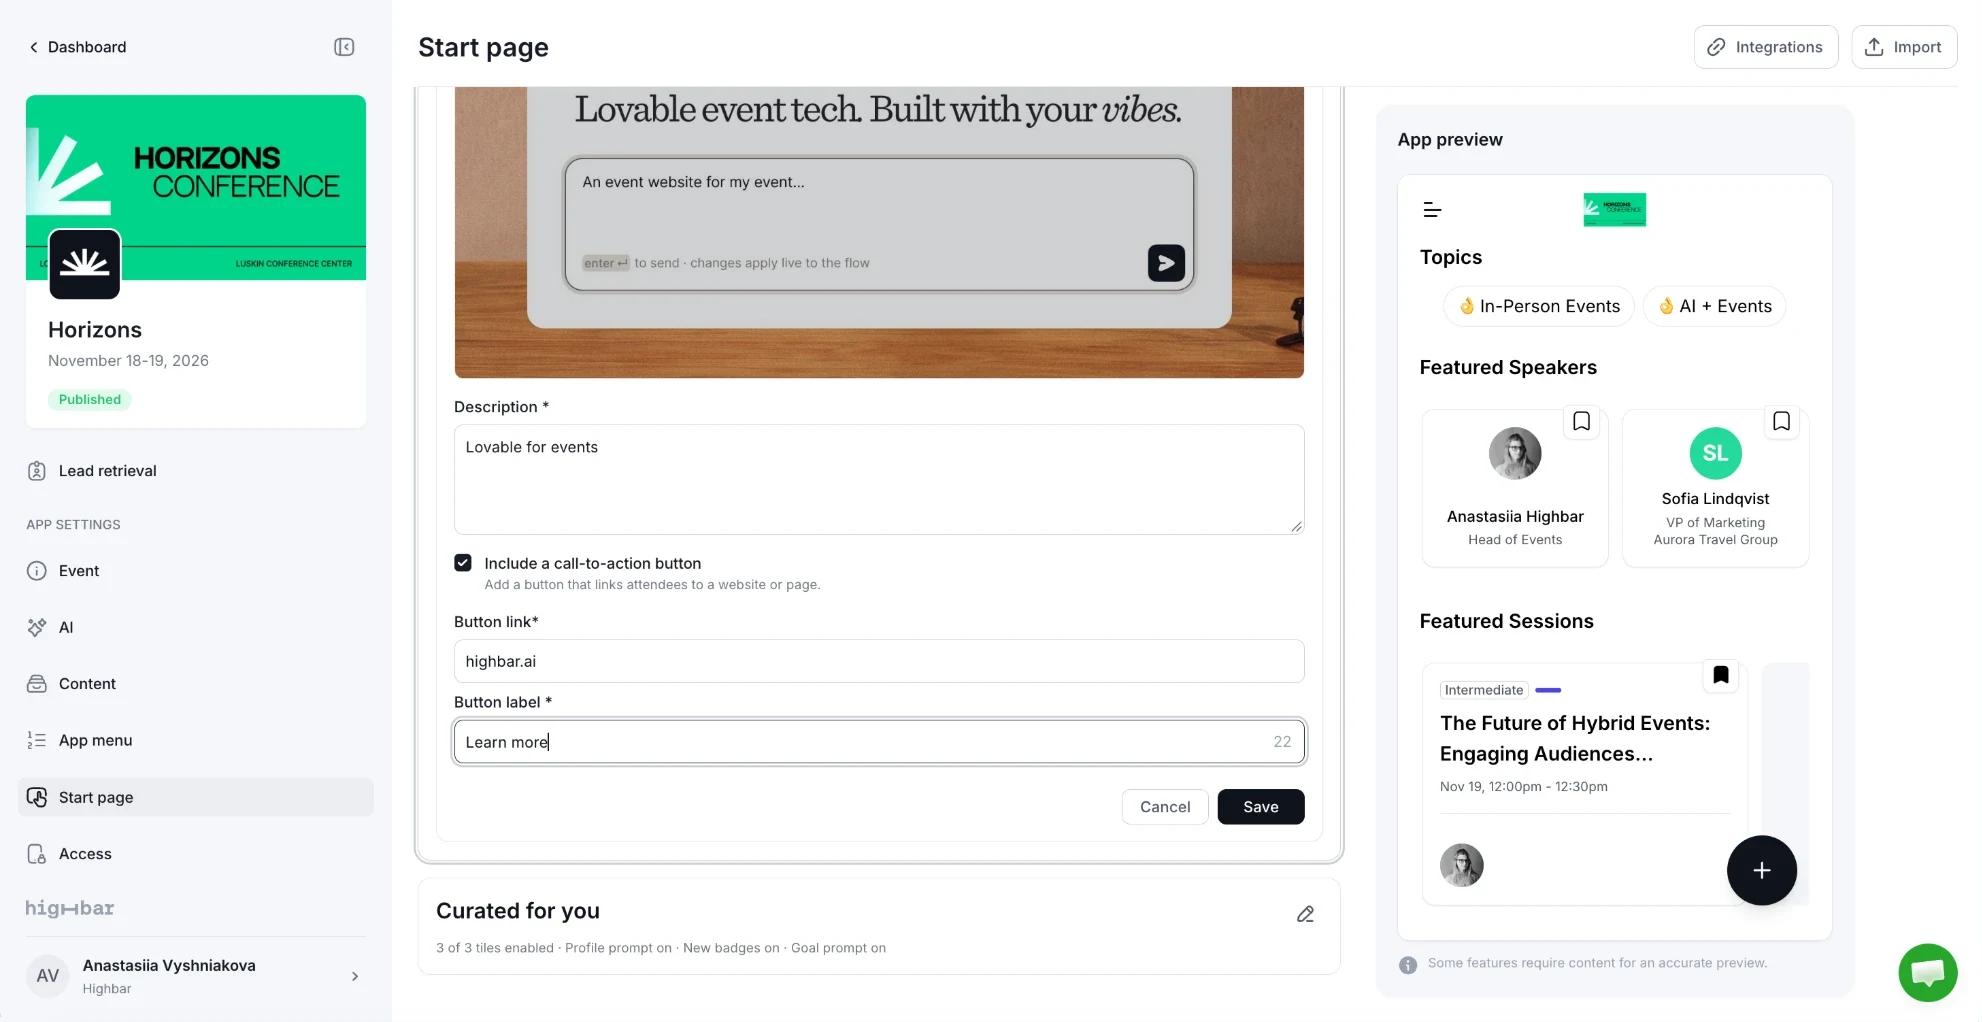
To send attendees somewhere, tick Include a call-to-action button and enter the Button link and Button label. Then click Save.
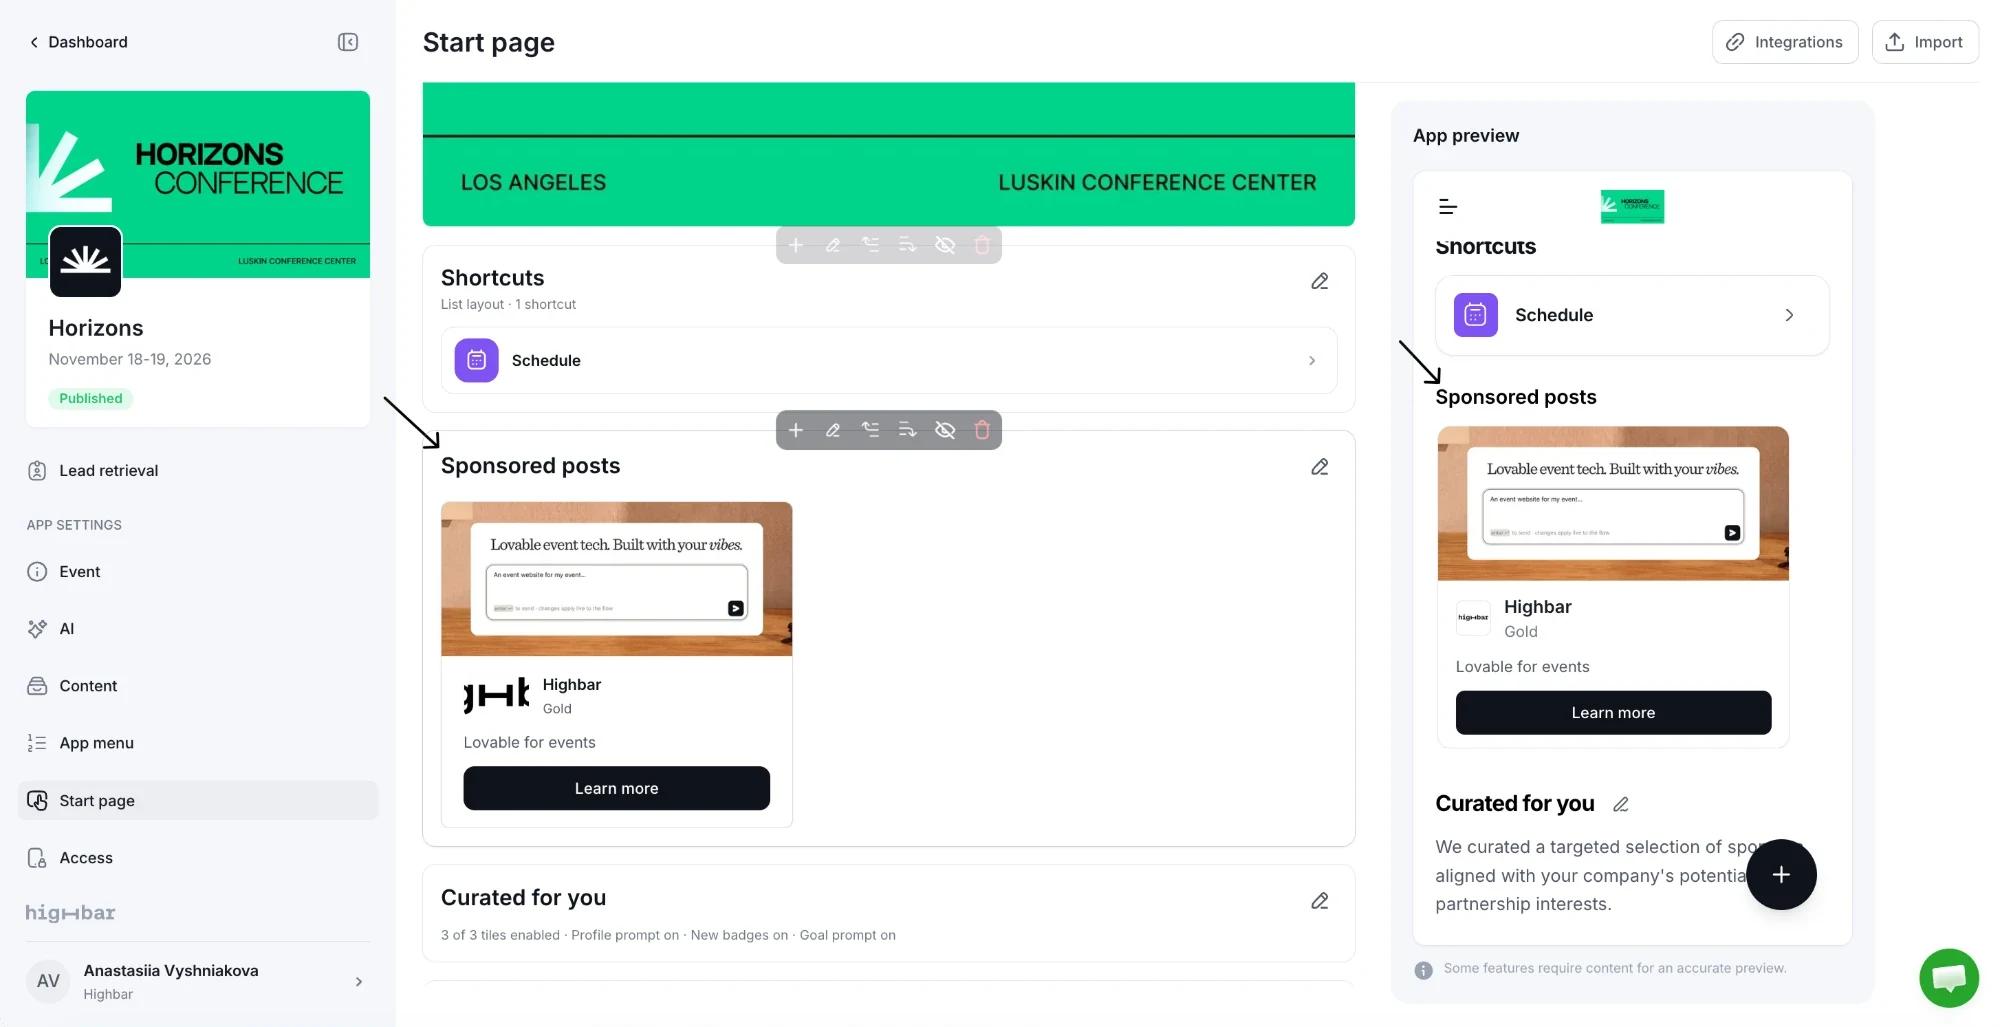
The post appears as a card with the sponsor's logo and category, your description and the button.
Featured content
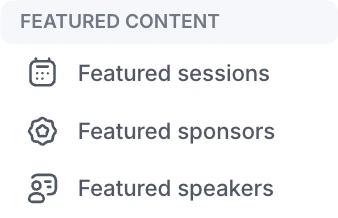
Featured sessions, Featured sponsors and Featured speakers each show a row of cards you choose. Start typing to find items, then drag them into order. Each needs at least one item of that type in your content.