Appearance
Add the app label, navigation bar color, app icon, navigation bar logo and event cover that brand your event app.
The Appearance tab of Event settings sets how your app looks on attendees' phones, on its install page and inside the app. Open it from the Event step in the event sidebar (after launch, it's under App settings).
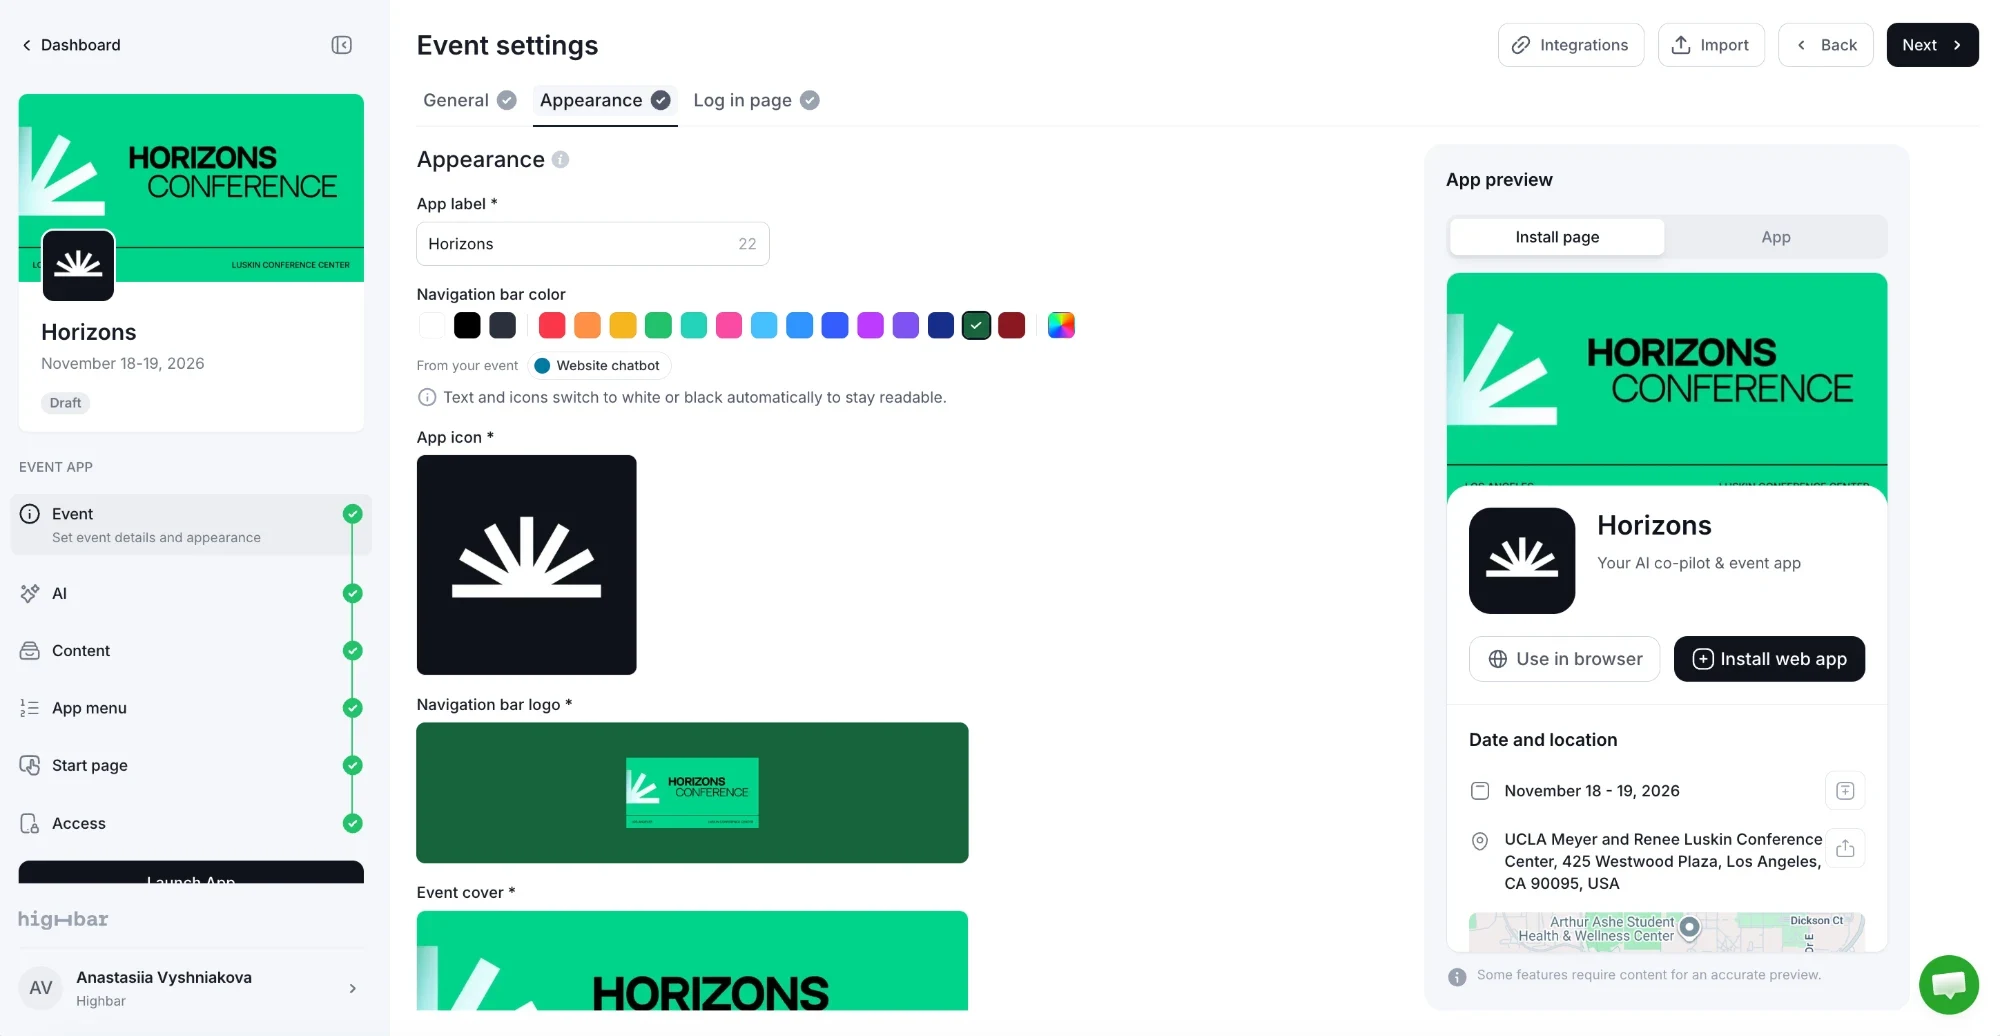
The four fields marked with an asterisk (App label, App icon, Navigation bar logo and Event cover) are required to launch. Navigation bar color is optional. They're the most common reason the Launch App button stays grey. See Launch your app.
What each image is for
| Field | Where attendees see it | Size |
|---|---|---|
| App label | The name under your app's icon once it's installed on a phone. | Up to 30 characters |
| Navigation bar color | The bar at the top of every screen in the app. Optional: without it, the bar is white. | A color |
| App icon | The install page, the phone's home screen once installed, and the top of the menu on desktop. | Square, 512 × 512 px |
| Navigation bar logo | The bar at the top of the app, and the top of the menu on phones. | Wide, up to 500 × 64 px |
| Event cover | The top of the install page and the log in page, the top of the menu on desktop, and the preview image when someone shares your app's link. | 1200 × 640 px |
The App label is usually your event name or a shortened version of it, such as "Summit 26". Keep it short enough to read under a phone icon.
The info icon next to the Appearance heading opens a summary of each field and its size.
Choose a navigation bar color
Pick a color under Navigation bar color:
- Click one of the preset swatches. The first one, Default (white), is the standard white bar.
- Click the multicolor swatch at the end to choose any color.
- If your event already uses a color elsewhere, such as your Website chatbot, it's suggested under From your event. Click it to use the same color.
The color saves straight away, and the App preview switches to the app so you can see it. Text and icons on the bar switch to white or black automatically to stay readable.
The color is used for the bar at the top of every screen, and for the round action button in the corner unless the color is too pale to stand out. The rest of the app, such as the schedule, lists and the menu, keeps its usual look.
Upload an image
Click Select image in the field's box, or drag a file onto it. Use a JPG or PNG of up to 5 MB.
In the crop window, drag the image to position it and use Zoom to fit it to the shape shown.
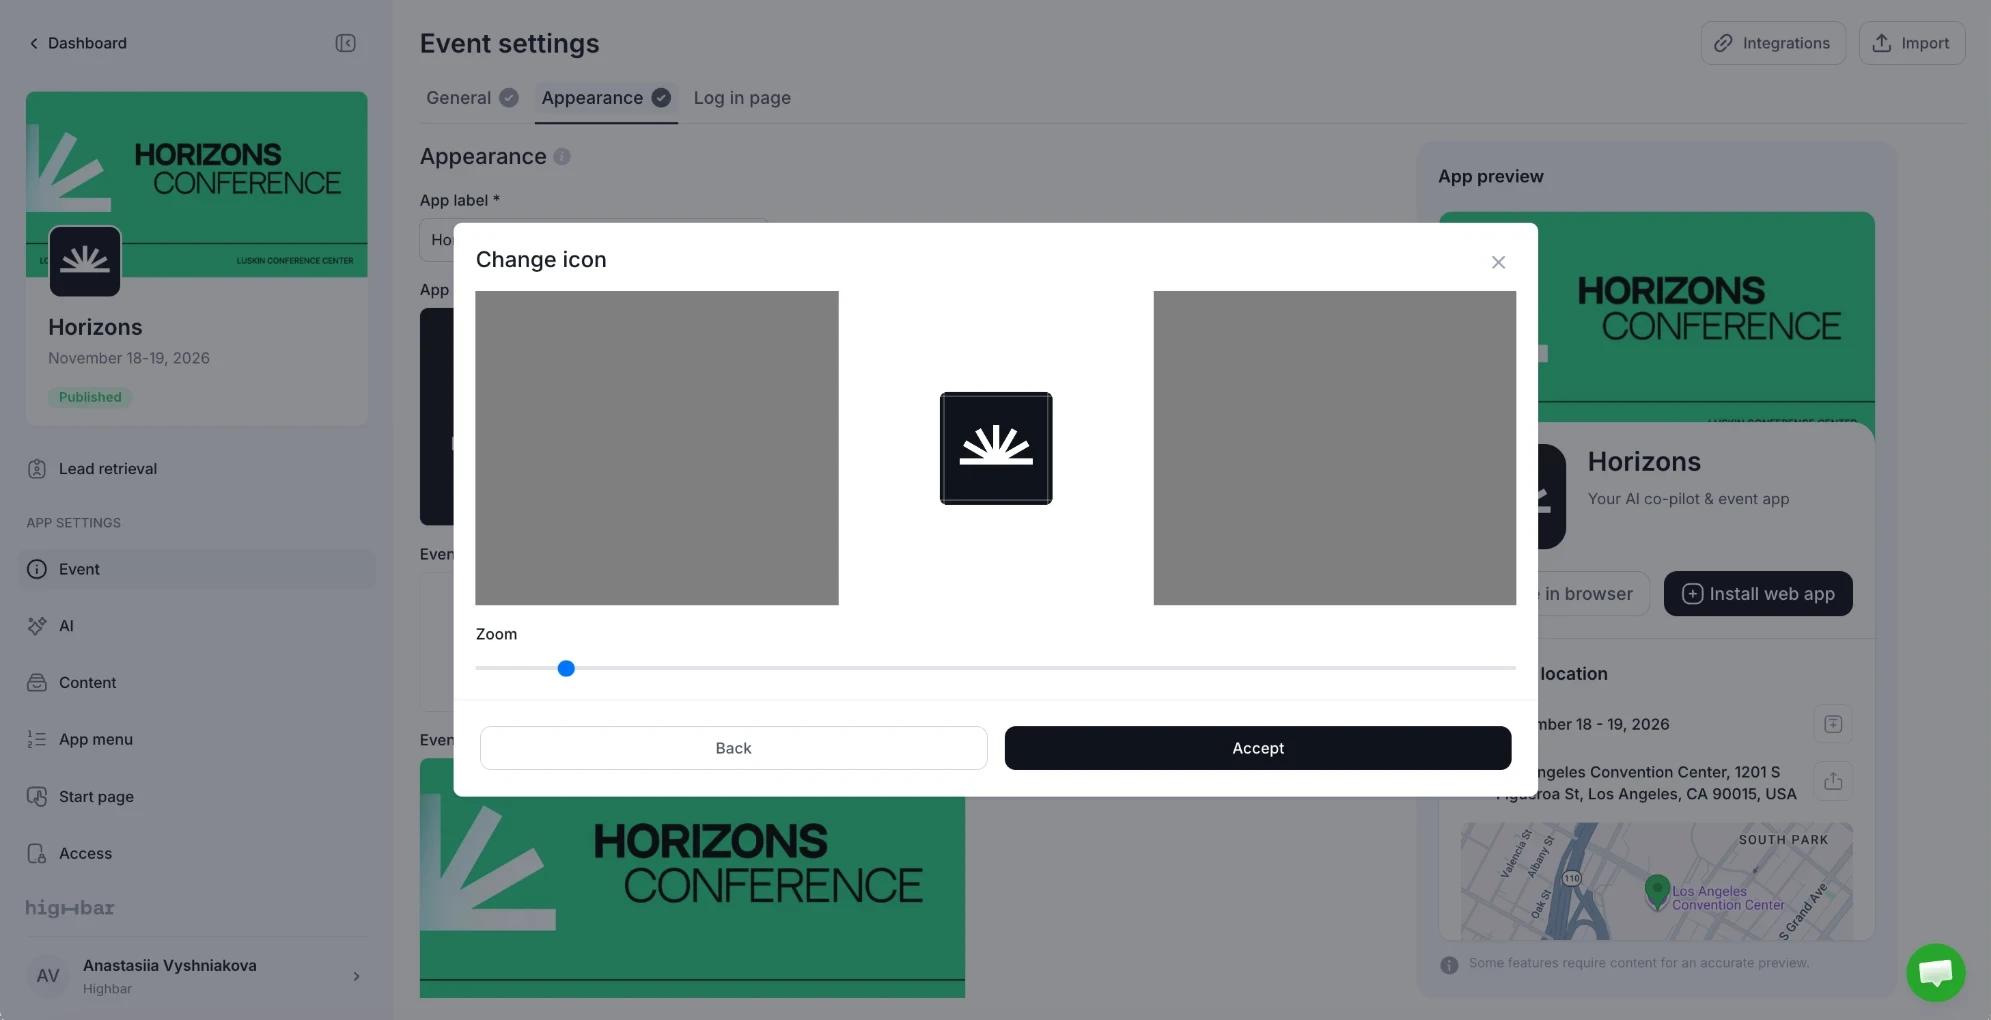
Click Accept. The image saves straight away, and the App preview updates. Click Back instead to pick a different file.
To replace an image, click the trash icon on it and upload a new one.
Tips for good results
- App icon: a simple mark or logo works better than text, which becomes unreadable at icon size.
- Navigation bar logo: it sits on the navigation bar, and the upload box shows it on your bar color. Use a version of your logo that reads well on that color. A PNG with a transparent background avoids a visible box around it.
- Event cover: use a wide, high-quality image that reflects your event's brand. It's the first thing people see on the install and log in pages.
The event cover is not your start page's cover. The image at the top of the attendee's home page is a separate Cover image section on the Start page, which you upload there.
Related settings
- The event name, headline and the rest of the install page are on the General tab.
- The names and icons of your app's menu entries are set on the App menu page.
- The AI Concierge's own name and chat icon are on the AI Concierge tab.
Event details
Set your event's name, dates, venue and time zone, add organizer contact details, and choose what appears on your app's install page.
Log in page: terms and consent
Add your own terms to the app's log in page, choose whether attendees must tick a box to agree, and see who accepted each version.