App menu
Arrange, rename and group the entries in your event app's menu.
The App menu step sets the menu attendees use to move around your app: built-in entries like Messages and My agenda, and your content sections. It sits between Content and Start page in the event sidebar (after launch, under App settings).
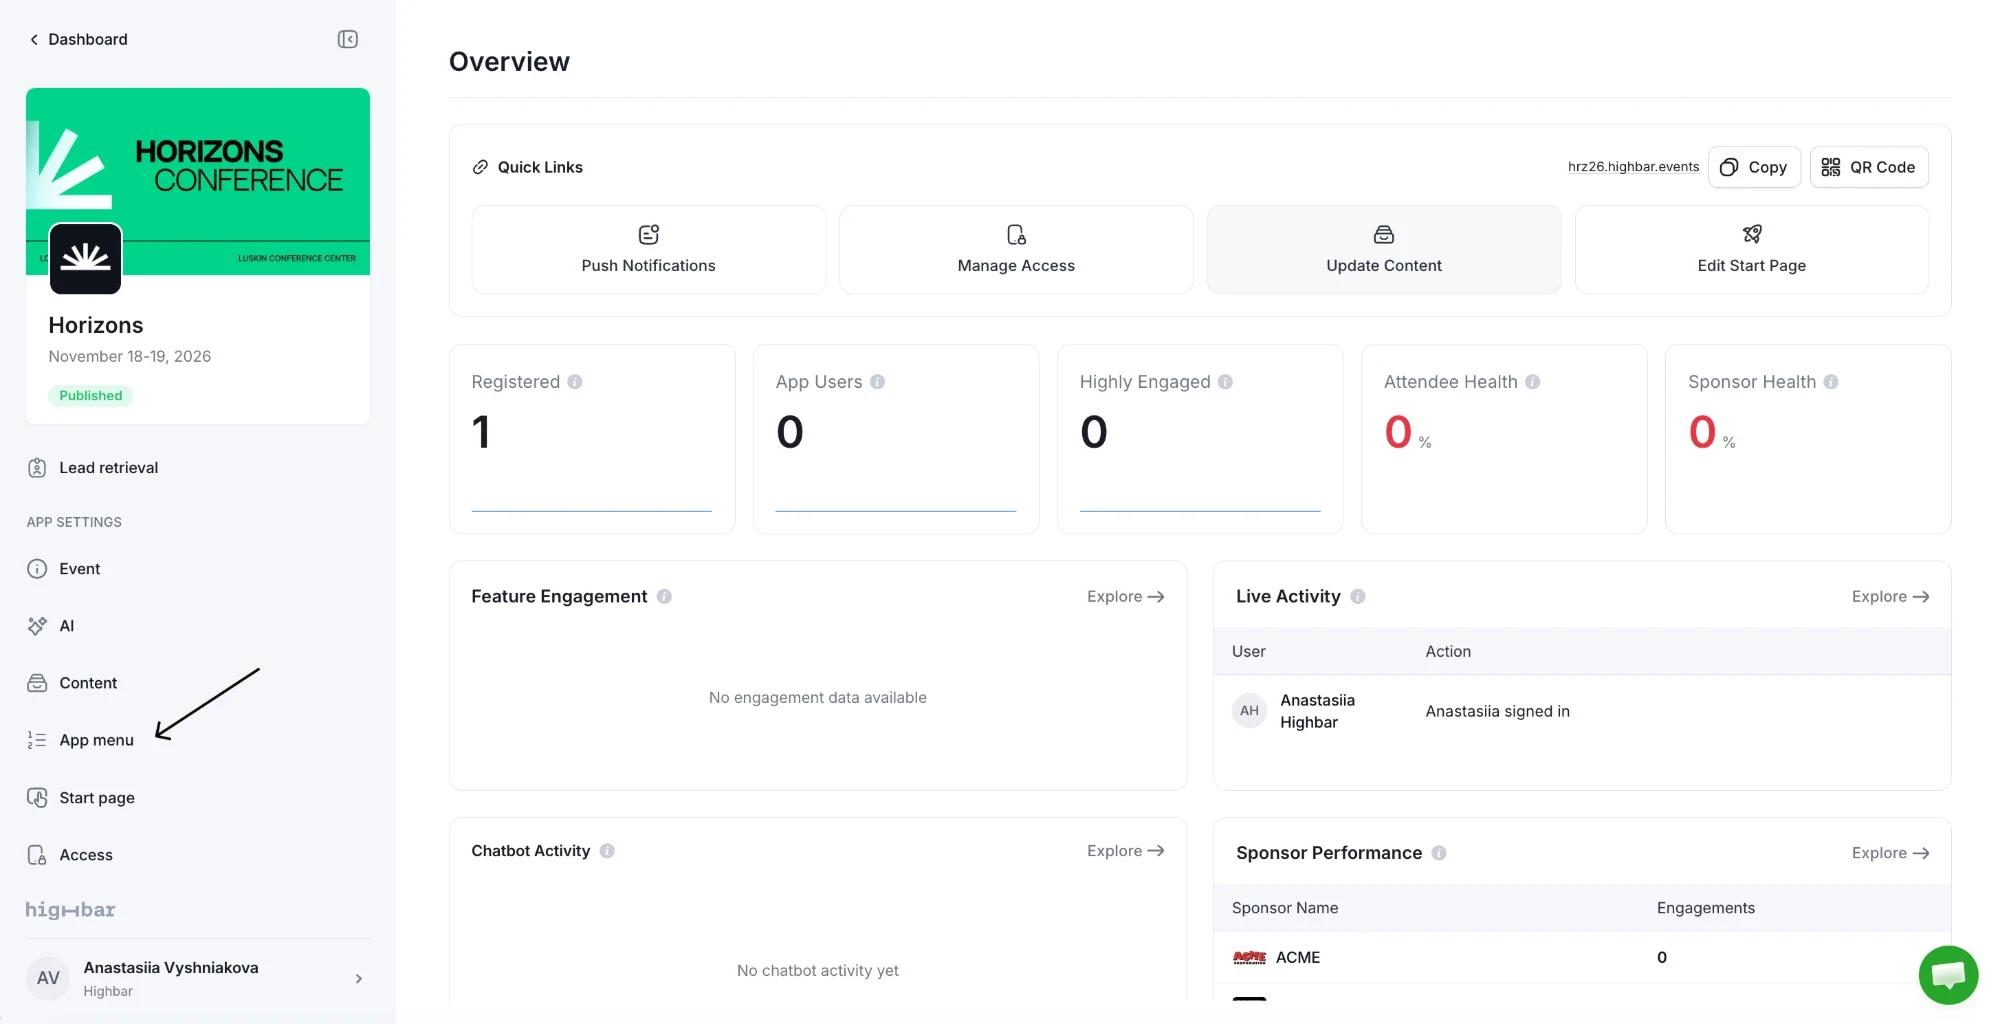
Your app starts with a complete default menu, so this step never blocks launch. Every change saves straight away, and the App preview shows the menu open.
How the menu is laid out
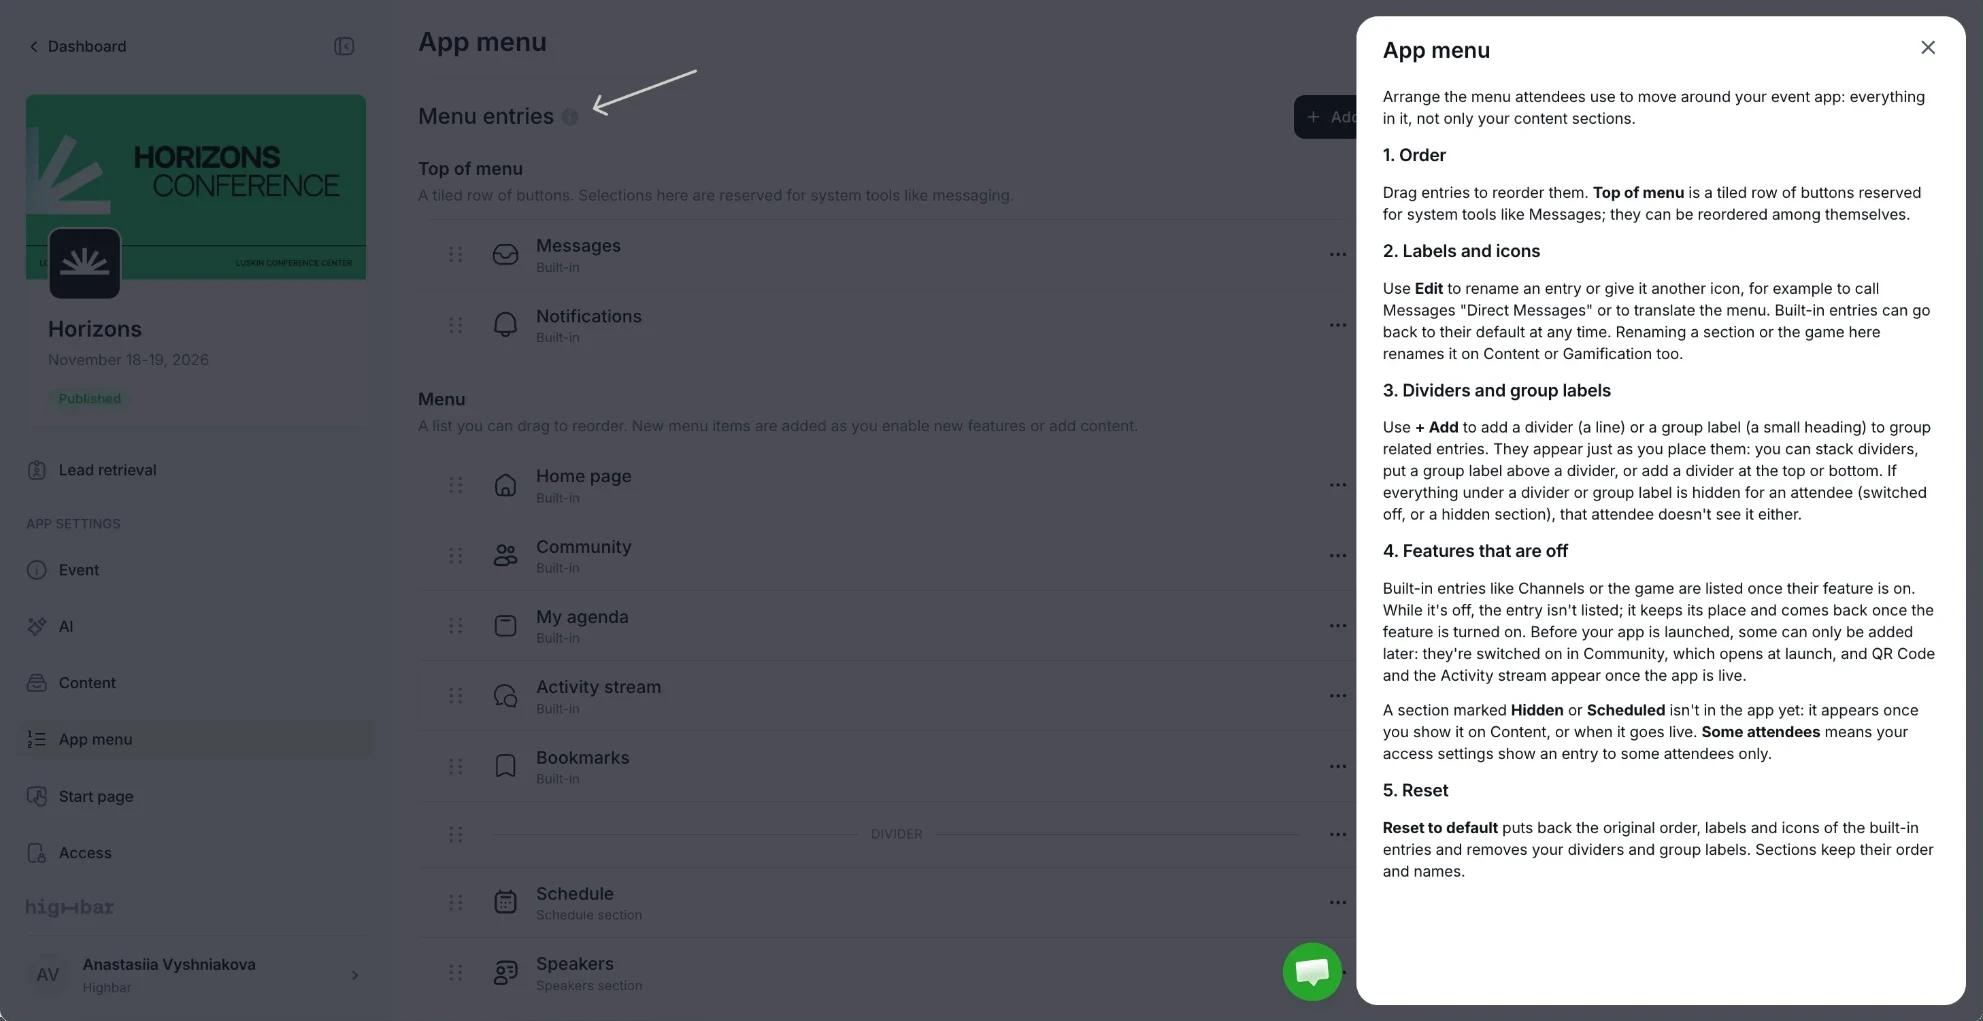
For a short guide to this page, click the info icon next to Menu entries.
The page has two parts:
- Top of menu: a row of large buttons at the top of the phone menu (the first rows on desktop). It holds the built-in tools Messages and Notifications, plus QR Code once contact exchange or lead retrieval is on. QR Code opens the attendee's own code, for others to scan.
- Menu: the list below. By default it starts with Home page, Community, your game, My agenda, Activity stream and Channels (the ones that are on), then a divider and your content sections. New sections are added at the end.
Some built-in entries only appear when their feature is on:
| Entry | Attendees see it when |
|---|---|
| Messages | Messaging is on and the attendee is allowed to message. |
| QR Code | Your app is launched and contact exchange (on the Community overview) or lead retrieval is on. Both are off for new events. |
| Community | Attendees have access to the community. |
| Your game | Gamification is on. The entry takes the game's Label ("Scavenger Hunt" for a new game) and shows Gamification under its name. |
| Activity stream | Your app is launched and the activity stream is on. |
| Channels | Channels are on. |
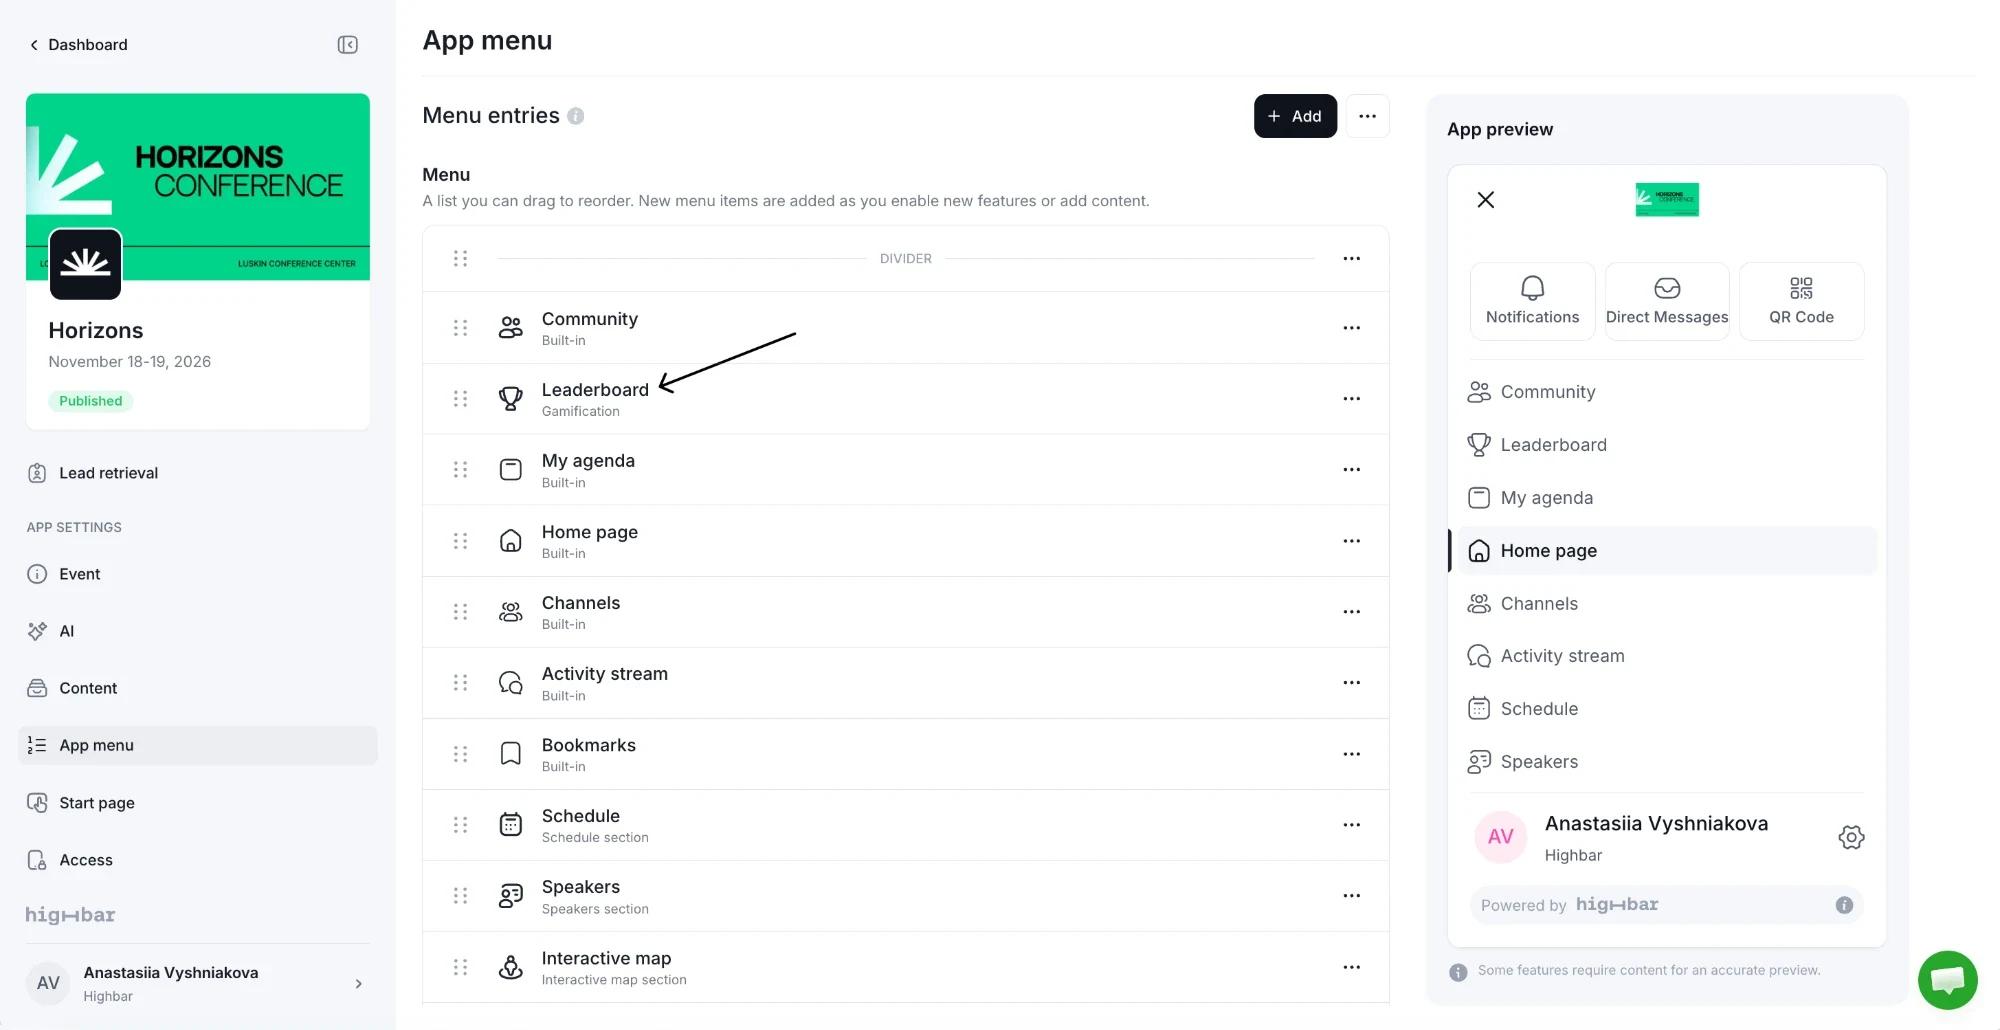
Notifications, Home page (your start page) and My agenda are always there. An entry whose feature is off isn't listed on this page: it keeps its place and comes back when you turn the feature on. Before launch, a note reminds you that some features, like the activity stream, are added after launch.
Reorder entries
Drag an entry by its handle to move it. Entries stay in their own part: built-in tools can't move into the main list, and sections can't move into Top of menu.
Rename an entry or change its icon
Click the ... menu on the entry's row and choose Edit.
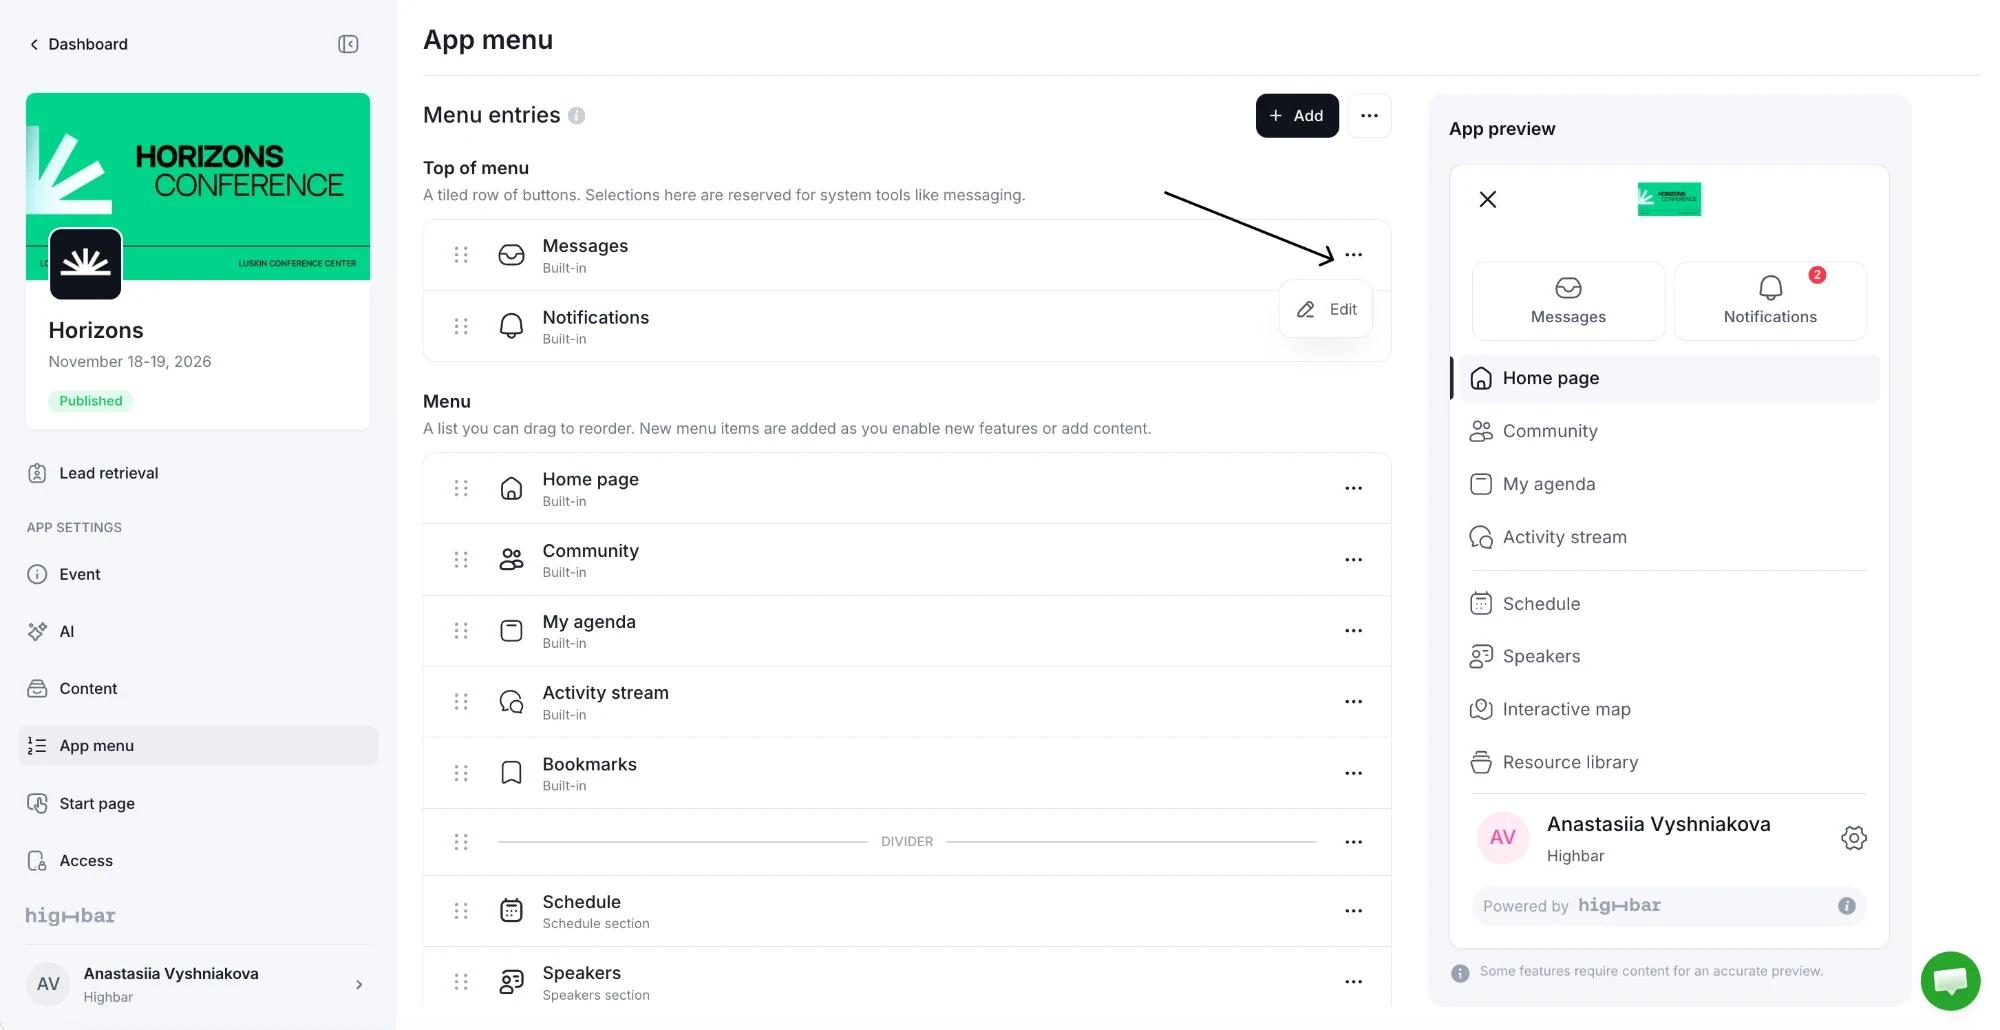
Change the Label (up to 20 characters in Top of menu, 30 in the main list) and pick an Icon. Recommended icons are shown first.
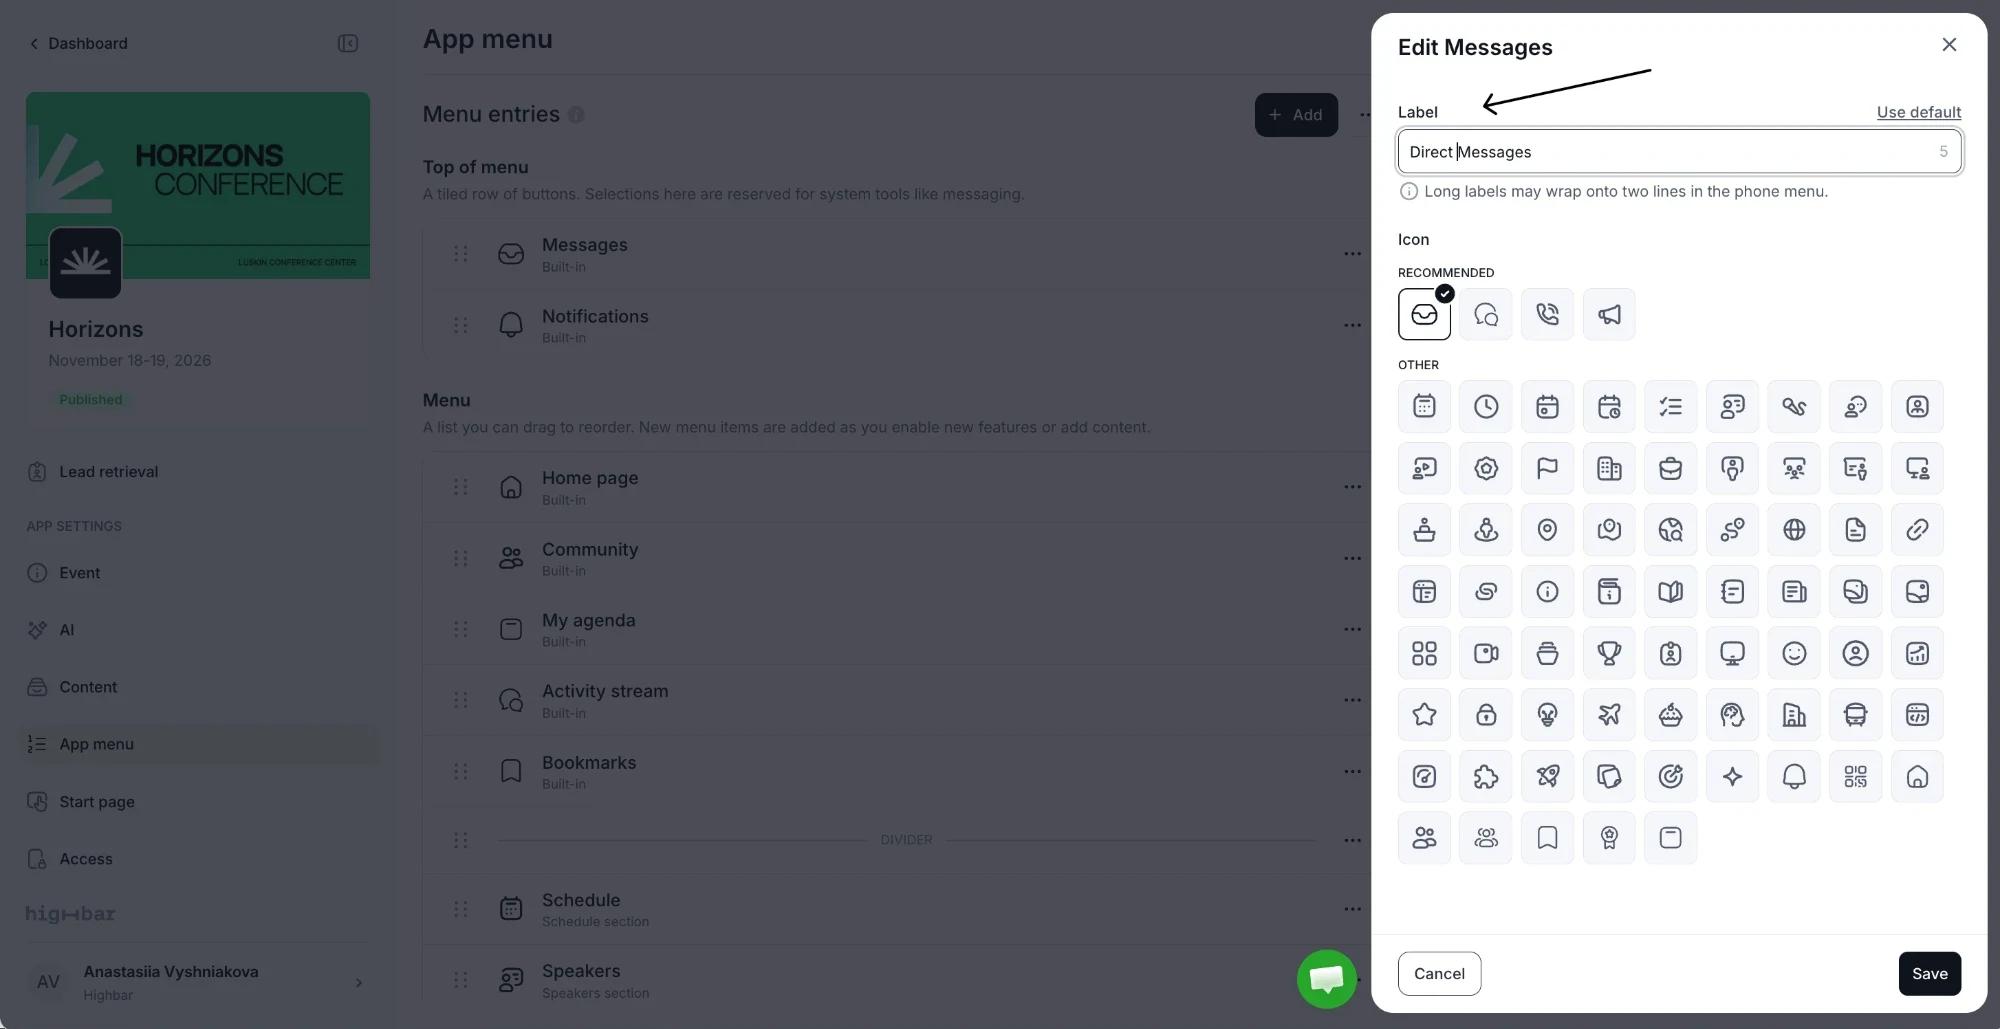
Click Save.
Use this to translate the menu or match your event's wording, for example calling Messages "Direct messages". A renamed built-in entry shows its original name under the new one, such as "Default: Messages", and Use default puts back its original label and icon.
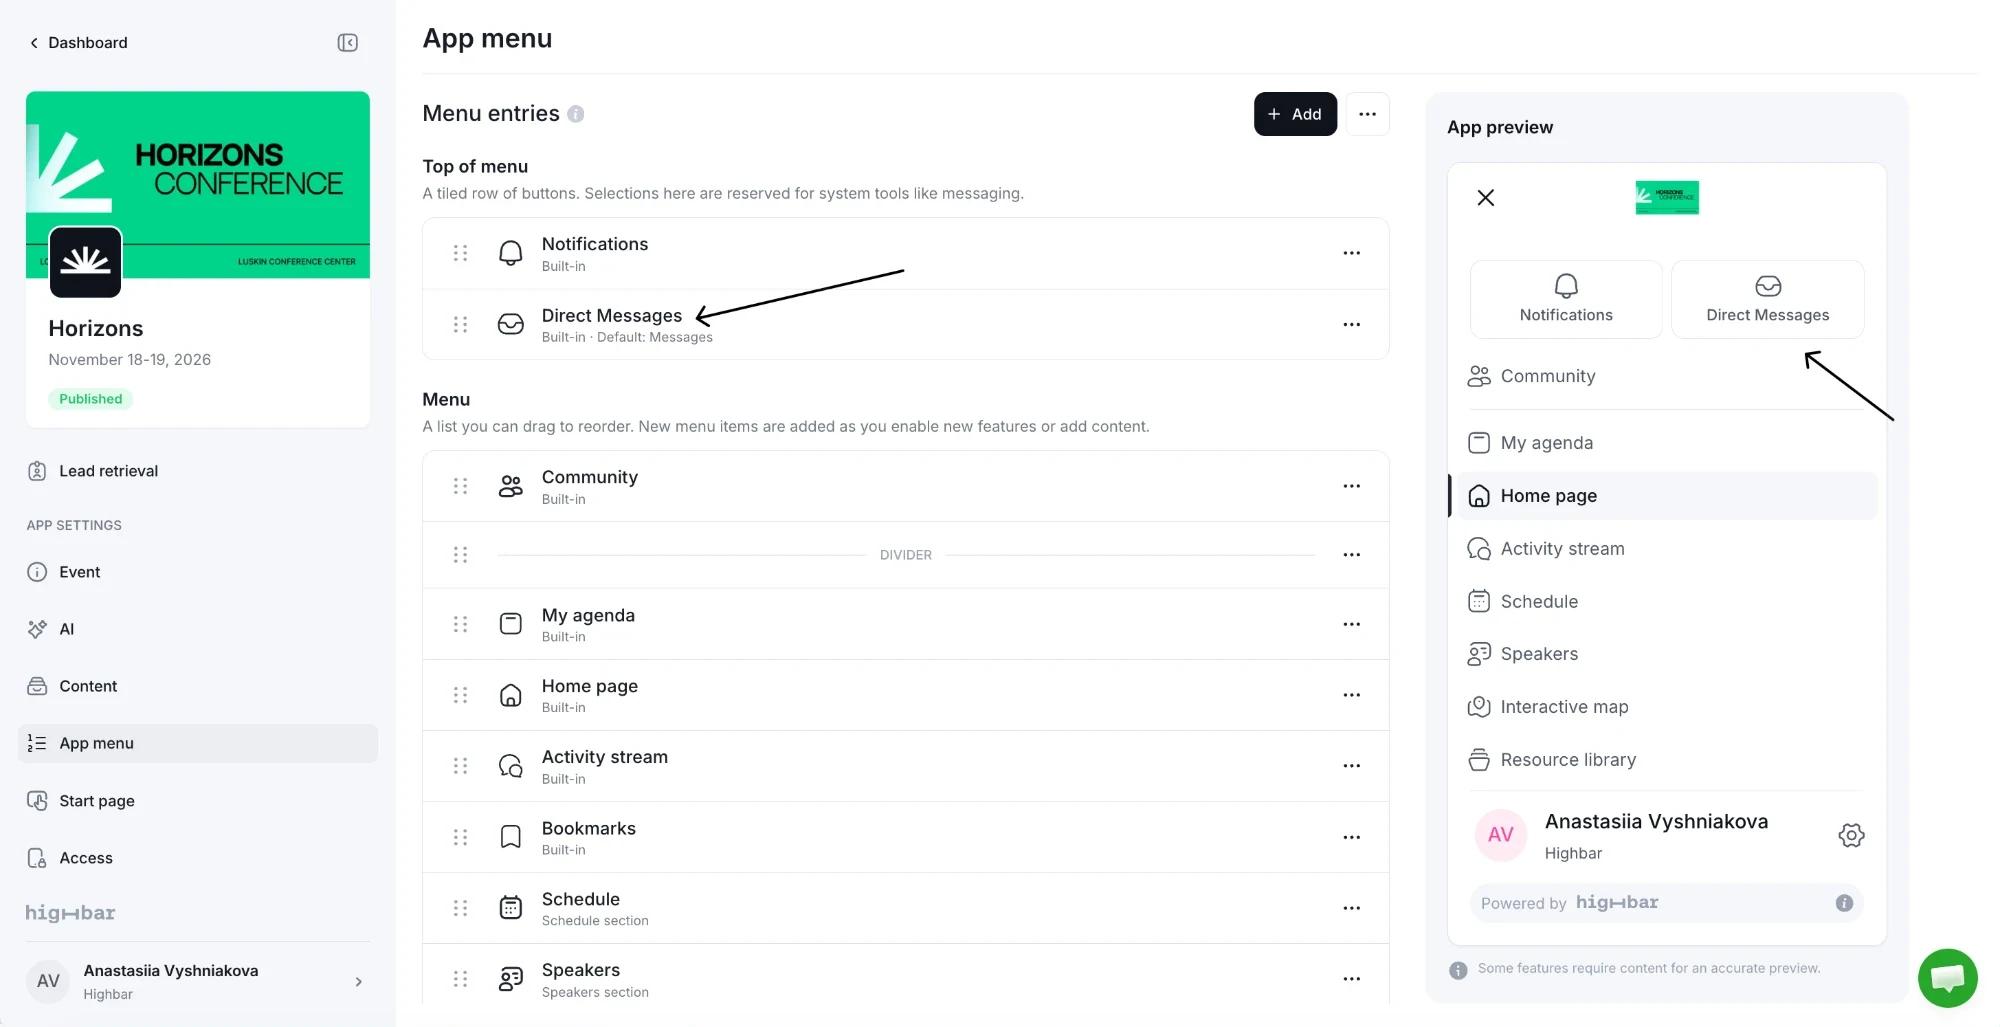
Renaming a section here also renames it on the Content page. Editing your game's entry changes its Label and icon on the Gamification page, and the other way round.
Group entries
Click Add and choose:
- Divider: a line between entries.
- Group label: a small heading, up to 30 characters.
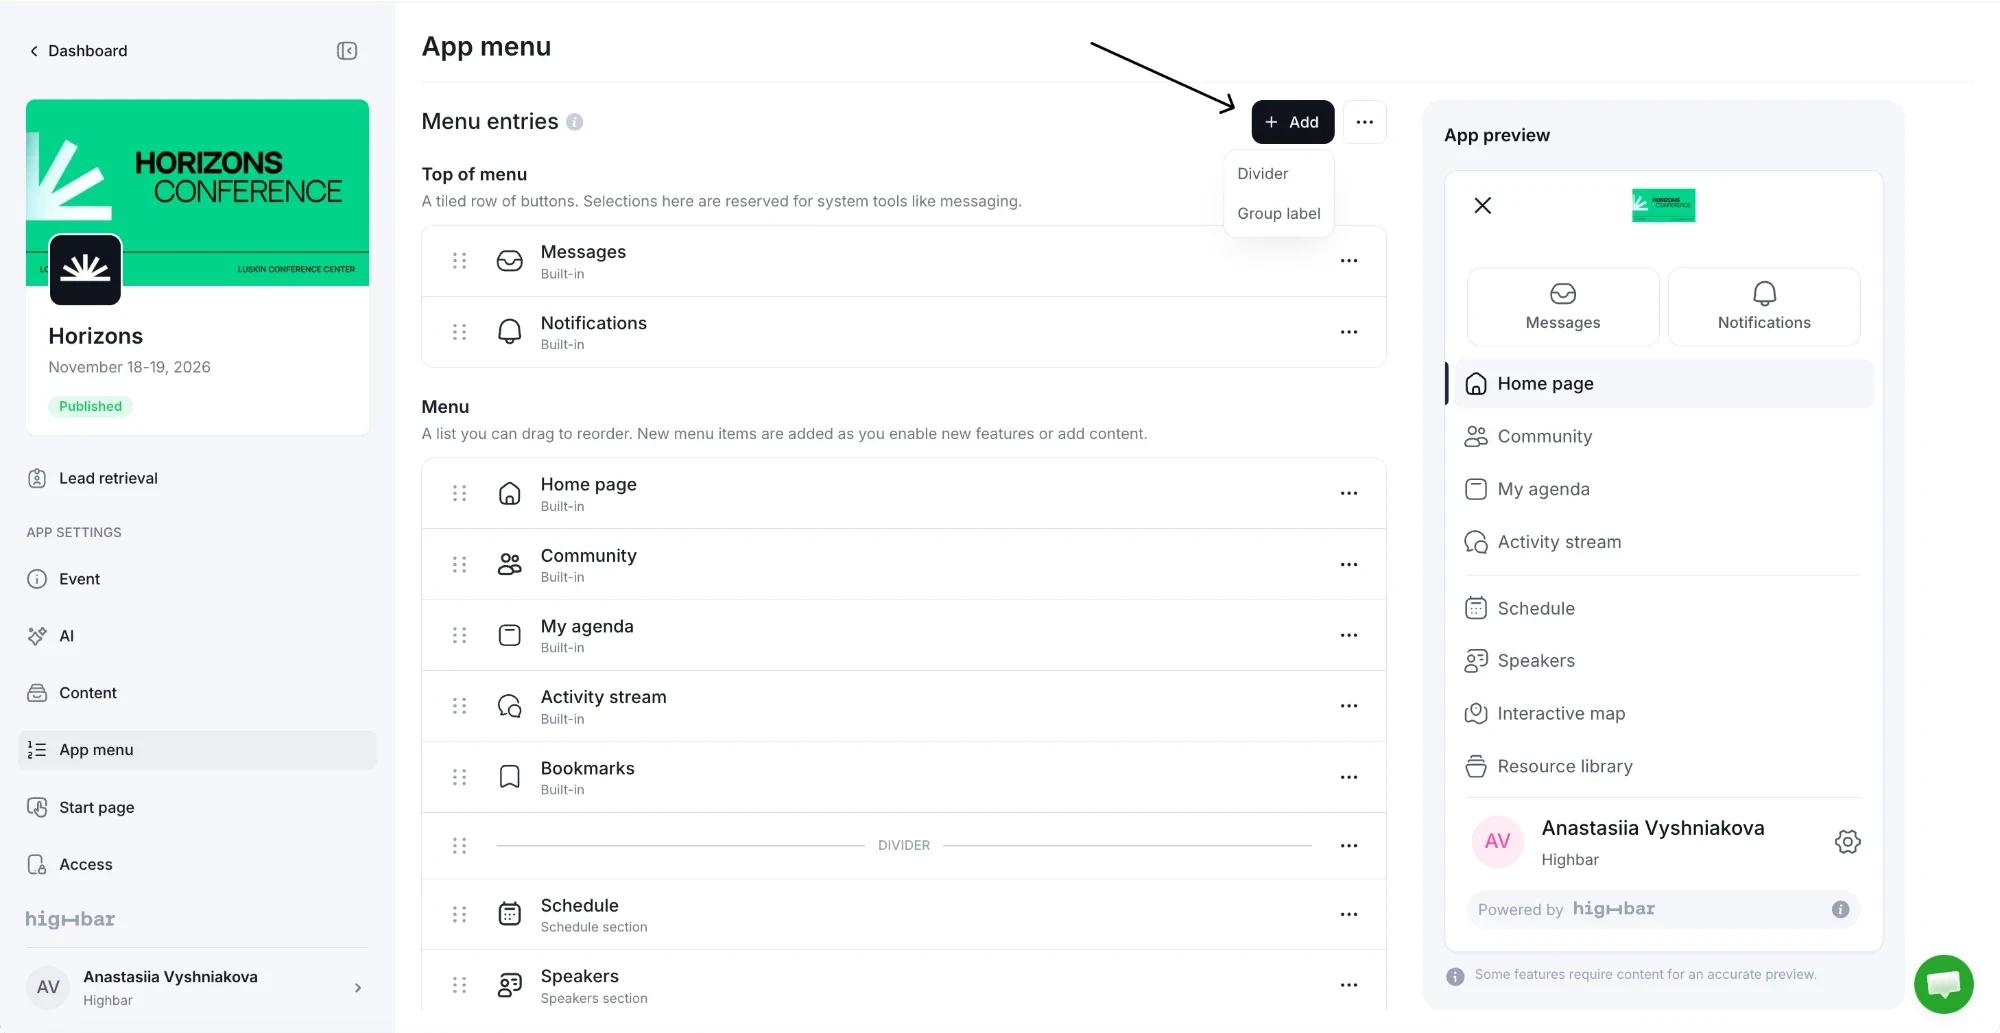
Drag it into place. To delete one, open its ... menu and choose Remove.
If an attendee can't see anything under a divider or group label (for example, every section under it is hidden), they don't see the divider or label either.
Status labels
Some entries carry a label explaining why attendees might not see them:
- Hidden: the section is hidden on the Content page.
- Scheduled: the section appears at a set time. Hover over the label to see when.
- Some attendees: your messaging settings show this entry to some attendees only.
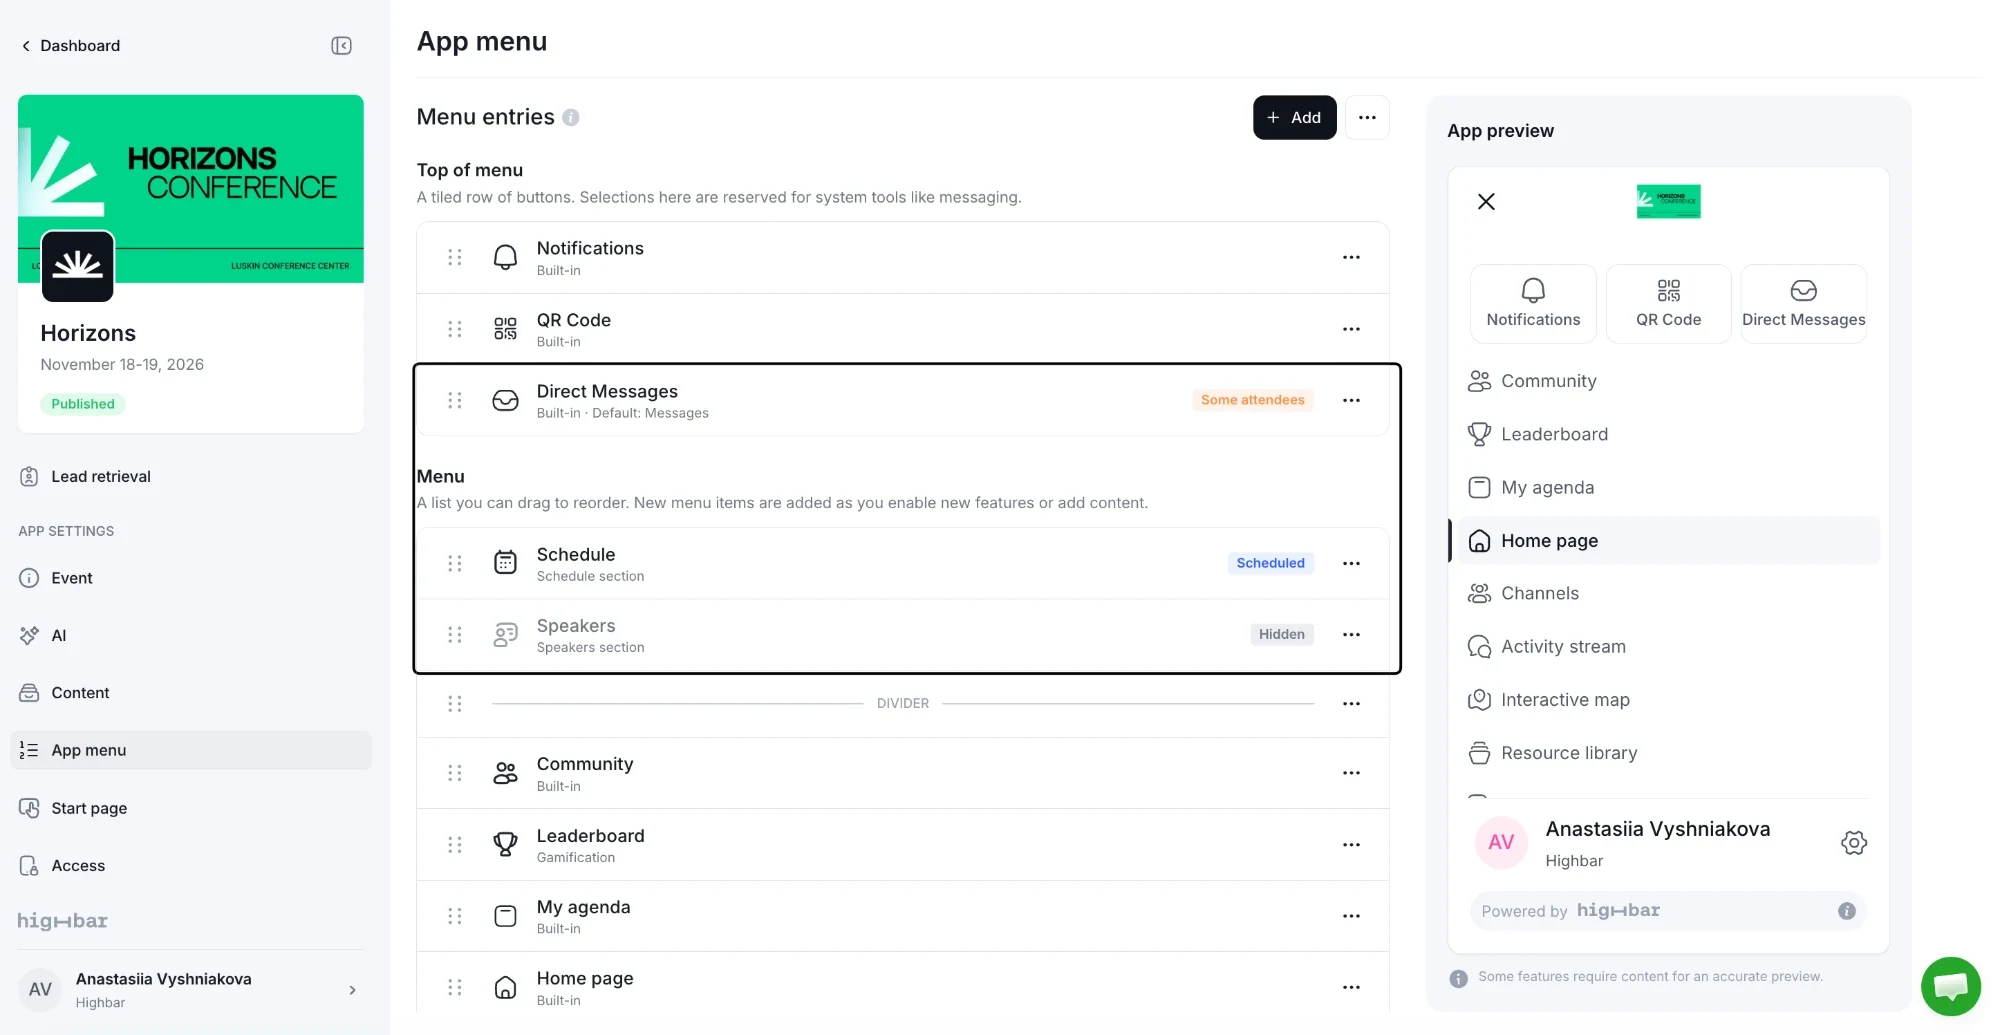
The ... menu links to where you change these, such as Manage content or Messaging settings.
You can't remove built-in entries or sections from the menu here. To take a section out of the app, hide it on the Content page (see Sections and visibility). A built-in entry disappears when you turn its feature off.
Reset the menu
Once you've changed the menu, the ... button next to Add offers Reset to default.
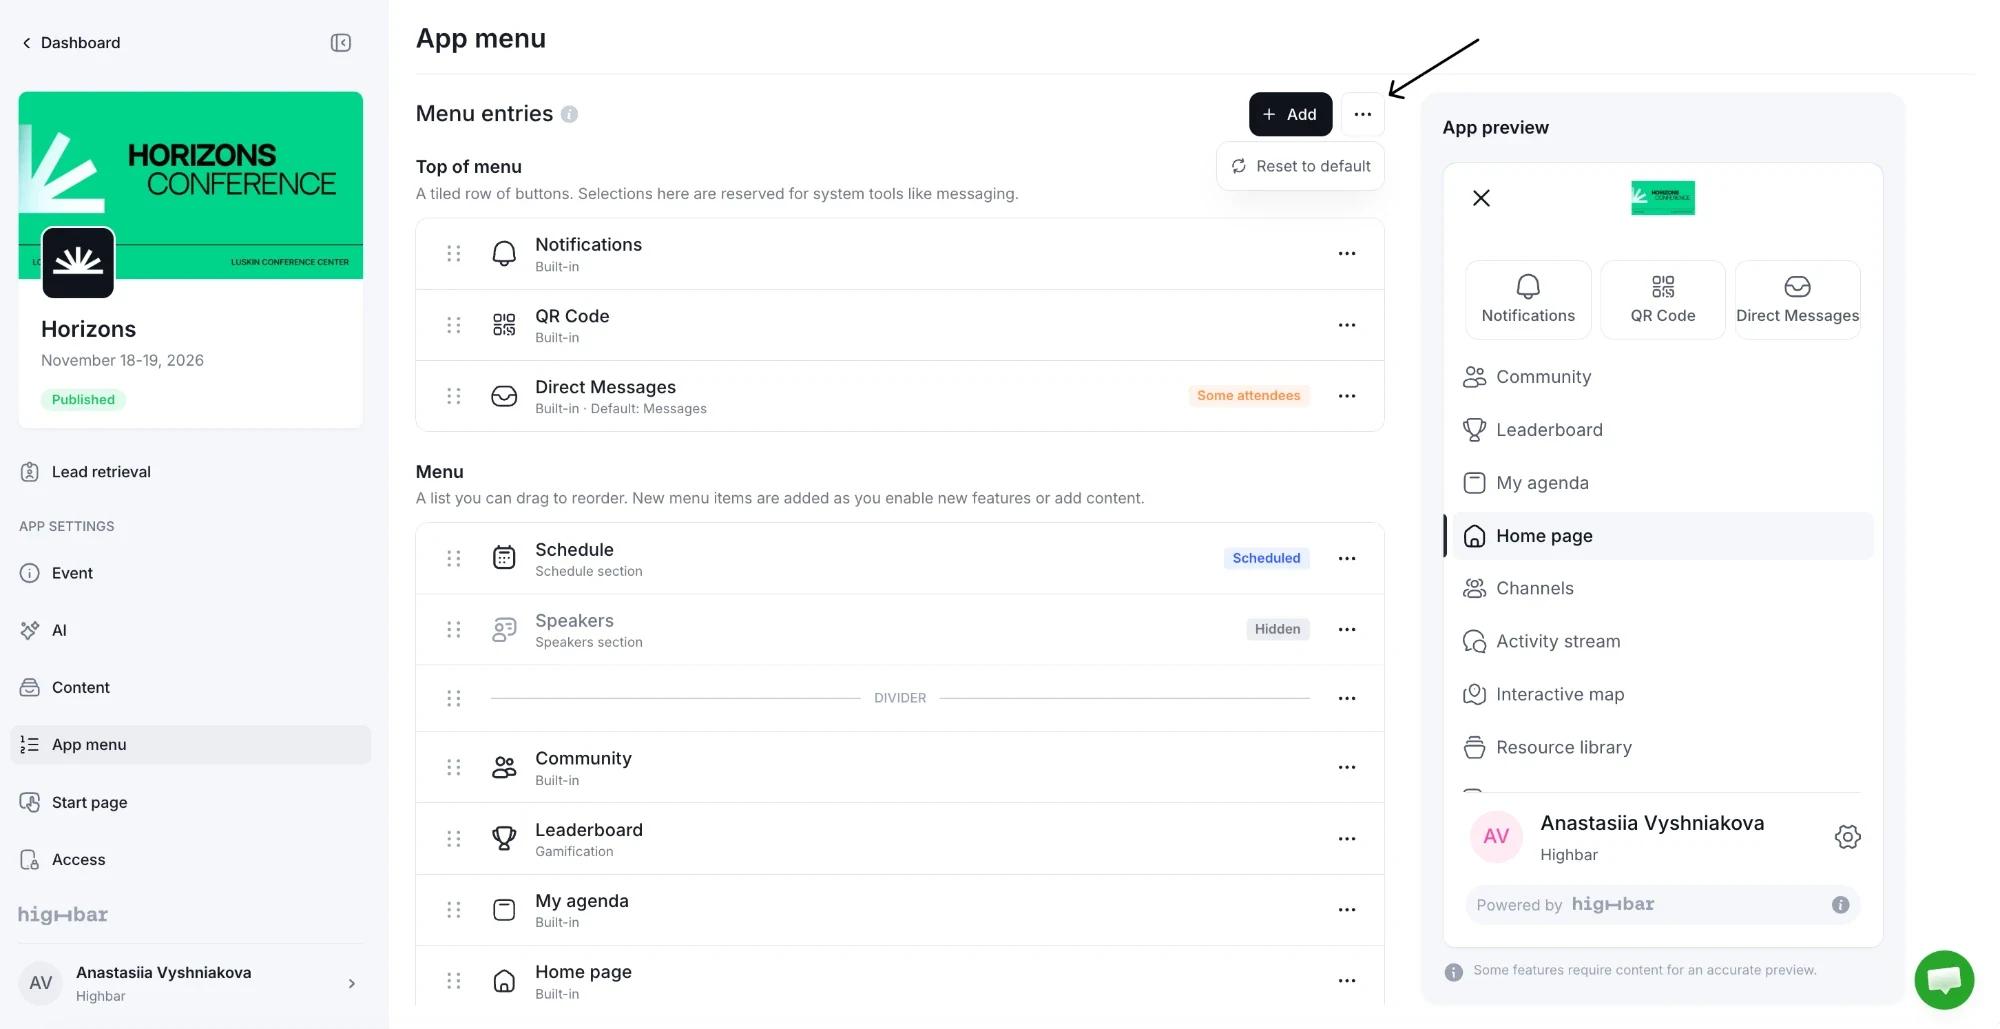
It puts back the original order, labels and icons of the built-in entries and removes your dividers and group labels. Your sections keep their order and names.
Importing content
Bring sessions, speakers, sponsors and FAQs into your event app from CSV or Excel files, check them before they go in, and undo an import if you need to.
Start page
Build the home page attendees see after they log in, from sections such as a welcome message, an AI summary, shortcuts and featured content.