Content: sections and visibility
Add the sections attendees browse in your event app, and choose when each section and item is visible.
Content is where you build what attendees browse in your event app: the schedule, speakers, sponsors, maps, files, photos and links. It's the third setup step in the event sidebar, after Event and AI.
Each part of the app is a section, with a type, a label and an icon. Each section appears in the app menu.
Add a section
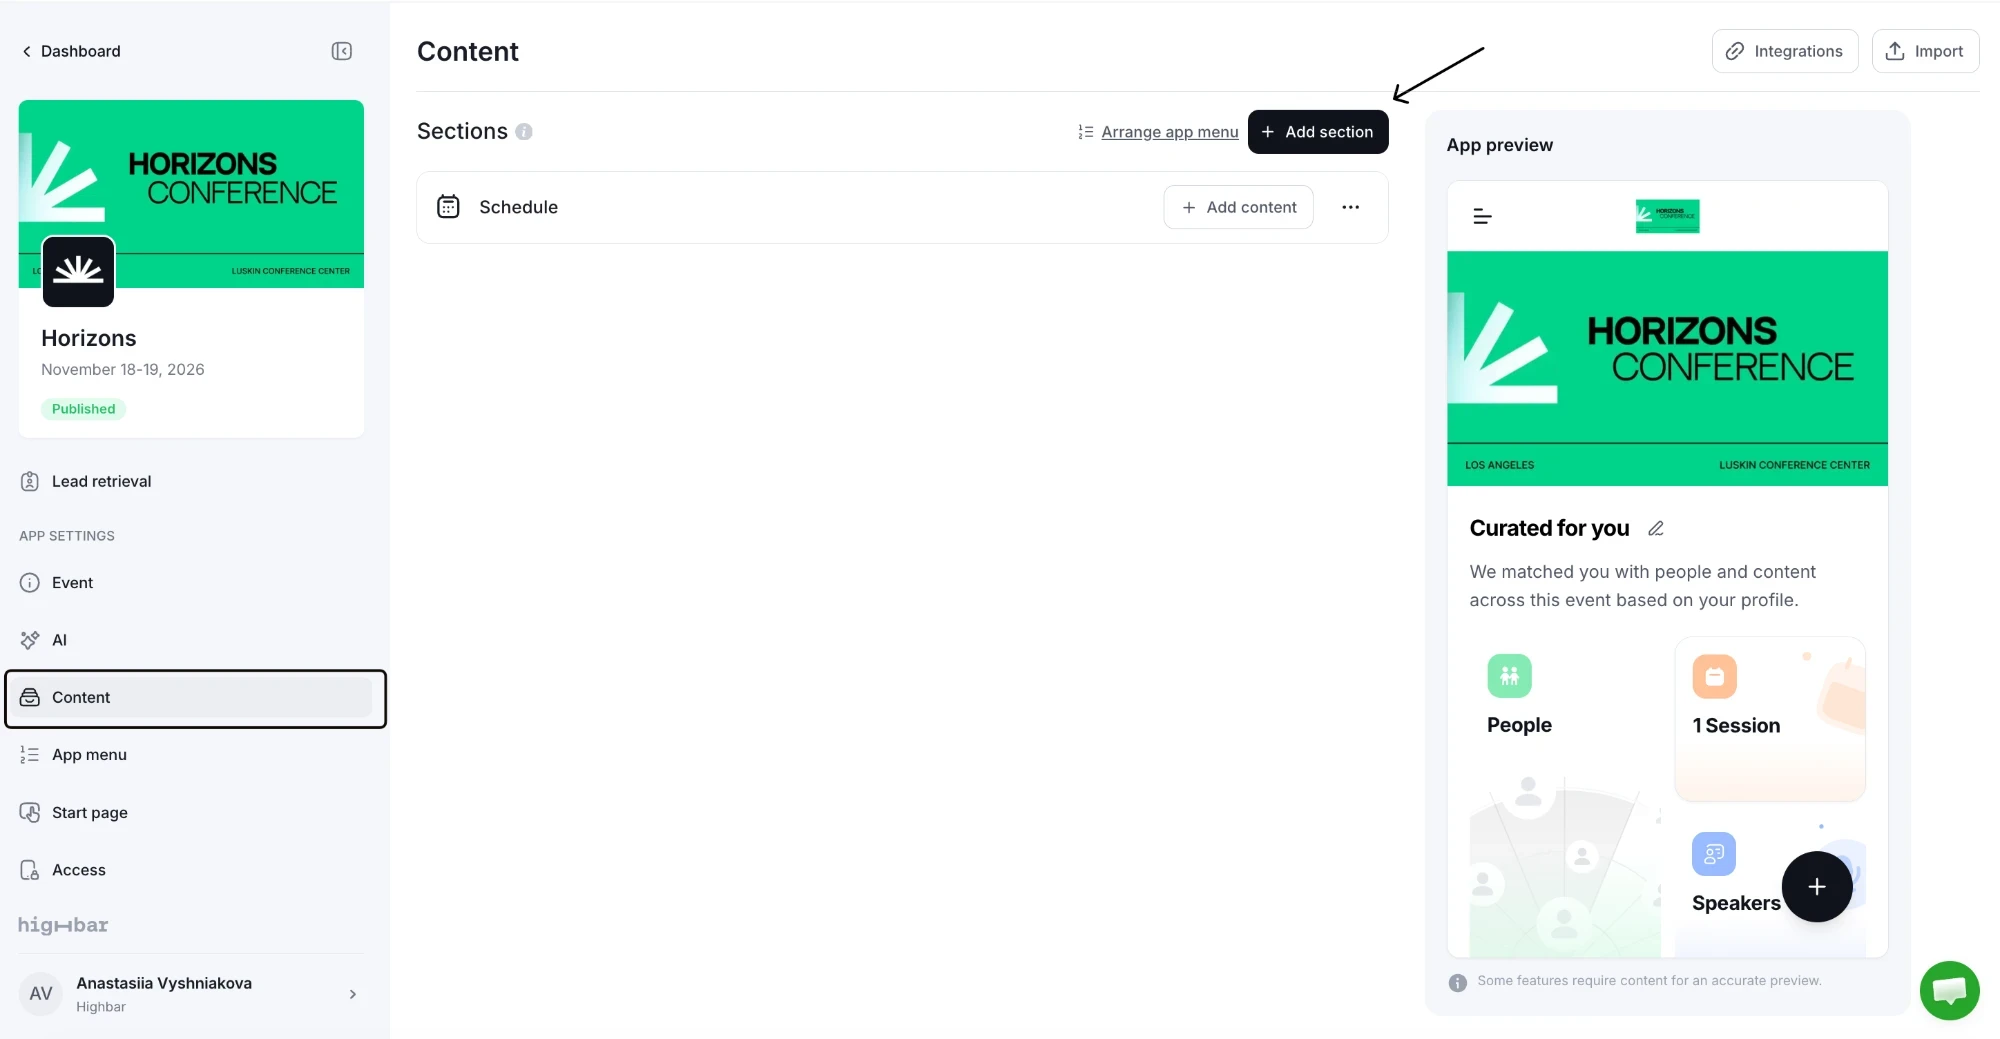
Open Content and click Add section.
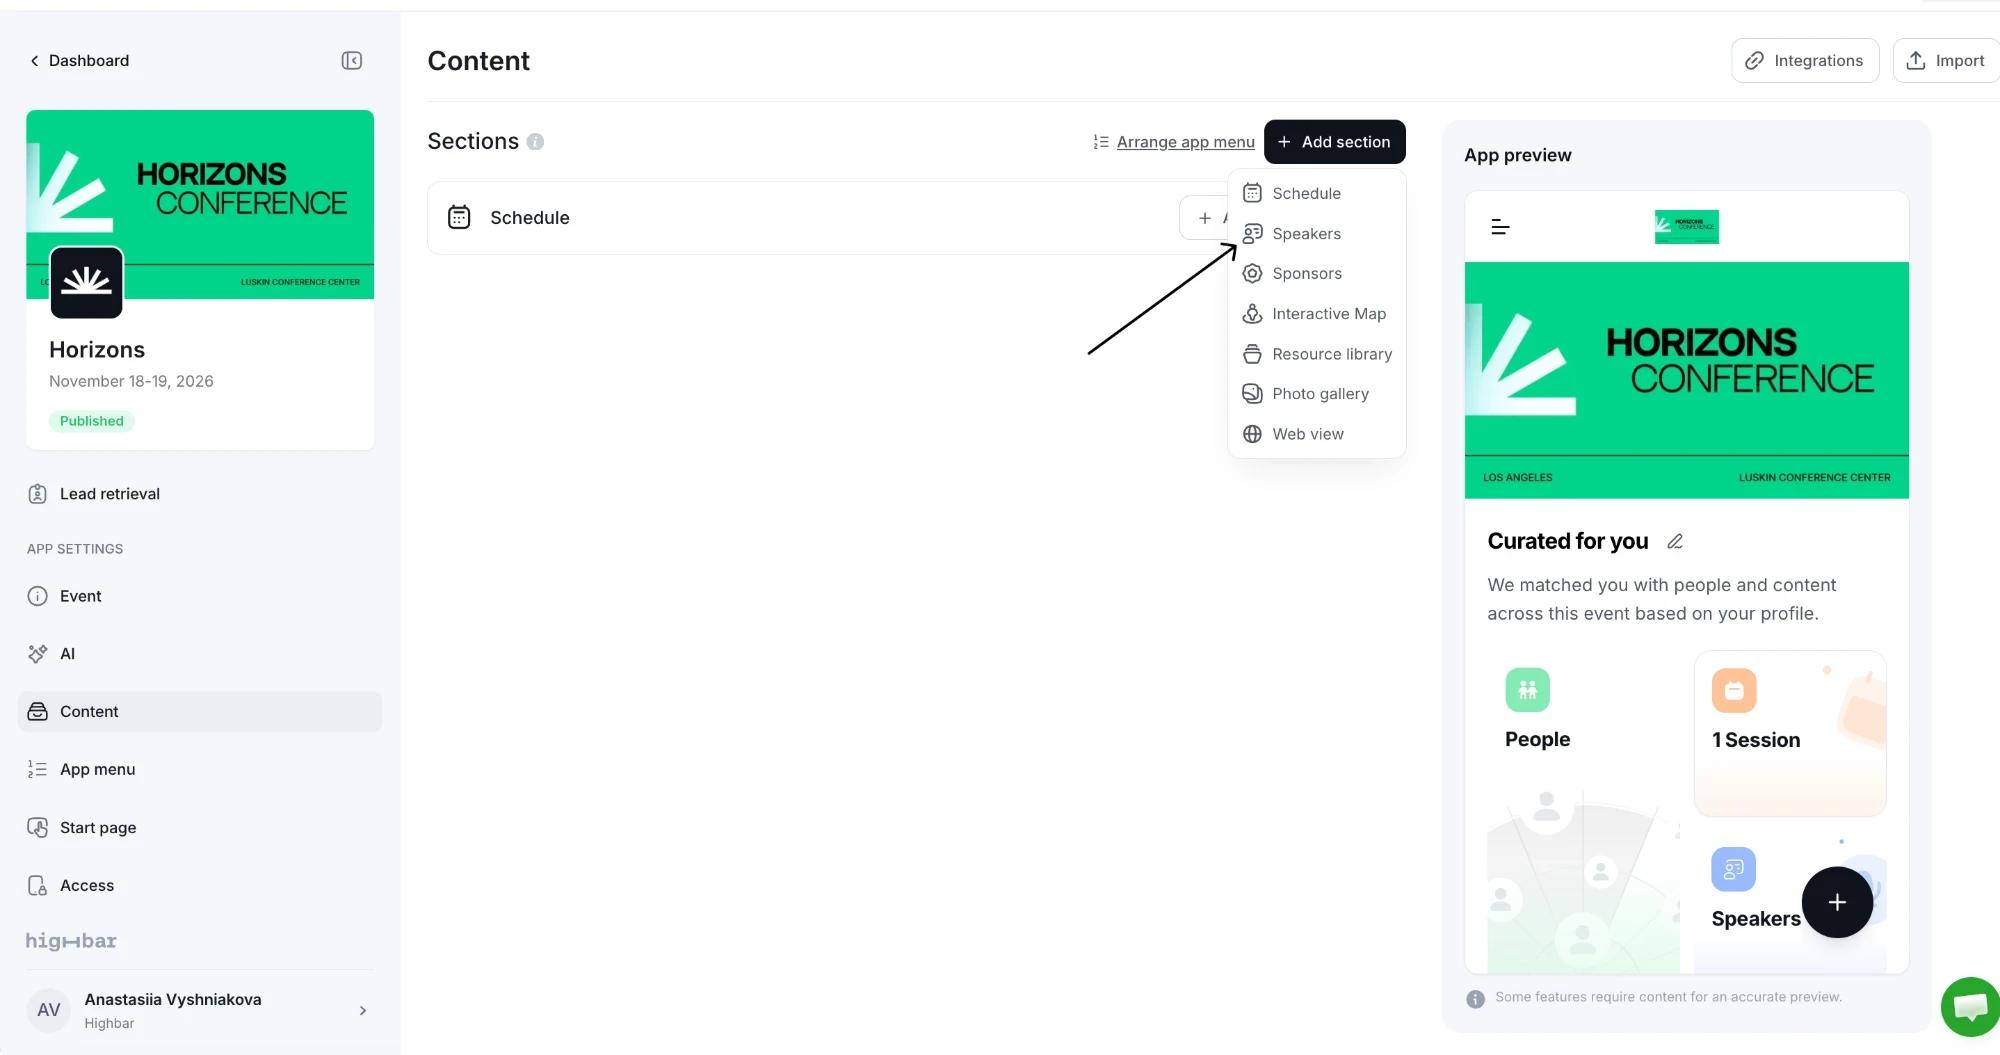
Pick a section type from the list below.
Enter a Label of up to 30 characters. This is the name attendees see in the app menu.
Choose an Icon. The Recommended icons suit the section type, and Other holds the rest.
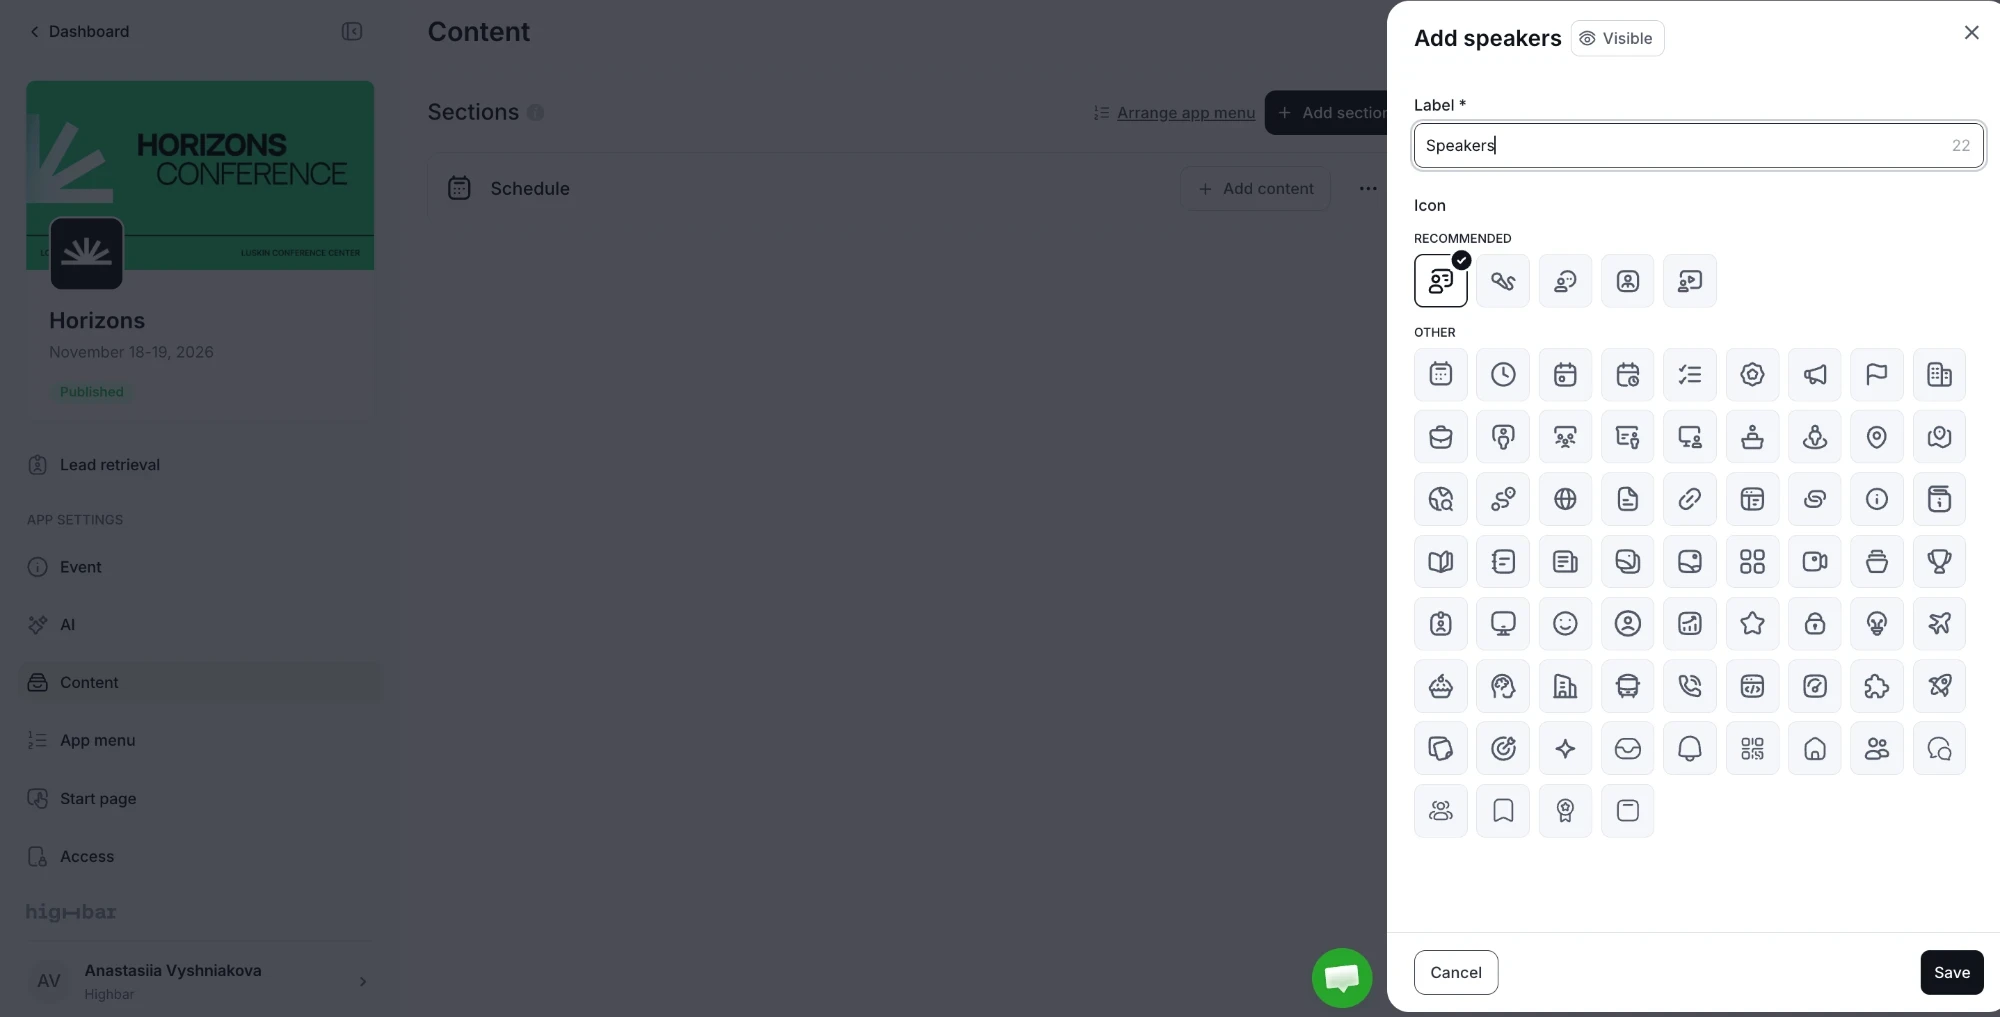
Click Save, then click Add content on the section's row to start filling it.
| Section type | What it holds |
|---|---|
| Schedule | Sessions with times, rooms, tracks and speakers. See Schedule. |
| Speakers | Speaker profiles. See Speakers. |
| Sponsors | Sponsor and exhibitor profiles. See Sponsors and exhibitors. |
| Interactive Map | Venue maps with pins linked to your content. See Interactive maps. |
| Resource library | Files and web links, grouped into categories. See Resource library. |
| Photo gallery | Event photos, grouped into albums. See Photo gallery. |
| Web view | A web page shown inside the app. See Web view. |
You can add more than one section of the same type, for example "Speakers" and a separate "Moderators" list. A second section of a type gets a number added to its label, which you can change.
Rename, reorder or delete a section
-
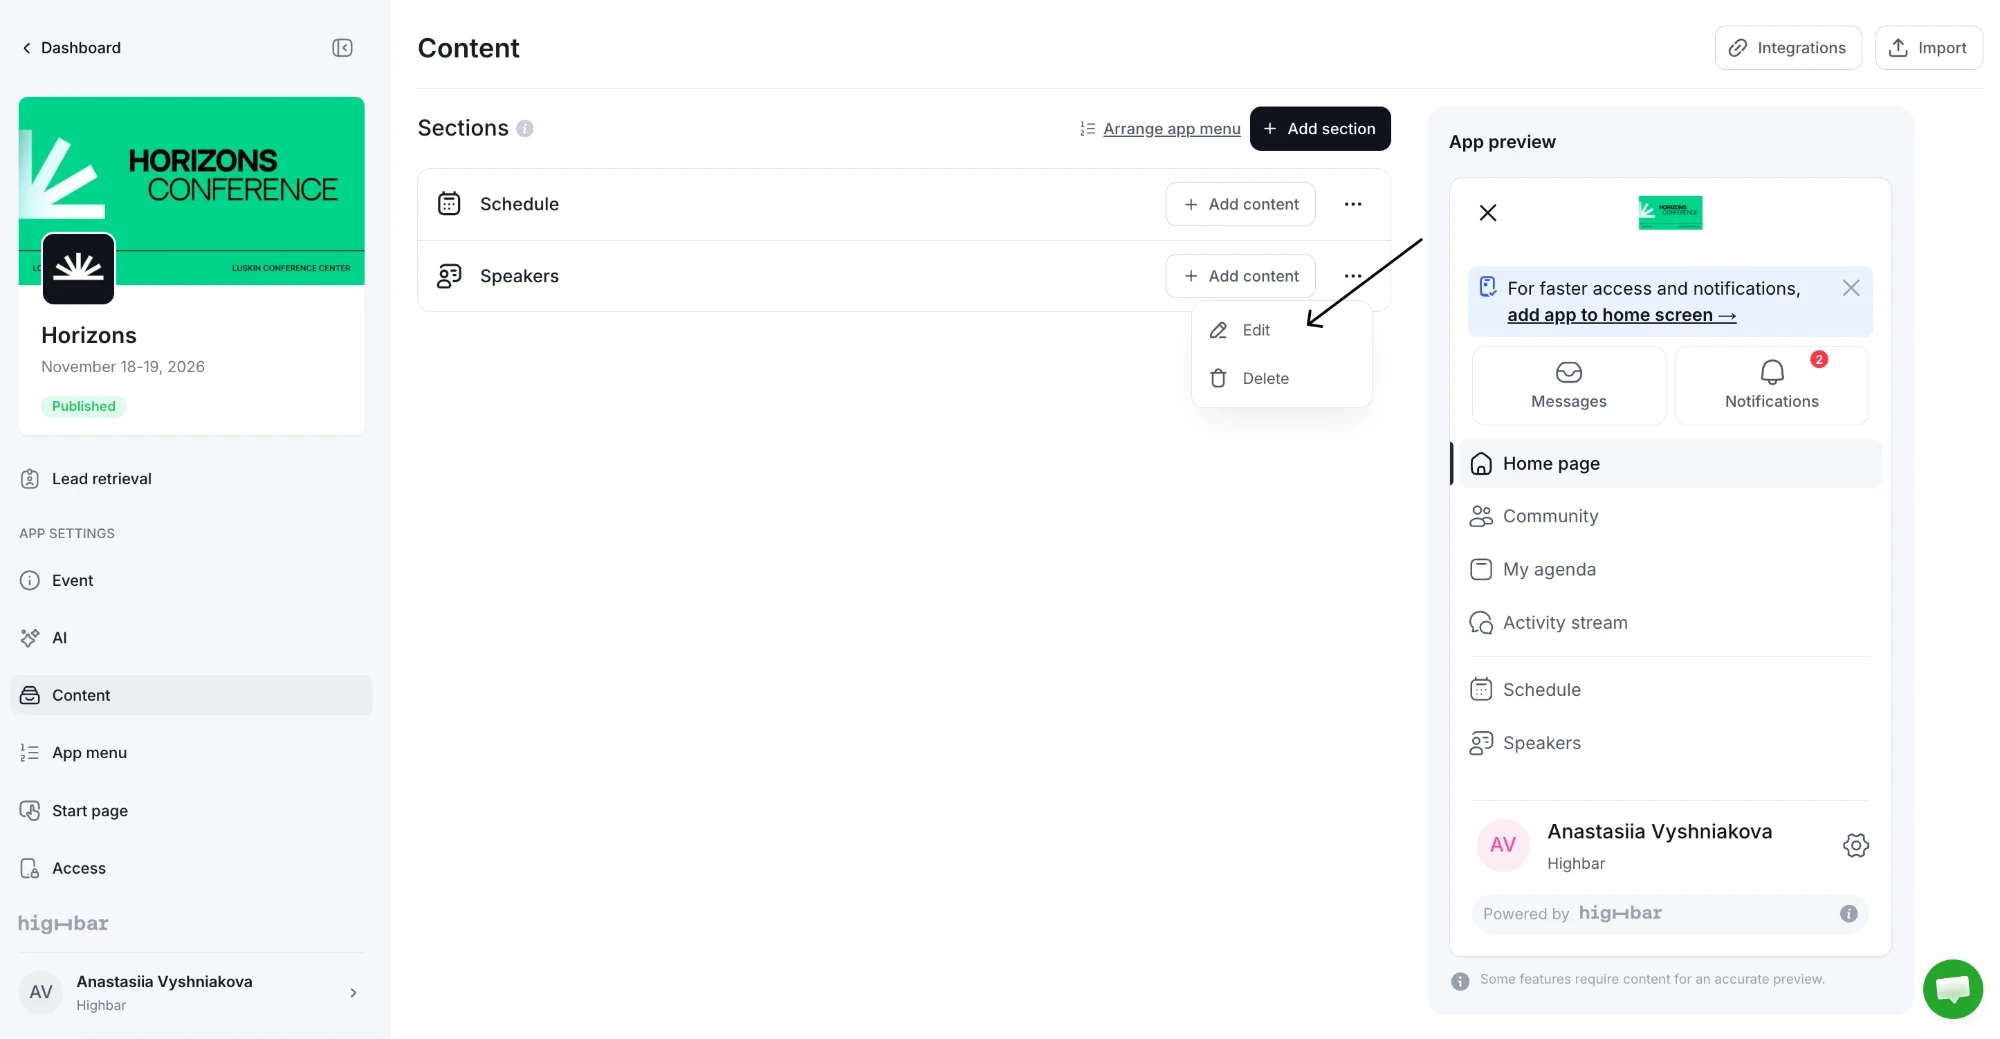
Rename it or change its icon. Open the three-dot menu on the section's row and choose Edit.
-
Reorder it. The sections list follows your app menu. Click Arrange app menu to reorder, rename and group items on the App menu page.
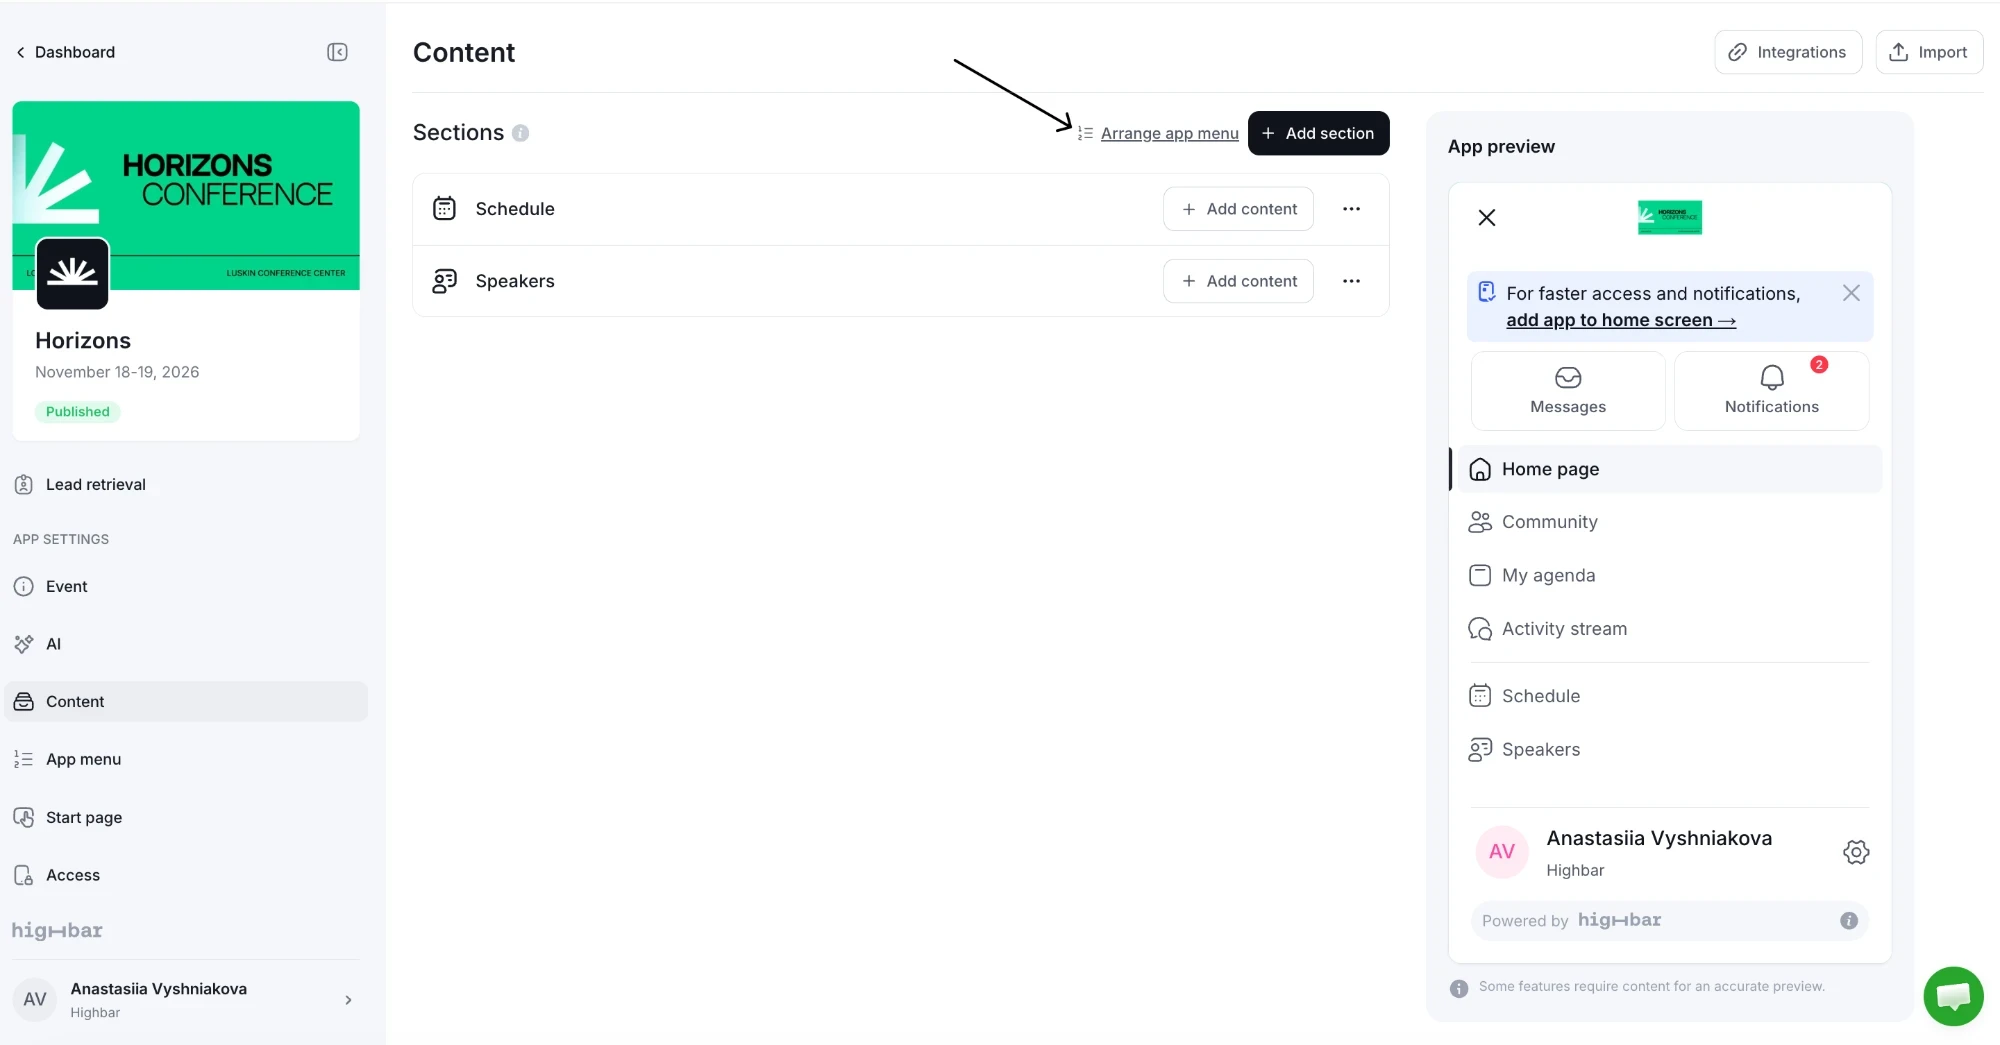
-
Delete it. Open the three-dot menu, choose Delete and confirm.
On a wide screen, click Show app preview to see the app next to your list as you work.
Show, hide or schedule sections and items
Every section has a visibility setting. So does every item in a Schedule, Speakers, Sponsors, Resource library or Photo gallery section.
| Setting | What attendees see |
|---|---|
| Visible (default) | The section or item appears in the app. |
| Hidden | It's left out of the app until you show it again. |
| Scheduled | It stays hidden until the date and time you pick, then appears on its own. |
You change visibility in two places:
-
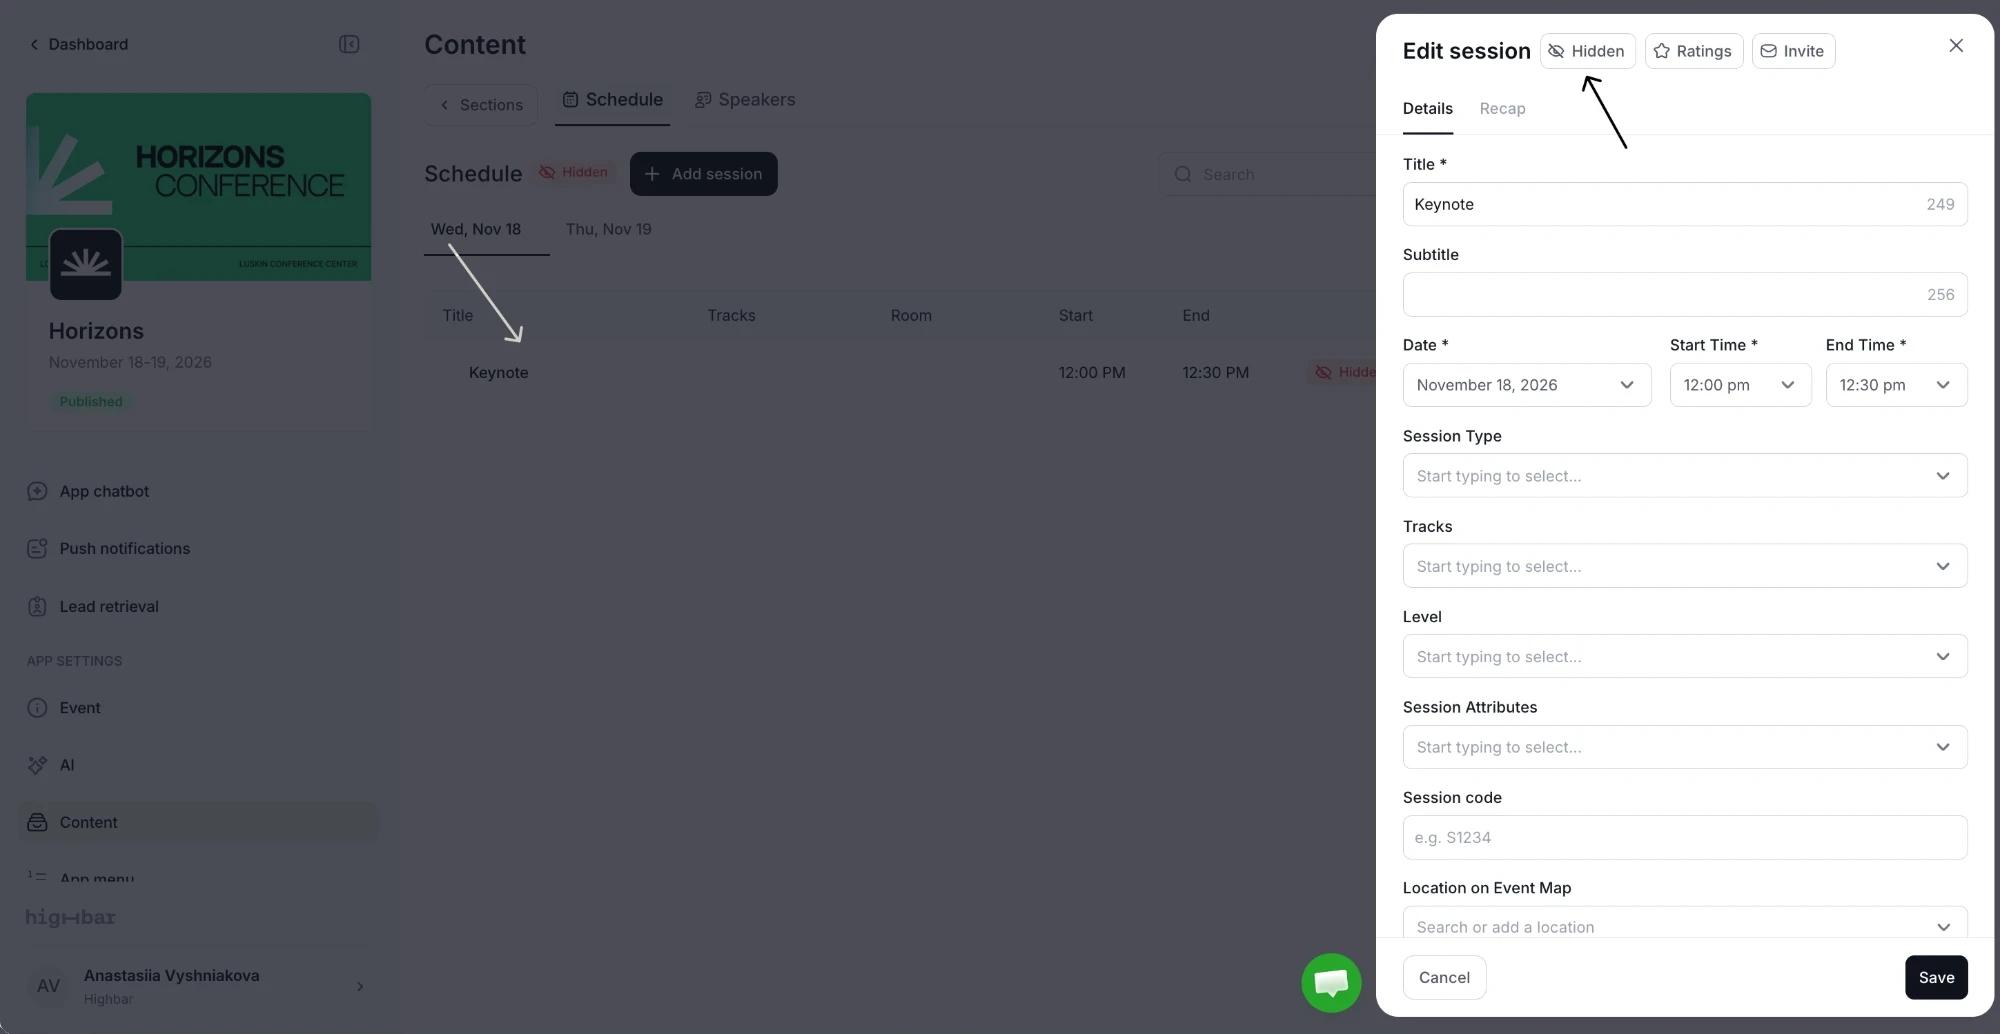
In the edit drawer. Next to the drawer's title is a button that reads Visible, Hidden or Scheduled. Click it to open the visibility panel.
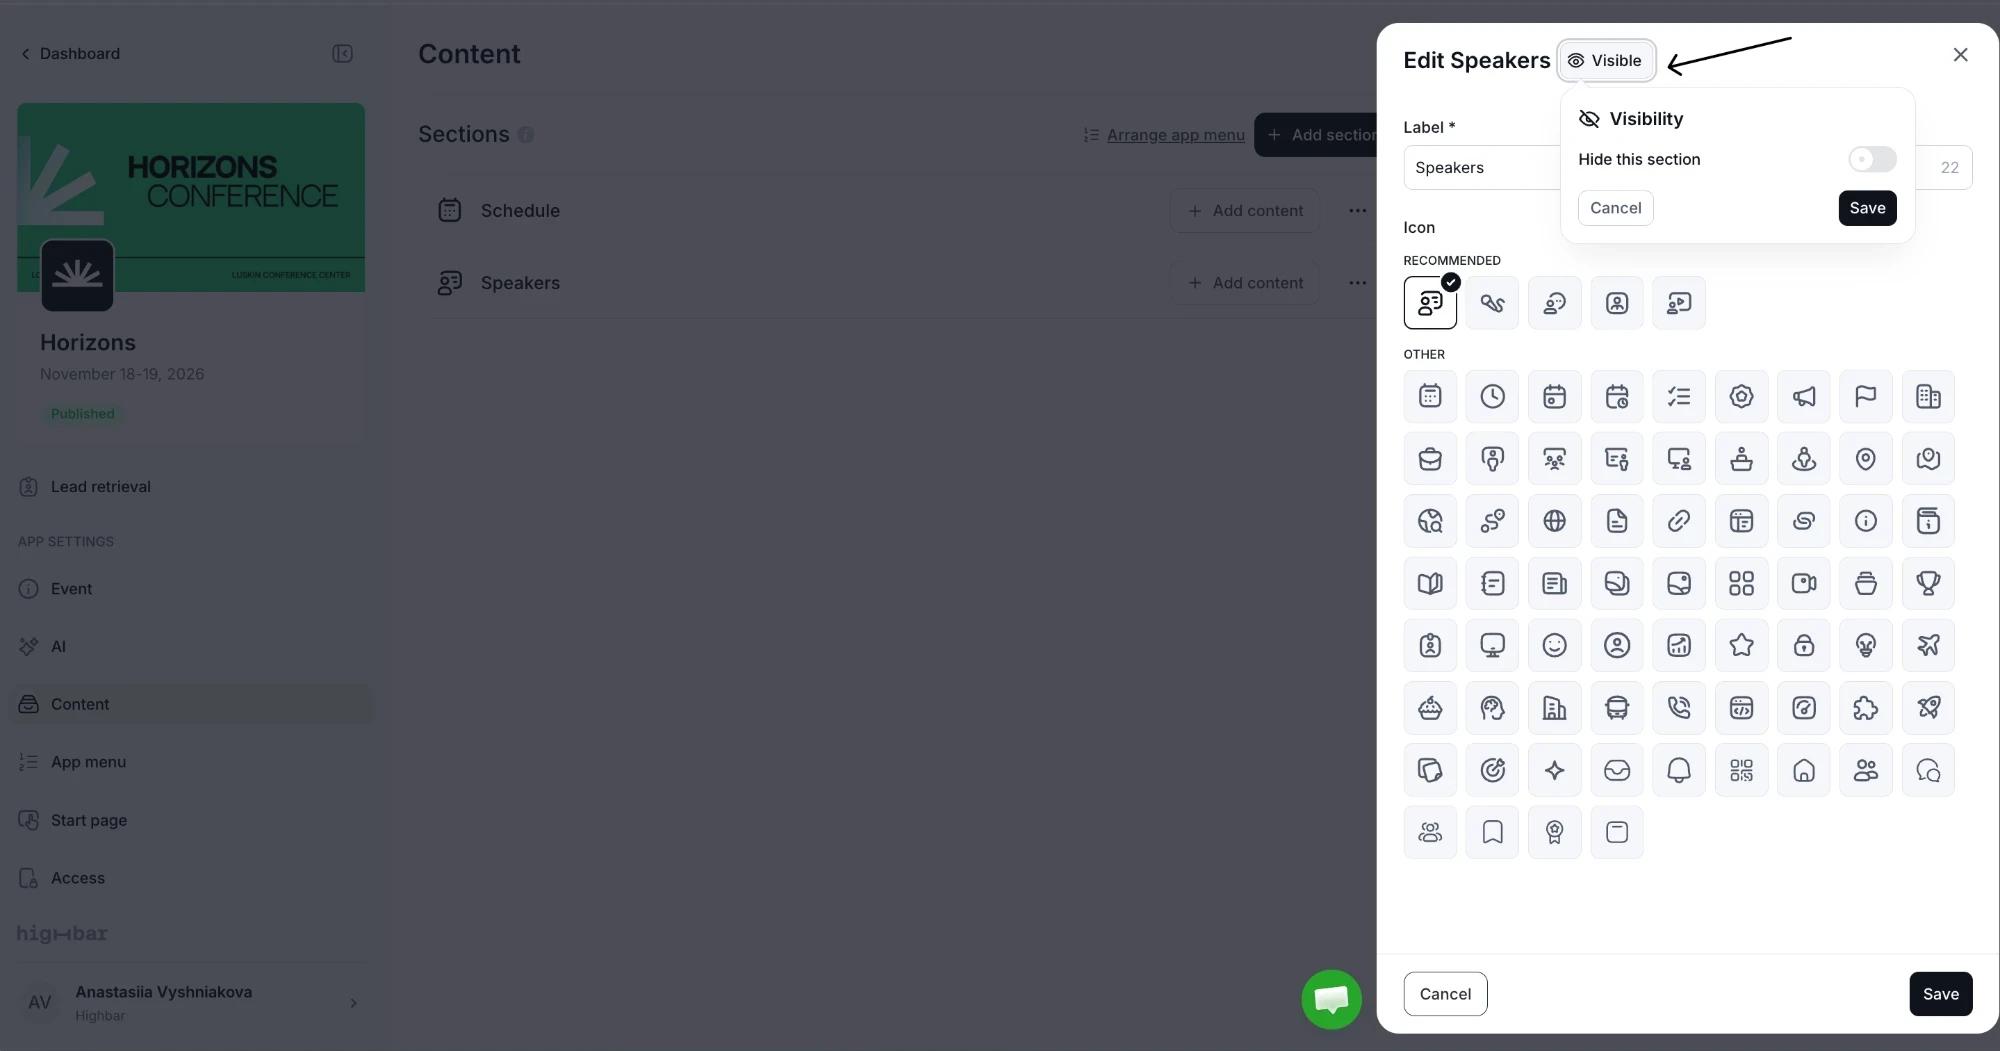
-
In a list. Hidden items show a Hidden pill and scheduled items show their go-live date. Click the pill to show the item now or change the schedule. To hide a visible session, speaker or sponsor quickly, use Hide session, Hide speaker or Hide sponsor in the row's menu.
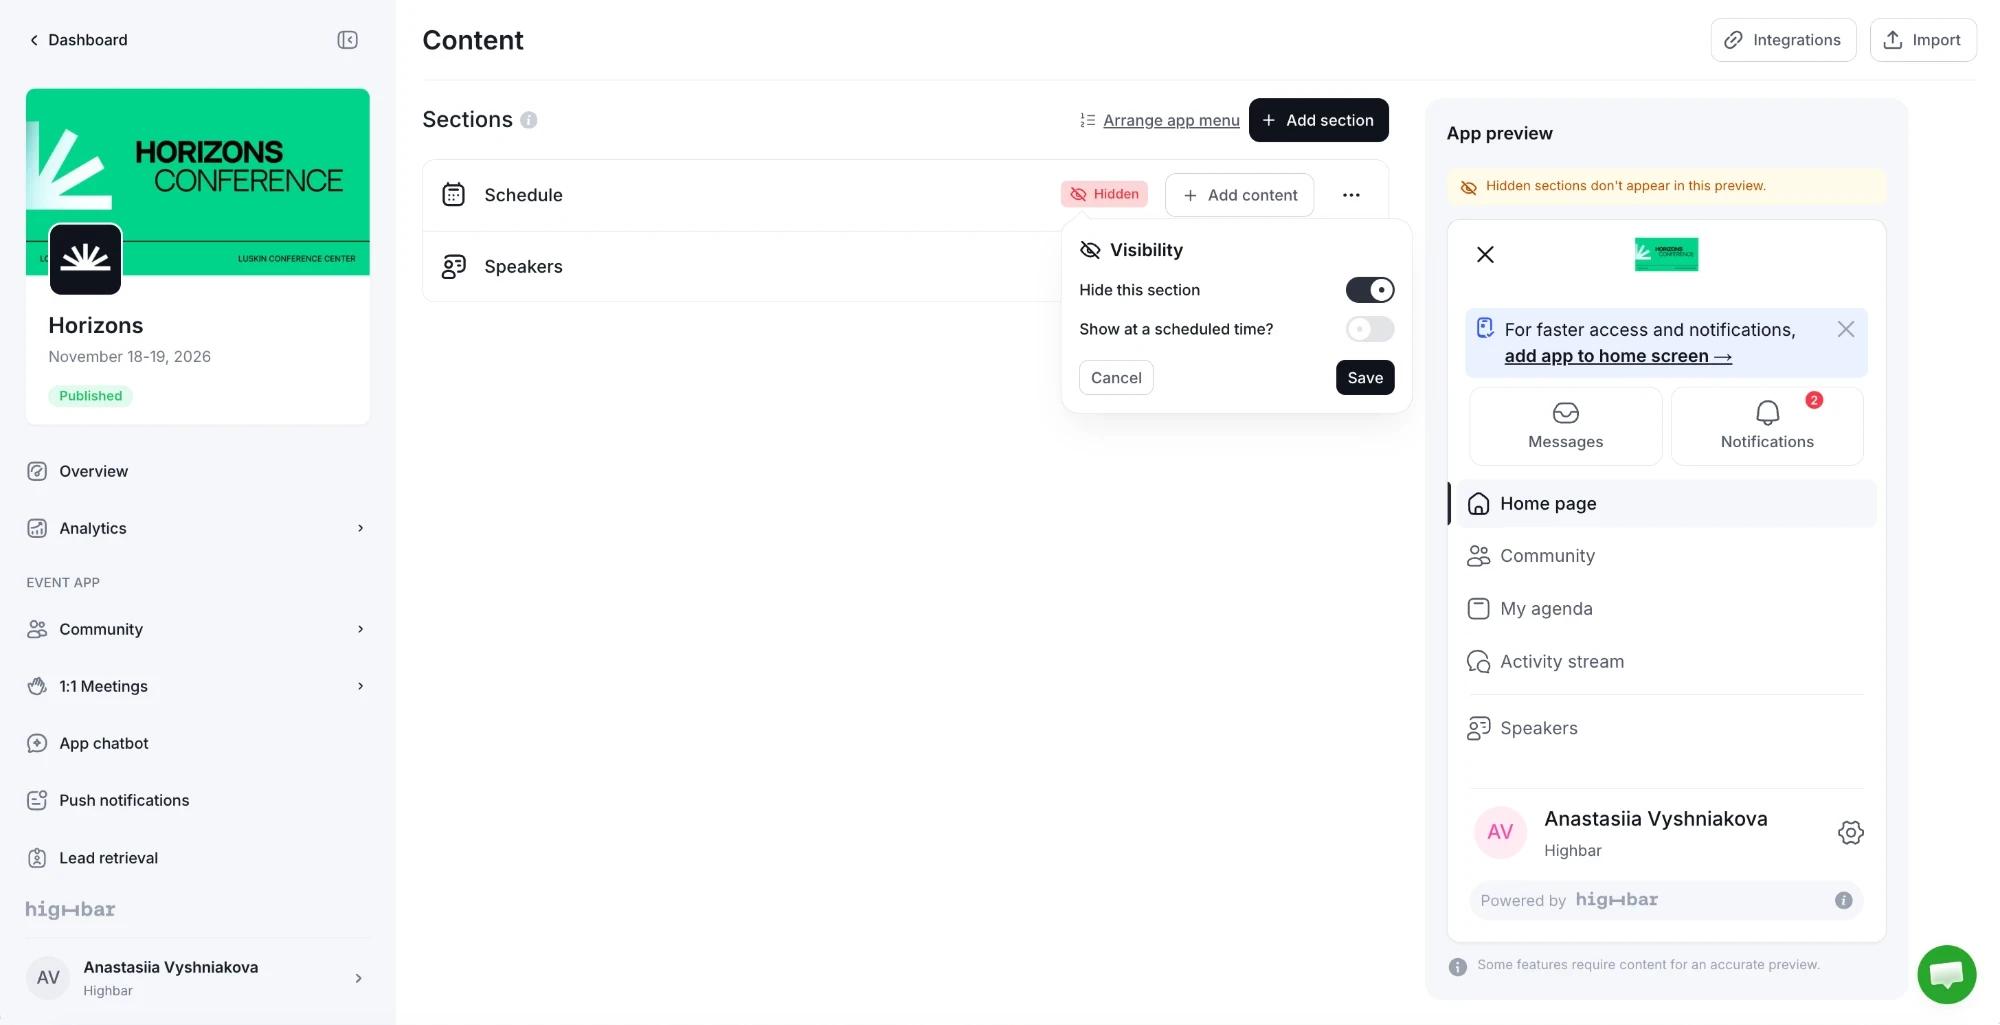
To hide a session from its row, open the section's tab (1), click the row's three-dot menu (2) and choose Hide session (3).
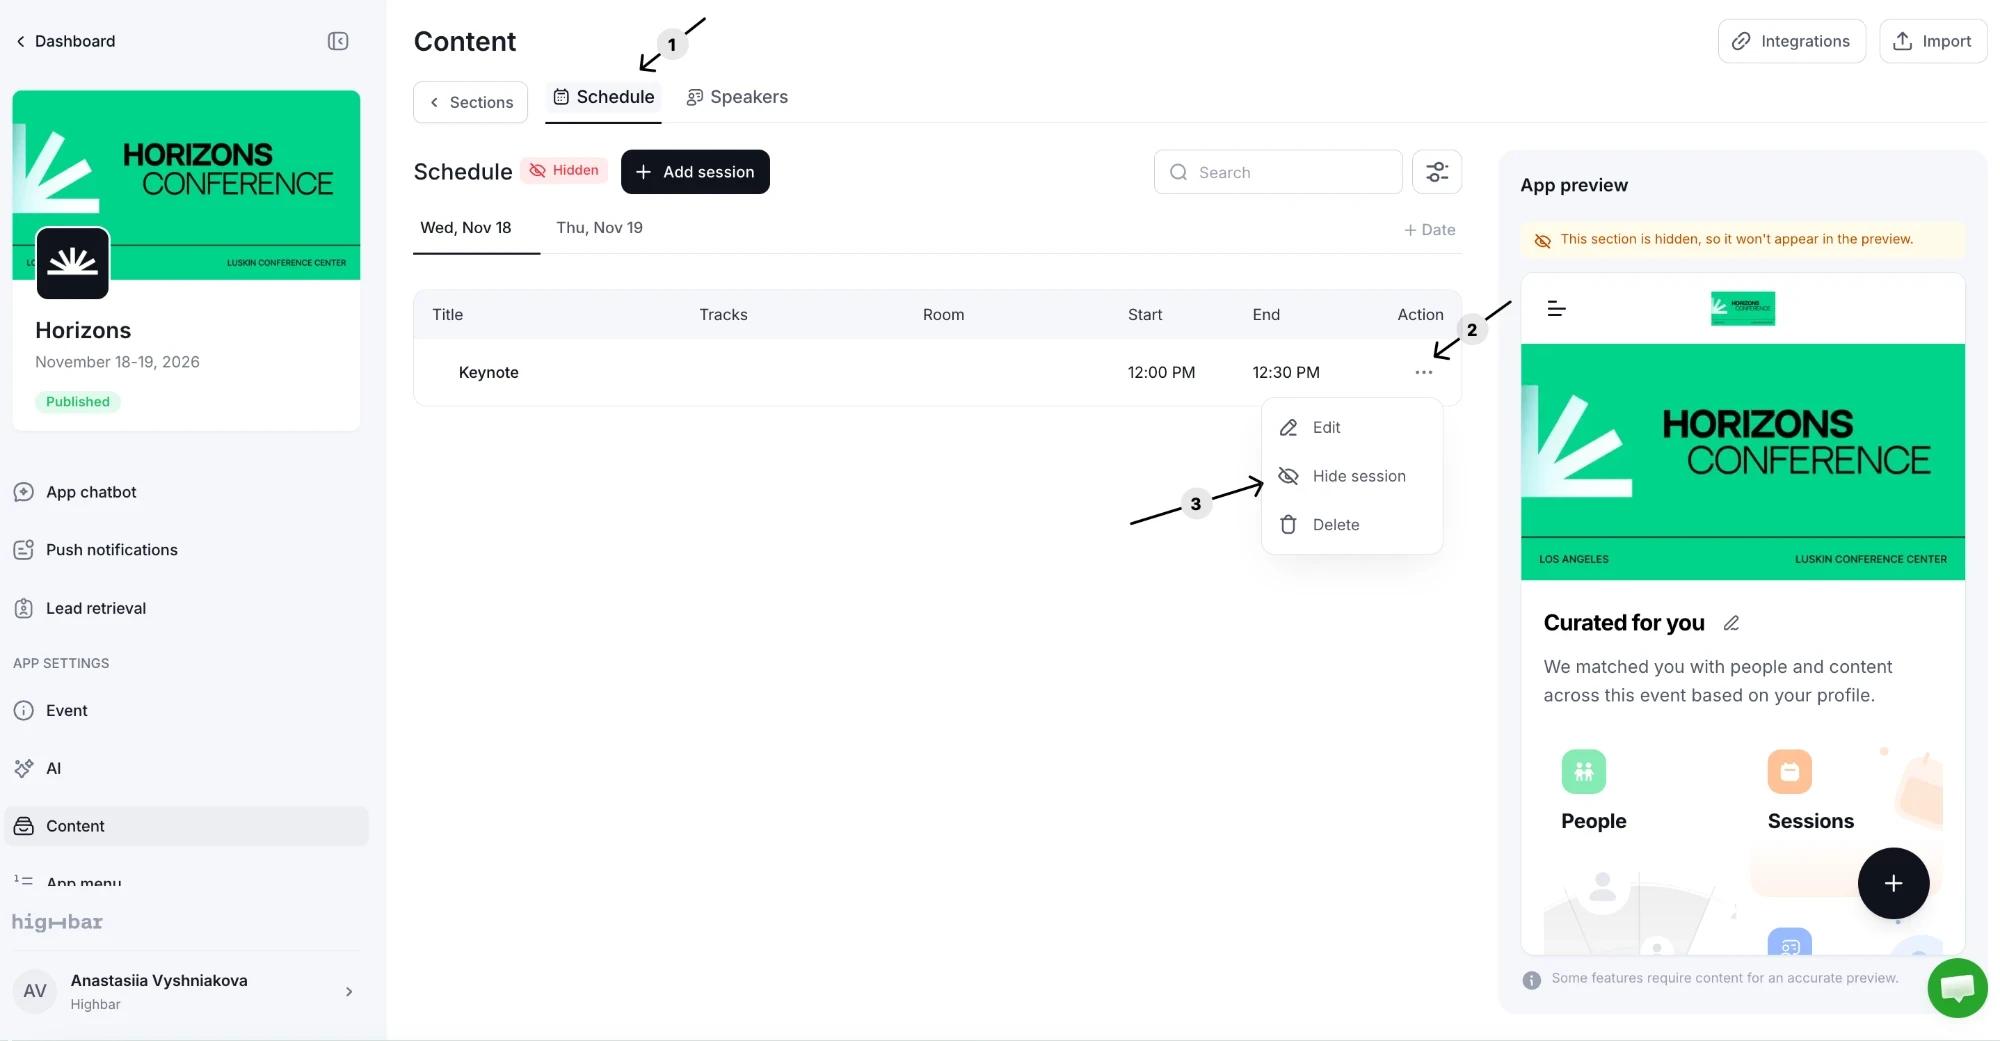
The session then shows a Hidden pill. Click it to open its visibility panel.
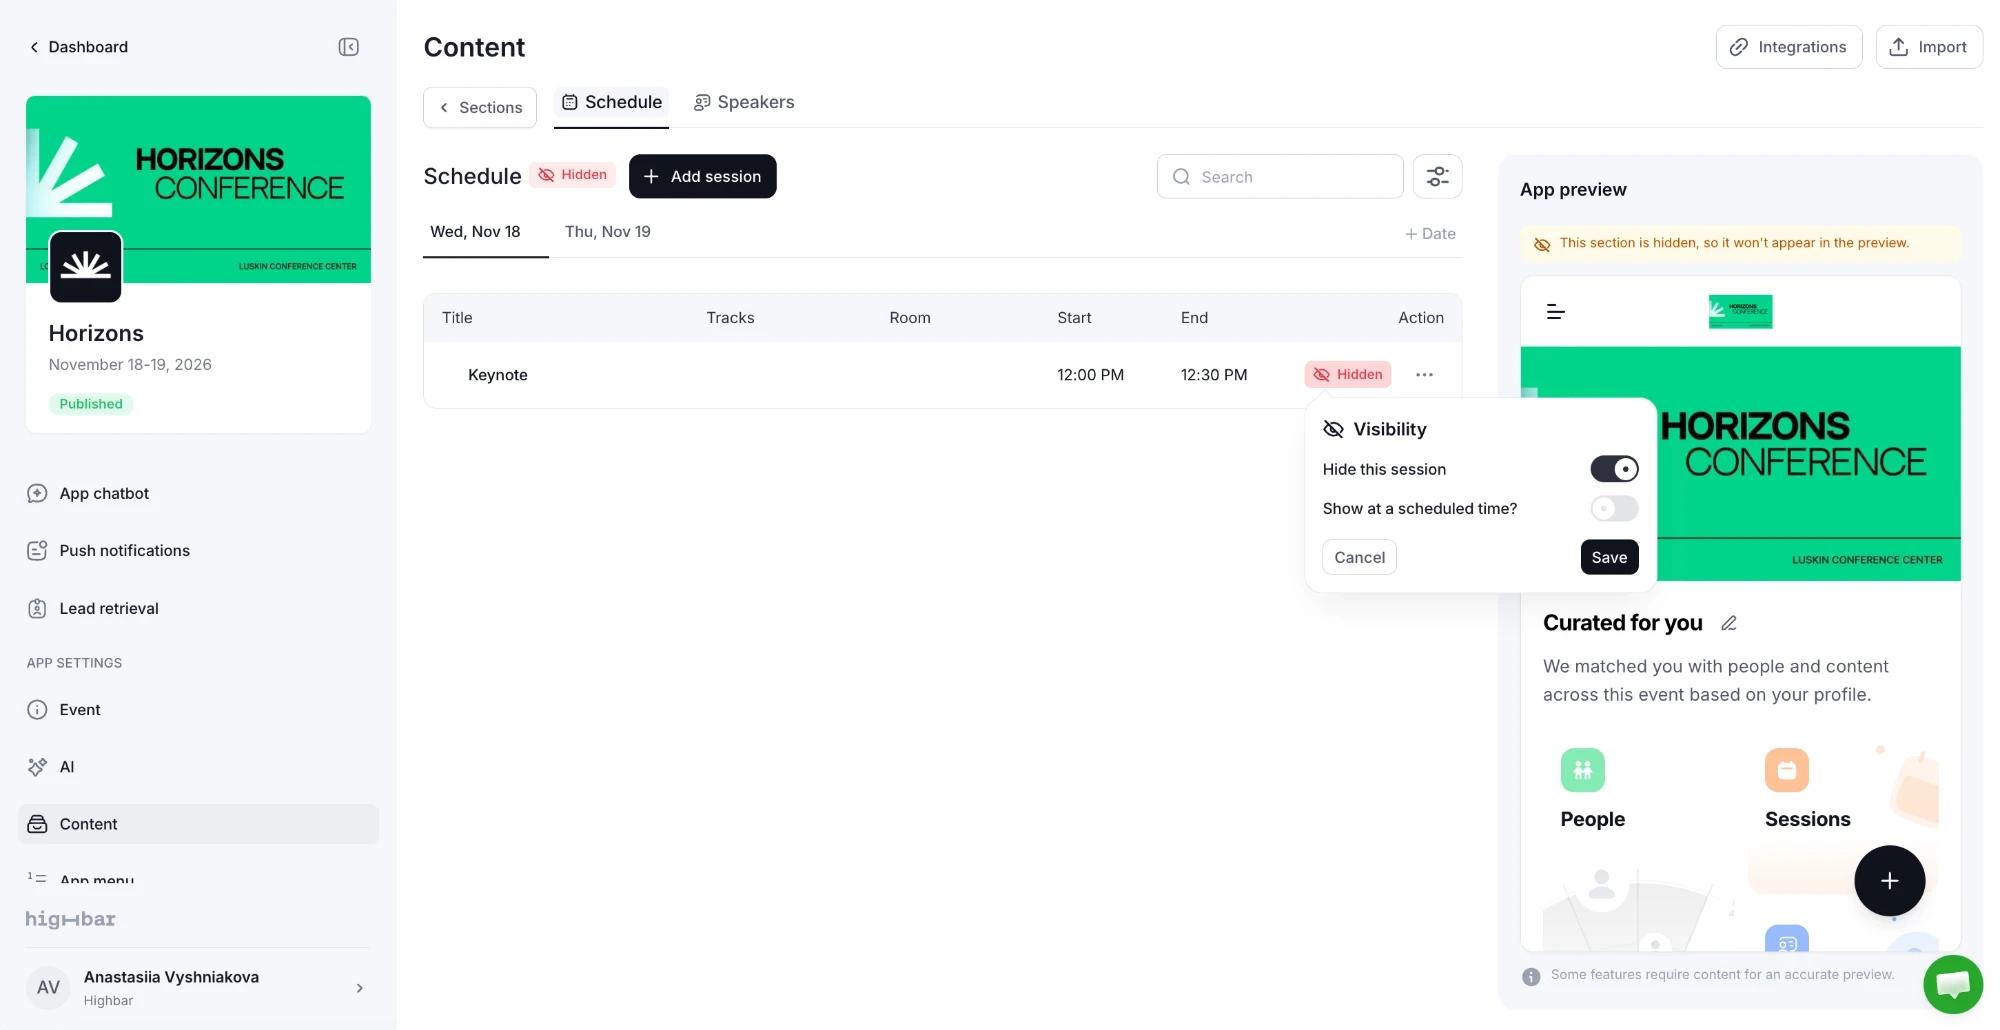
To schedule a section or item:
Open the visibility panel and turn on Hide this section (or session, speaker and so on).
Turn on the Show at a scheduled time? switch.
Pick the Date and Time. The time uses your event's time zone, shown below it. Click the time zone to choose another.
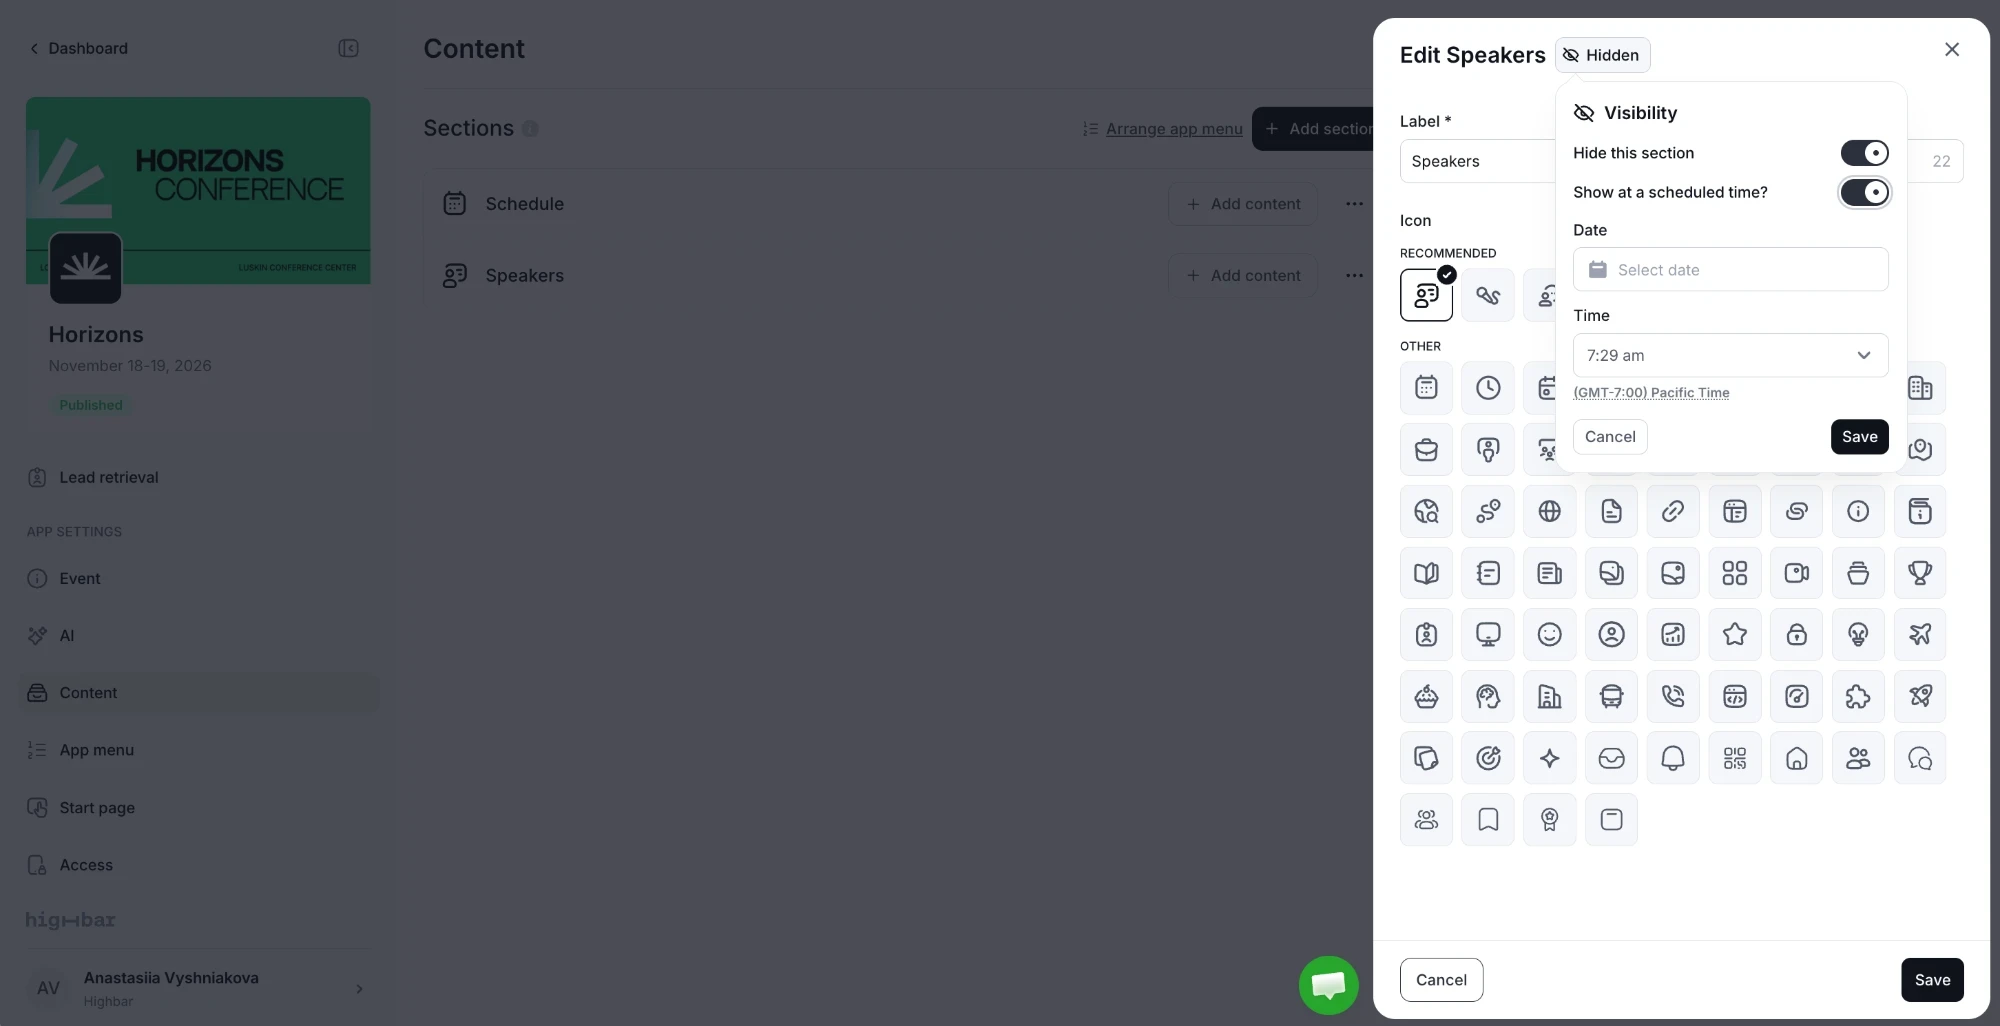
Click Save in the panel. If you're in an edit drawer, click the drawer's Save as well.
Hidden sections don't appear in the app preview either. The preview says when one is hidden or scheduled.
Keep an item away from the AI Concierge
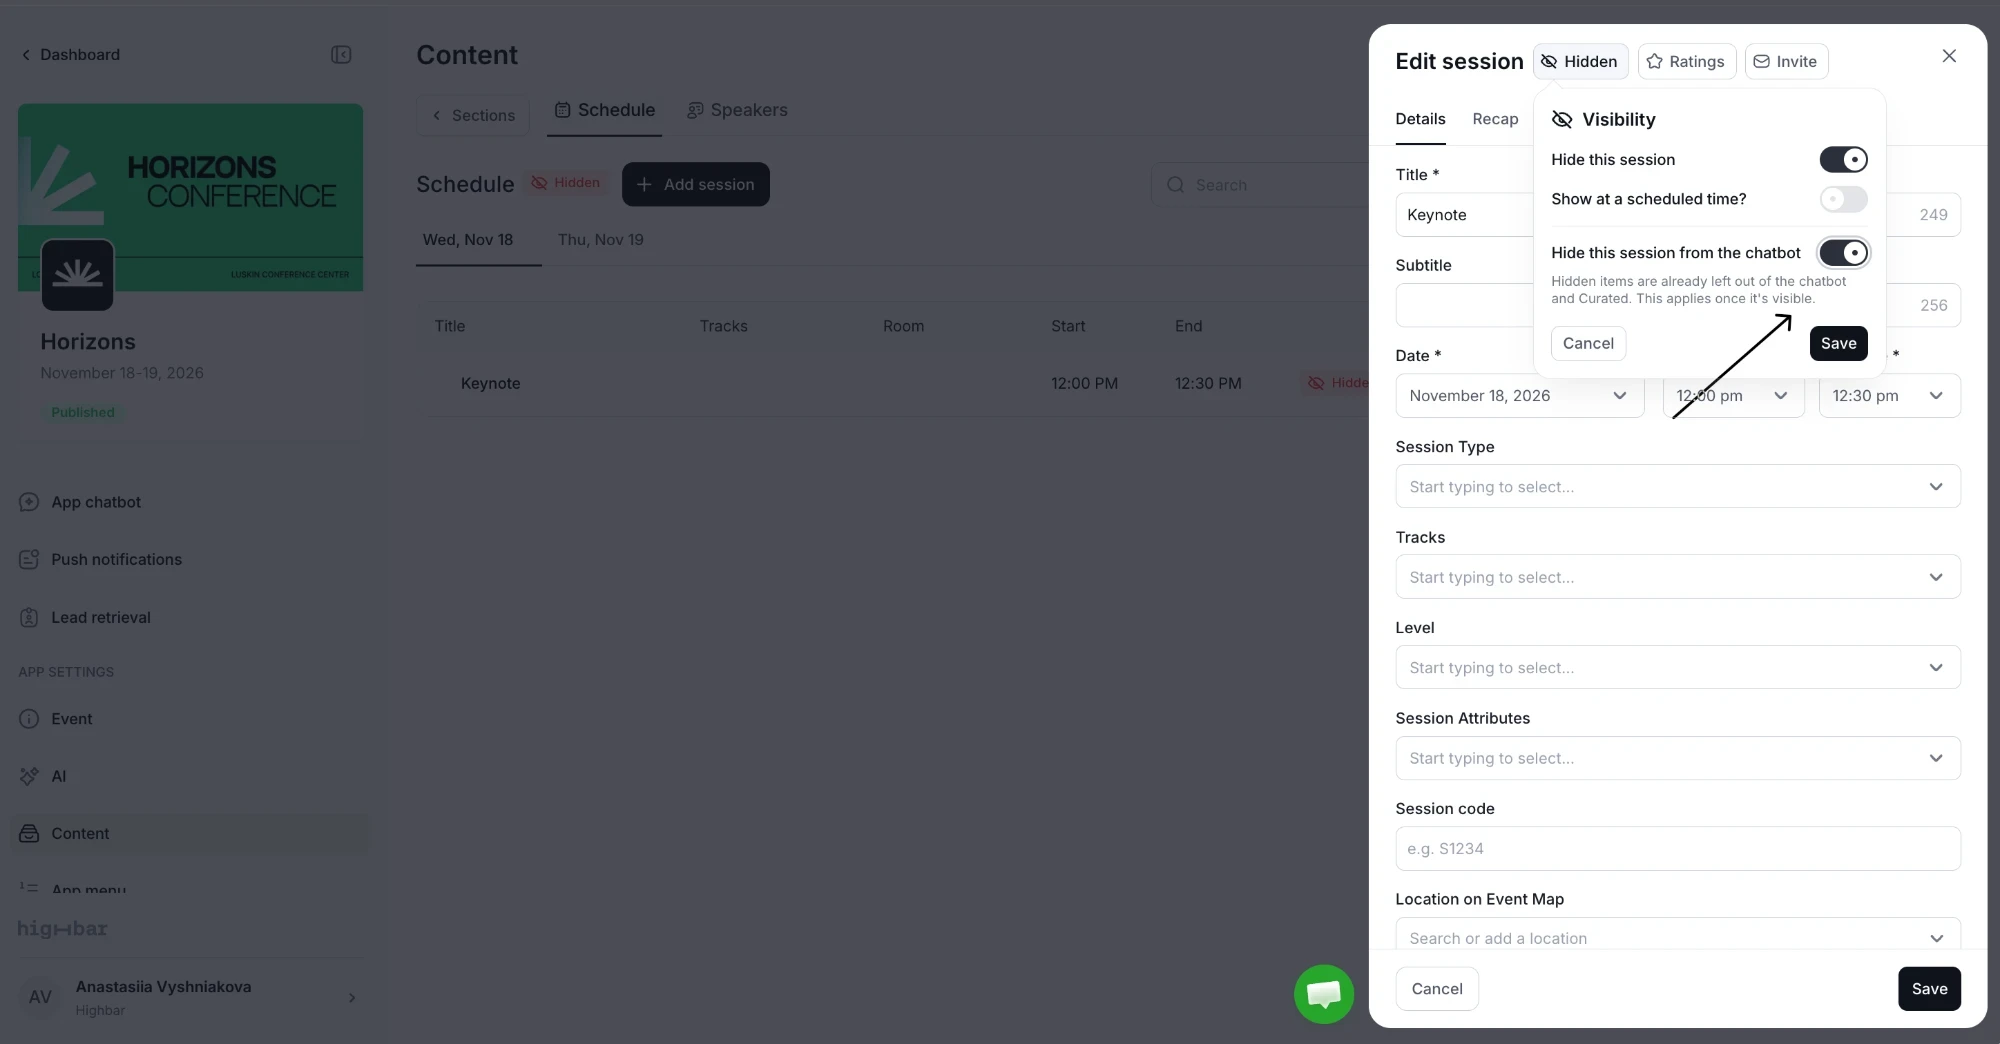
Sessions, speakers and sponsors have one more switch in the visibility panel of their edit drawer (it isn't in the panel you open from a list's Hidden pill): Hide this session from the chatbot (or speaker, or sponsor). Attendees still see the item, but the AI Concierge and Curated recommendations don't use it. Hidden items are already left out, so this only matters for visible ones.
To find it, click the item in its list to open the edit drawer, then click the visibility button next to the drawer's title.
Bring content in faster
Two buttons sit at the top of every Content page:
- Import brings in sessions, speakers, sponsors and FAQs from a CSV or Excel file. See Importing content.
- Integrations connects an event platform, such as Sessionize, Swoogo or Stova, to import sessions, speakers and more from it. It's the same panel you'll find on the Access page. See Integrations.
What you need to launch
The Content step is complete once at least one Schedule, Speakers or Sponsors section has at least one item. Hidden items count. Map, resource library, photo gallery and web view sections don't complete the step on their own. See Launch.