Sponsors and exhibitors
Build sponsor and exhibitor profiles for your event app, organize them by category, and let company reps update their own profiles.
A Sponsors section lists the companies supporting or exhibiting at your event. Each company gets a profile page in the app with its logo, description, links, files, booth and the people representing it.
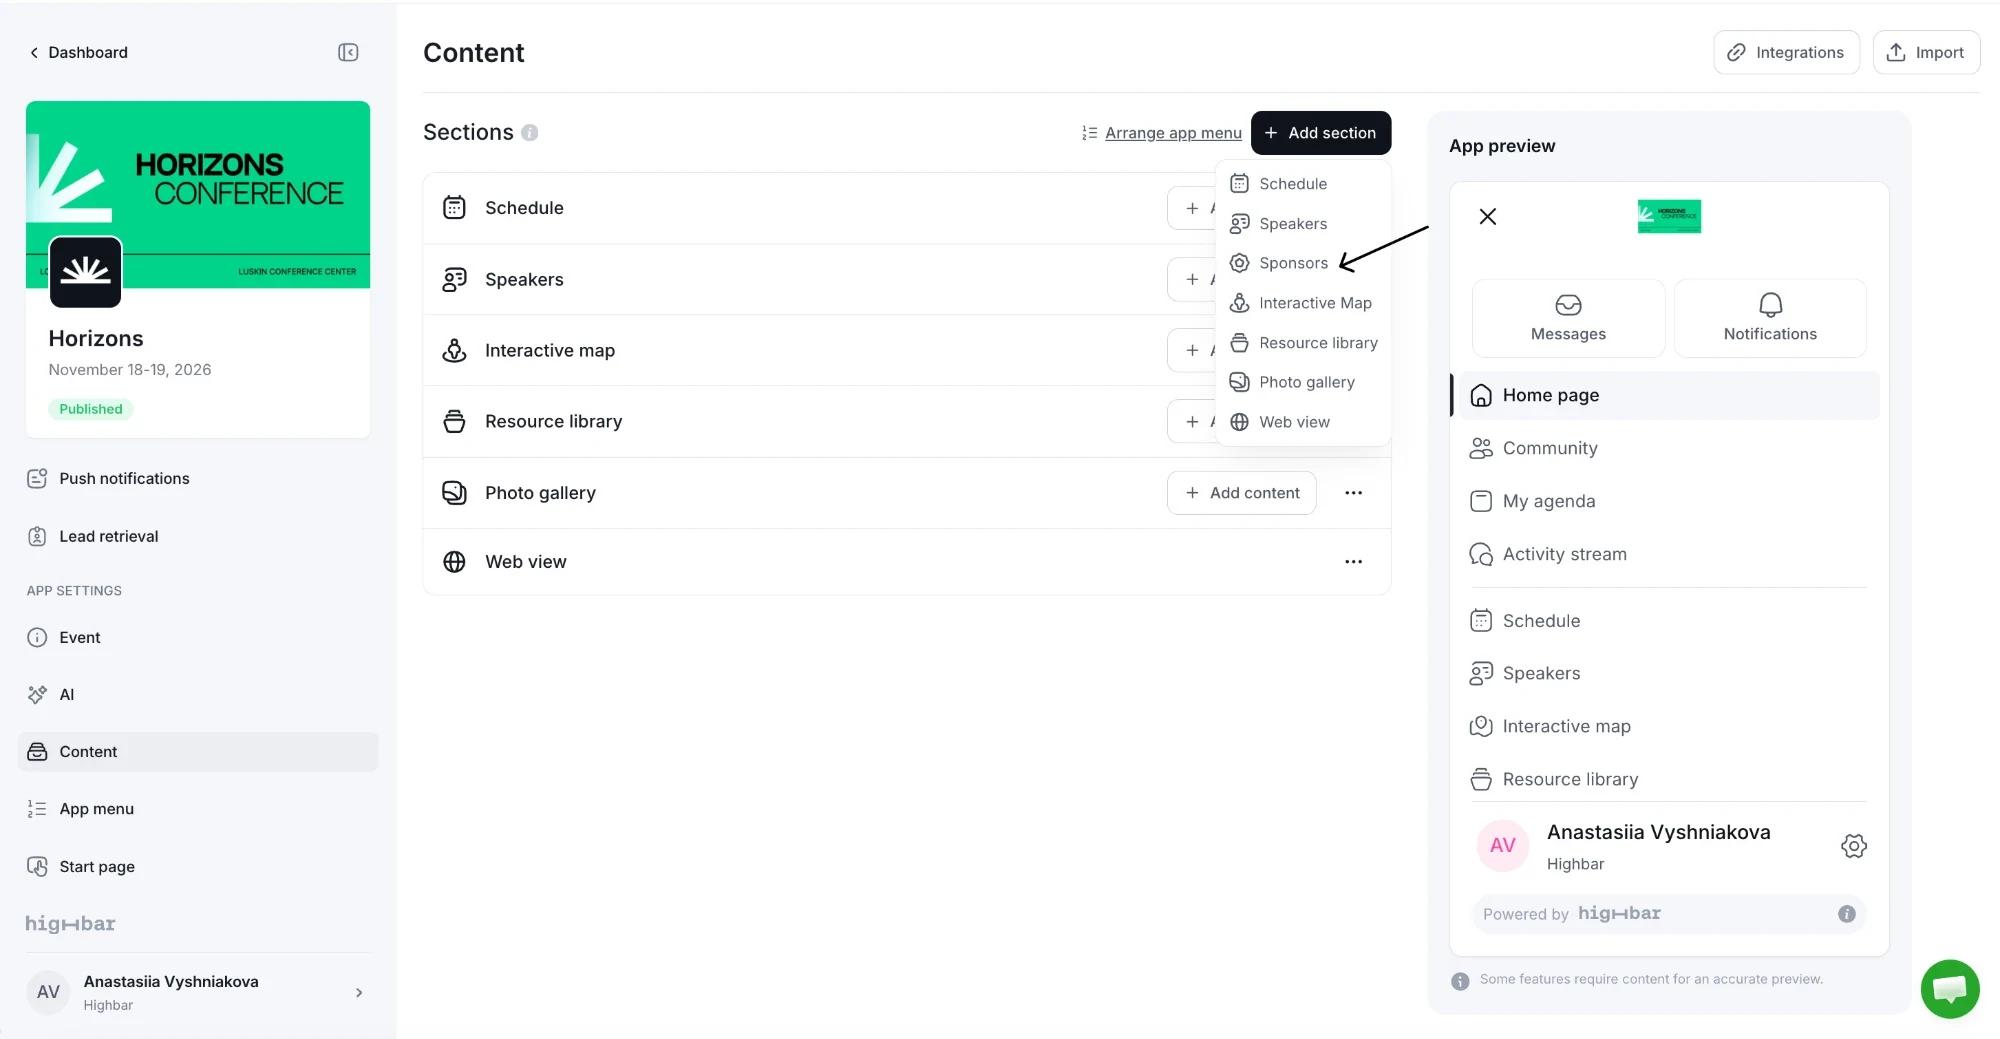
To add the section, open Content, click Add section and choose Sponsors.
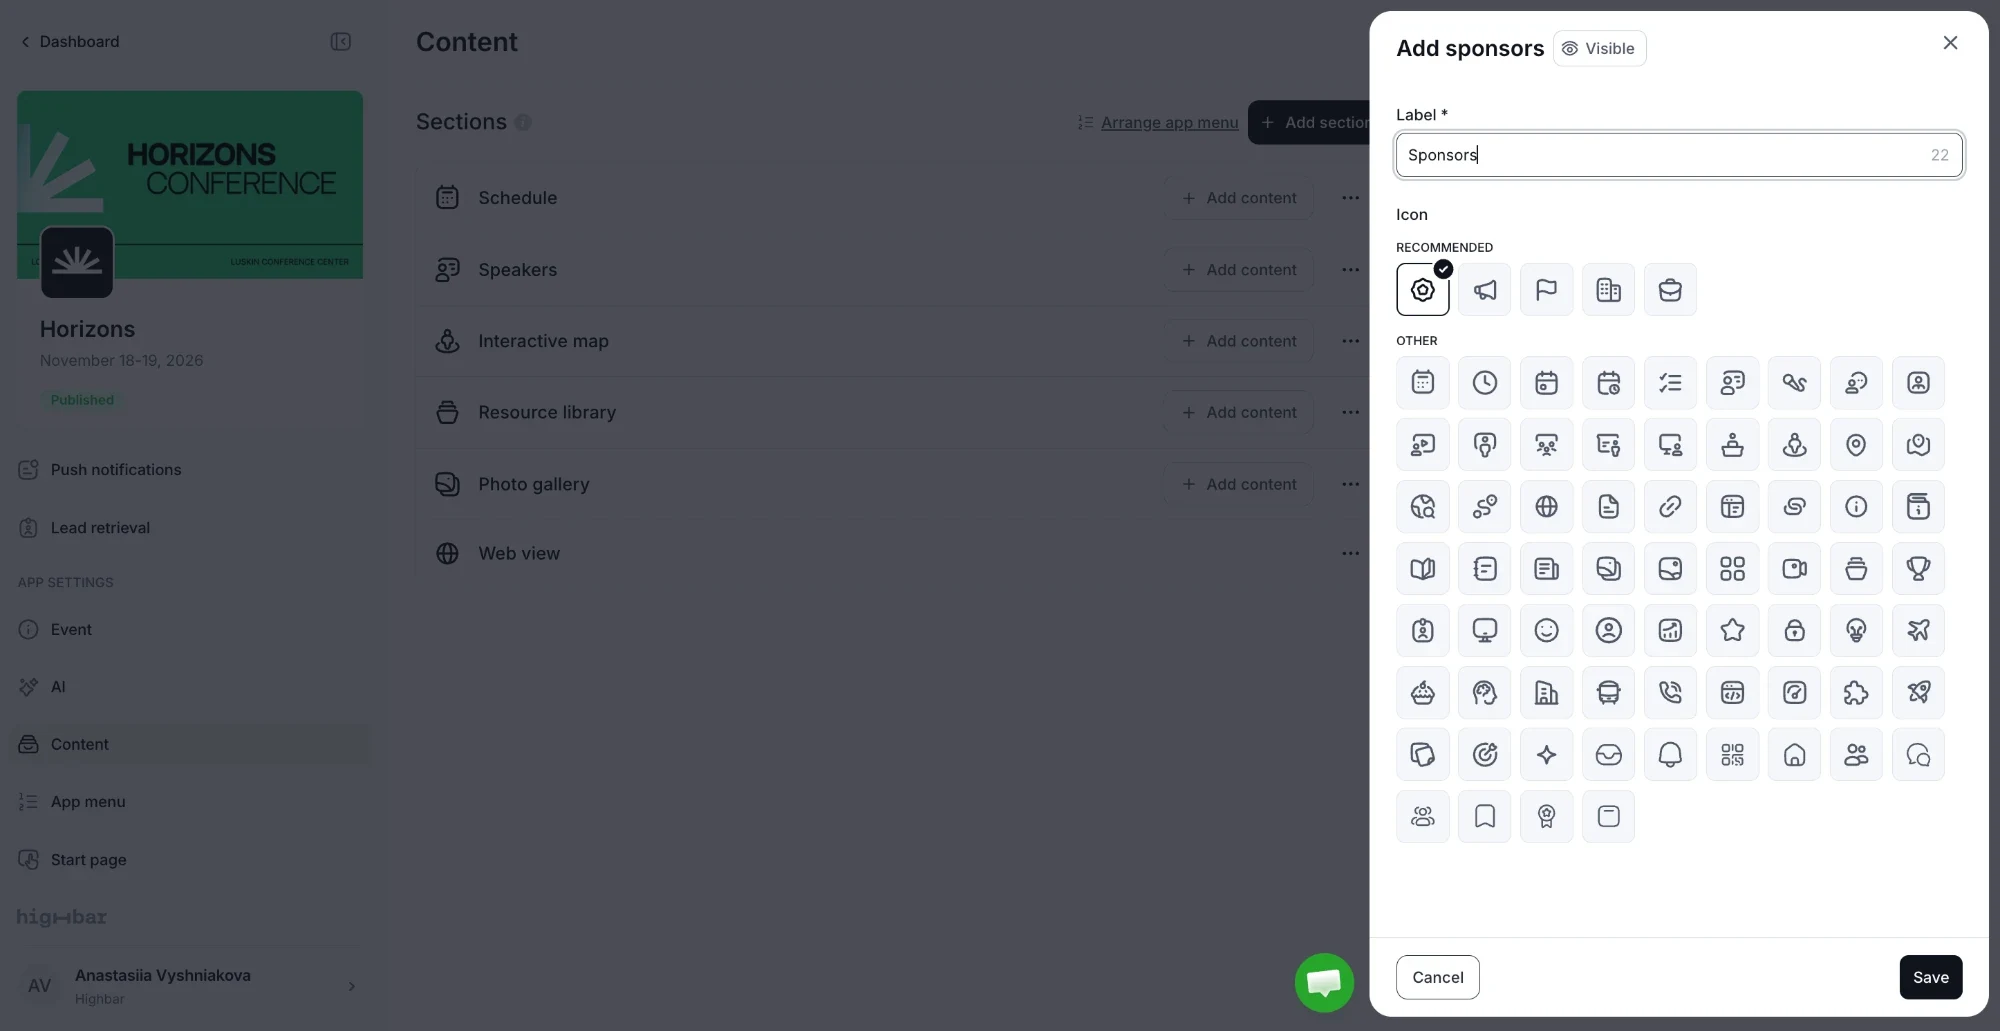
Give the section a Label and pick an Icon, then click Save. See Sections and visibility to rename, reorder, hide or schedule sections.
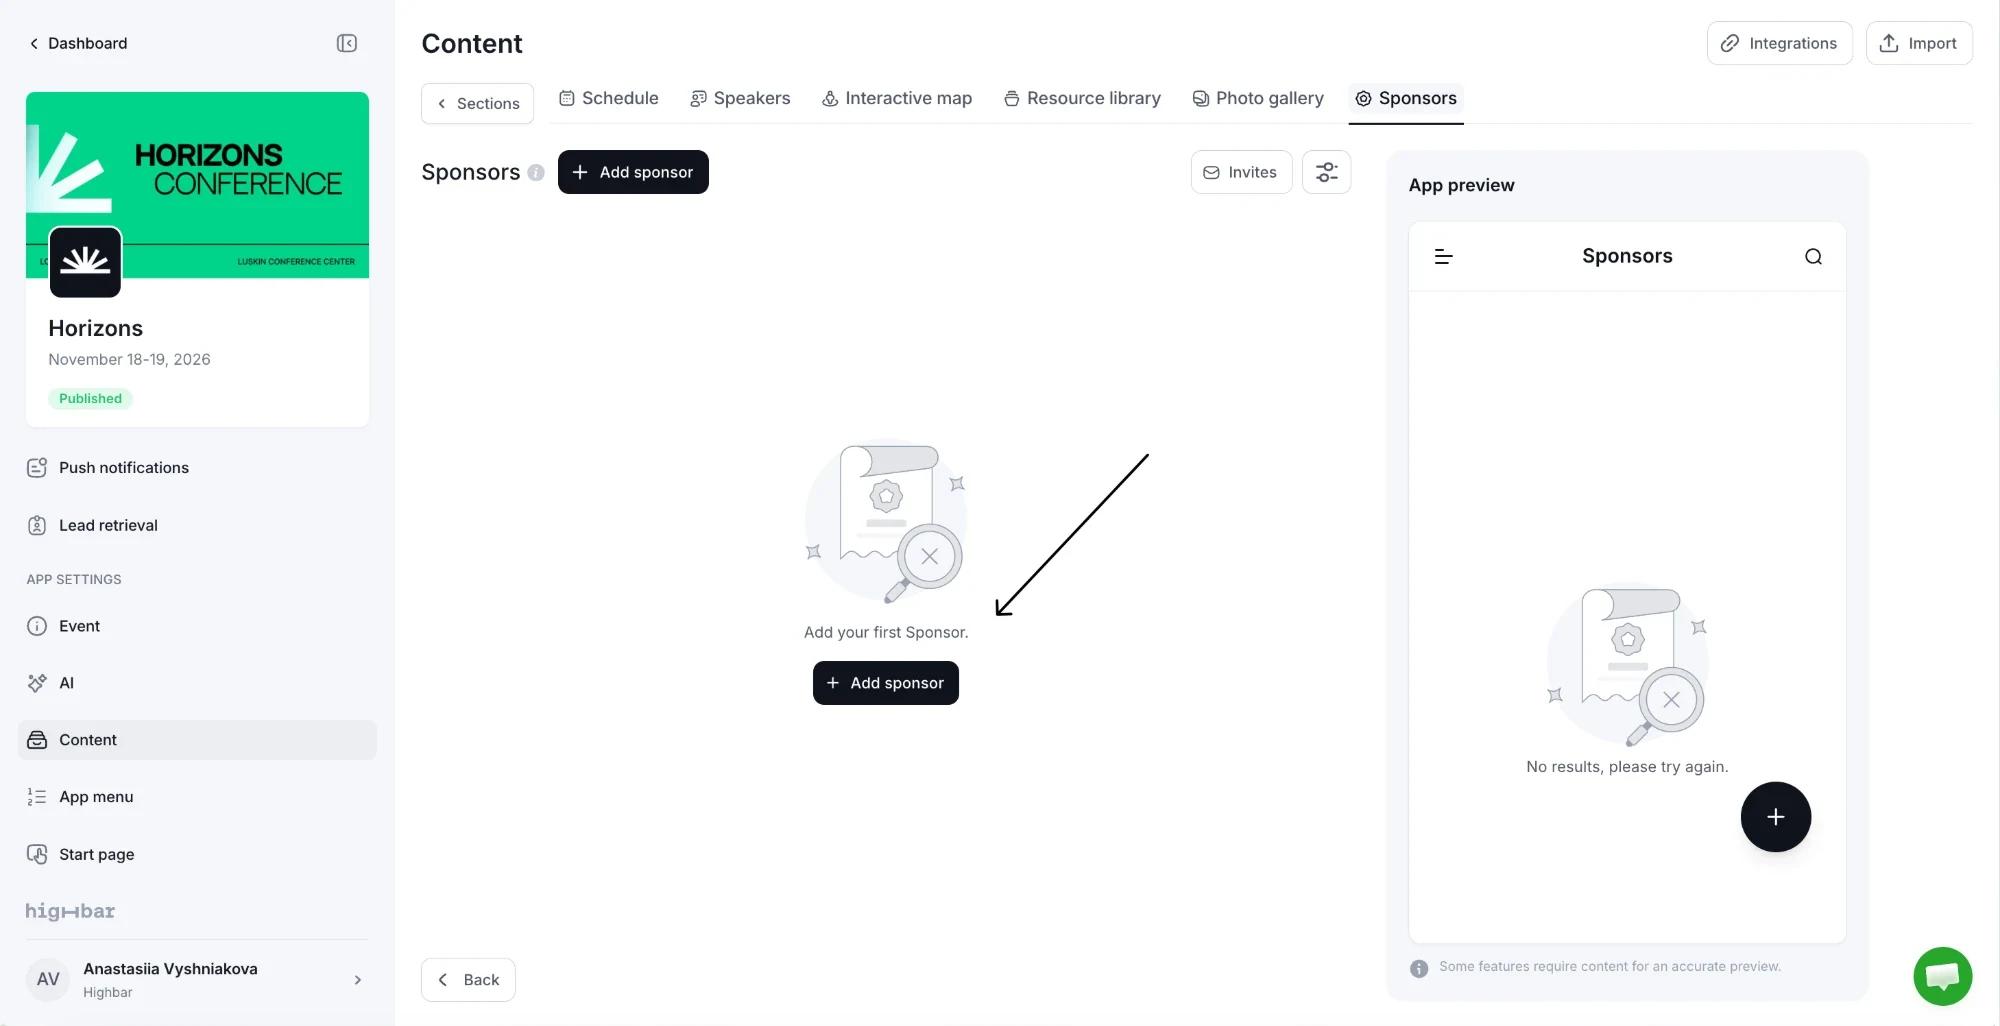
After that, to fill it in, open Content and click Add content on the Sponsors section's row (or click the section's name). Once you're inside a section, each section has its own tab at the top, and Sections takes you back to the list.
There's no separate exhibitor section type. For an exhibitor list, add a Sponsors section and give it a label such as "Exhibitors" (see Sections and visibility), then fill in each company's Booth number. You can have a sponsors section and an exhibitors section side by side.
Add a sponsor
Click Add sponsor.
Enter the Company. It's the only required field. As you type, matching companies from Brandfetch appear below the field.
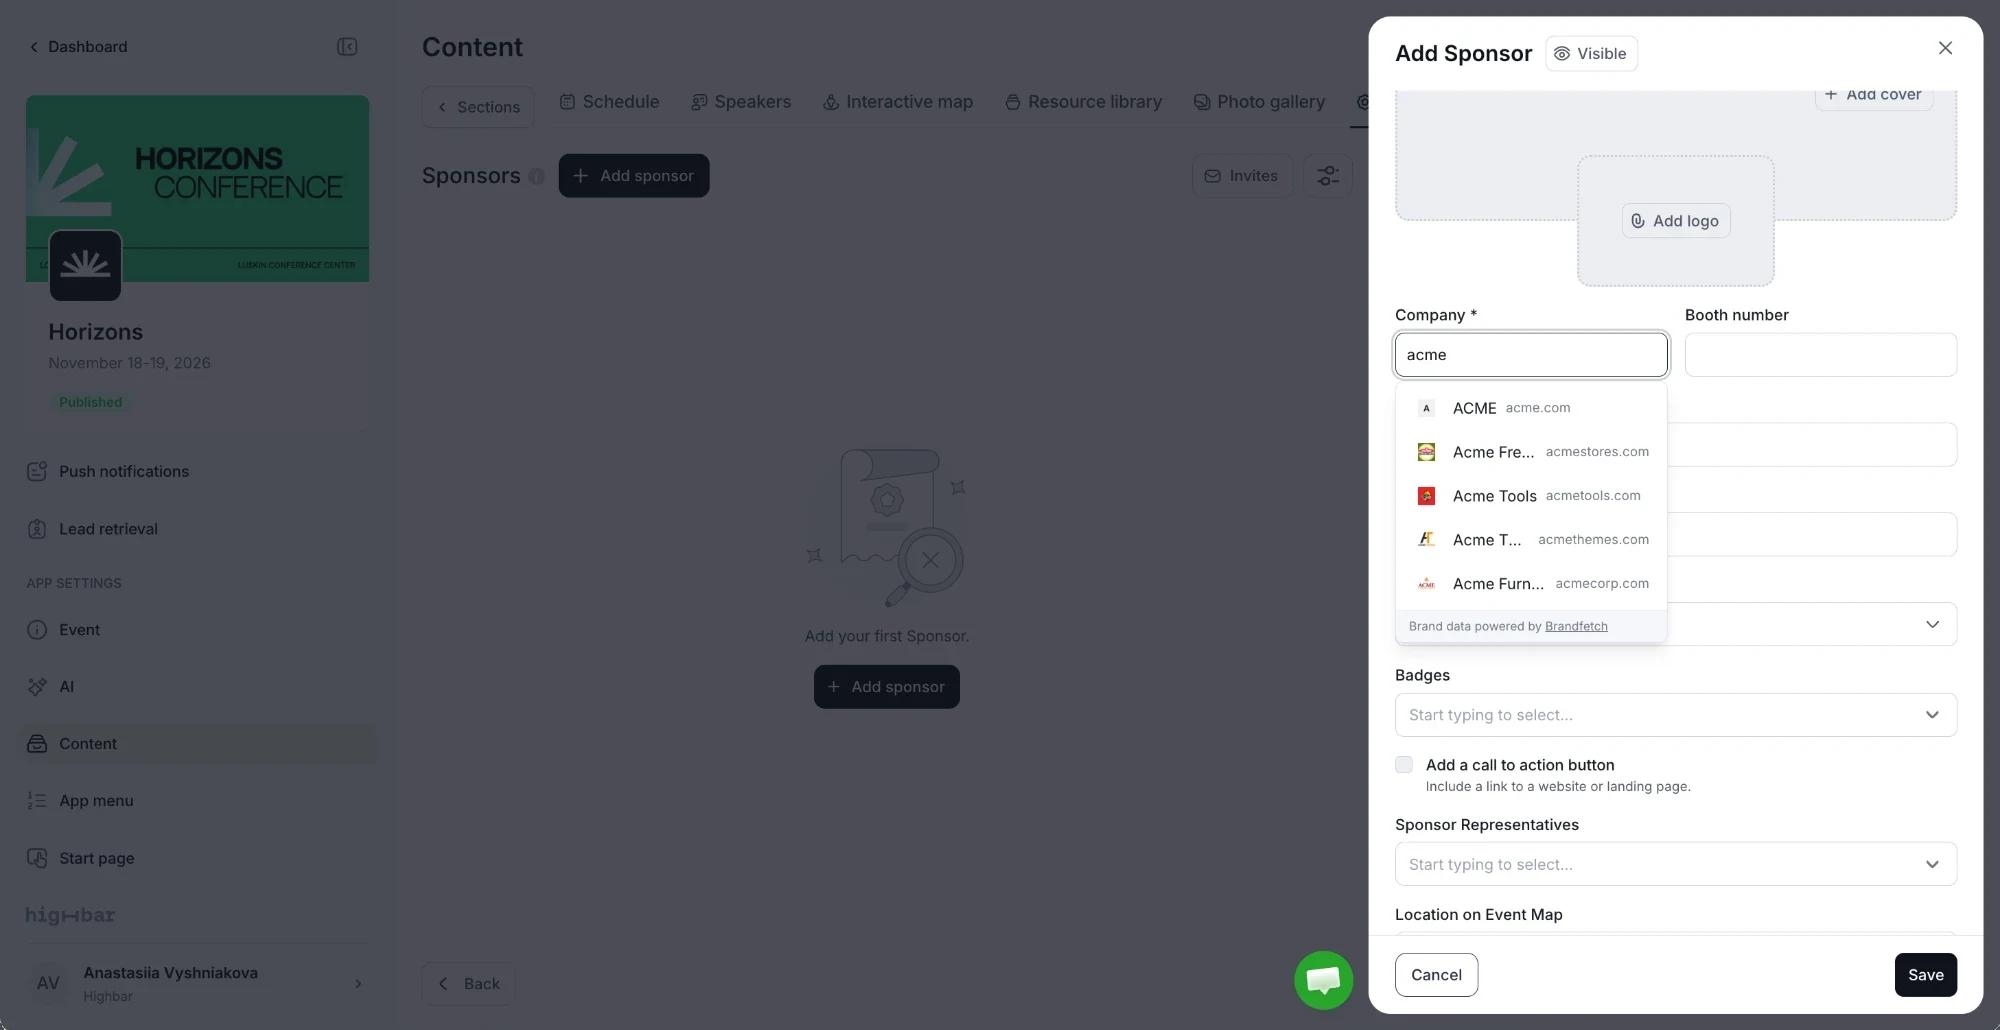
Pick one to fill in the company's official name, plus its logo, cover image, description, website and social links where Brandfetch has them. Fields you've already filled in keep what you entered. To skip the suggestions, just keep typing.
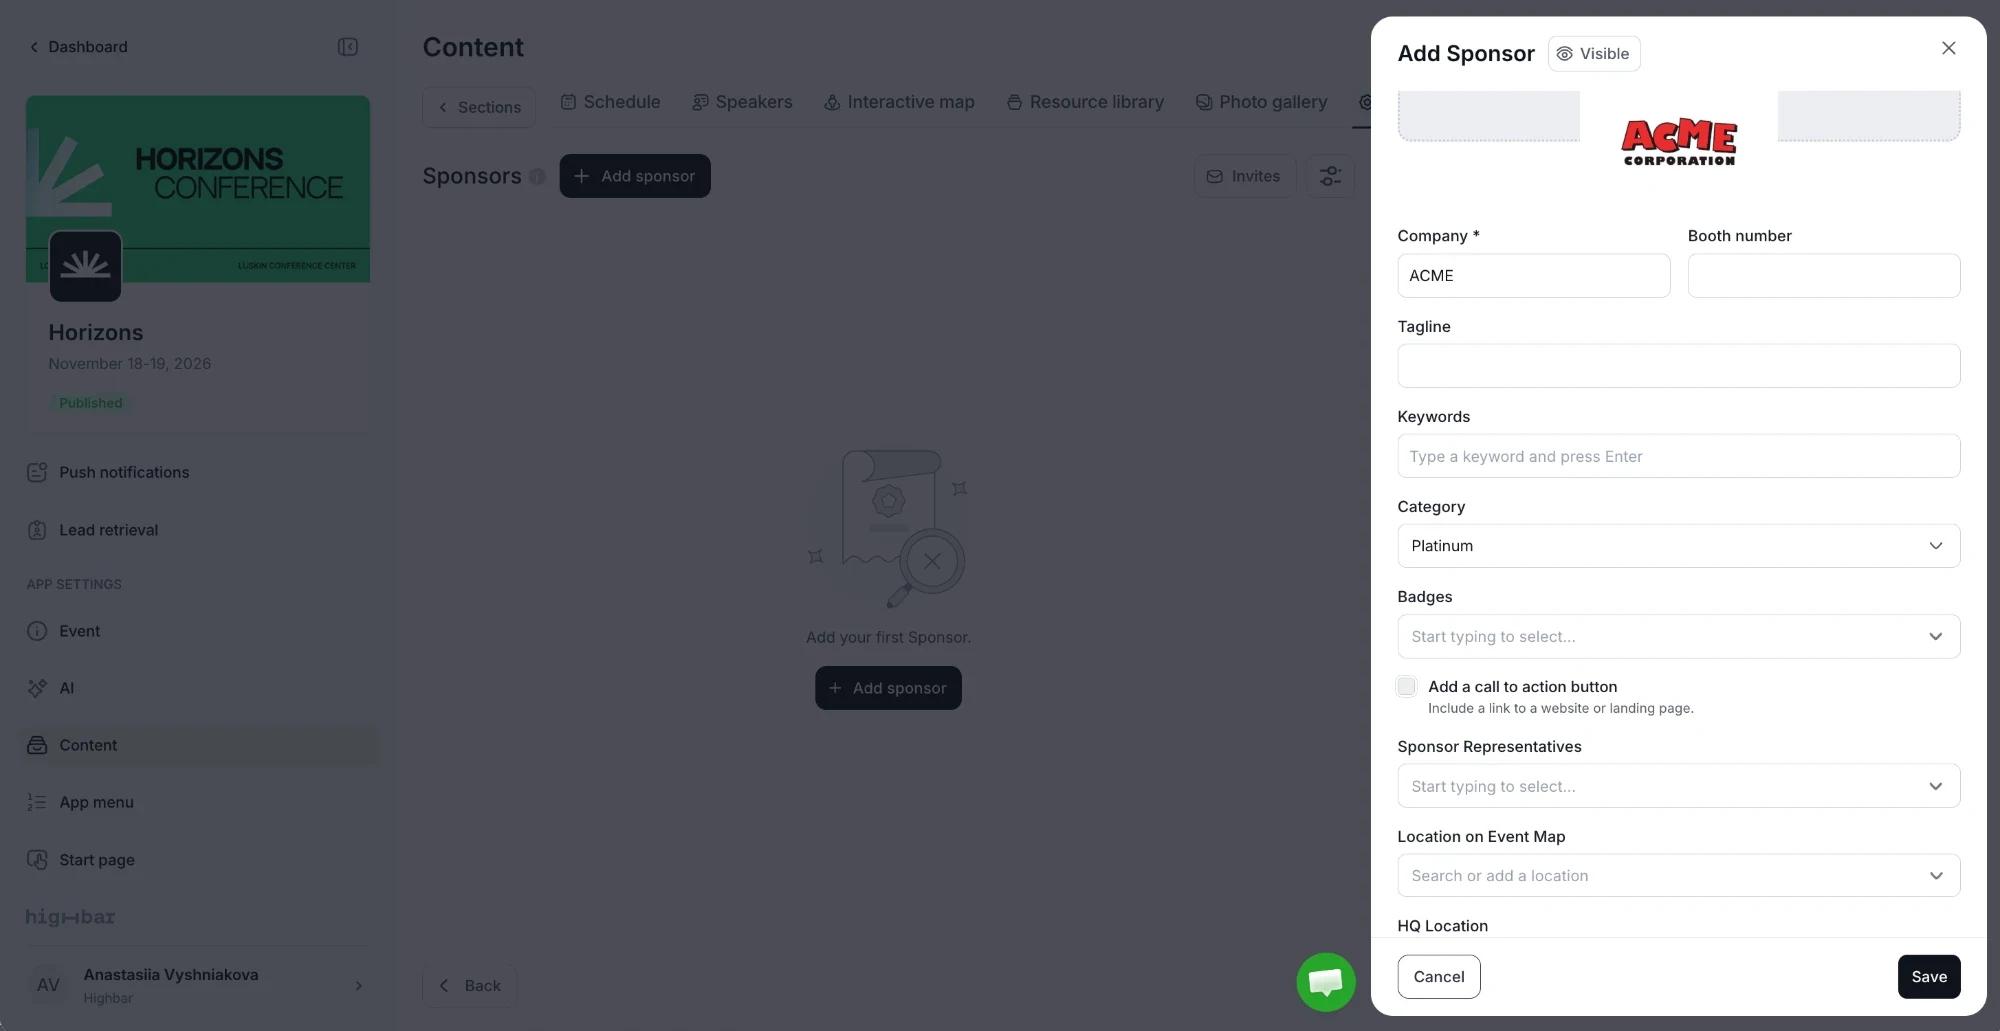
Add a logo, a cover image and any other details below, then click Save.
To add many companies at once, use Import at the top of the page. See Importing content.
Profile fields
| Field | What it's for |
|---|---|
| Booth number | Shown on the company's card and page. |
| Tagline | A one-line summary, shown under the company's name on its page. The AI Concierge also uses it when answering questions about sponsors. |
| Keywords | Type a keyword and press Enter. Attendees can filter the list by keyword. |
| Category | The company's tier or group, such as Gold or Startup. Shown on its card in the list. |
| Custom fields | Any extra fields you set up in settings (see below). |
| Badges | Recognition markers, such as "Founding partner", shown on the company's page. |
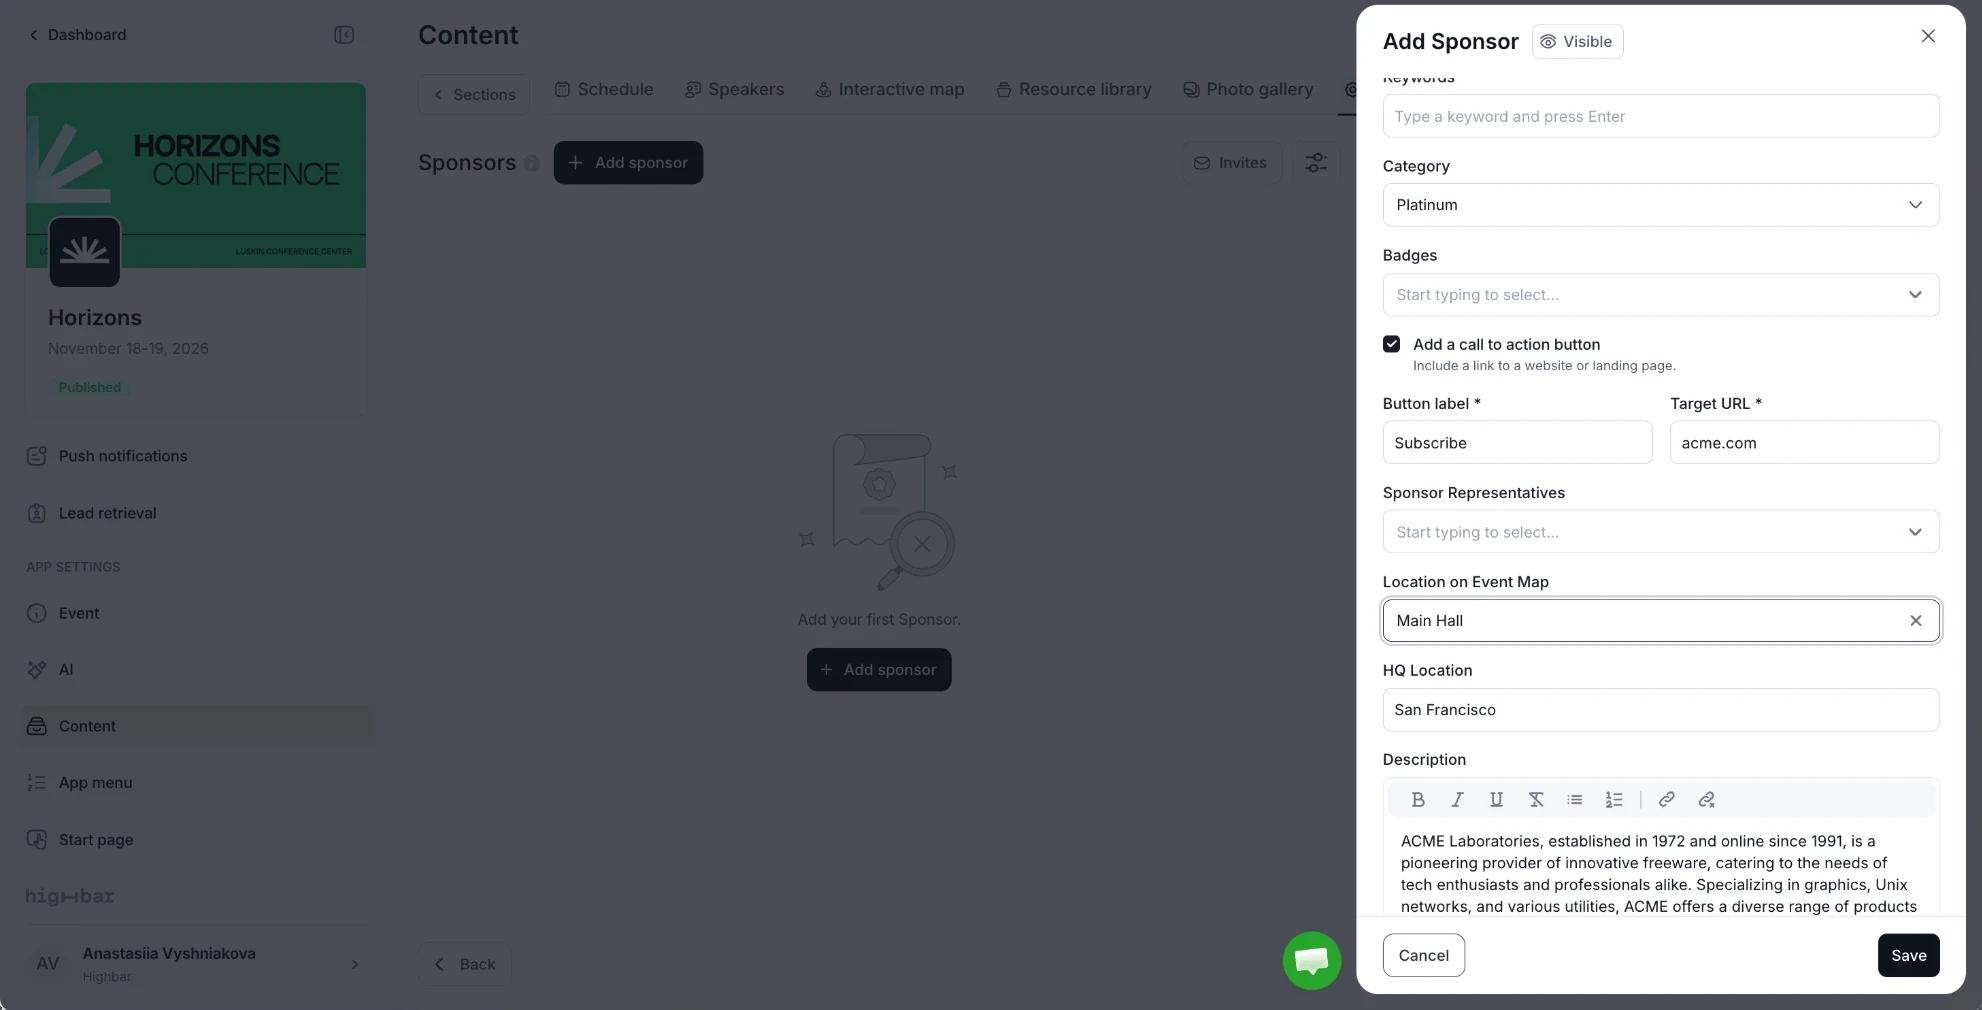
| Add a call to action button | A button on the company's page, with a Button label and a Target URL. |
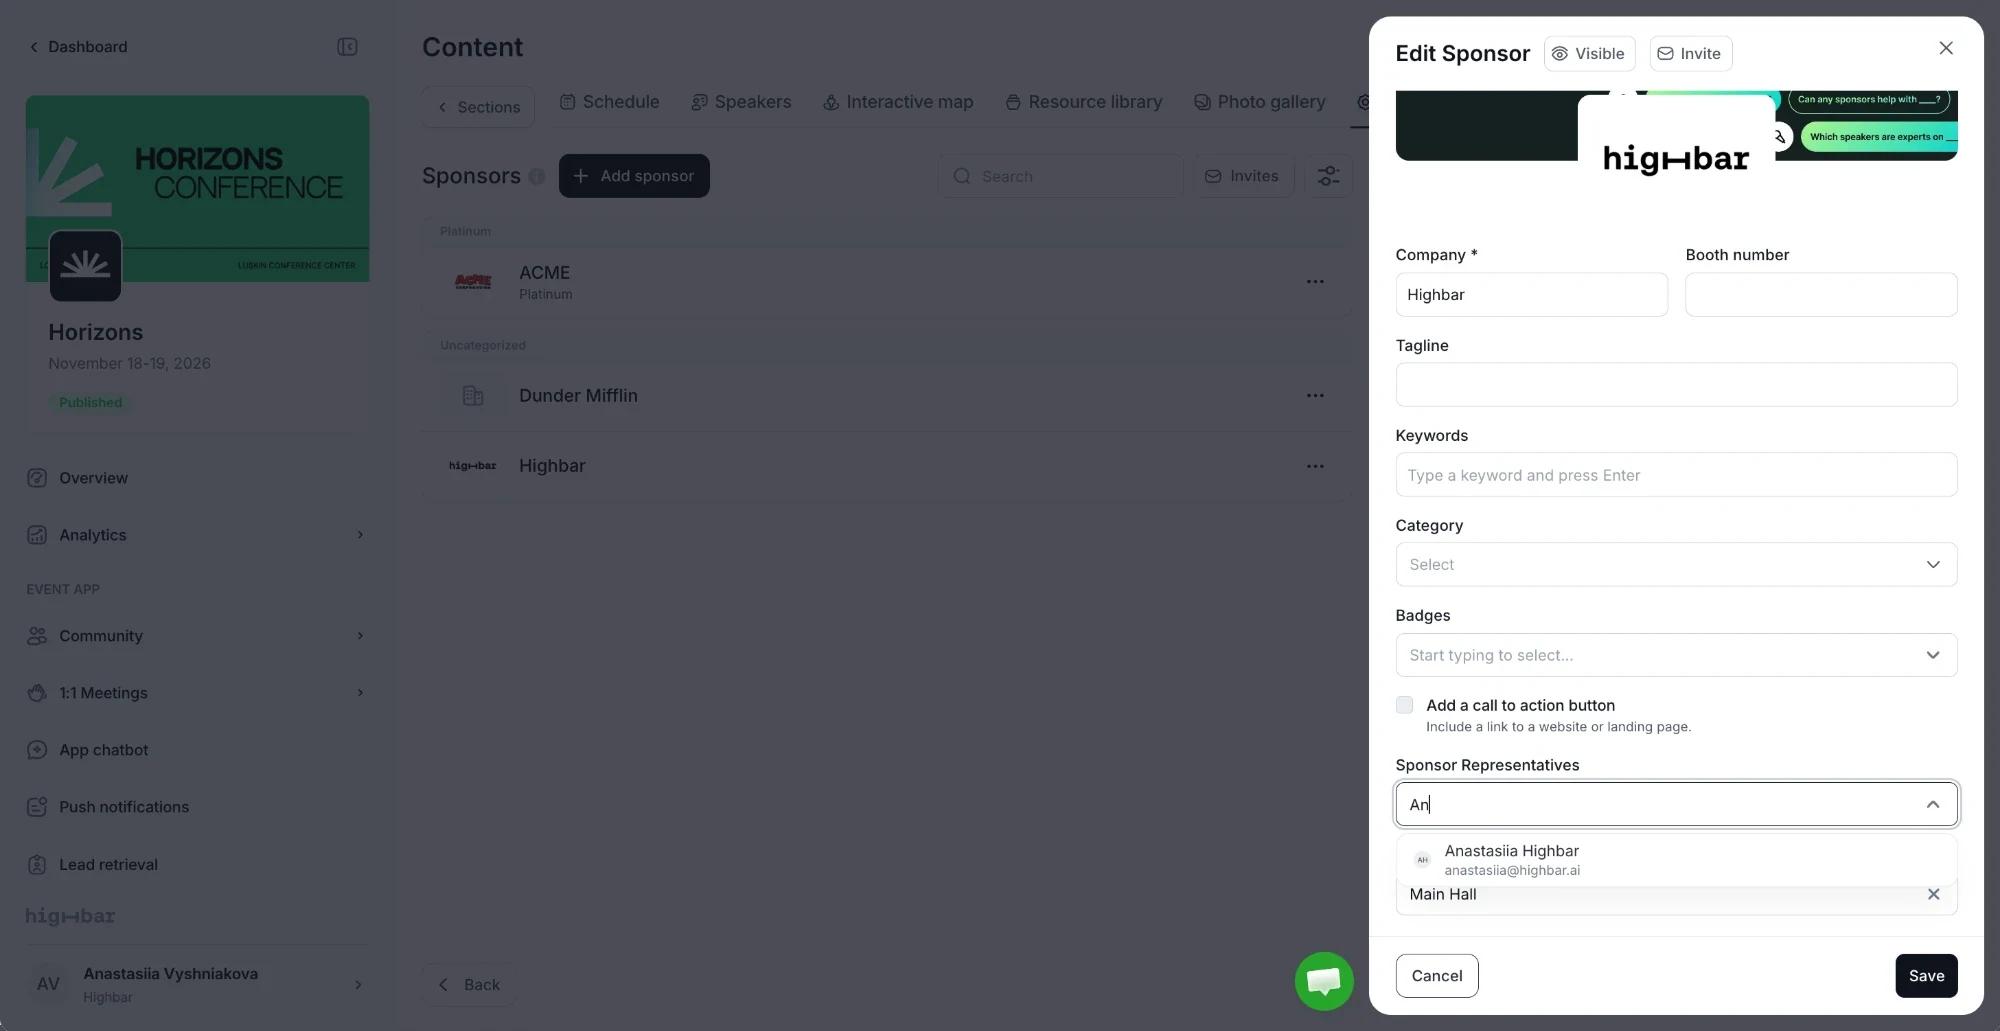
| Sponsor Representatives | People from your attendee list who represent the company. They're listed on its page, linked to their profiles. |
| Location on Event Map | Links the company to a pin on an interactive map. |
| HQ Location, Description, Phone, Website | Details shown on the company's page. |
| Social links | LinkedIn, Facebook, X, Instagram, YouTube and TikTok. |
| Attachments | Up to 5 files: PDF, DOC(x), PPT(x), XLS(x) or TXT, up to 10 MB each. |
| Products & services | Up to 5 products or offers, each with a title, description, media and a button. |
To add a representative, start typing their name under Sponsor Representatives and pick them from your attendee list.
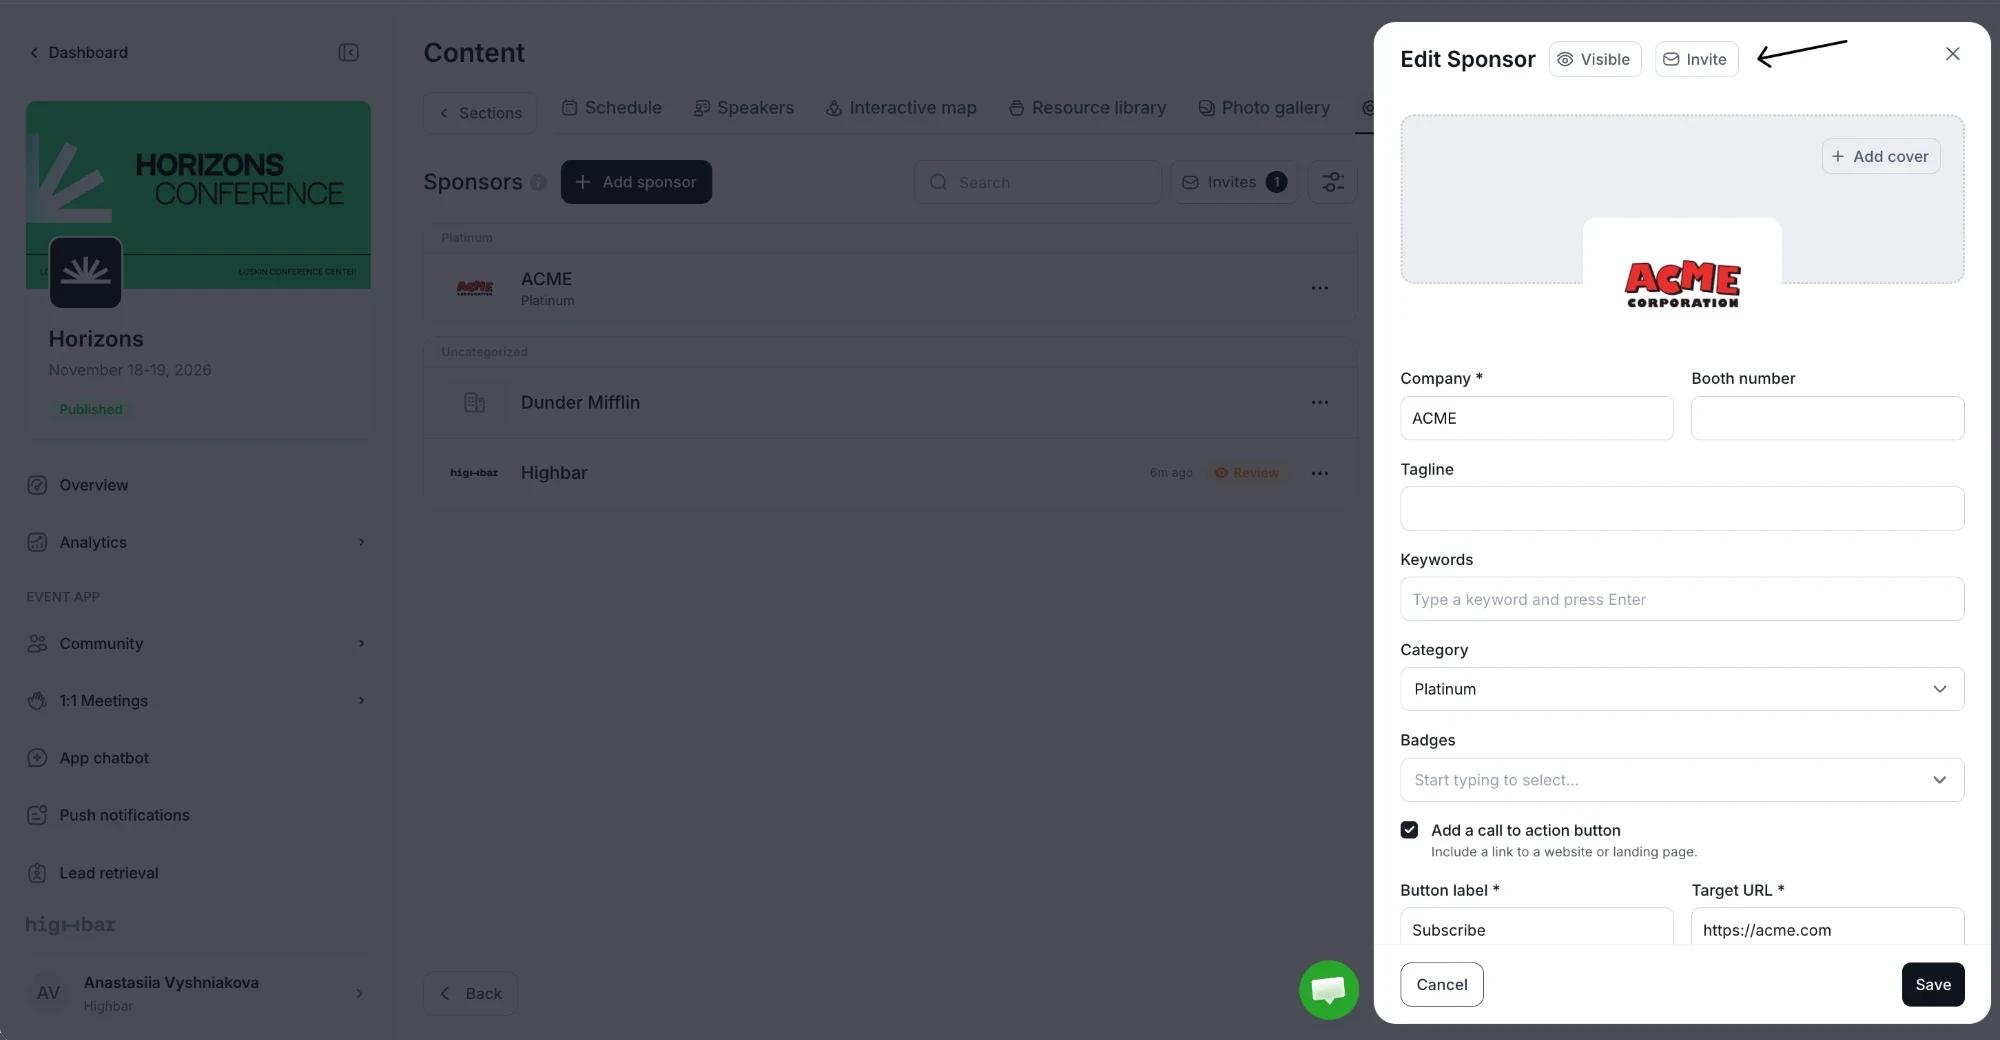
The button next to the drawer's title sets the company's visibility, and can keep it away from the AI Concierge. See Sections and visibility.
Sponsor settings
Click the gear (Sponsor settings) in the section's toolbar.
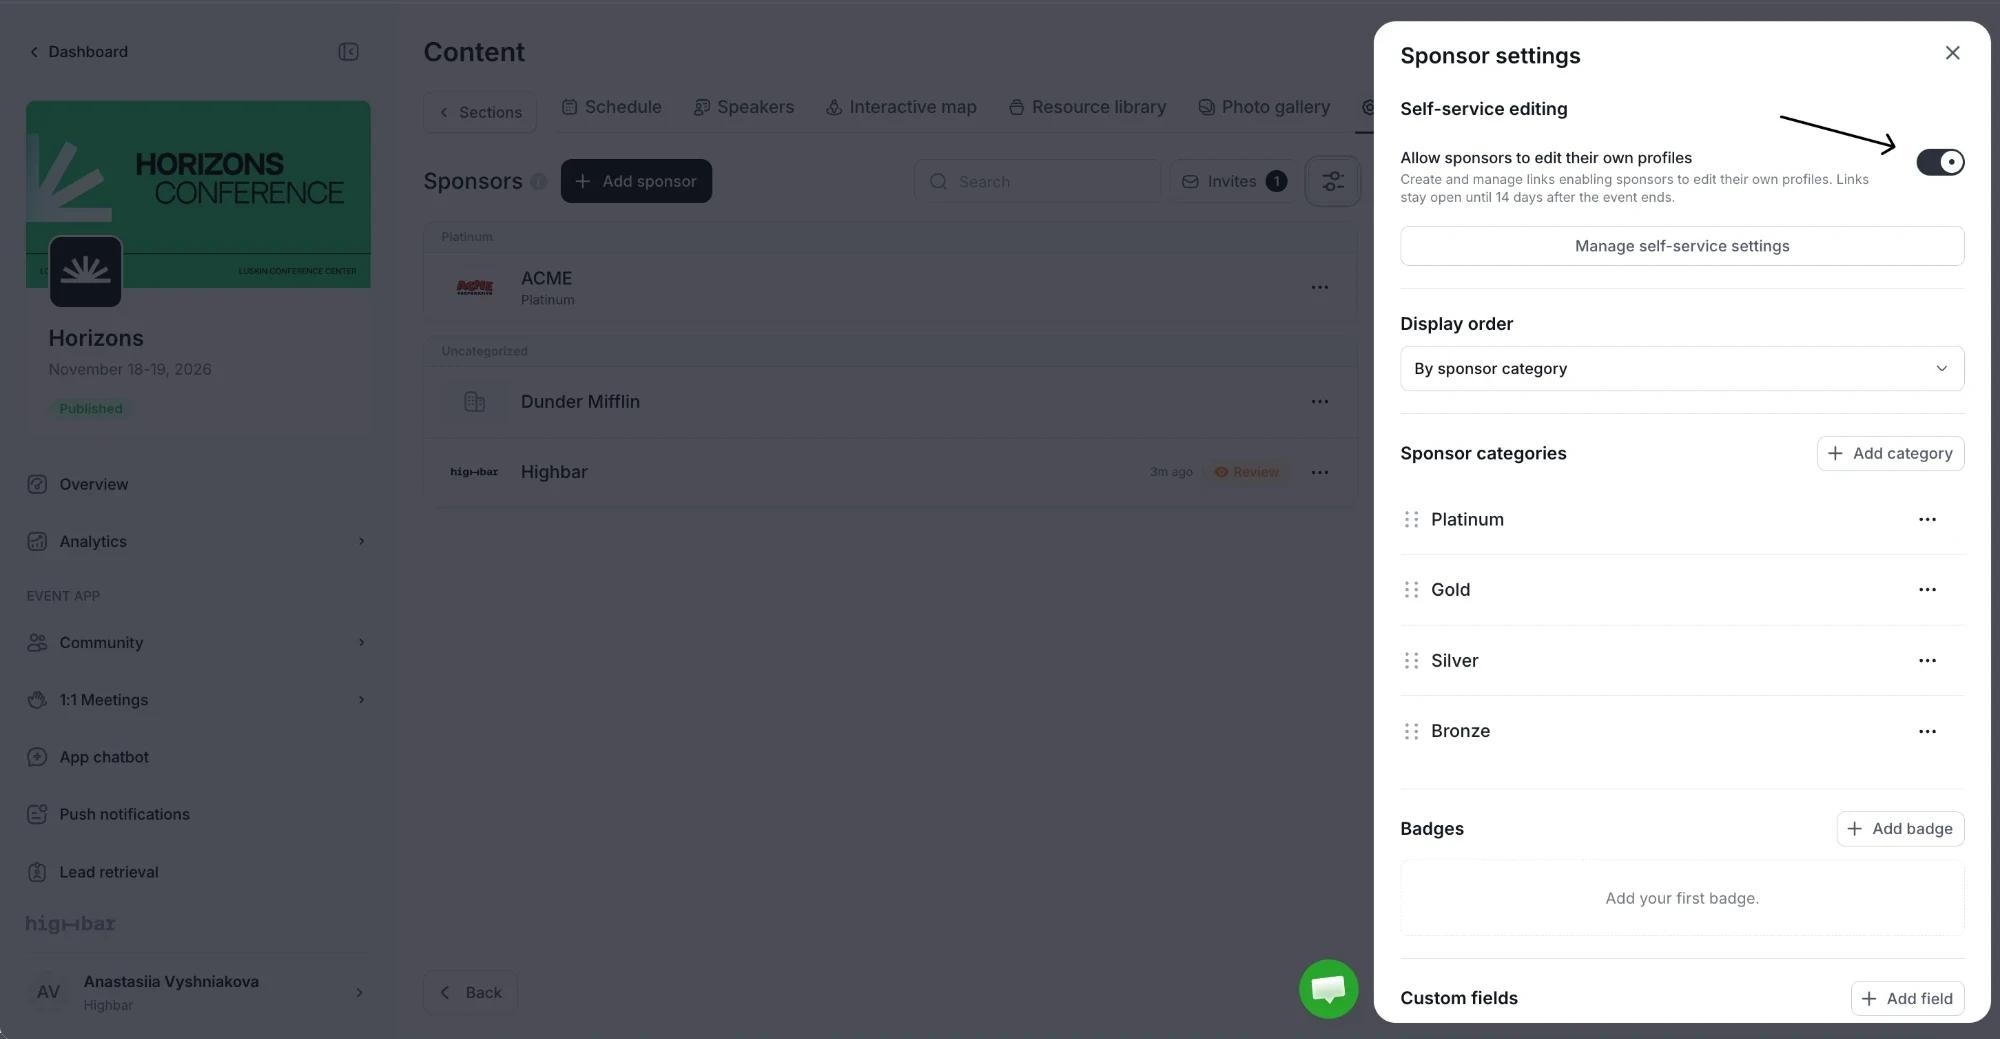
- Display order: order companies in the app By sponsor category, By company name or in Manual order. With manual order, drag companies in the list.
- Sponsor categories: click Add category to create tiers or groups, and drag them into order.
- Badges: click Add badge to create a badge with a label and an icon or image.
- Custom fields: click Add field to create your own field, such as Industry or Region, with a list of Options. Turn on Show in app to let attendees filter by it, and Allow self-service editing to let company reps set it themselves.
- Allow sponsors to edit their own profiles: lets you send reps private links (see below). On by default.
Let company reps update their profiles
Each rep gets their own private link to the company's profile. Nobody needs an account or a password.
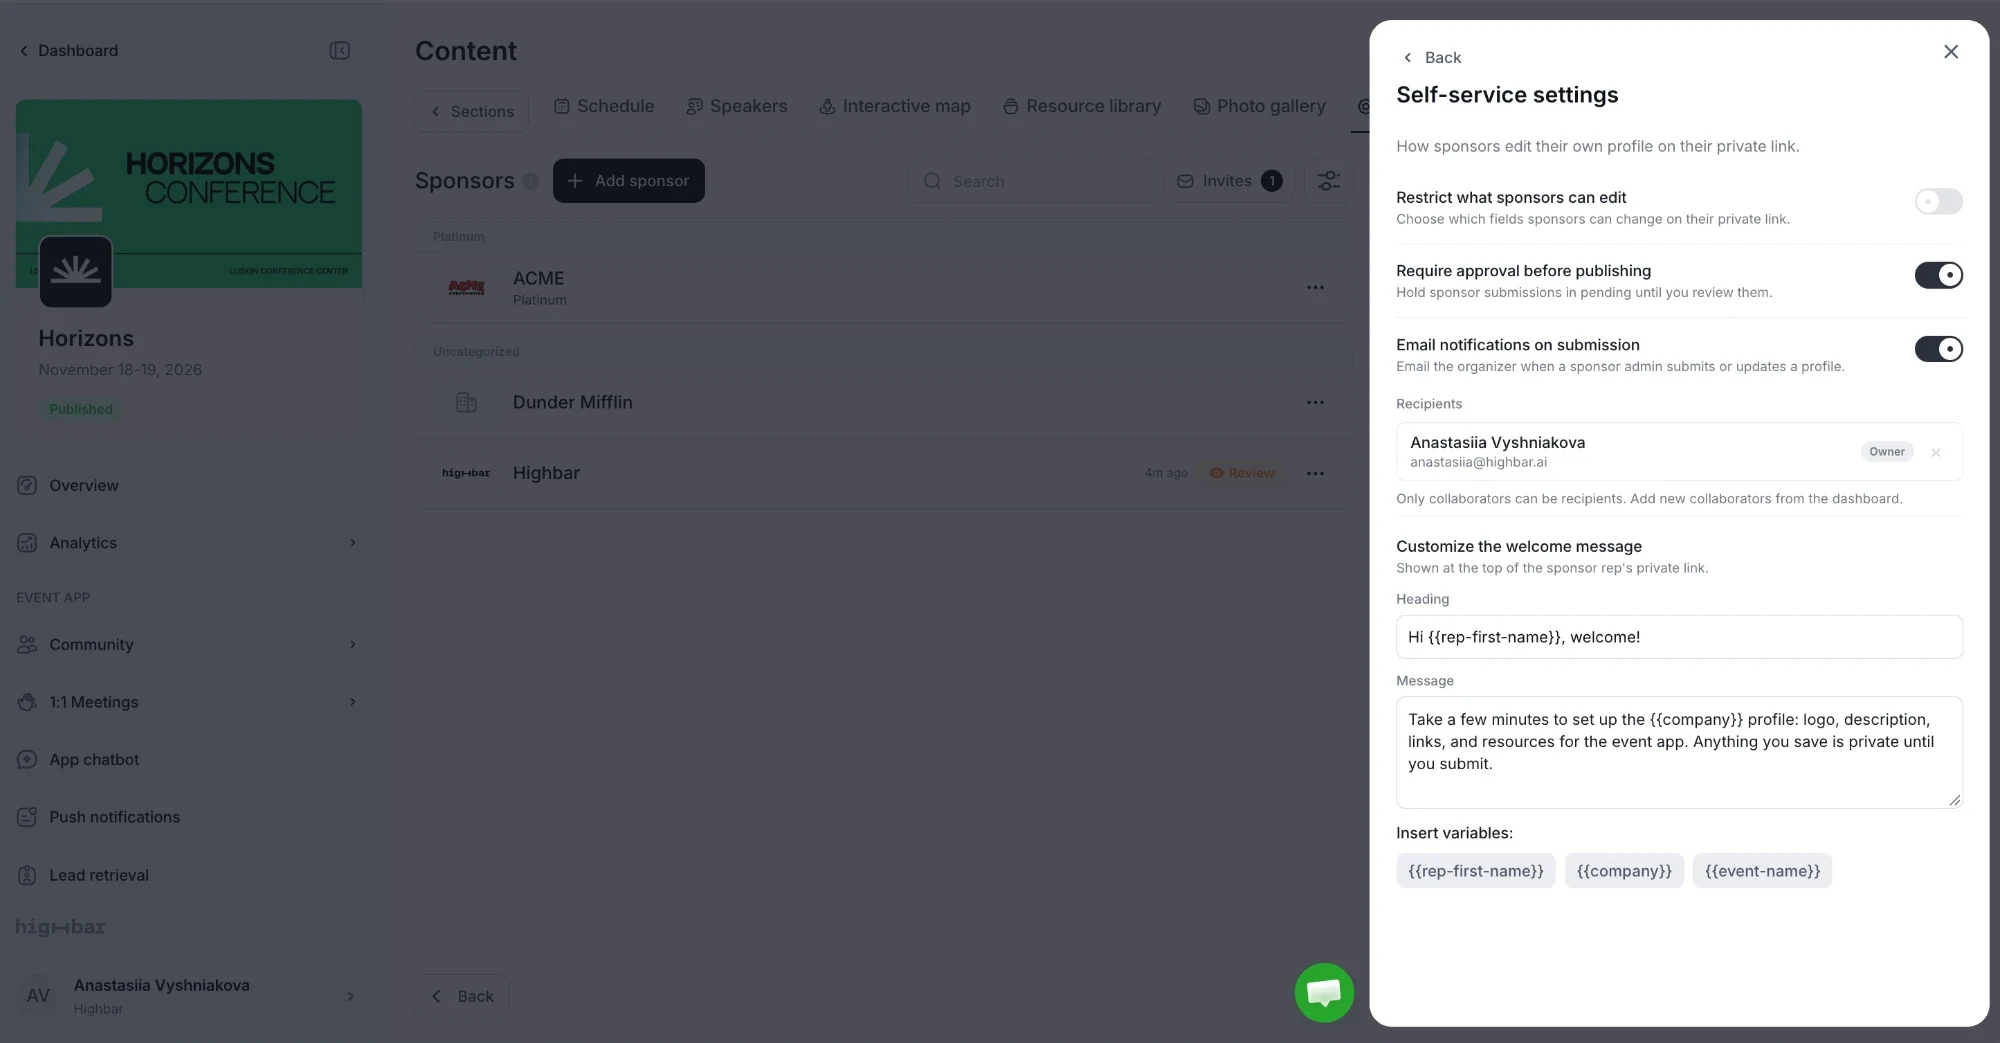
Under Allow sponsors to edit their own profiles, click Manage self-service settings to choose the rules:
- Restrict what sponsors can edit: click Manage editable fields and untick anything reps shouldn't change.
- Require approval before publishing: holds each submission until you review it. On by default. With it off, changes go live as soon as a rep submits.
- Email notifications on submission: emails the people you choose under Recipients. Only collaborators on the event can be recipients.
- Customize the welcome message: the Heading and Message at the top of the rep's page. Insert
{{rep-first-name}},{{company}}or{{event-name}}to personalize it.
Send the links
One company. Open the company and click Invite next to the drawer's title.
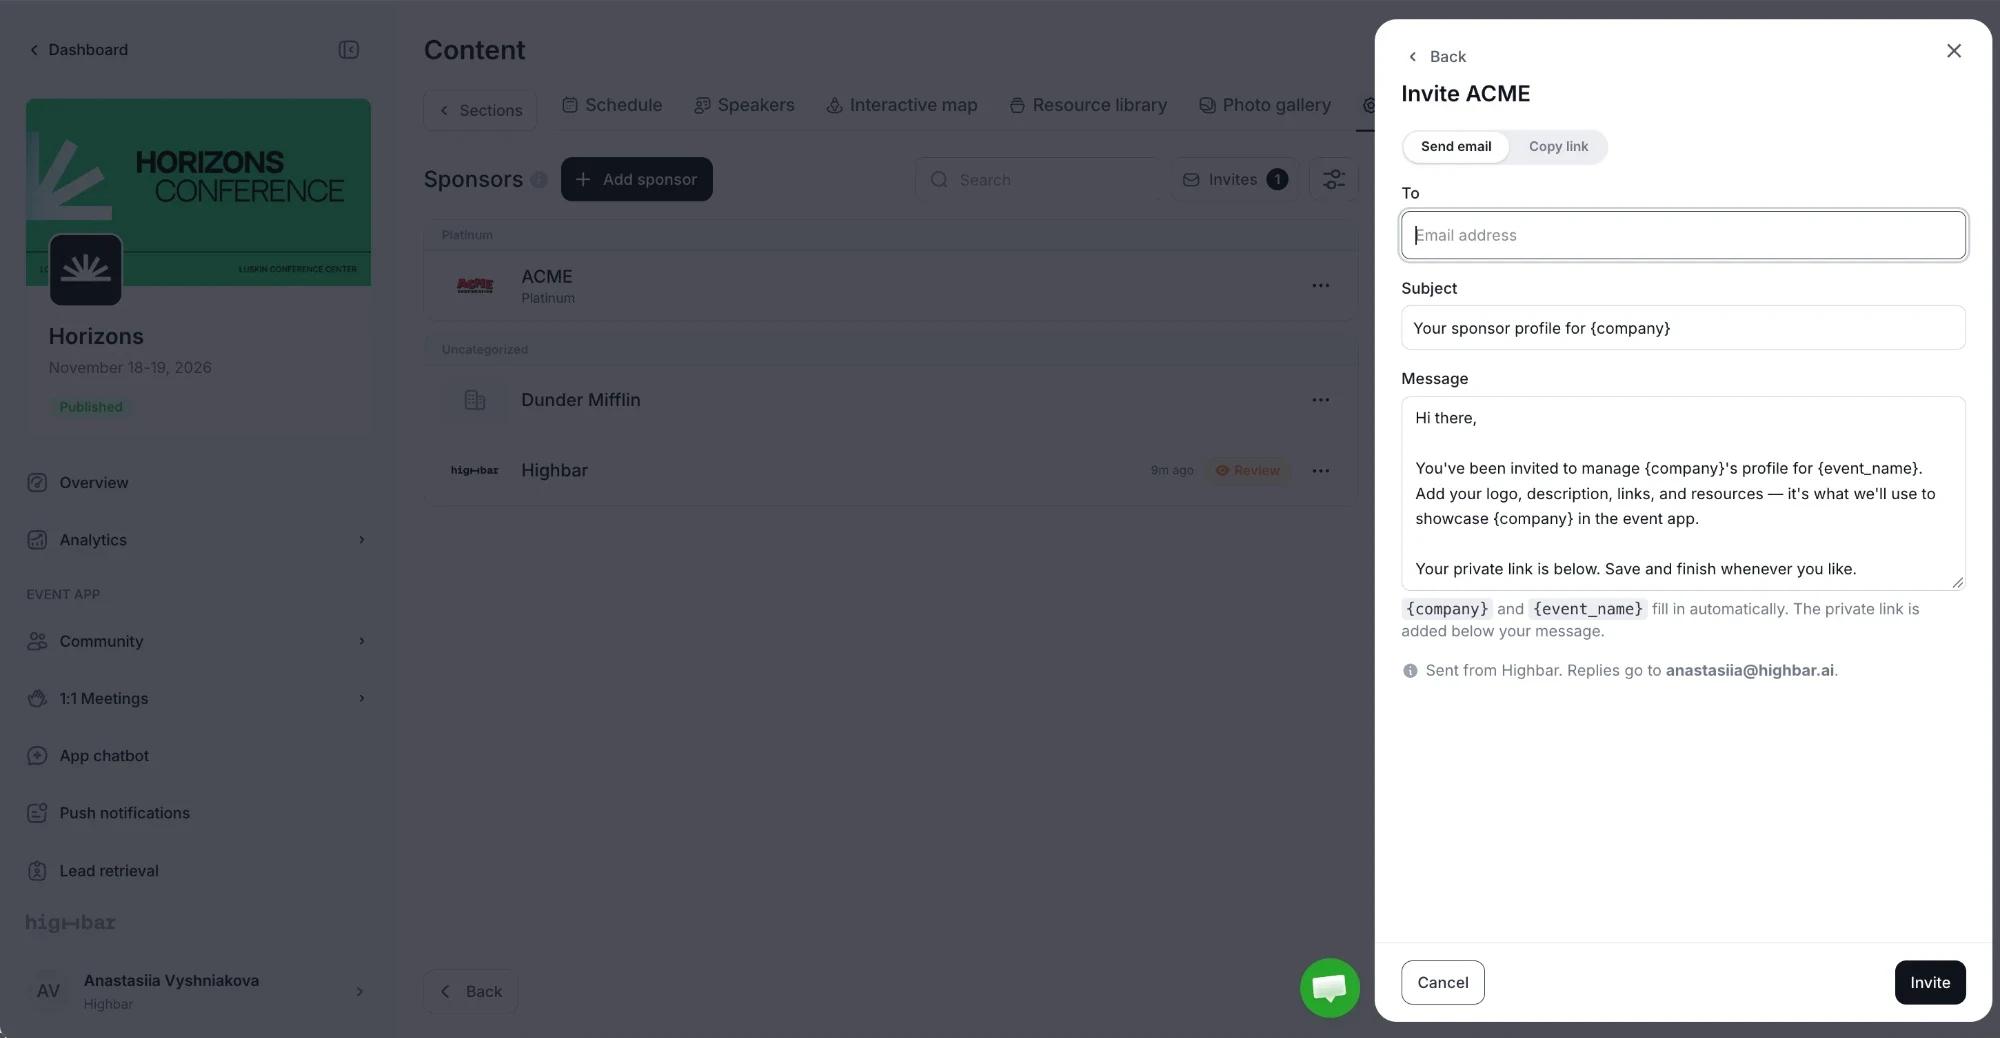
On Send email, enter one or more rep addresses in To, edit the Subject and Message if you like, and click Invite. Each rep gets their own link. The email comes from Highbar, and replies go to you.
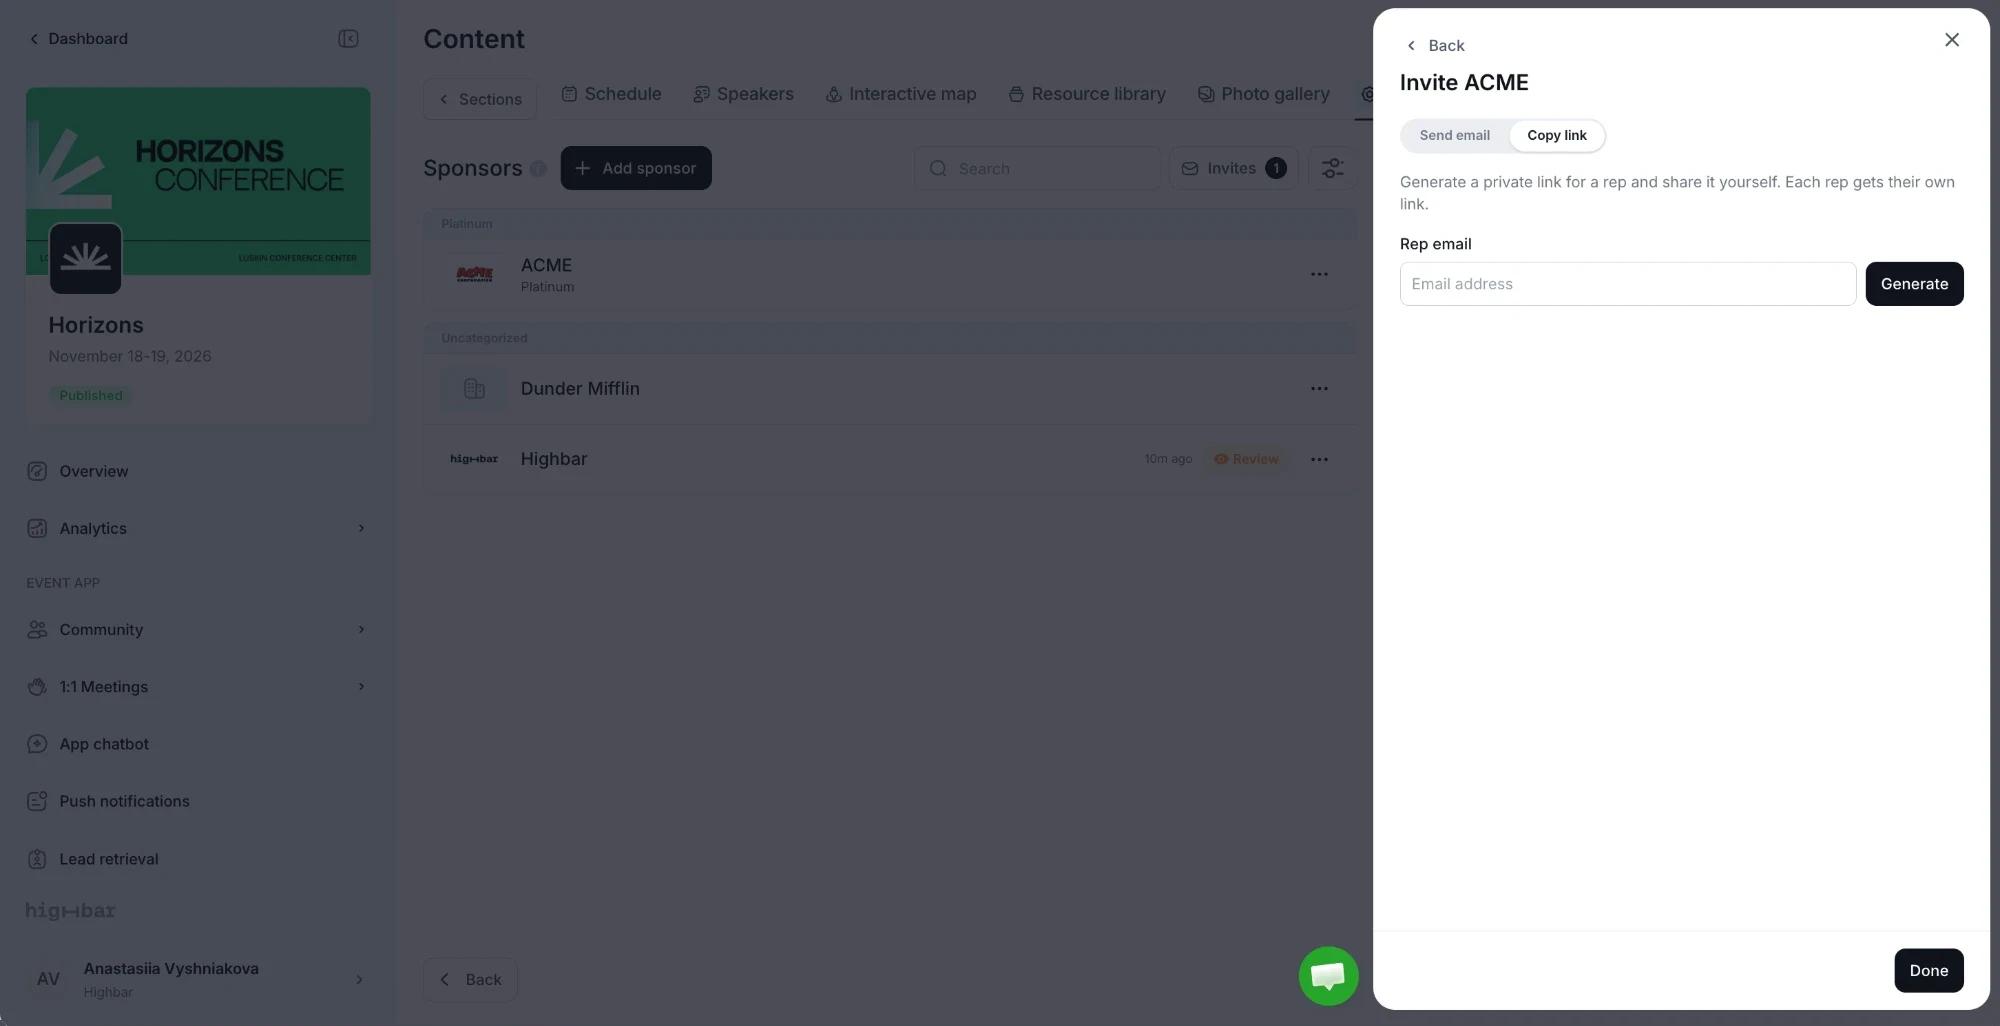
To share a link yourself, use Copy link: enter the Rep email, click Generate, then copy it. You can Deactivate a rep's link there and Reactivate it later.
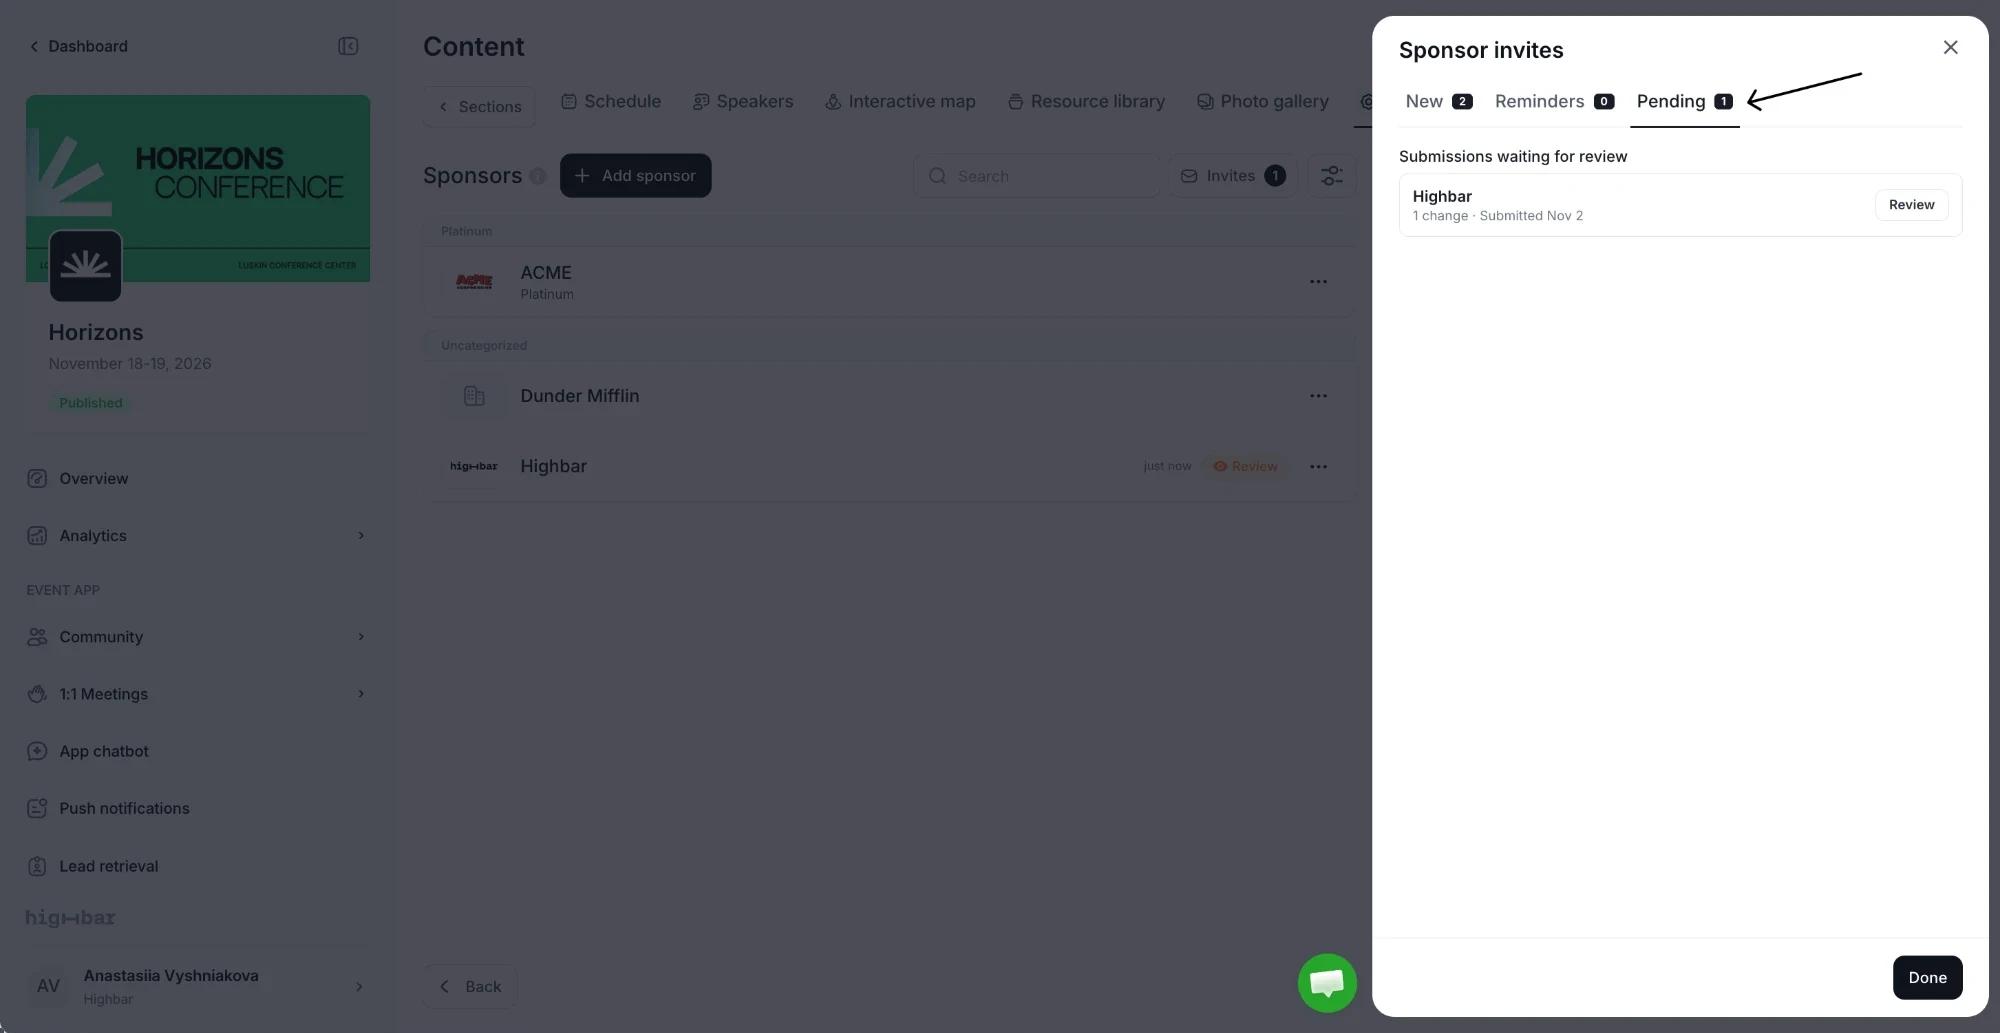
Many companies. Click Invites in the section's toolbar. The Sponsor invites panel has New (enter a rep email for each company), Reminders (reps who haven't responded) and Pending (submissions waiting for review).
On New, edit the Subject and Message if you like: {company} and {event_name} fill in for each sponsor, and the private link is added automatically. Under Recipients, enter a rep email next to each company you want to invite, then click the send button (for example Send 1 invite).
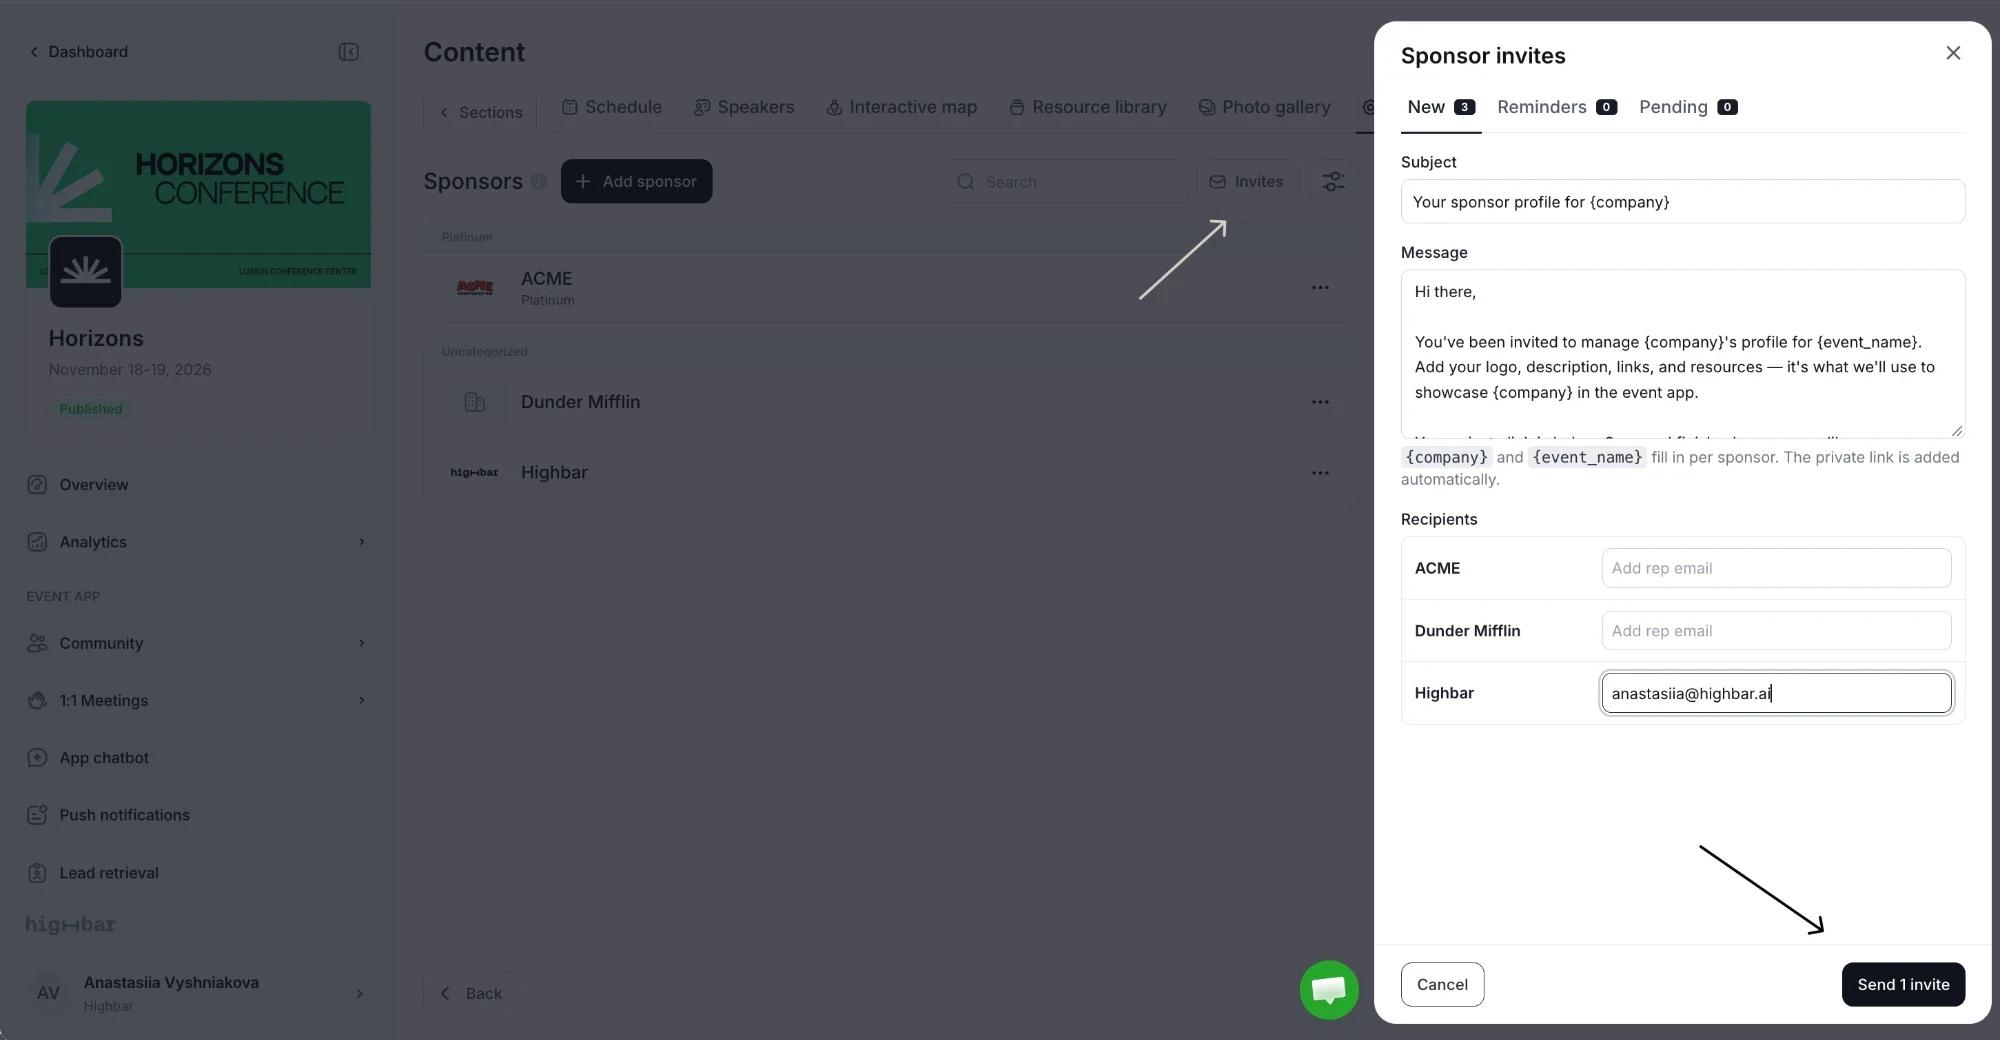
Links stay open until 14 days after your event's end date, the same as speaker links. See How long links work.
What reps can change
Send reps Update your sponsor profile with their link: it walks them through the page.
The link opens a page branded with your event. Reps can update the logo, cover image, tagline, description, website, phone, HQ location, social links, call to action button, files and products, plus any custom fields you allow. The company name, category, booth number, badges and representatives stay with you, and show as Managed by the event organizer.
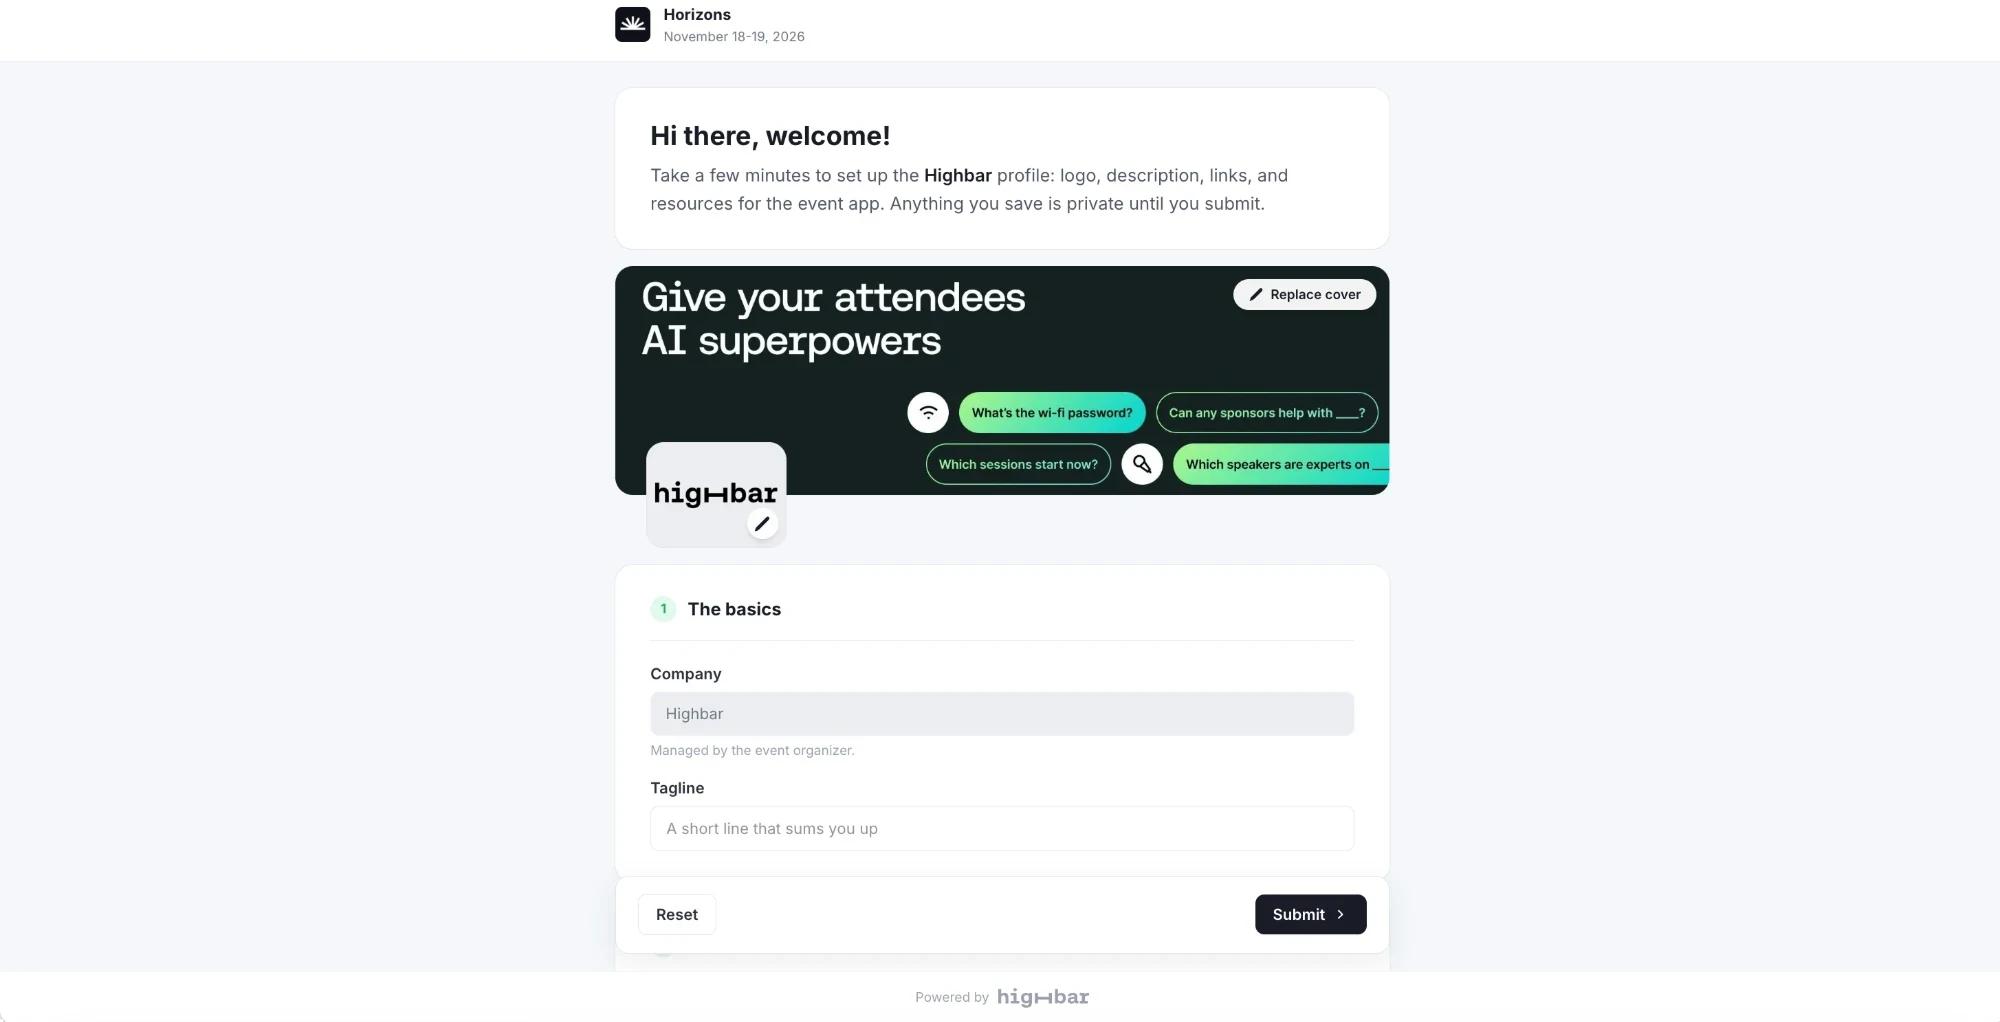
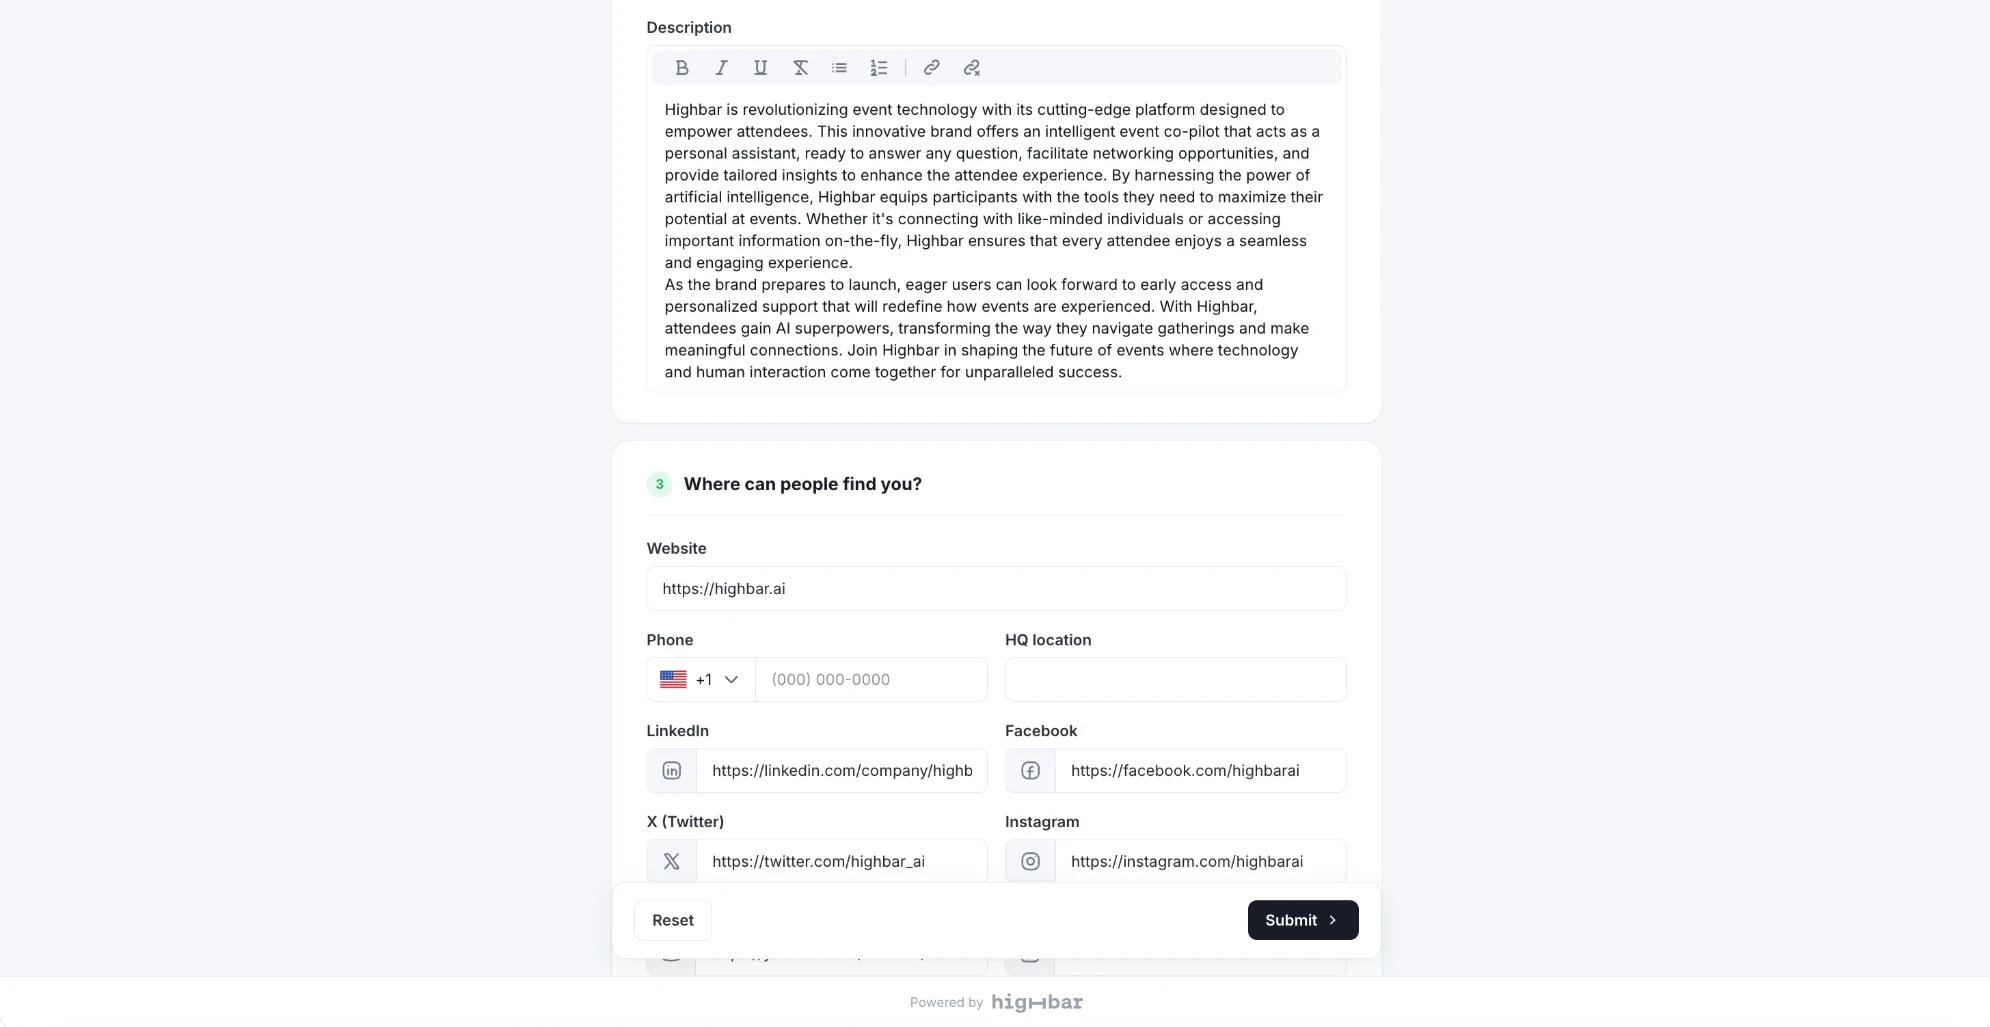
Their changes stay private until they click Submit. Reset discards their edits. When a submission is waiting for approval, the company's row shows Review, and a number on Invites shows how many submissions are waiting.
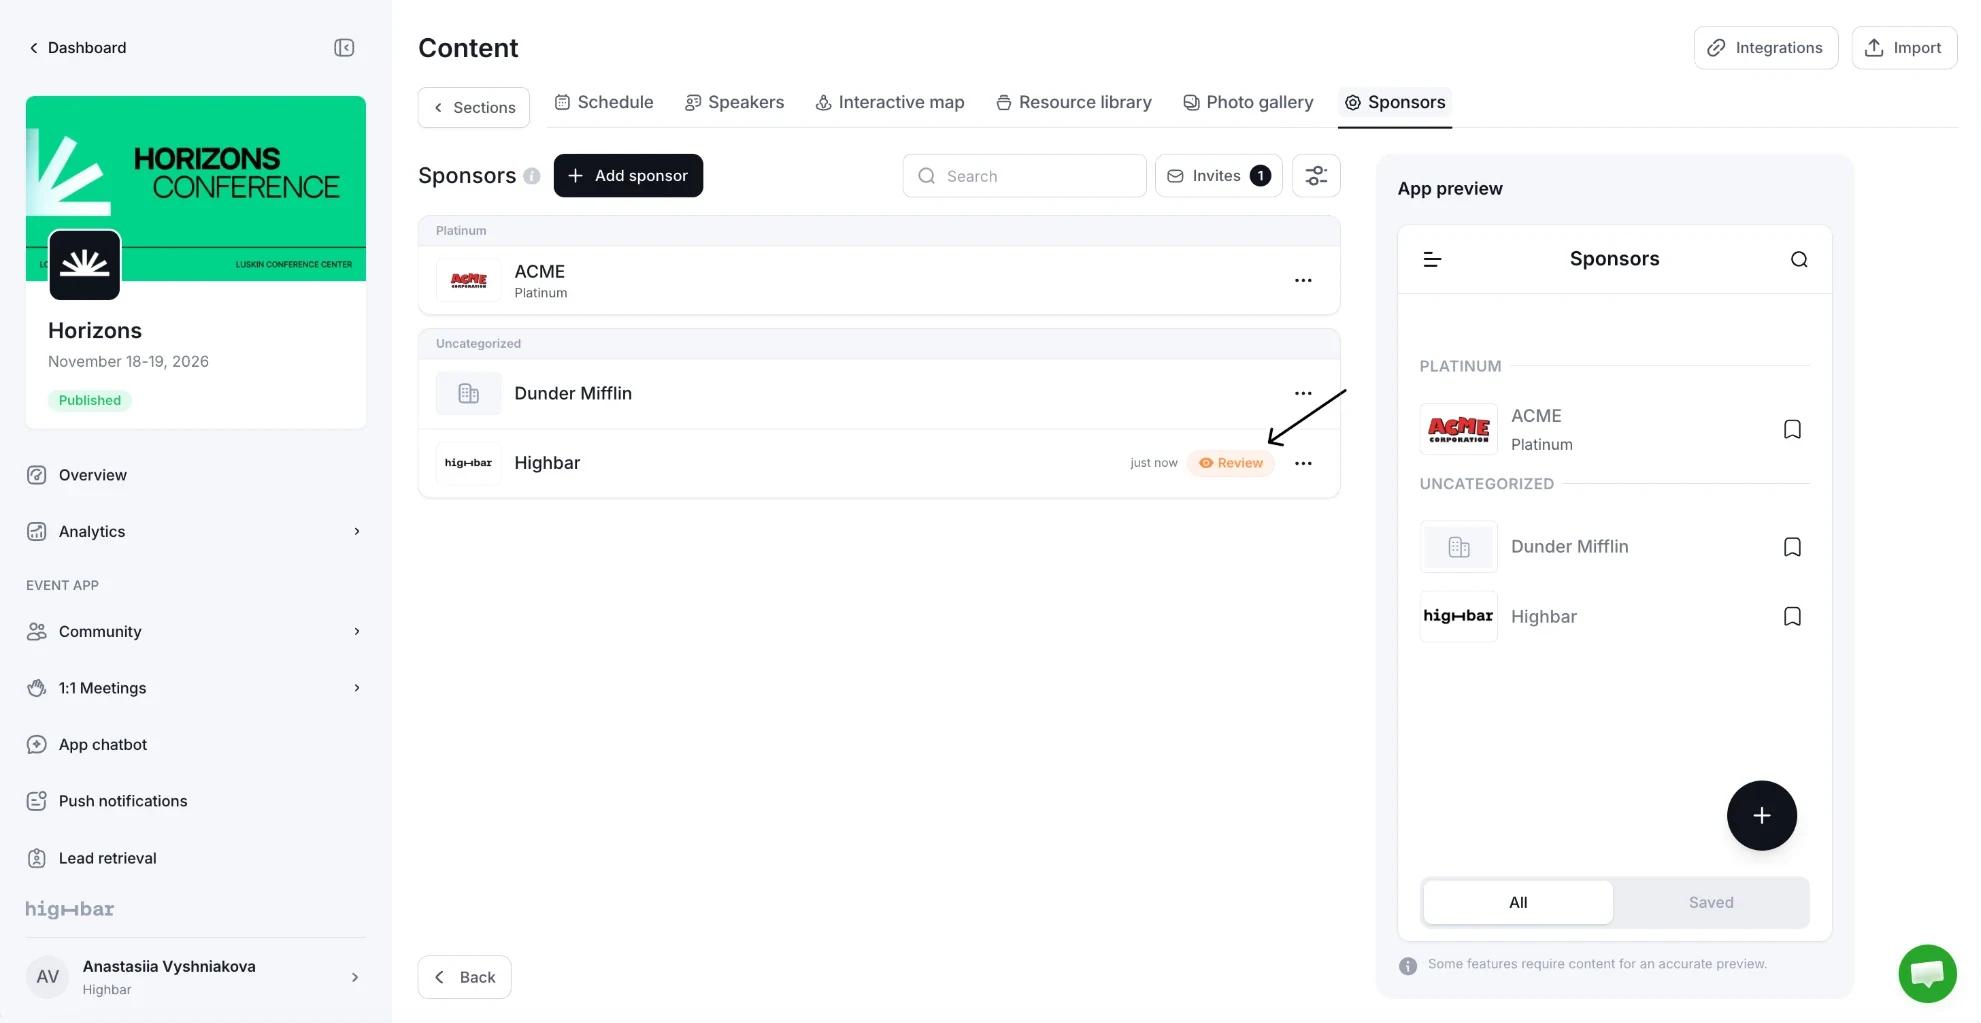
You can also find every waiting submission on the Pending tab of Invites, under Submissions waiting for review. Click Review next to a company to open it.
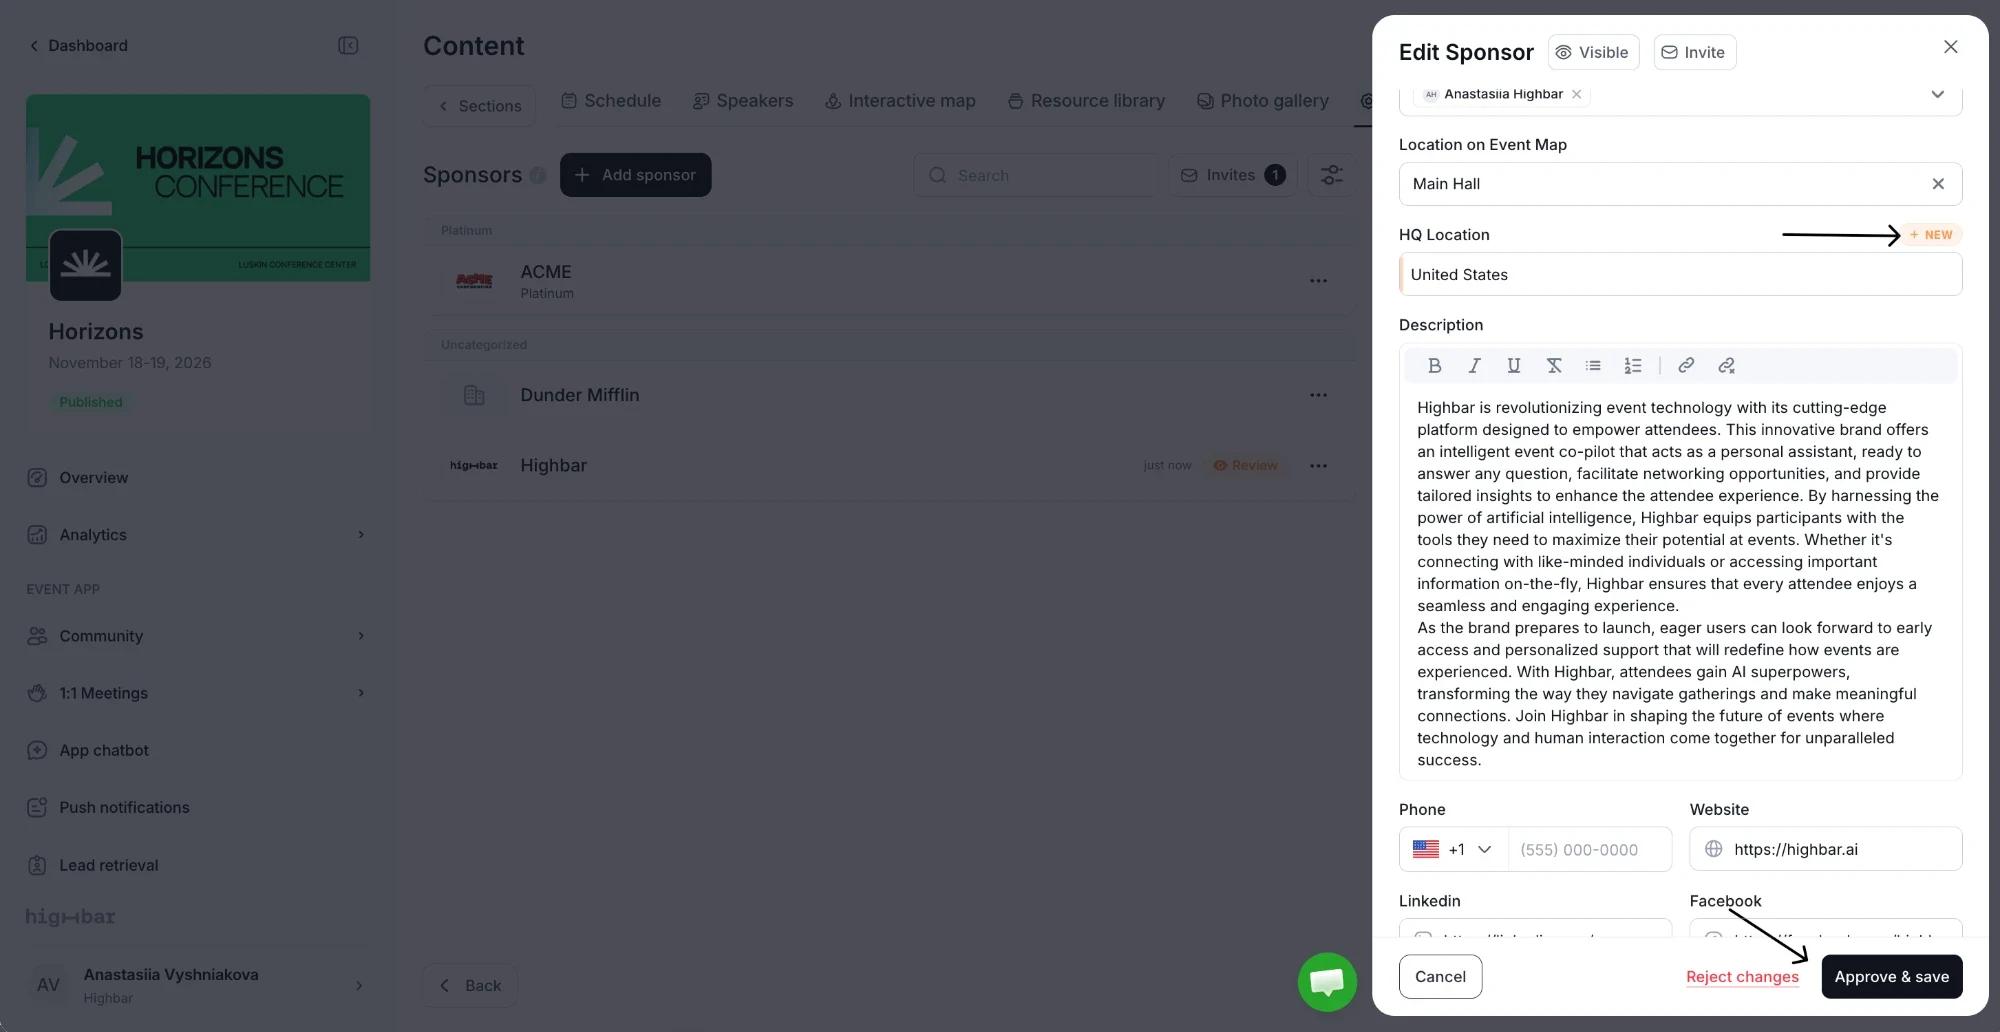
Open the company to see its submission. Each field the rep filled in is marked New if it was empty before, or Changed if it replaced an earlier value. Adjust anything you need, then click Approve & save to publish, or Reject changes to discard the submission.
What attendees see
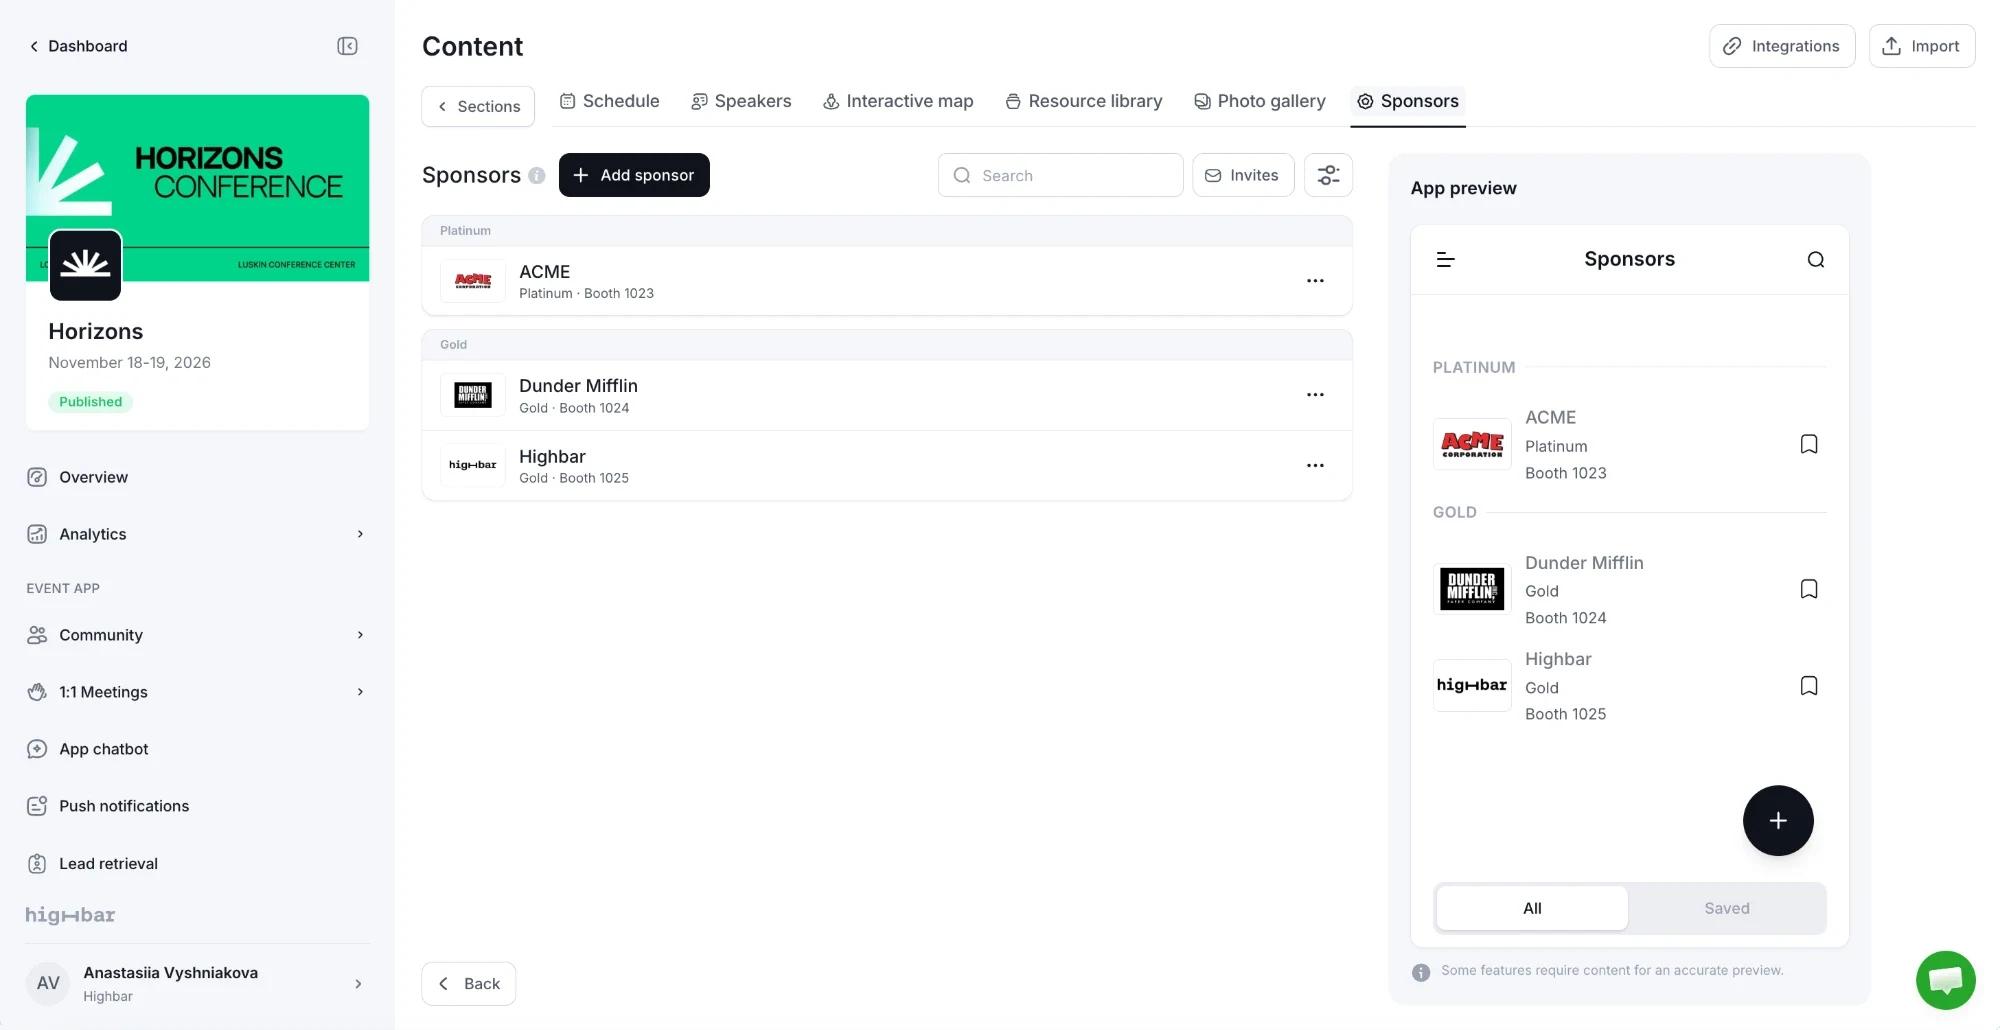
In the list, each company shows its logo, name, category and booth number. Attendees can save companies, and filter by keyword and by any custom field set to Show in app.
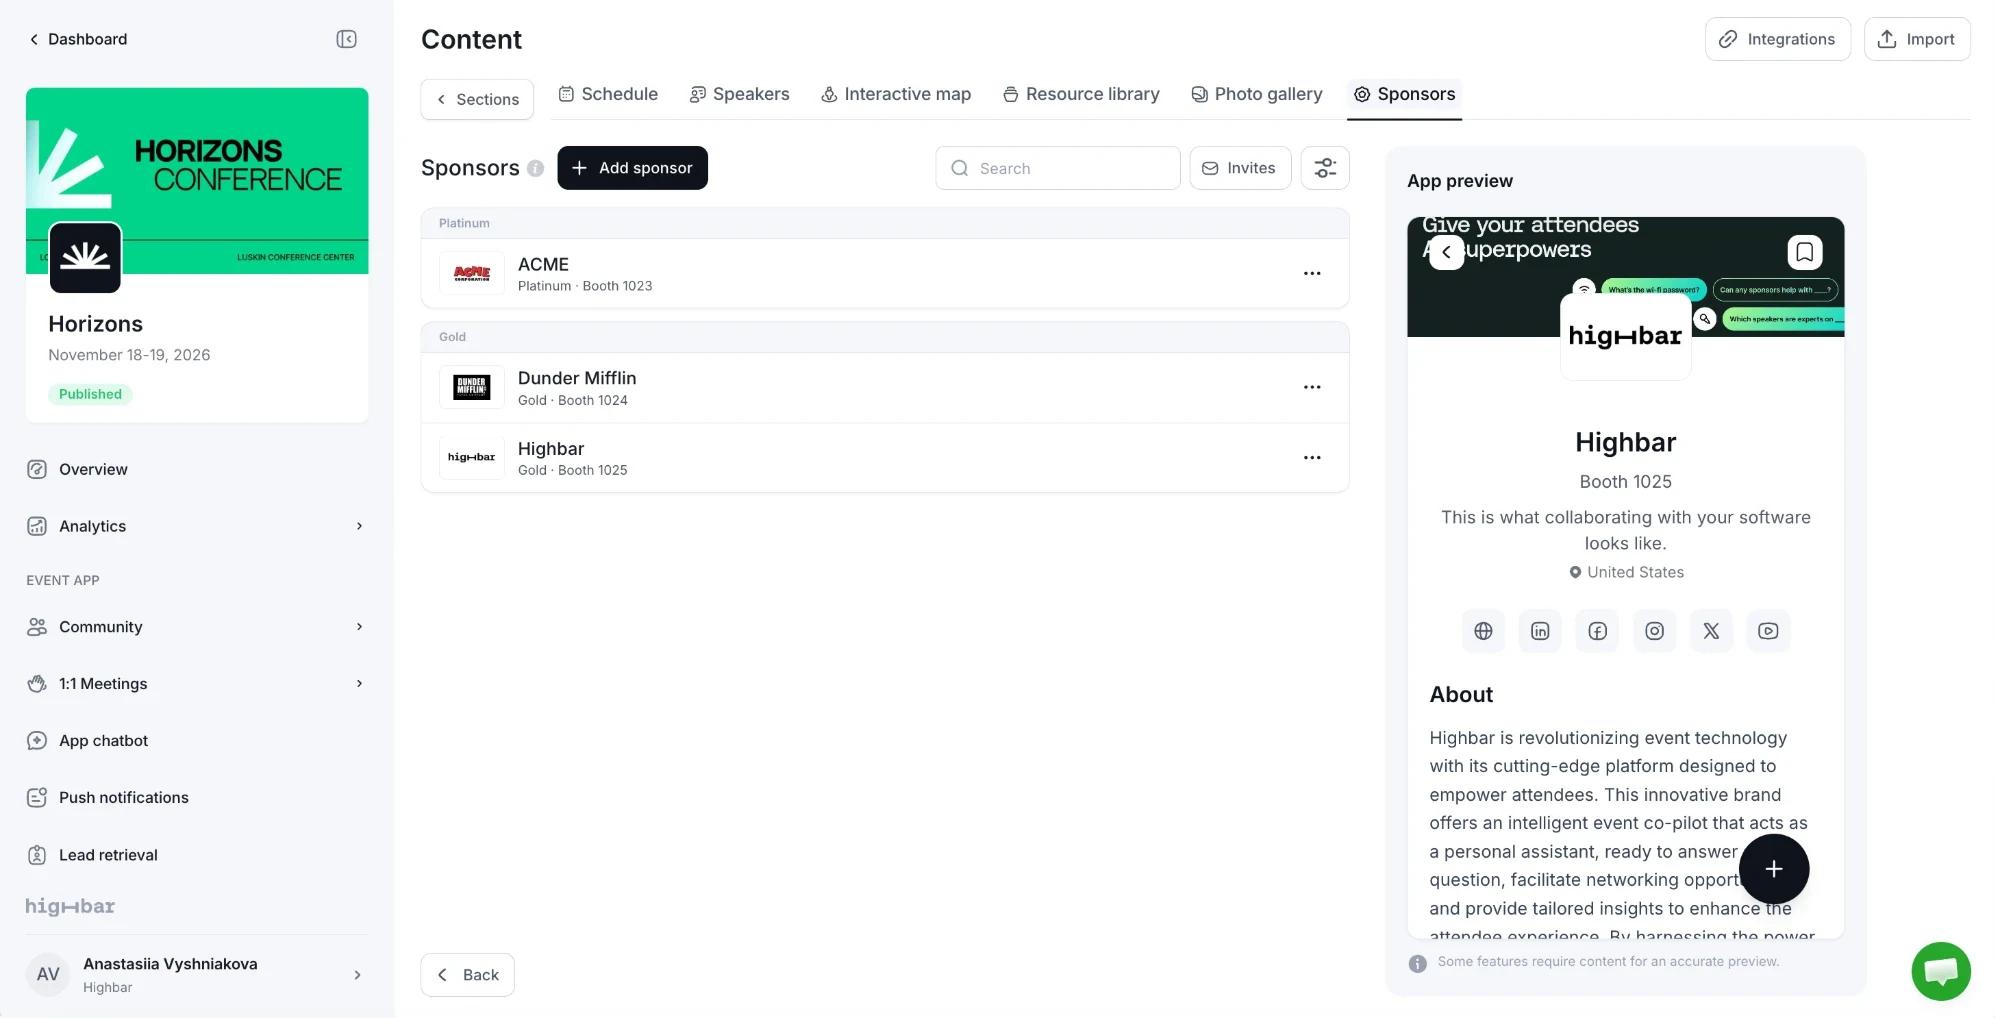
A company's page shows its cover and logo, tagline, booth number, custom field values, keywords, HQ location, social links, call to action button, badges and description. Below that come its map location, products and services, files, representatives, and the sessions it's linked to.
Booth staff can collect leads by scanning attendee badges. See Lead retrieval to add staff to each company.