Website chatbot
Add an AI chat assistant to any website, so visitors can ask about your event, see how to register and request letters before they sign up.
The website chatbot is a chat assistant you add to your own website, or any page you control. Visitors ask about the agenda, speakers, venue, pricing or how to attend, and it answers from your event's details. Anyone can chat: there's no log in.
It's separate from the AI Concierge, which attendees use inside the event app. The website chatbot has its own settings, and you can add it before your event is launched. It's free to use.
Set it up on the Website chatbot tab of the AI step. The tab is marked BETA.
Turn it on
Turn on Enable website chatbot. The rest of the settings and the Live preview appear. Changes save as you go, and the preview reloads to show them. Switch between Launcher and Chat above the preview to see the closed button and the open chat.
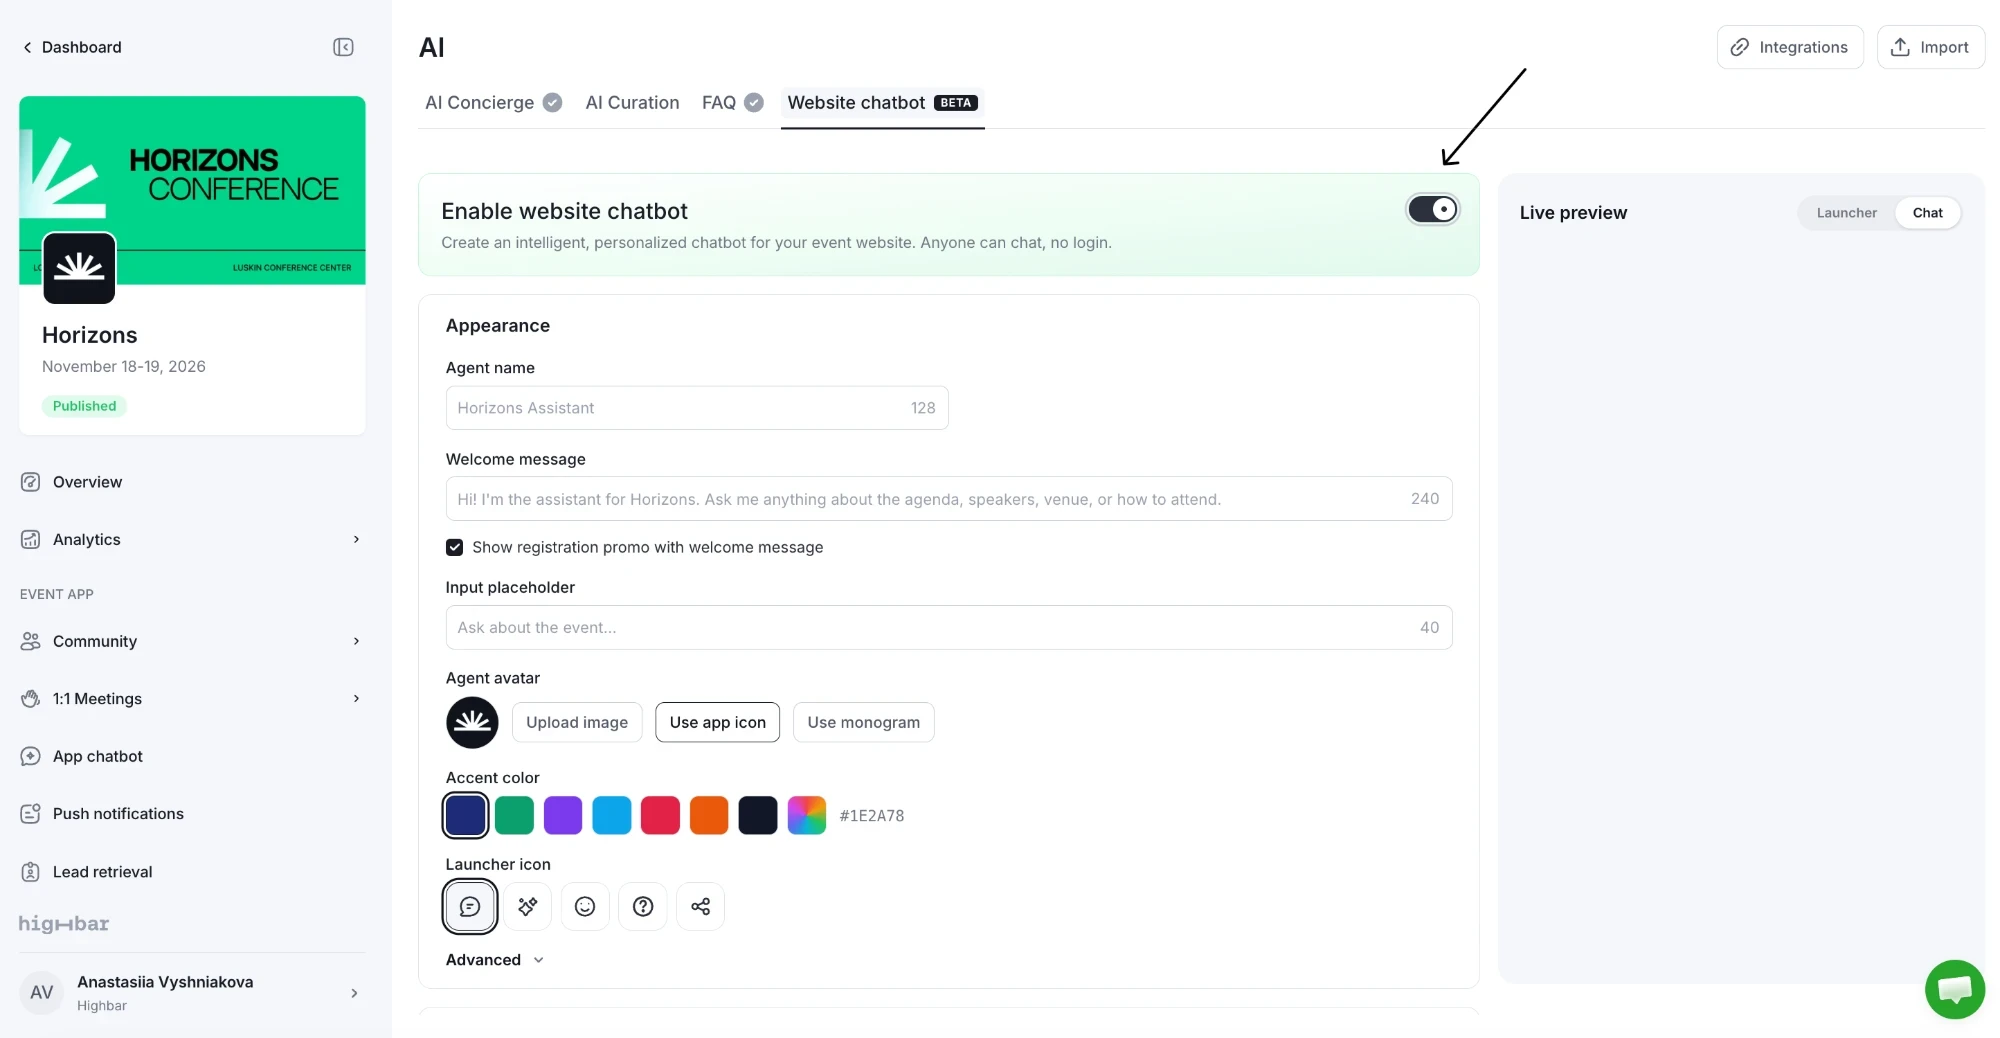
Appearance
| Setting | What it does |
|---|---|
| Agent name | The name at the top of the chat. If you leave it empty, it uses your AI Concierge's name. |
| Welcome message | The first message visitors see, up to 240 characters. Tick Show registration promo with welcome message to show your registration link with it. |
| Input placeholder | The hint in the box where visitors type. |
| Agent avatar | Upload image, Use app icon (the default) or Use monogram. |
| Accent color | Pick a preset or your own color. Without one, it uses your app's brand color. |
| Launcher icon | The icon on the button that opens the chat. |
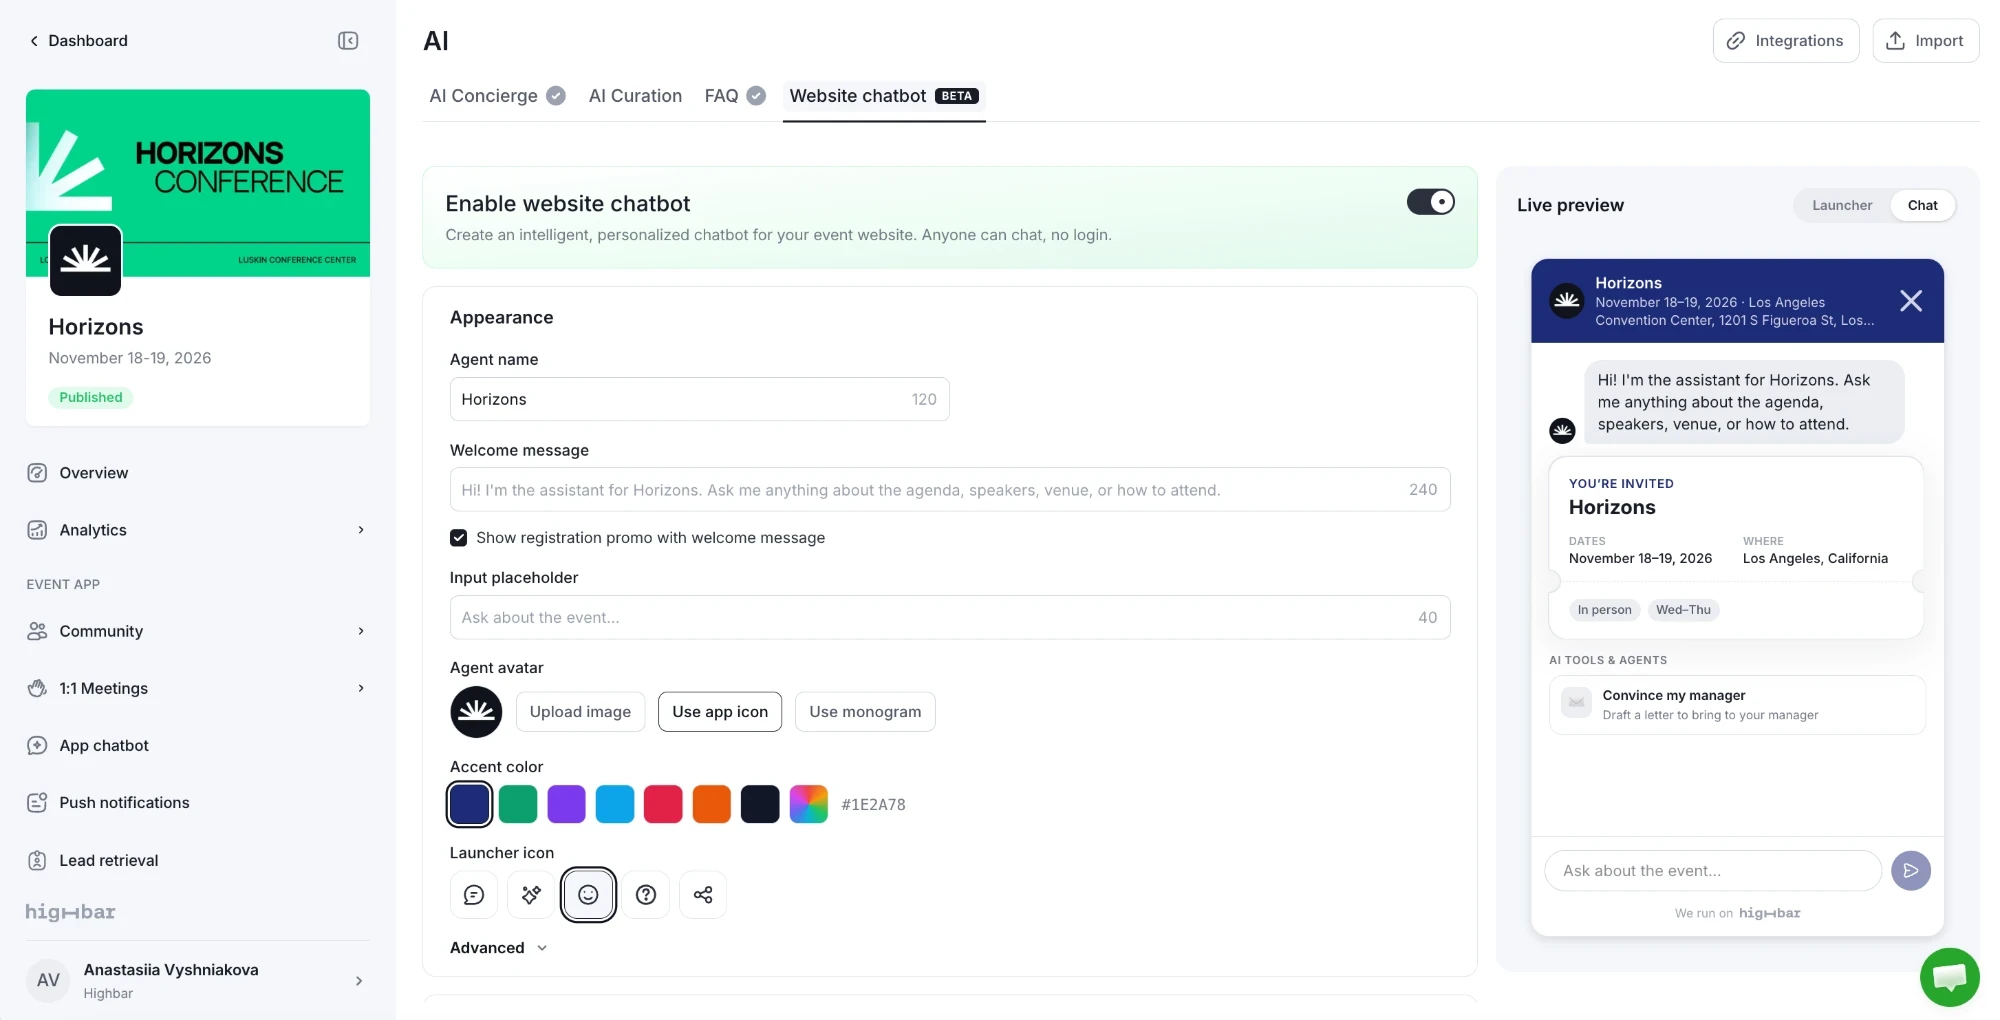
Under Advanced:
- Position: Right (default) or Left corner of the page.
- Launcher shape: Round or Rounded square.
- Theme: Light, Dark or Match system.
- Greeting teaser: a small bubble next to the button inviting the first message, with your own Teaser text. On by default.
- Auto-open: opens the chat by itself after a moment. Off is recommended.
- Message sound: a soft chime when a reply arrives.
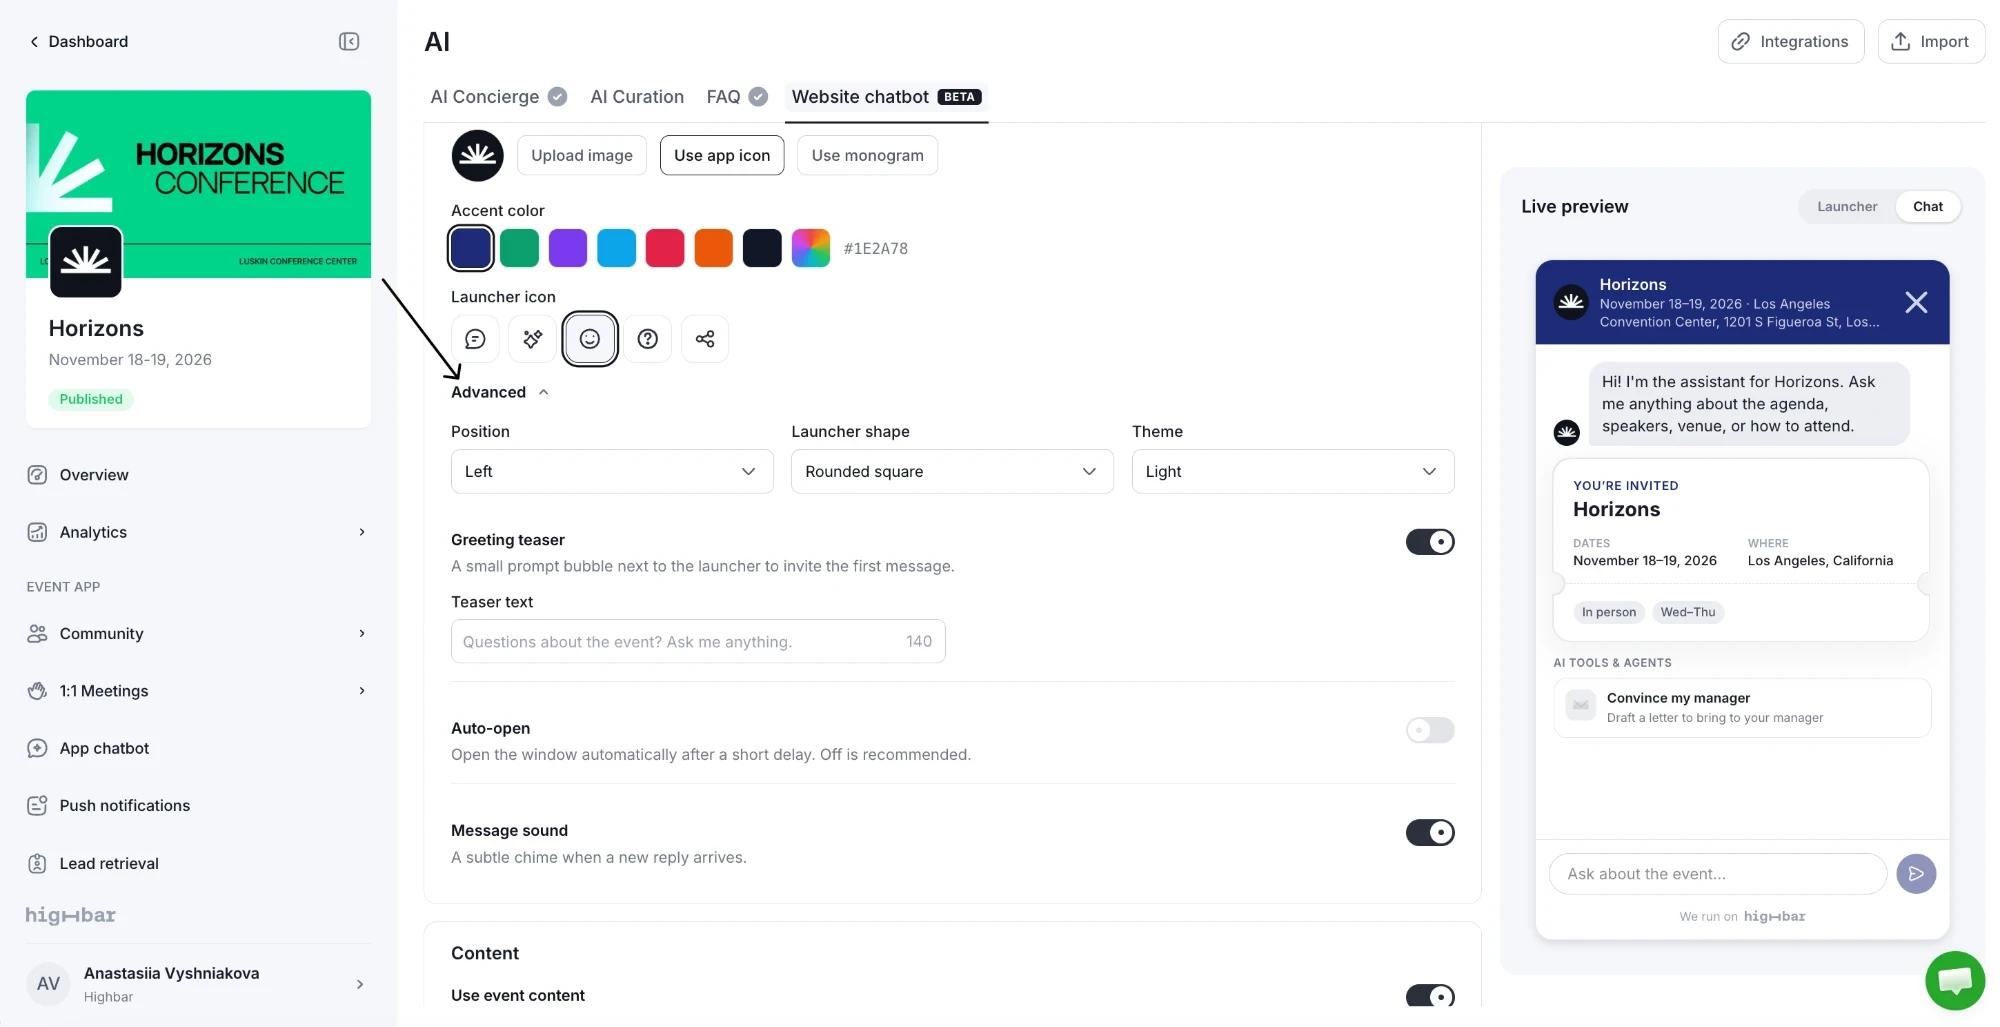
What it knows
Under Content, choose what the chatbot answers from:
- Use event content: your visible sessions, speakers and sponsors. On by default.
- Use event FAQs: the same FAQs as the AI Concierge, from the FAQ tab. On by default. See FAQs and AI Toolkit shortcuts.
- Custom FAQs: questions and answers only the website chatbot uses, such as pre-registration or sales questions. Click Add FAQs to add up to 30.
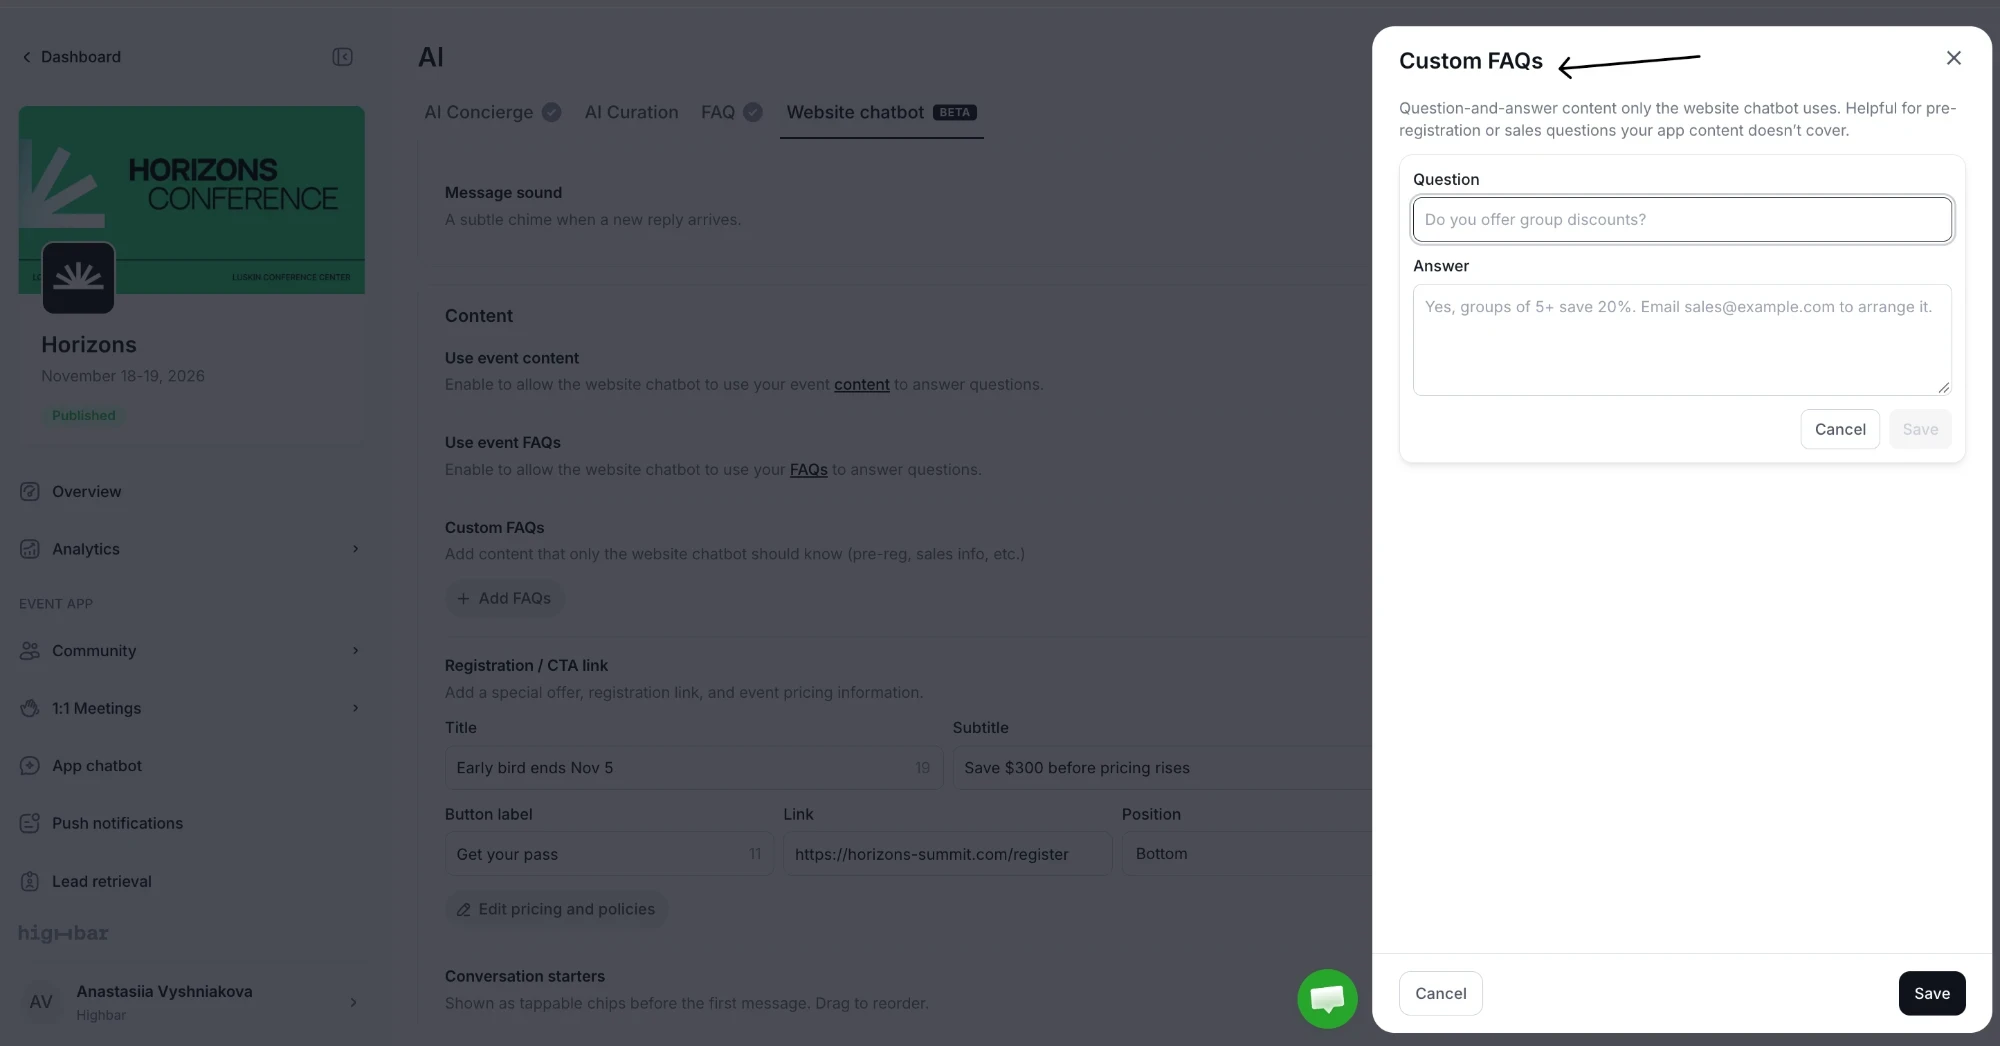
It also knows your event's name, dates, venue and time zone from Event details, and your organizer name and email if Organizer info is set to show on the install page.
The chatbot answers only from this information and says when it doesn't know. It doesn't answer questions unrelated to your event.
Registration link and pricing
Turn on Registration / CTA link to promote registration in the chat:
- Title and Subtitle: a short offer, such as "Early bird ends Aug 15".
- Button label: the text on the button, such as "Register now".
- Link: your registration page. Use the full address, starting with
https://. - Position: show the link at the Top or Bottom of the chat.
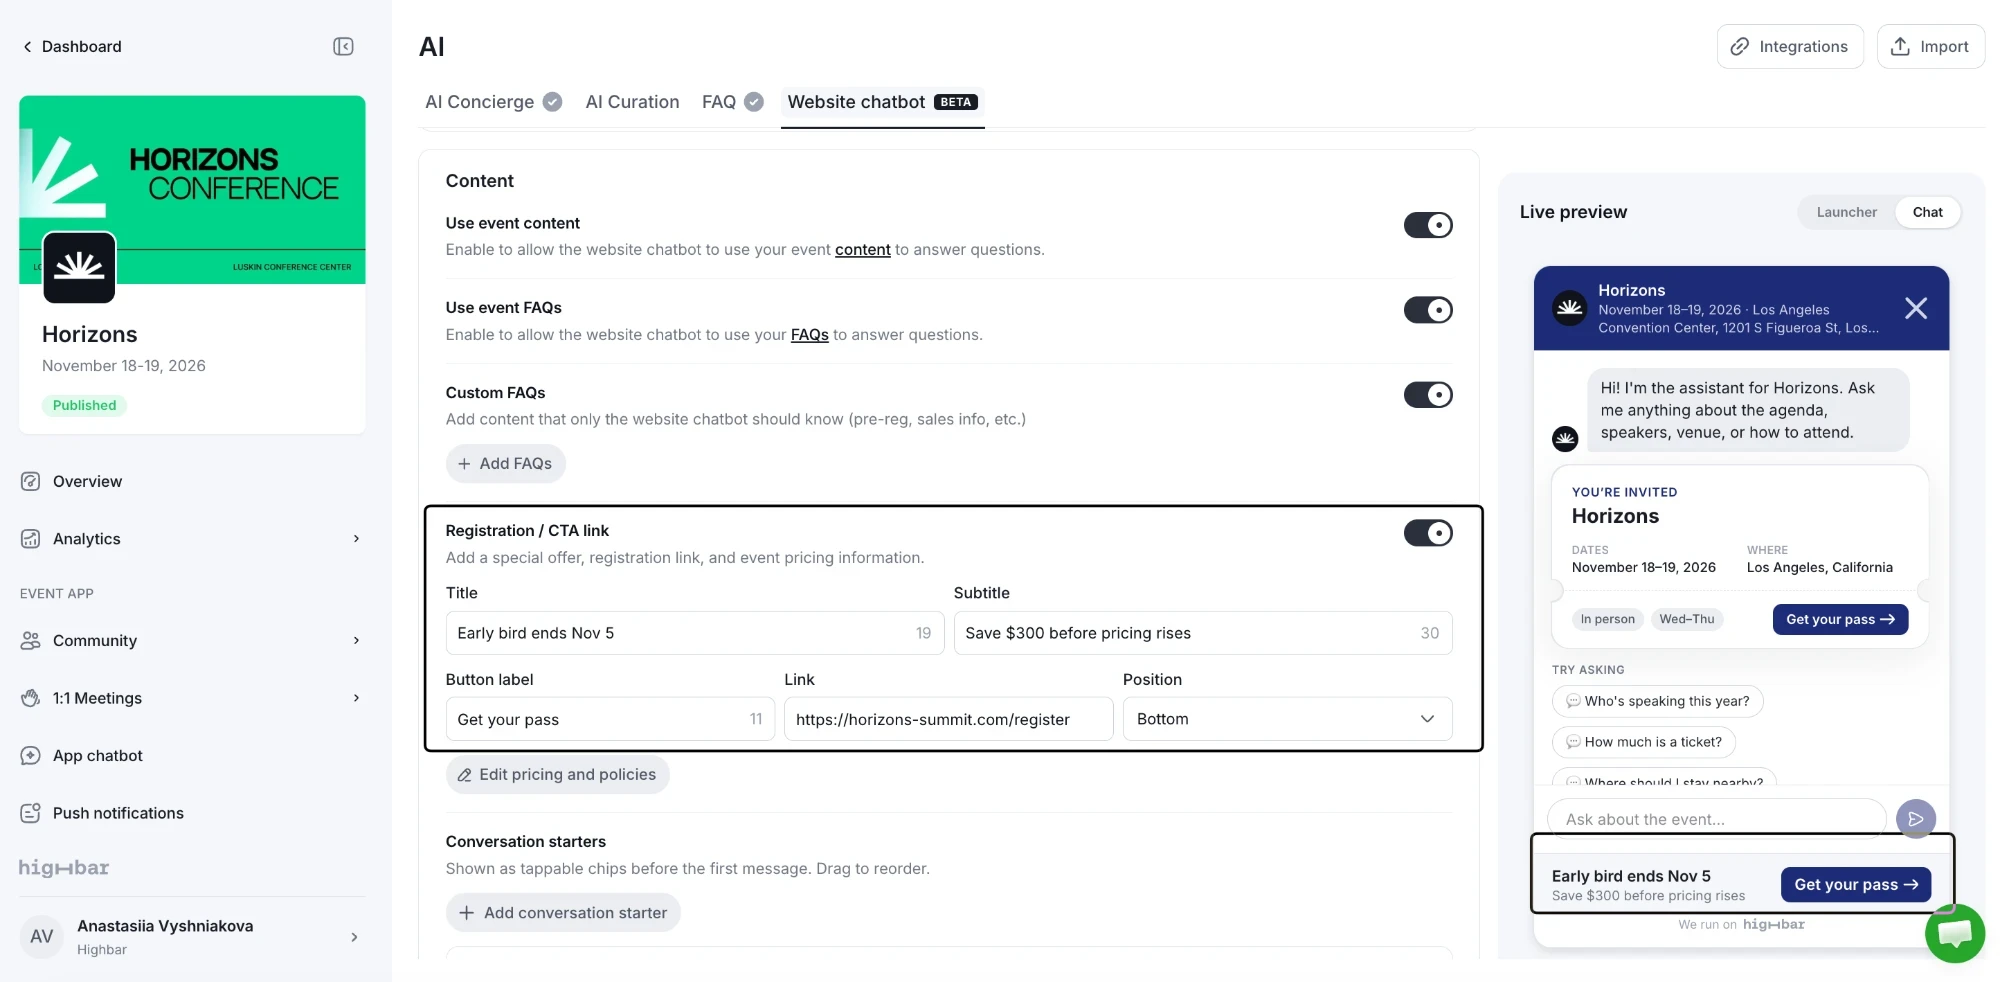
The chatbot also shares the link when a visitor asks about registering, tickets or pricing.
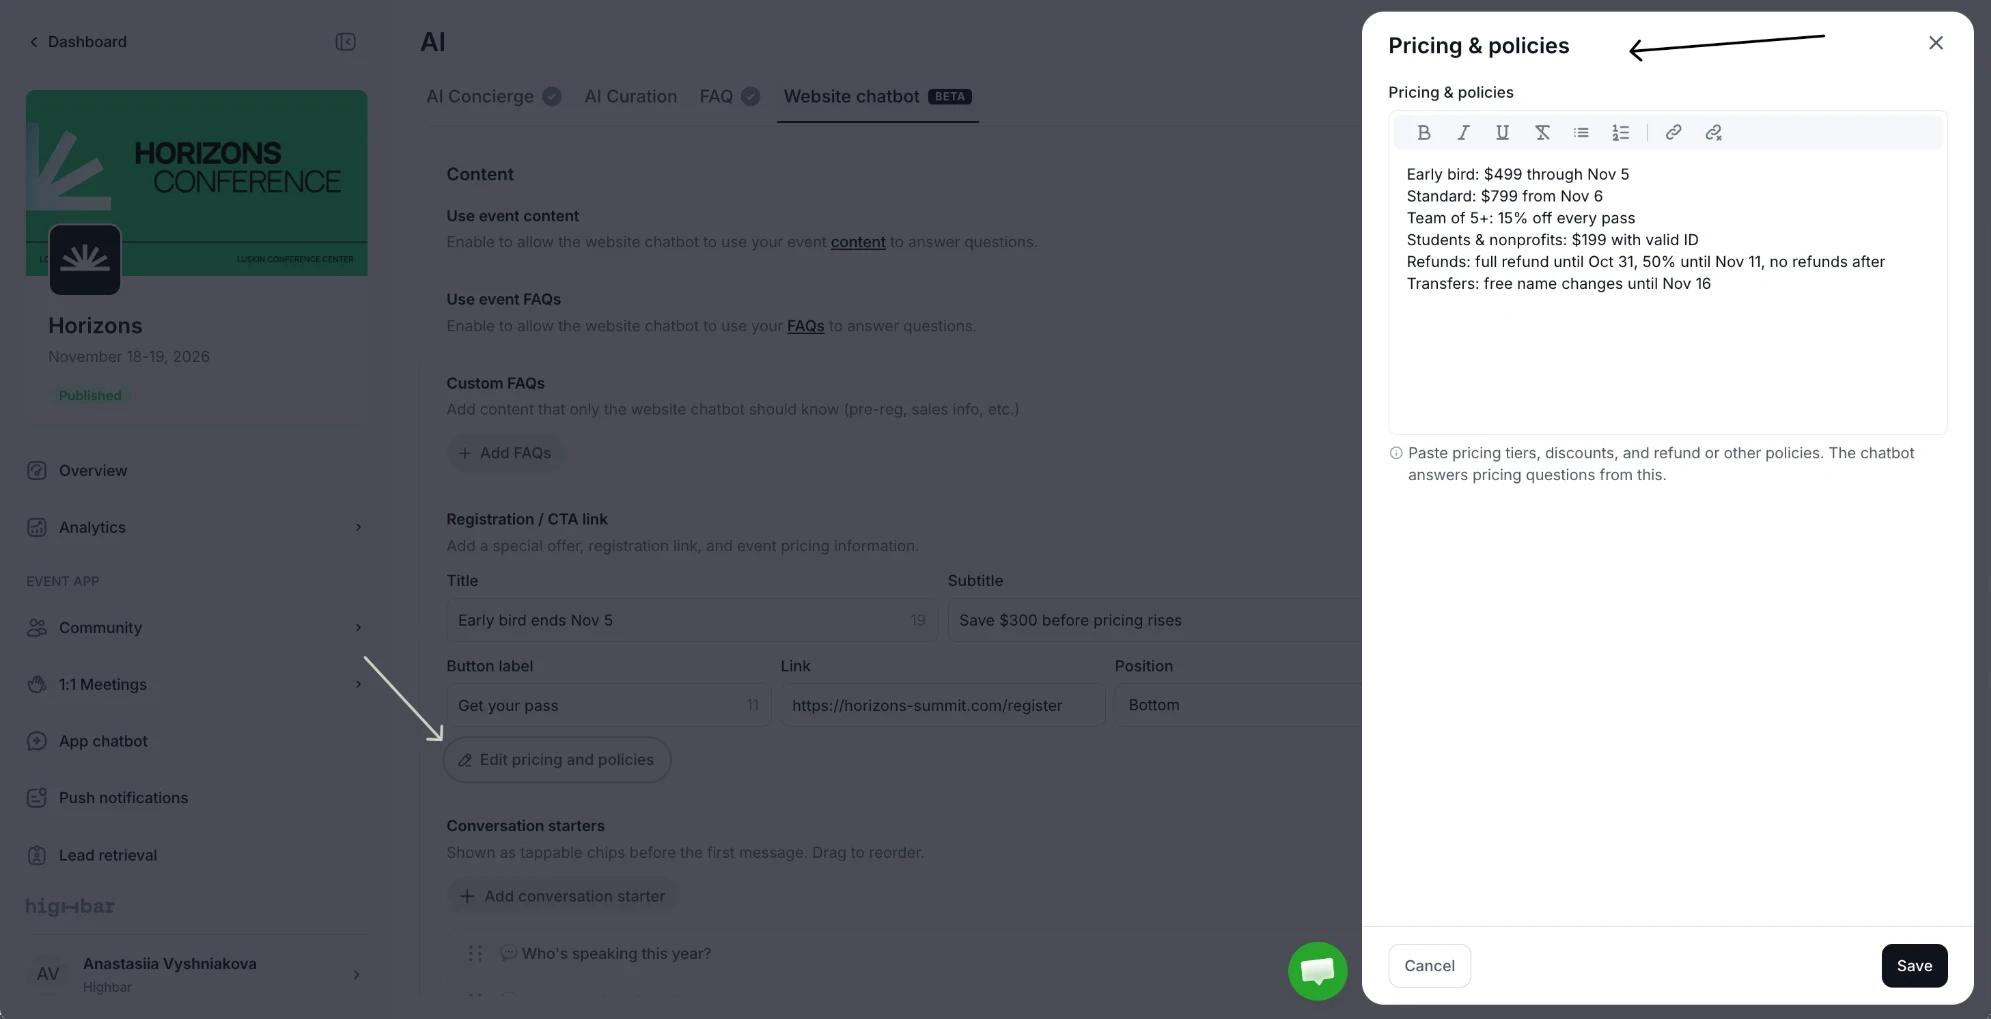
Click Add pricing and policies to paste your pricing tiers, discounts and refund policy. The chatbot answers pricing questions from this text.
Conversation starters
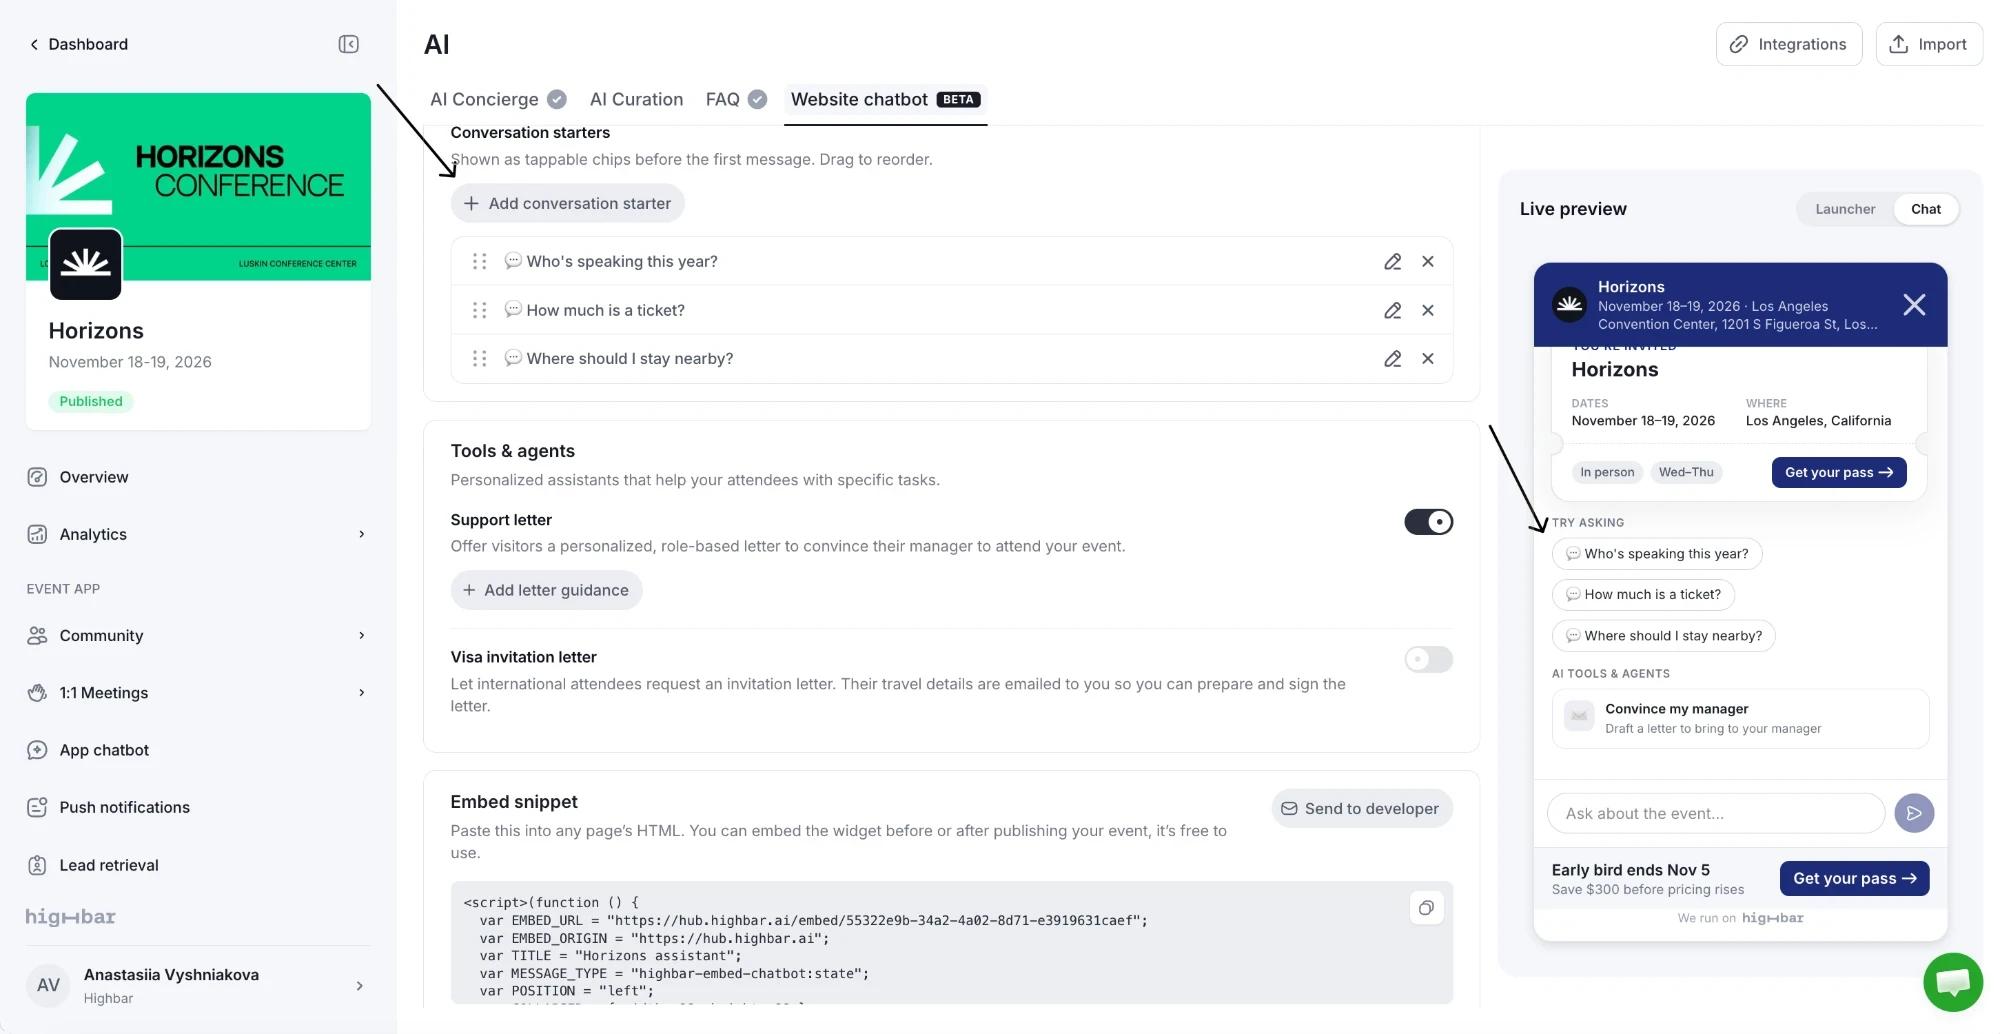
Add up to 4 Conversation starters: questions visitors can tap before they type, each with an emoji, such as "Who is speaking?". Drag them to change the order.
Tools for visitors
Under Tools & agents, offer visitors personalized help:
- Support letter: visitors enter their role and company, and the chatbot drafts a letter to convince their manager to approve the trip. On by default. Click Add letter guidance to tell it what to stress, such as your agenda highlights or group rates.
- Visa invitation letter: international visitors request an invitation letter. Off by default.
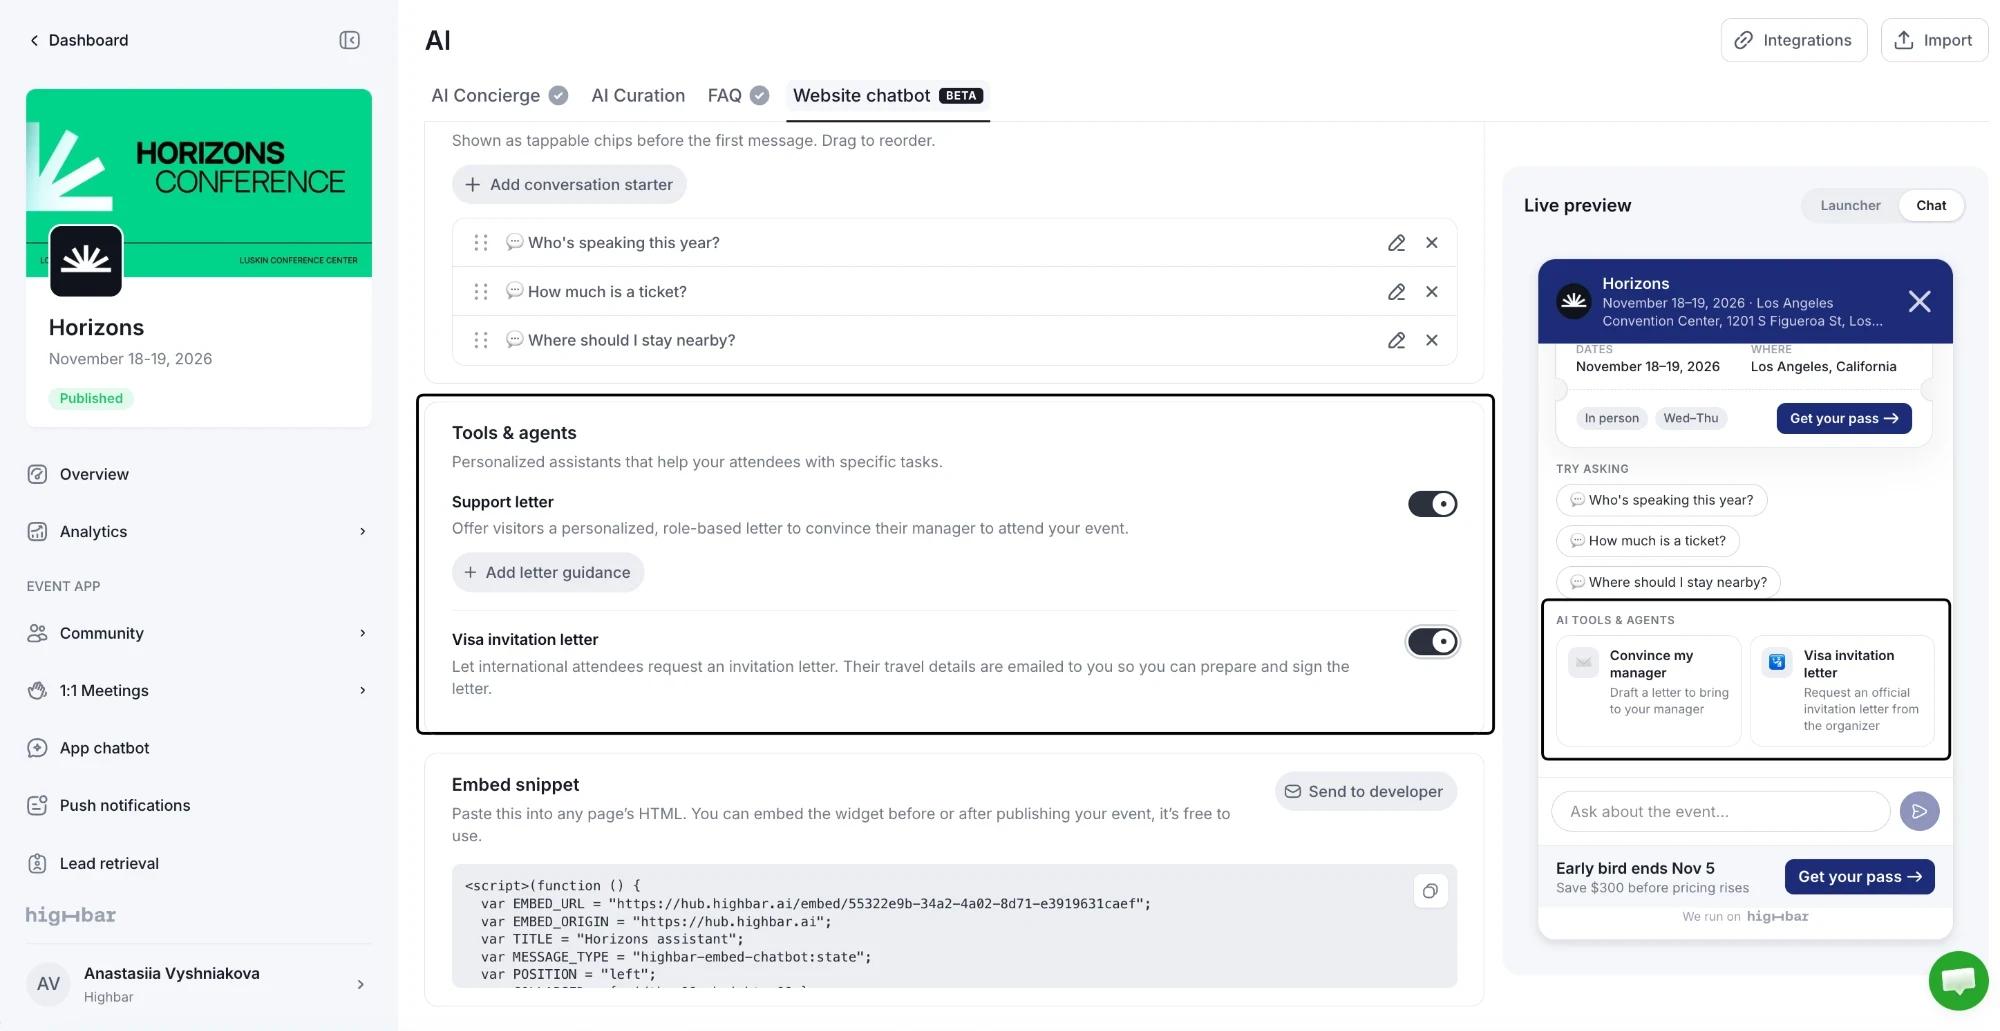
A visa request includes the visitor's passport number and travel dates, and it's emailed to the Support email in your Organizer info. Add a support email before you turn this on, and handle these emails carefully. The visitor gets a confirmation email without their passport details.
Add it to your website
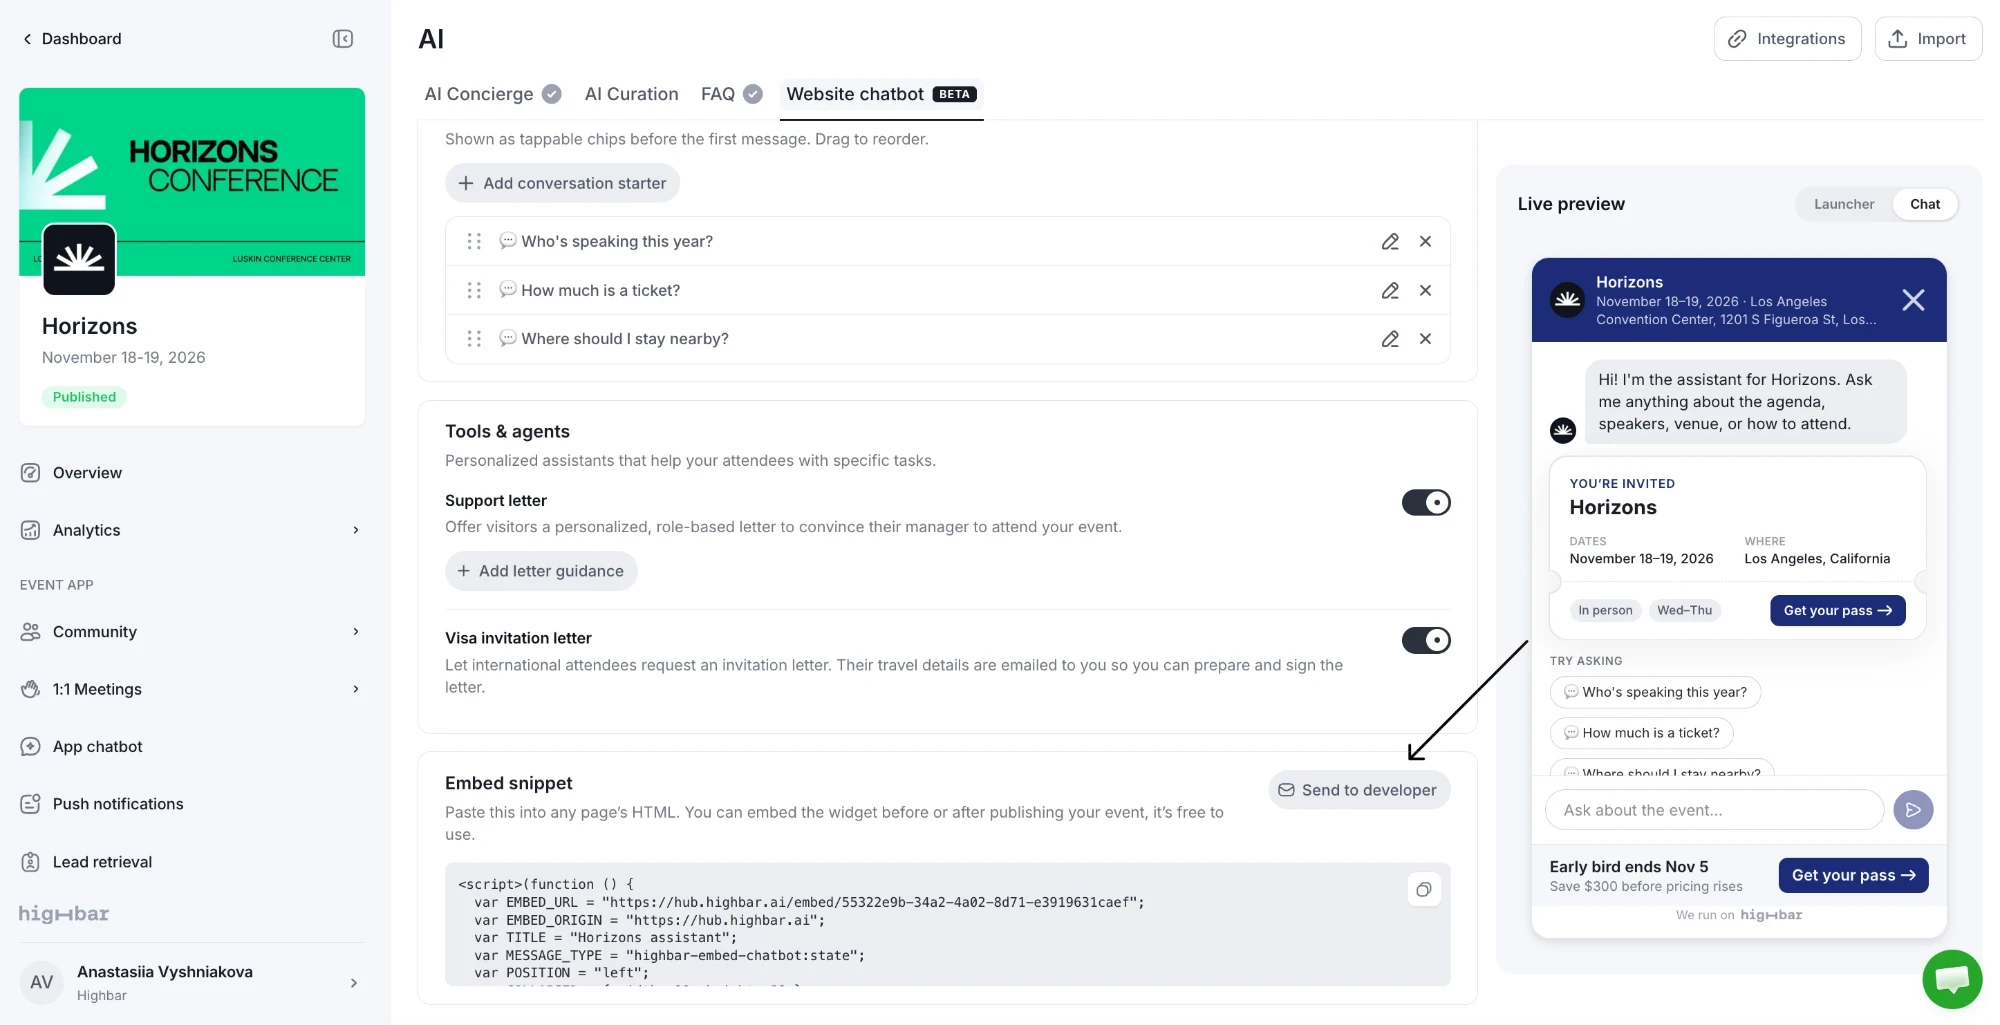
The Embed snippet card holds a short piece of code. Paste it into any page's HTML, just before the closing </body> tag, on every page where you want the chat. If your site uses a website builder, paste it into its custom HTML or embed code block.
-
Click the copy icon on the snippet to copy it.
-
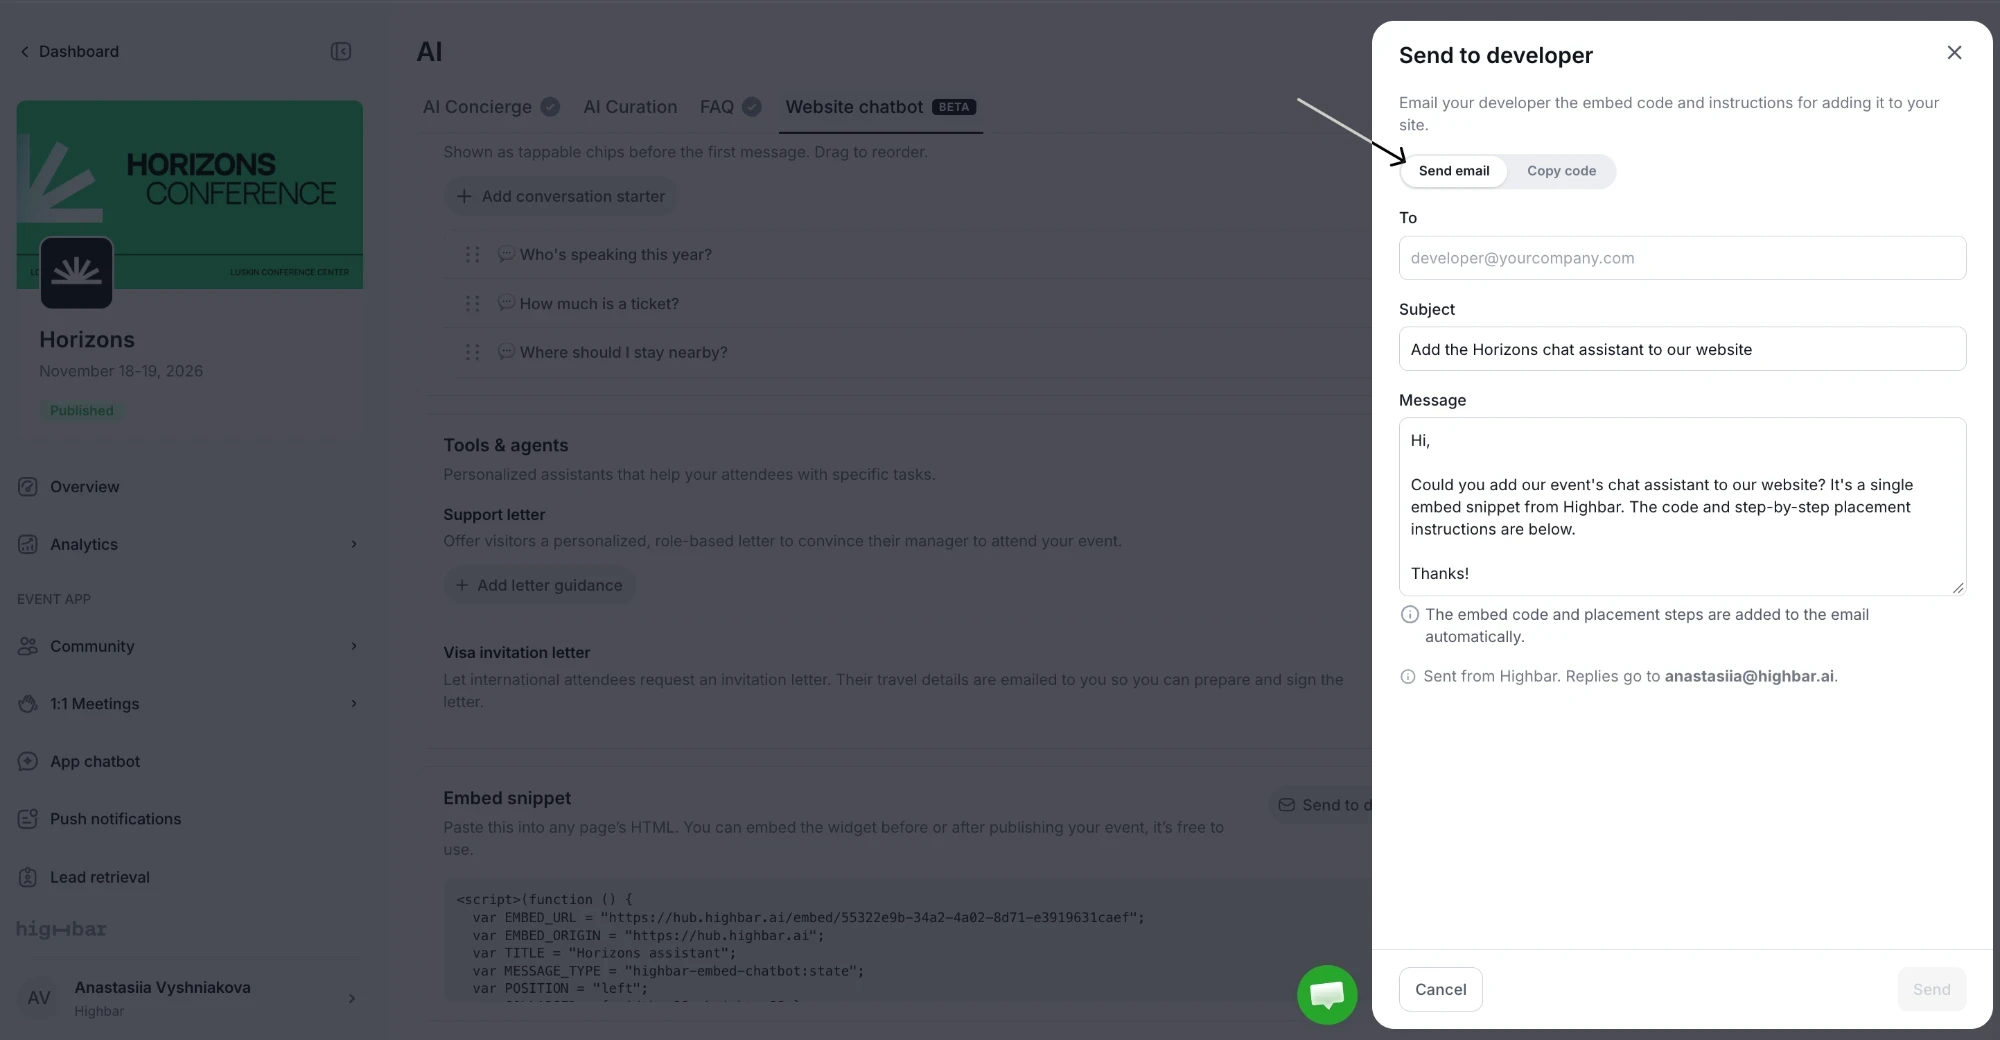
Click Send to developer to email the code to whoever manages your site. On the Send email tab, enter their address in To, check the Subject and Message, and click Send. The code and placement steps are added to the email for you, and replies go to your email address.
-
To share the code another way, open the Copy code tab in the same panel.
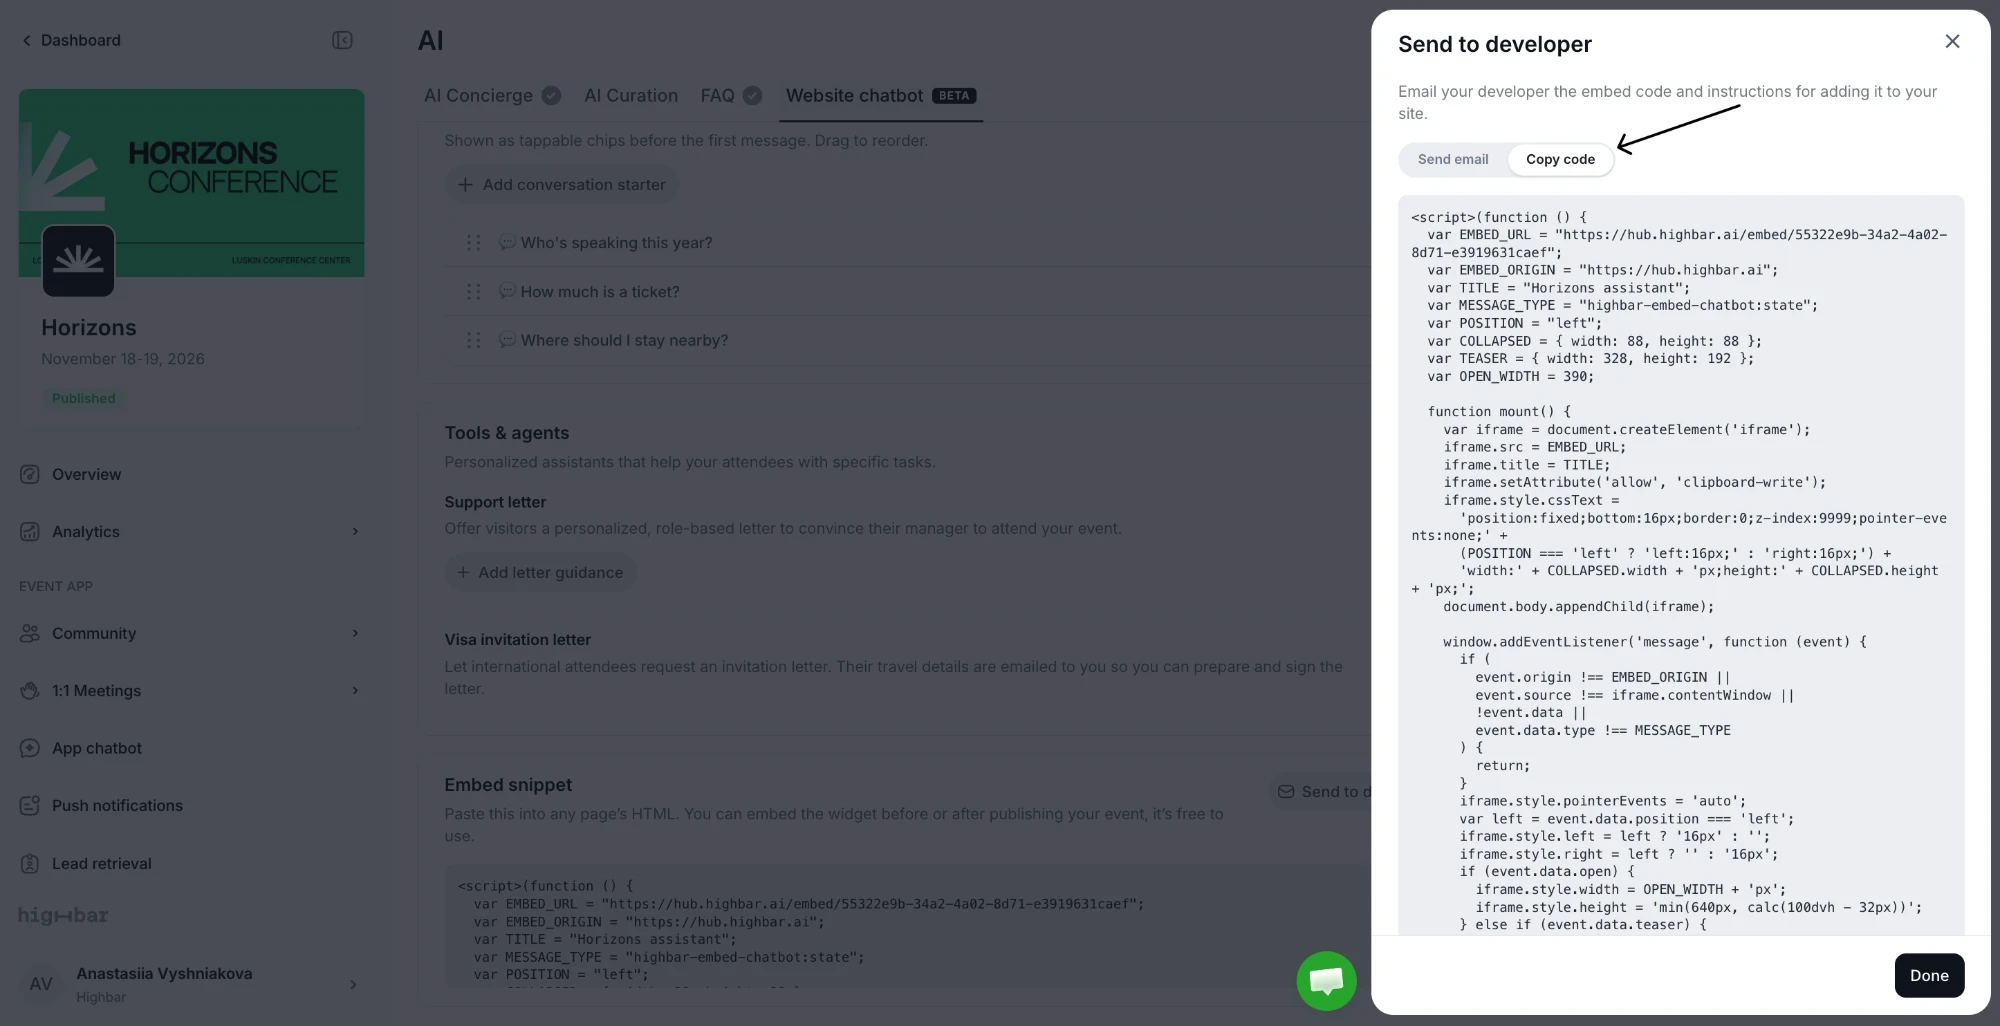
The chat button appears in the bottom corner of the page you chose under Position.
Good to know
- Conversations aren't saved. Visitors start a new chat when they reload the page, and the website chatbot's questions don't appear in App chatbot, which covers the in-app AI Concierge only.
- Fair use. Visitors who send many messages quickly are asked to wait a moment before trying again.
- Turning it off. When you turn off Enable website chatbot, the chat on your site says the assistant isn't available. Remove the snippet from your site to take it away completely.