Schedule
Add sessions to your event app's schedule, group them with tracks, types and levels, rename sessions and show CE credits.
A Schedule section holds your sessions: talks, workshops, breaks and anything else with a time slot. Attendees browse it by day, filter it, save sessions and open each one for the details.
To get there, open Content and click Add content on the Schedule section's row (or click the section's name). Once you're inside a section, each section has its own tab at the top, and Sections takes you back to the list. Sessions are grouped into day tabs. The toolbar has a search box, Show app preview and the Schedule settings gear.
Add a session
Click Add session.
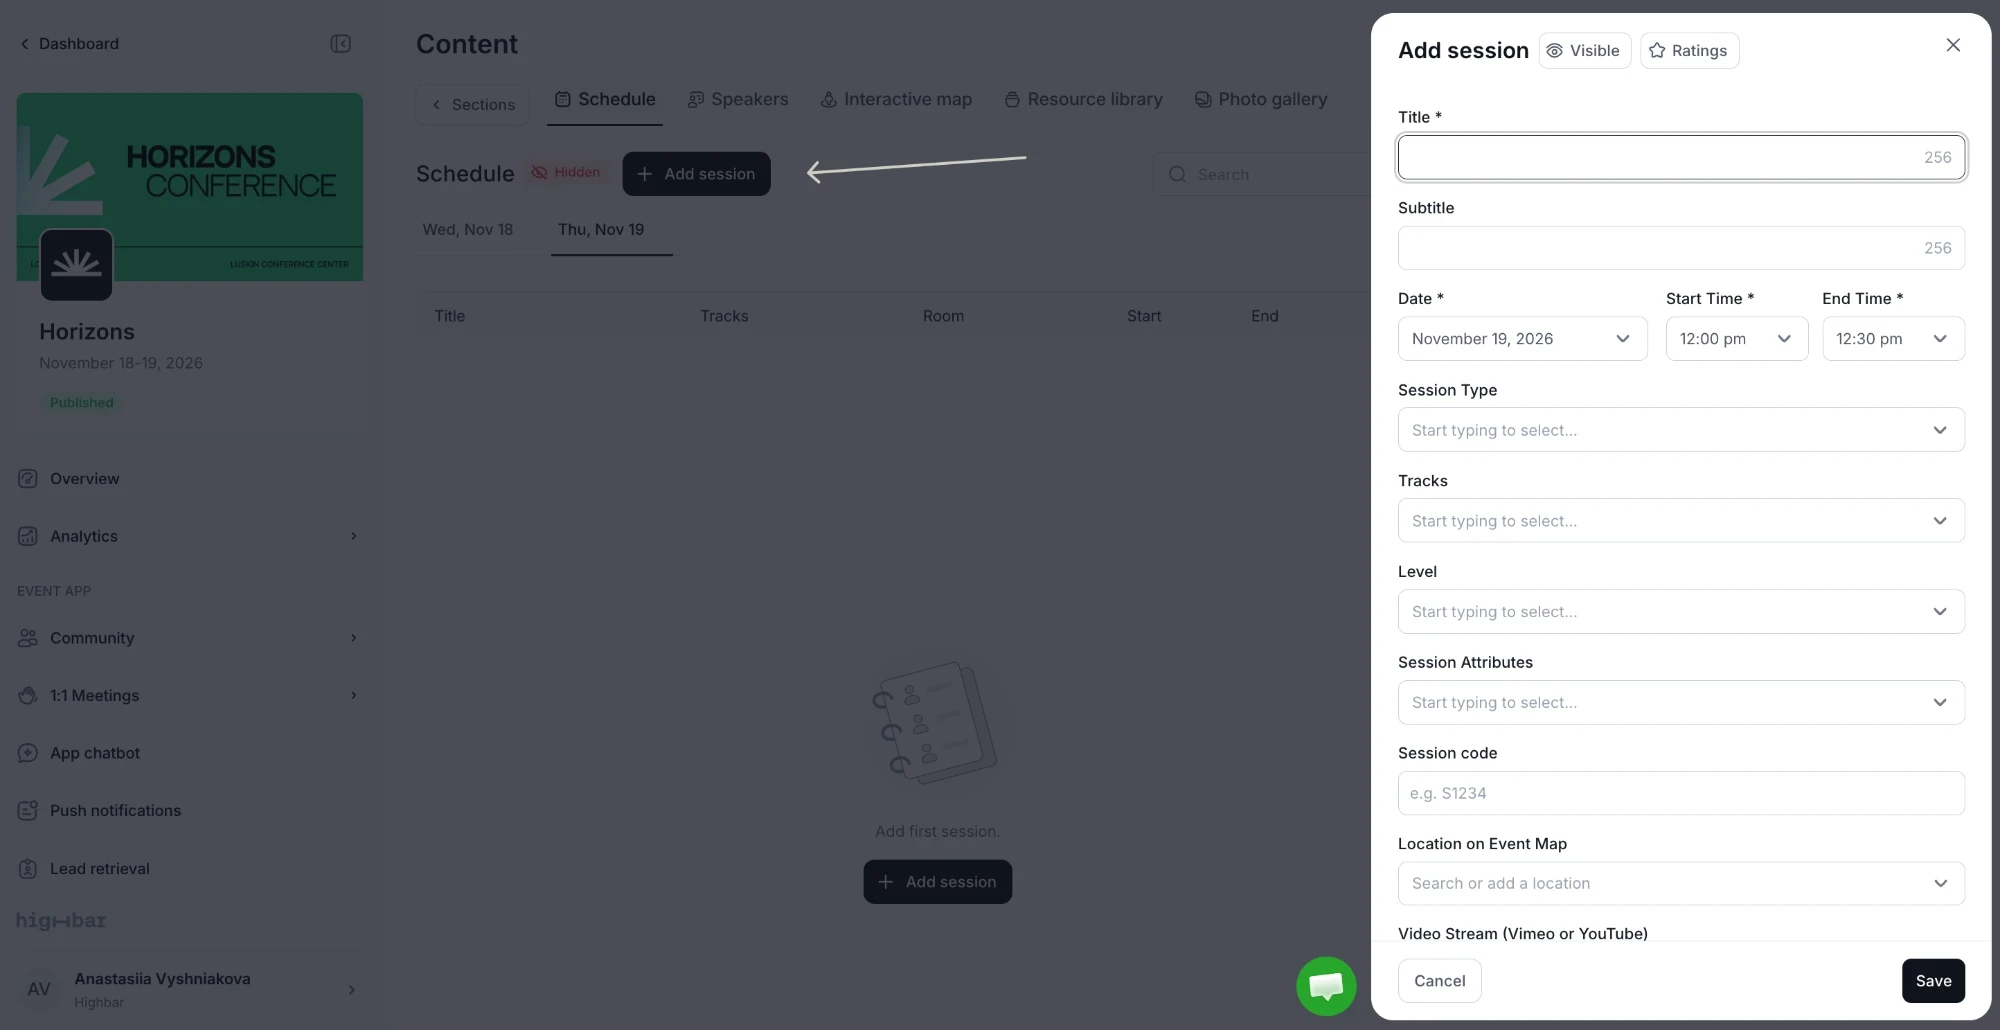
Fill in the Title, Date, Start Time and End Time. These are the only required fields. To use a day outside your event dates, choose Pick another date… in the date list.
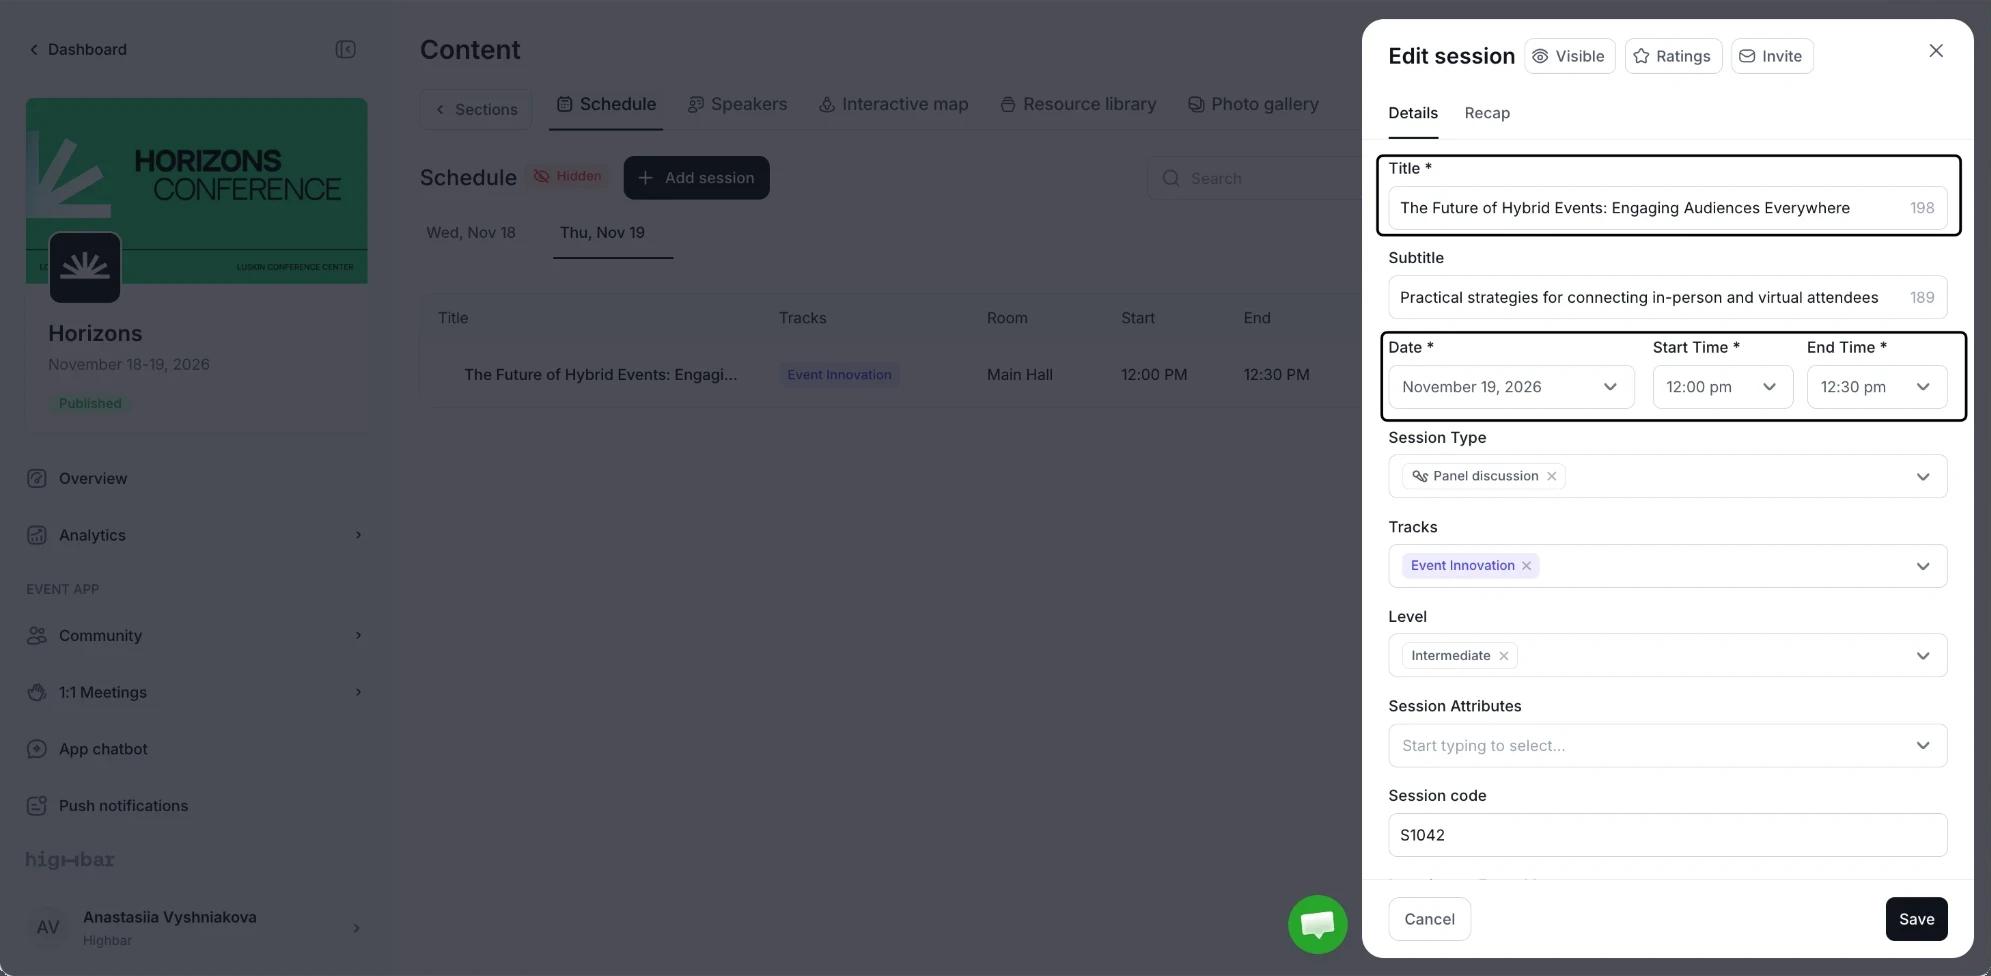
Add any of the optional details below, then click Save.
To bring in a whole agenda at once, use Import at the top of the page. See Importing content.
Session details
| Field | What it's for |
|---|---|
| Subtitle | A short line under the title. |
| Session Type, Tracks, Level, Session Attributes | Ways to group sessions. Attendees can filter the schedule by each of them. |
| Session code | Your own reference code, such as S1234. |
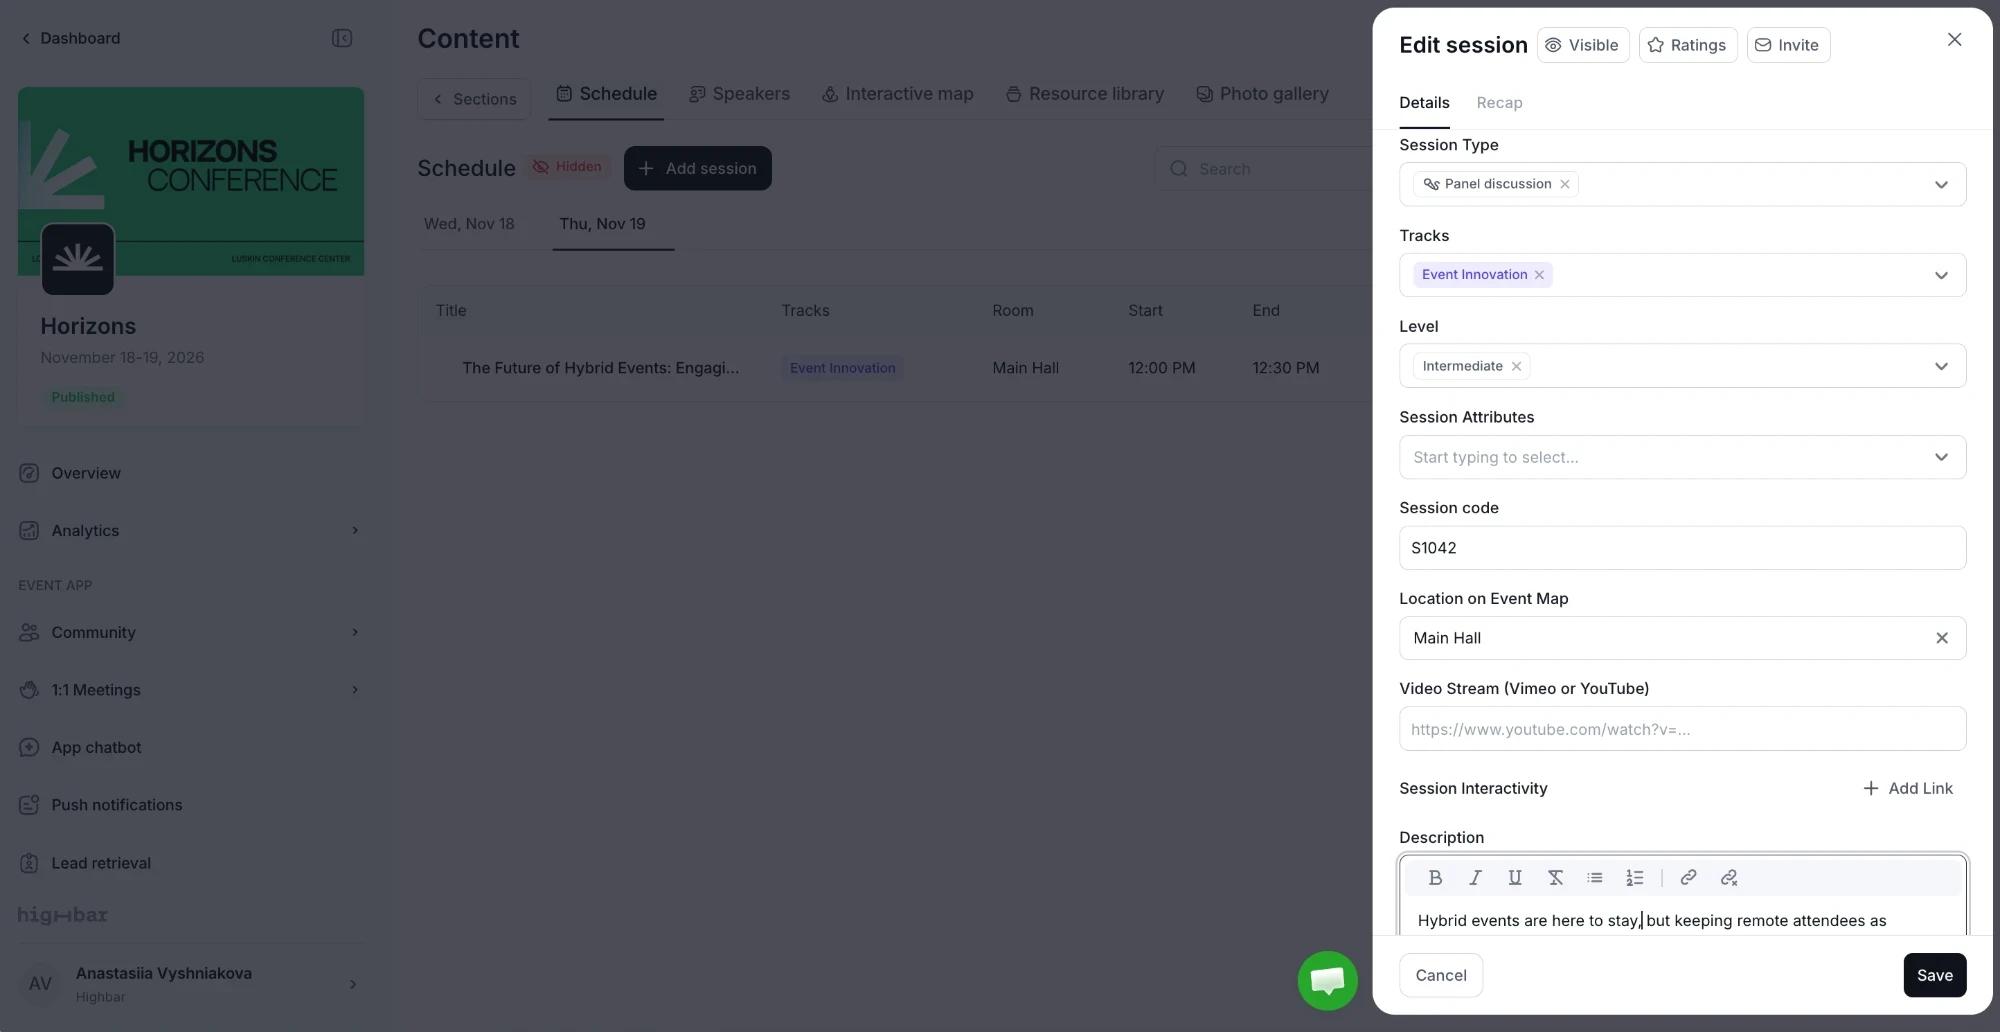
| Location on Event Map | The room or area, linked to a pin on an interactive map. Attendees can also filter by location. |
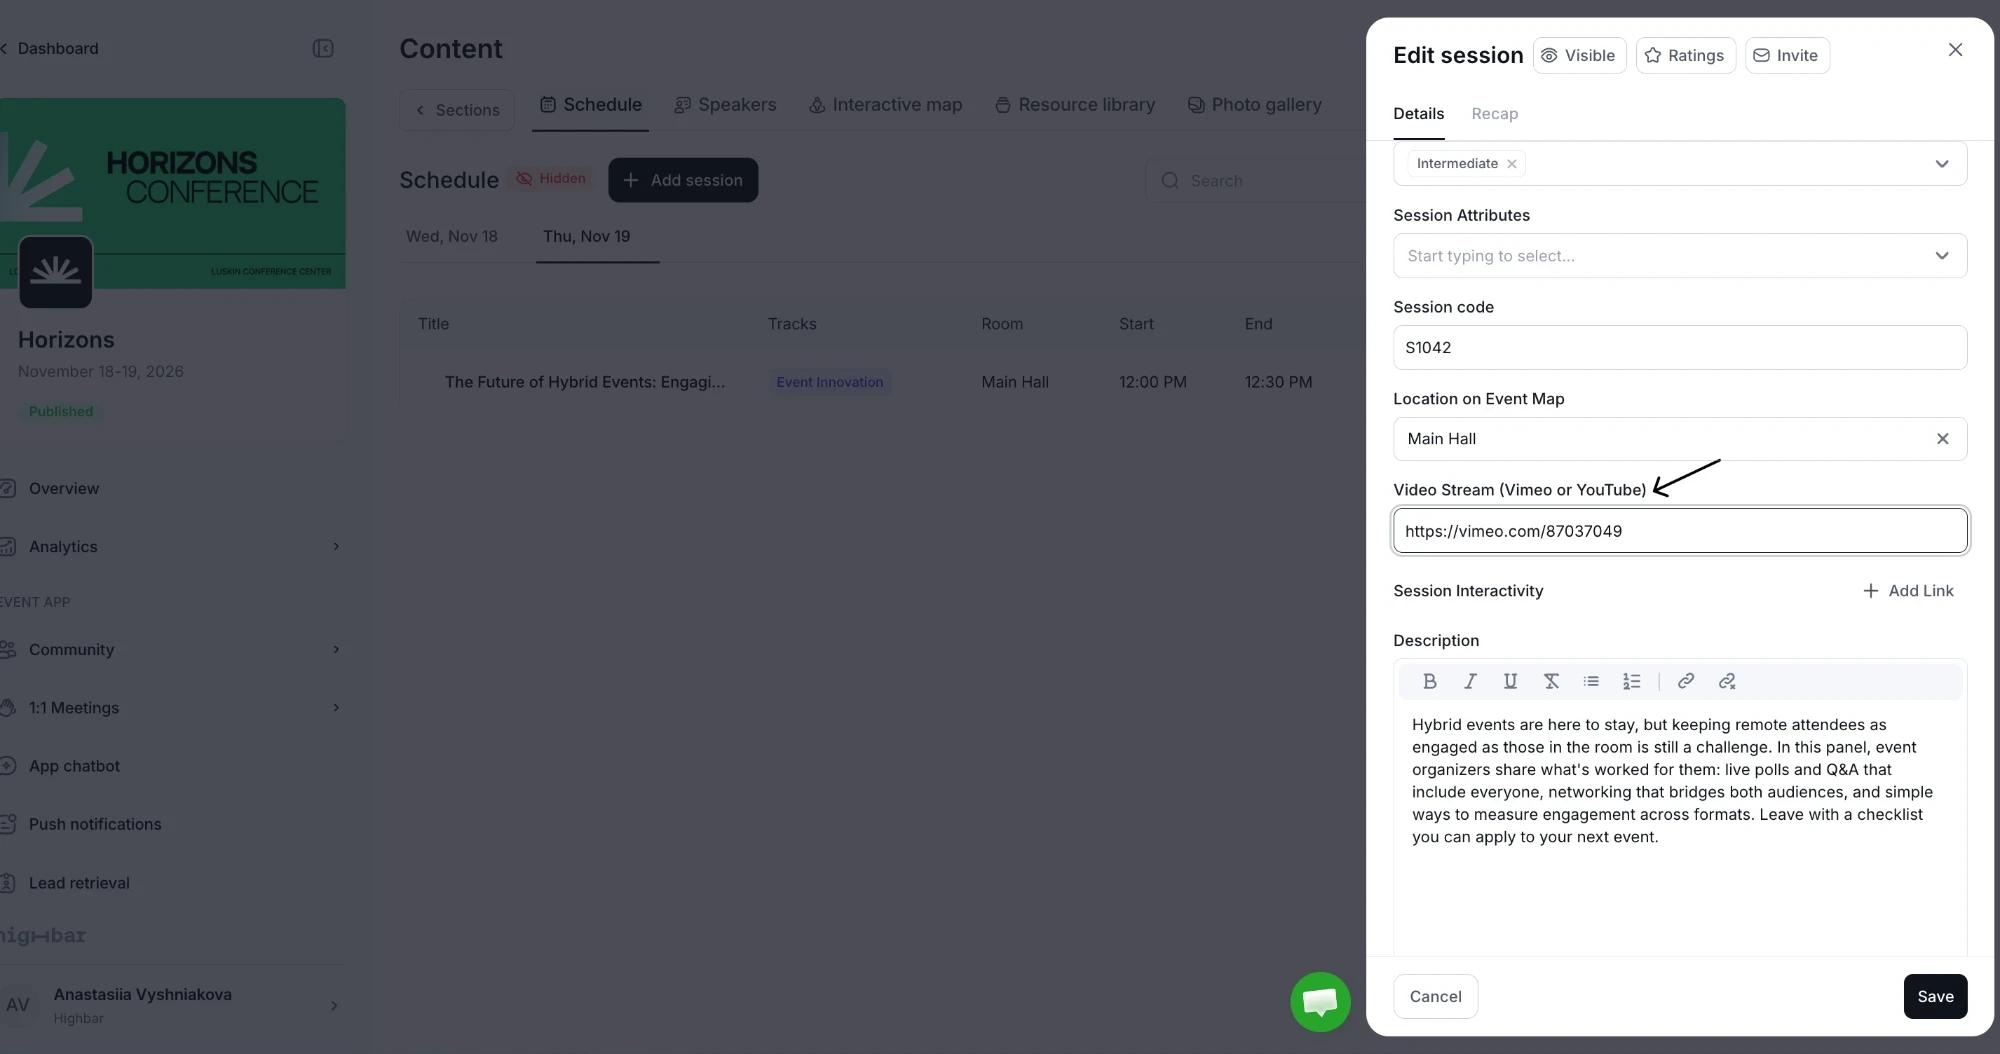
| Video Stream (Vimeo or YouTube) | A stream or recording link shown on the session page. |
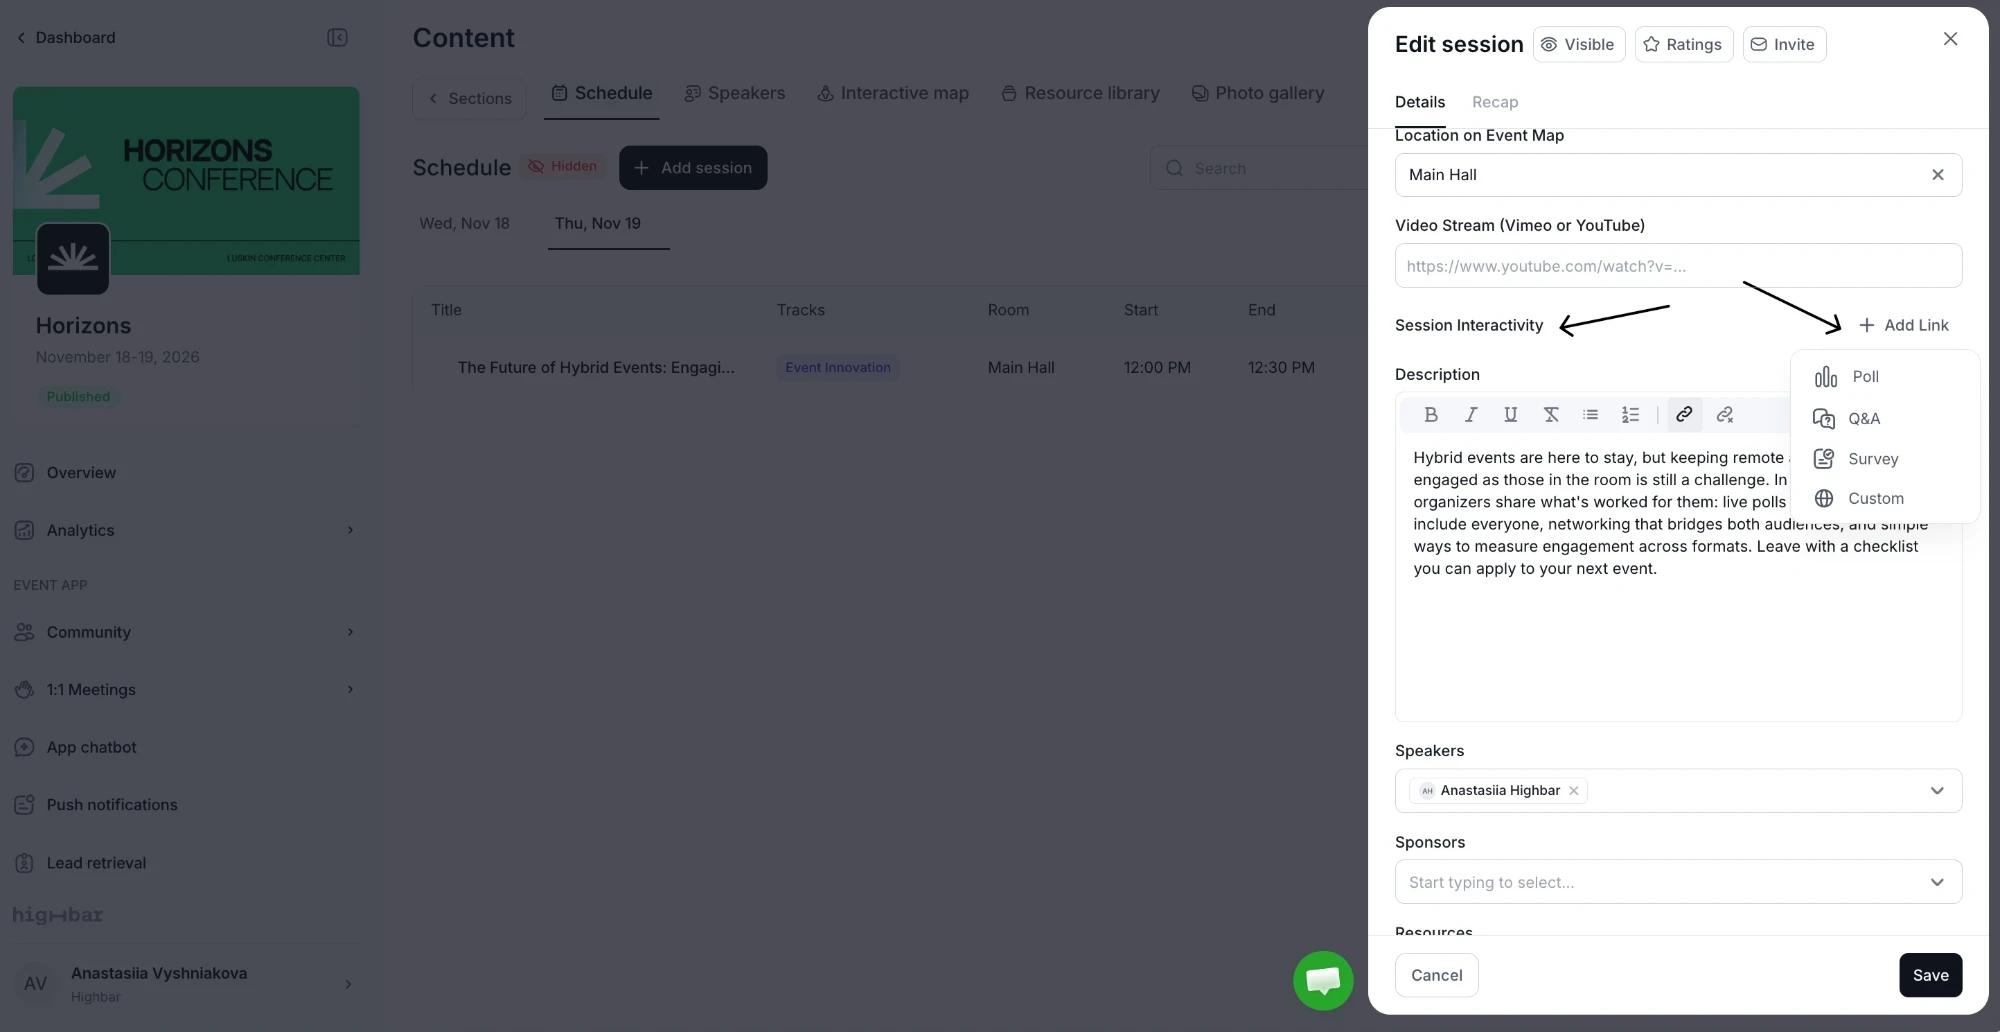
| Session Interactivity | Buttons on the session page, available once the session is saved. Click Add Link and choose Poll, Q&A, Survey or Custom, then add a Label, an Icon and a Link. |
| Description | The session abstract, with formatting. |
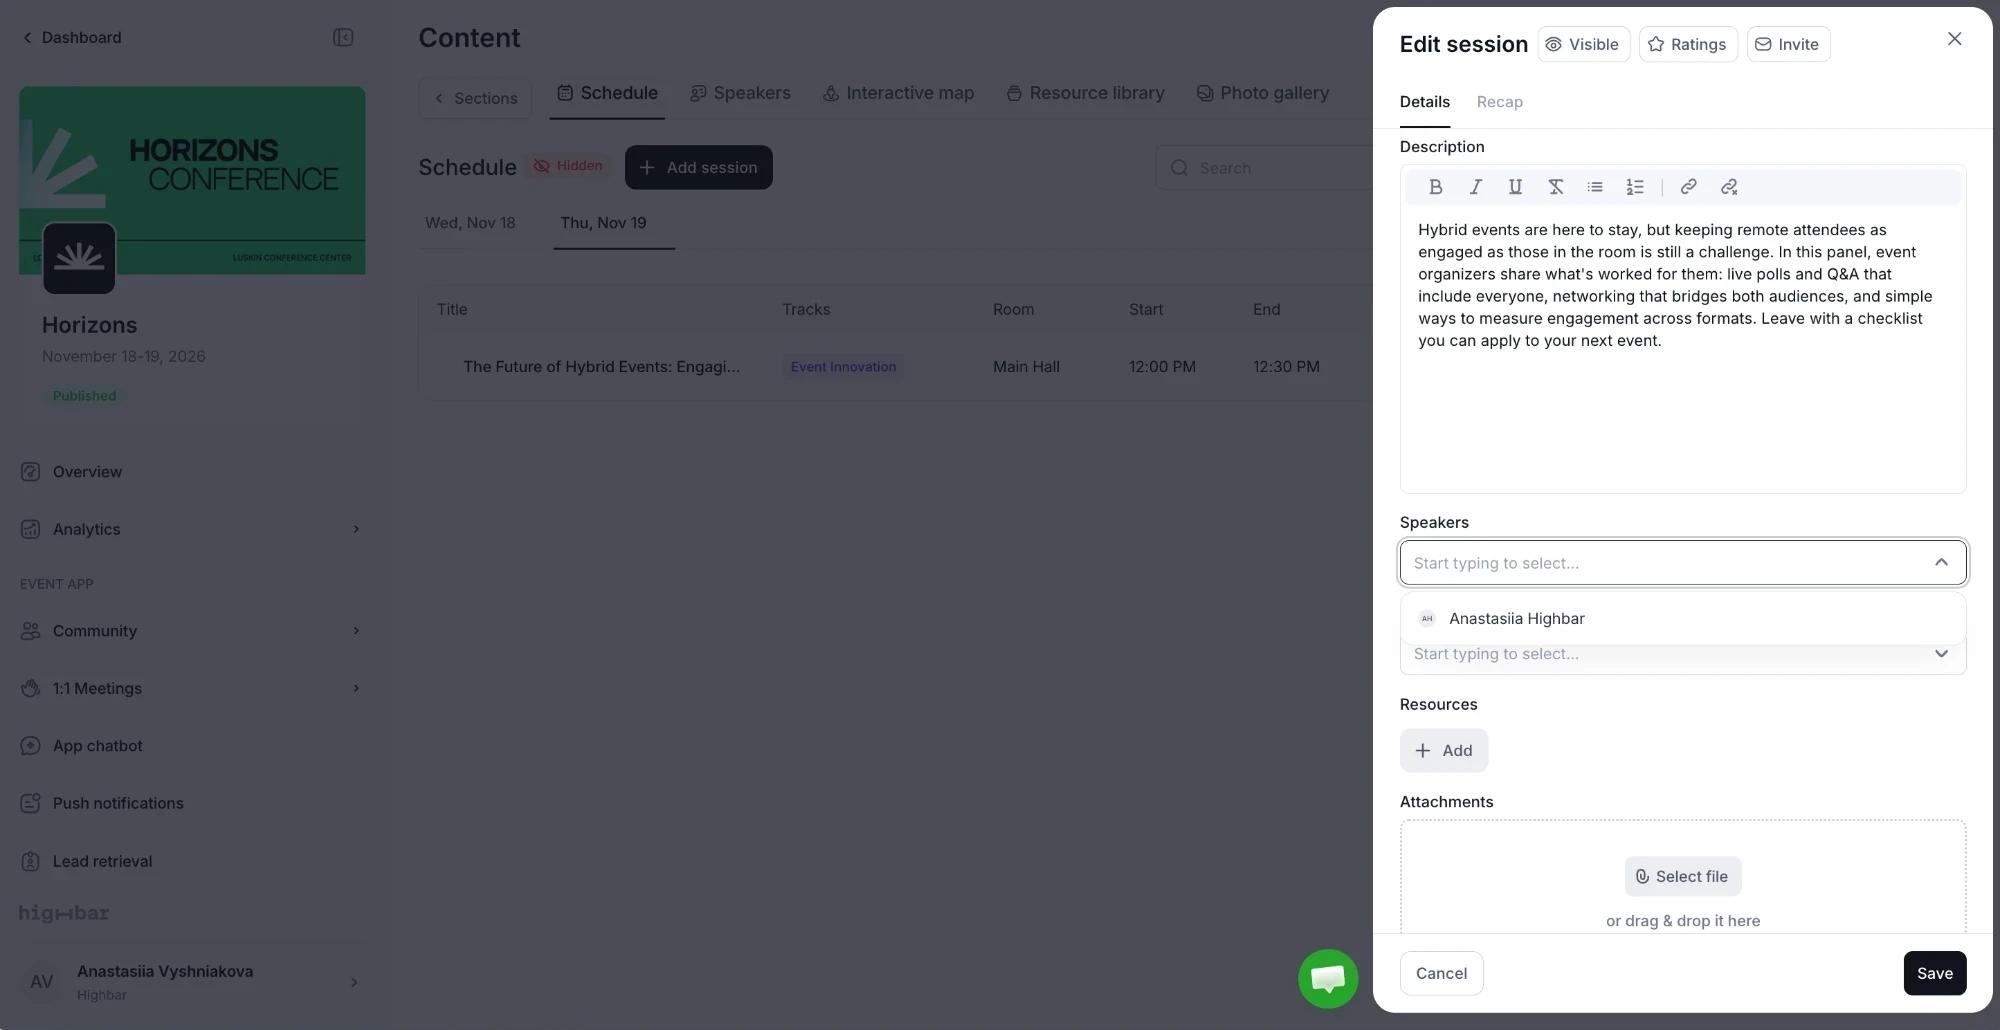
| Speakers | People from your Speakers sections. With two or more, drag them in Speaker order. |
| Sponsors | Sponsors linked to the session. |
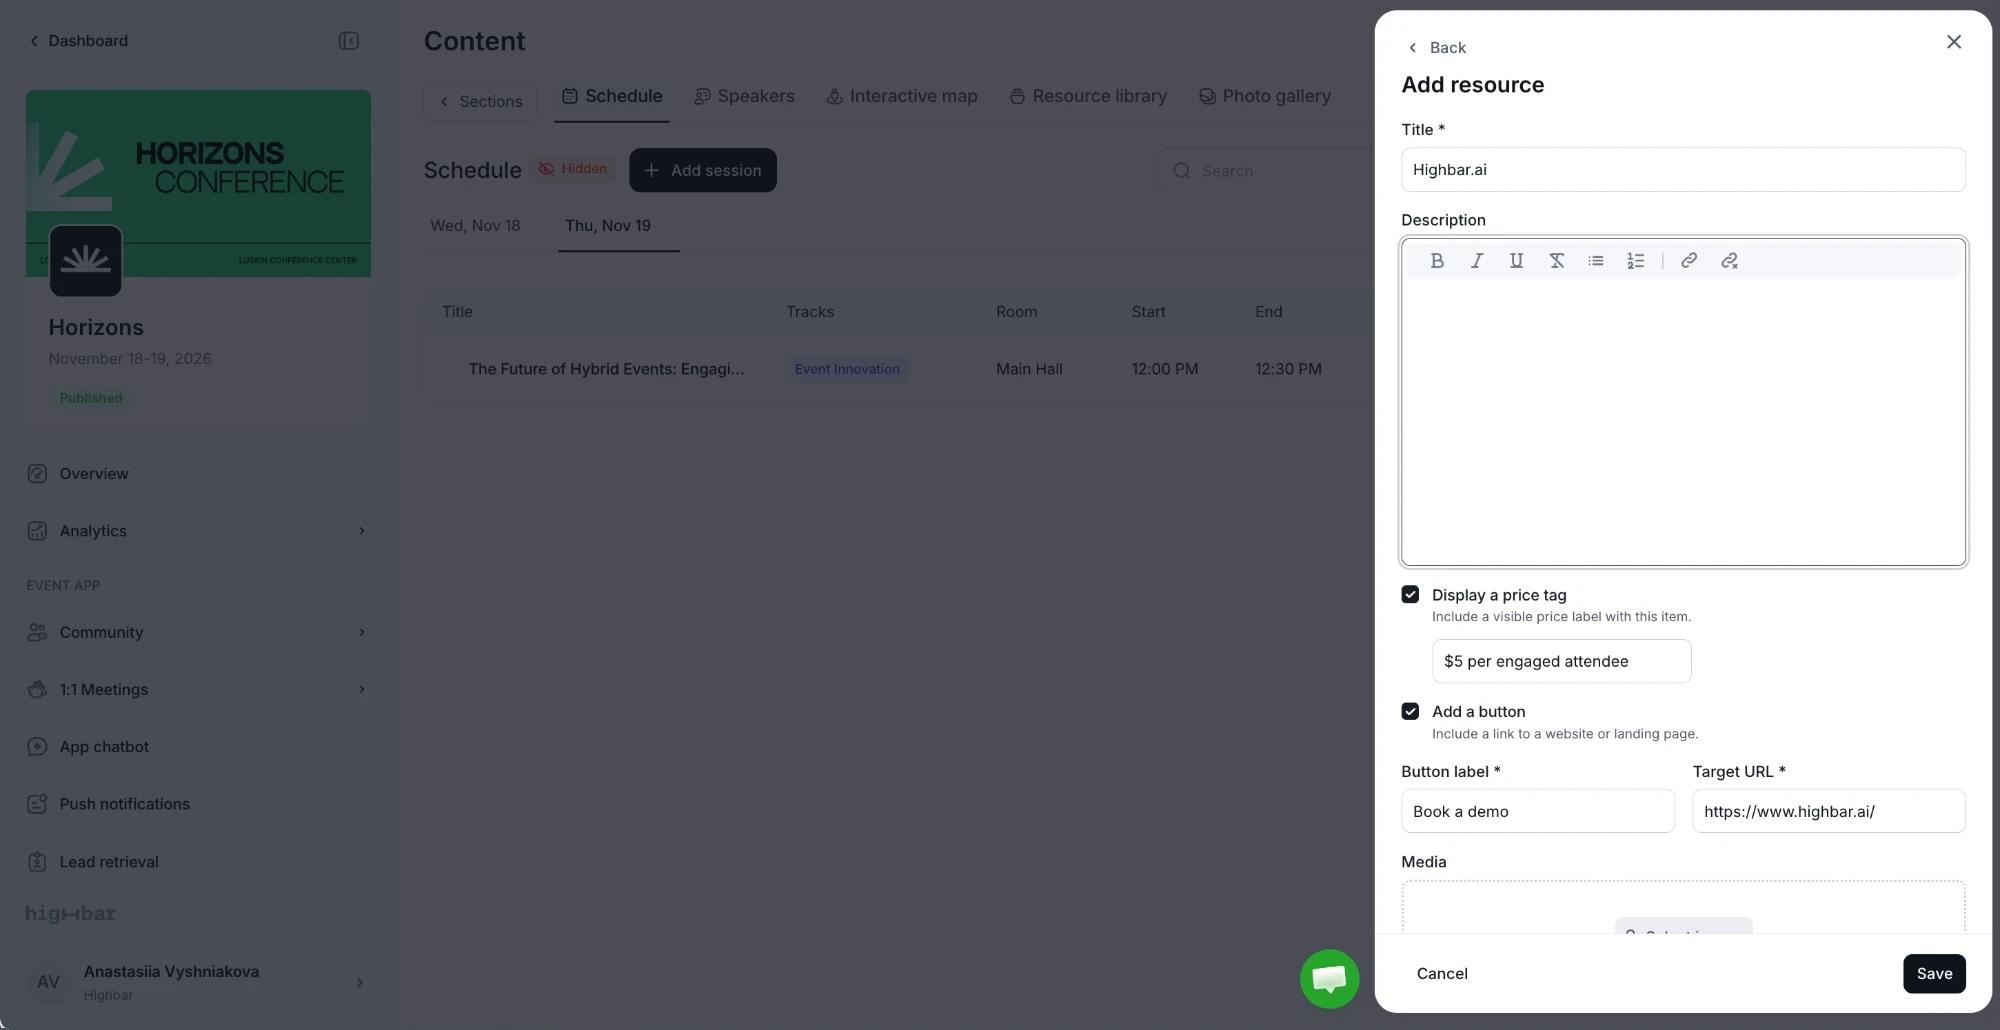
| Resources | Up to 5 products or links, each with a title, description, media and a button. |
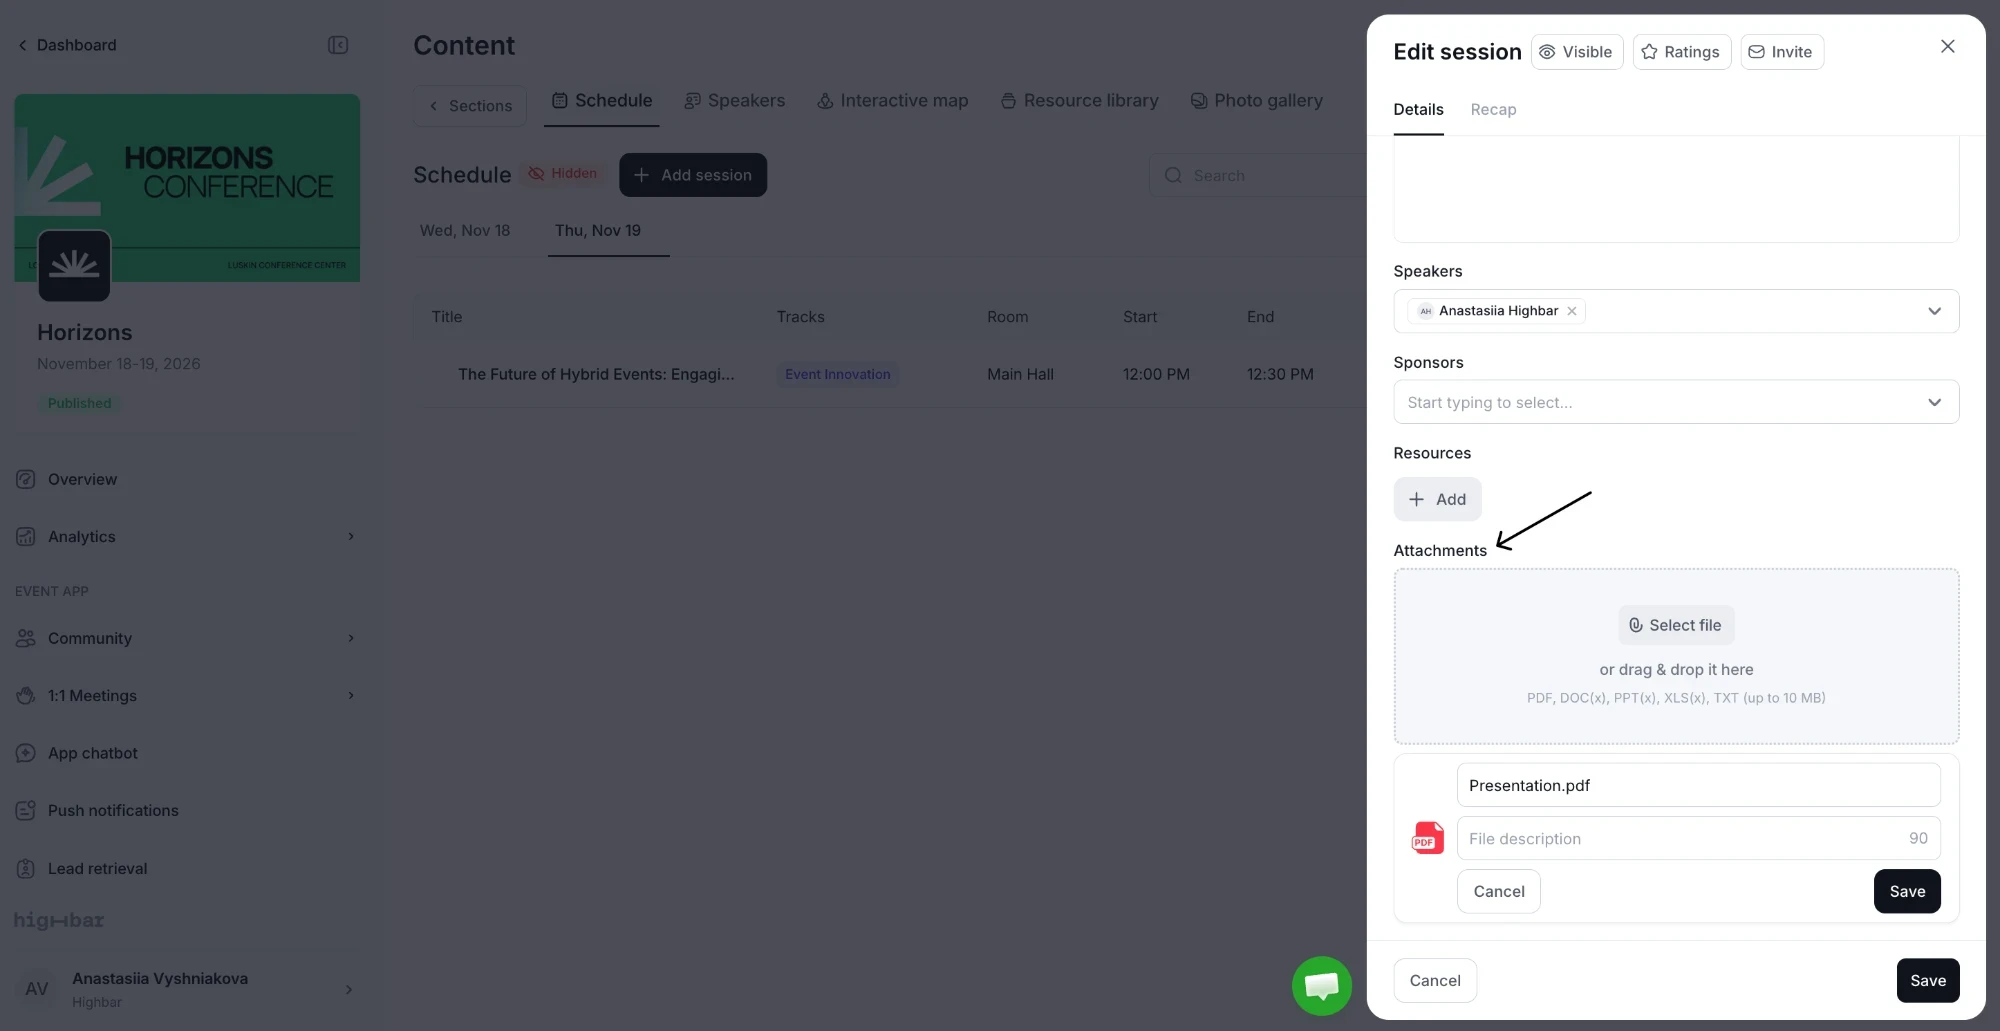
| Attachments | Up to 5 files for attendees to download: PDF, DOC(x), PPT(x), XLS(x) or TXT, up to 10 MB each. |
To show a stream or recording, paste its link in Video Stream (Vimeo or YouTube).
Under Session Interactivity, click Add Link and pick the kind of button to add. The field appears when you edit a session you've already saved.
In Speakers, start typing a name and pick the speaker from the list.
To add a resource, click Add under Resources. Give it a Title and a Description, and optionally tick Display a price tag to show a price, or Add a button with a Button label and Target URL. You can also add Media.
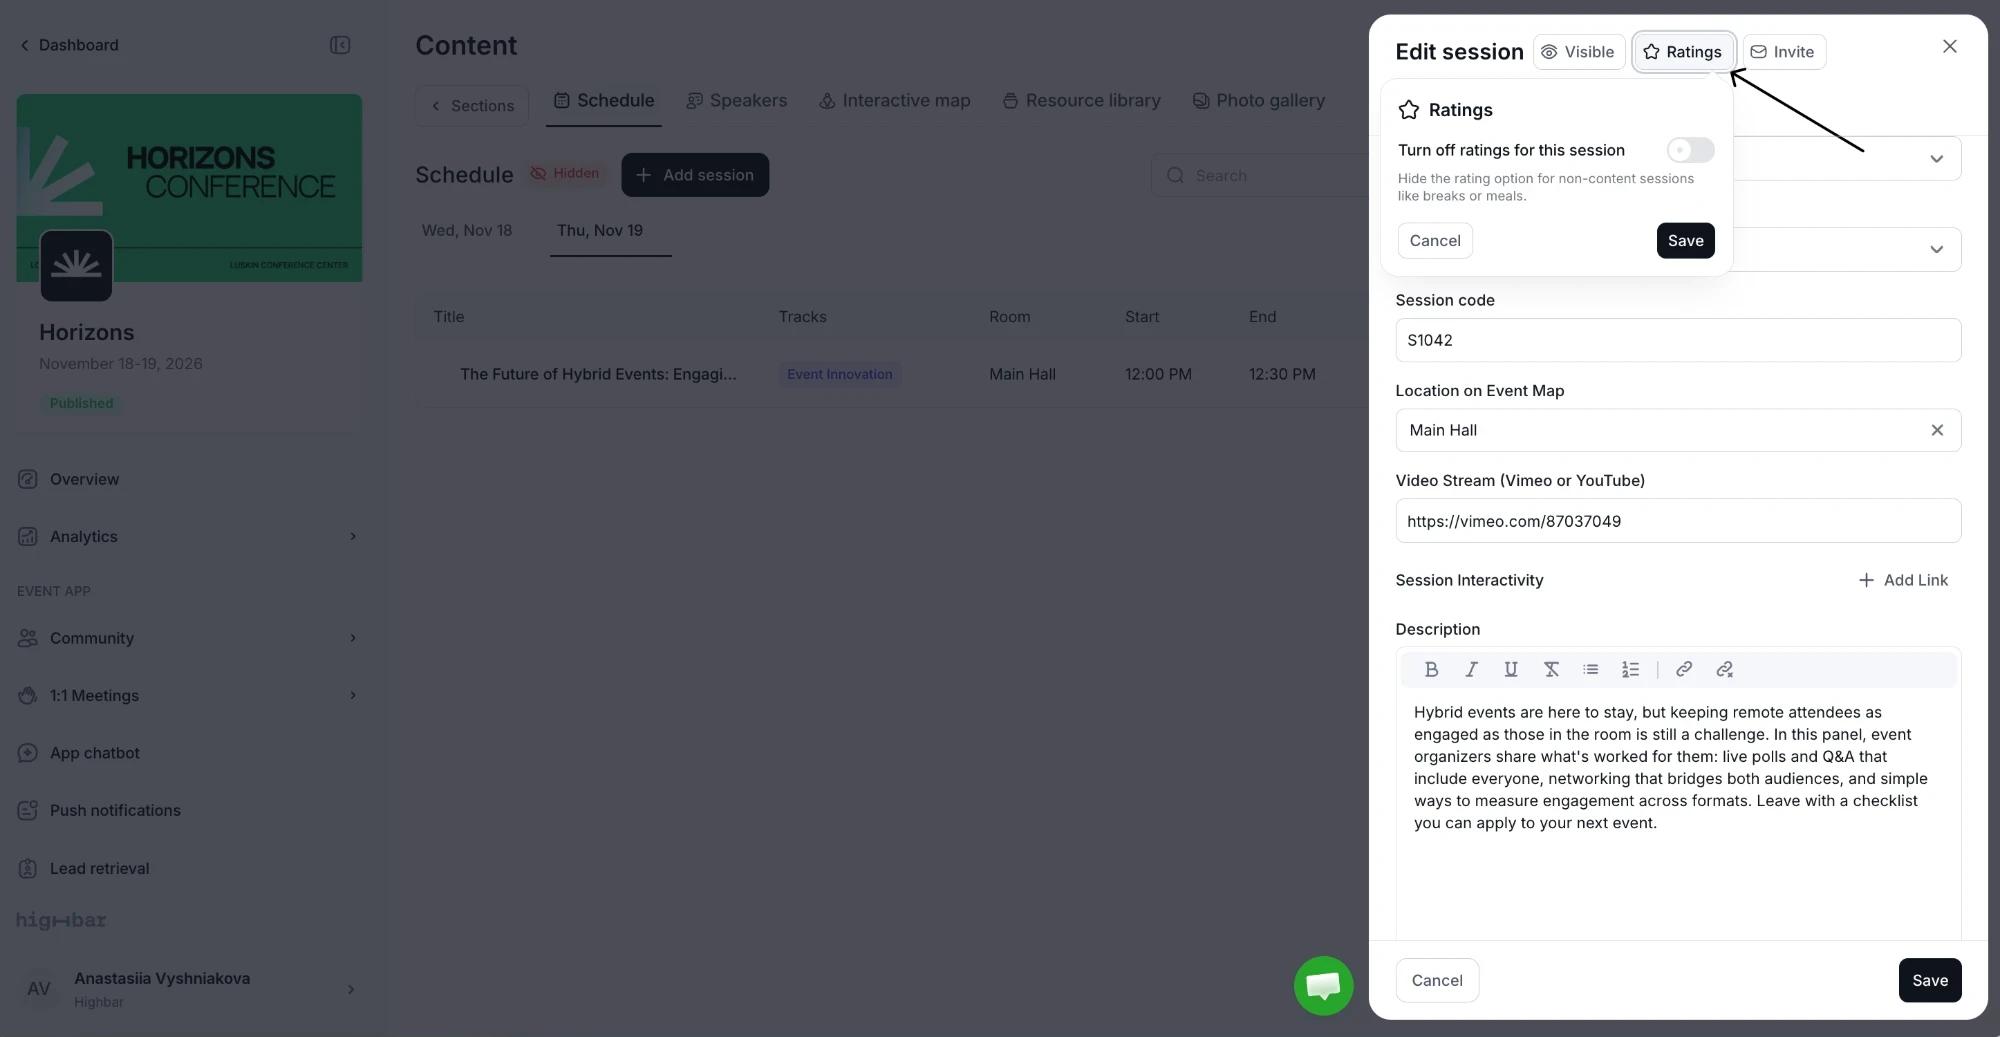
Buttons next to the drawer's title let you set the session's visibility (see Sections and visibility), turn ratings off for this session, and send its speakers an Invite.
Once a session is saved, its drawer has tabs: Details, Recap (see Recaps and ratings), and Roster for sessions with limited capacity.
Tracks, types, attributes and levels
You can create these on the fly from each field in the session drawer, or manage them all in Schedule settings:
| List | Each item has |
|---|---|
| Tracks | A Name and a Color. |
| Types | A Title and an Icon. |
| Attributes | A Title and an Icon. |
| Levels | A Title, such as 100 or Introductory. |
In Schedule settings, each list has its own button: Add track, Add type, Add attribute and Add level.
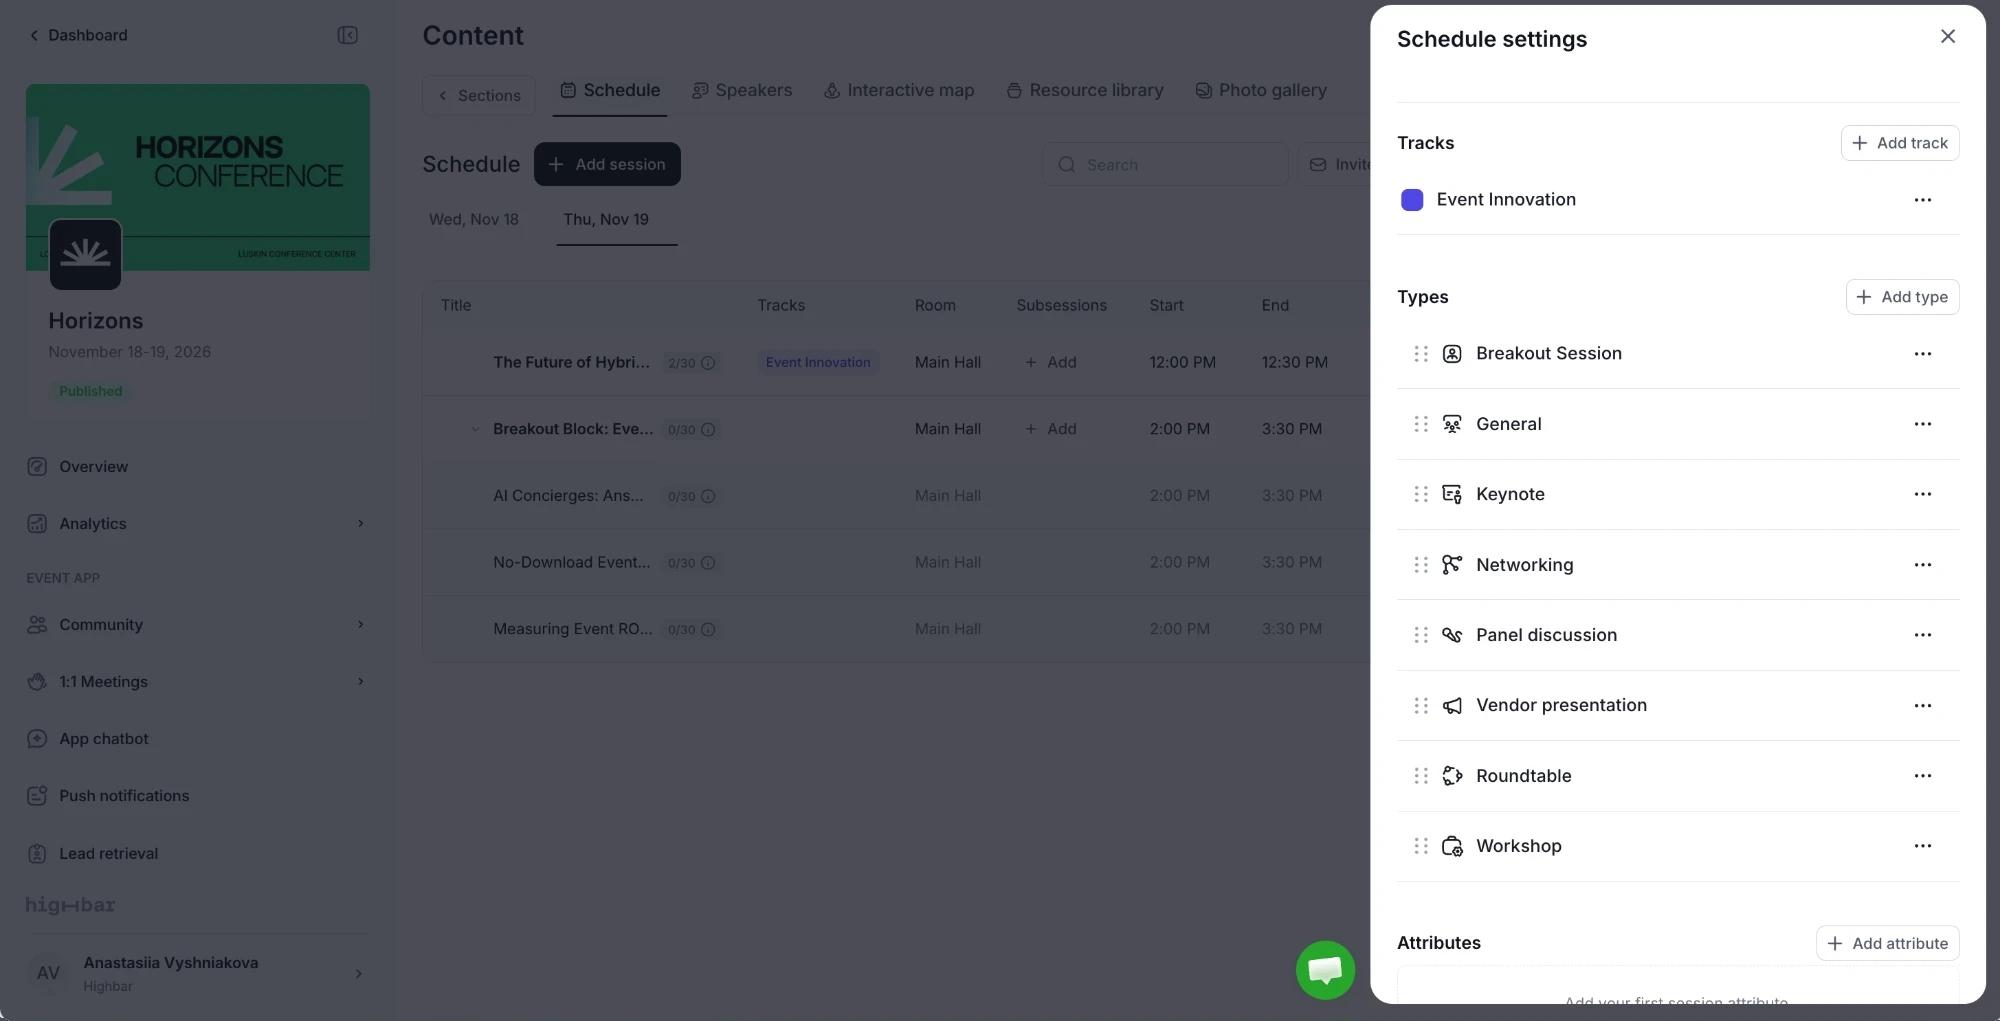
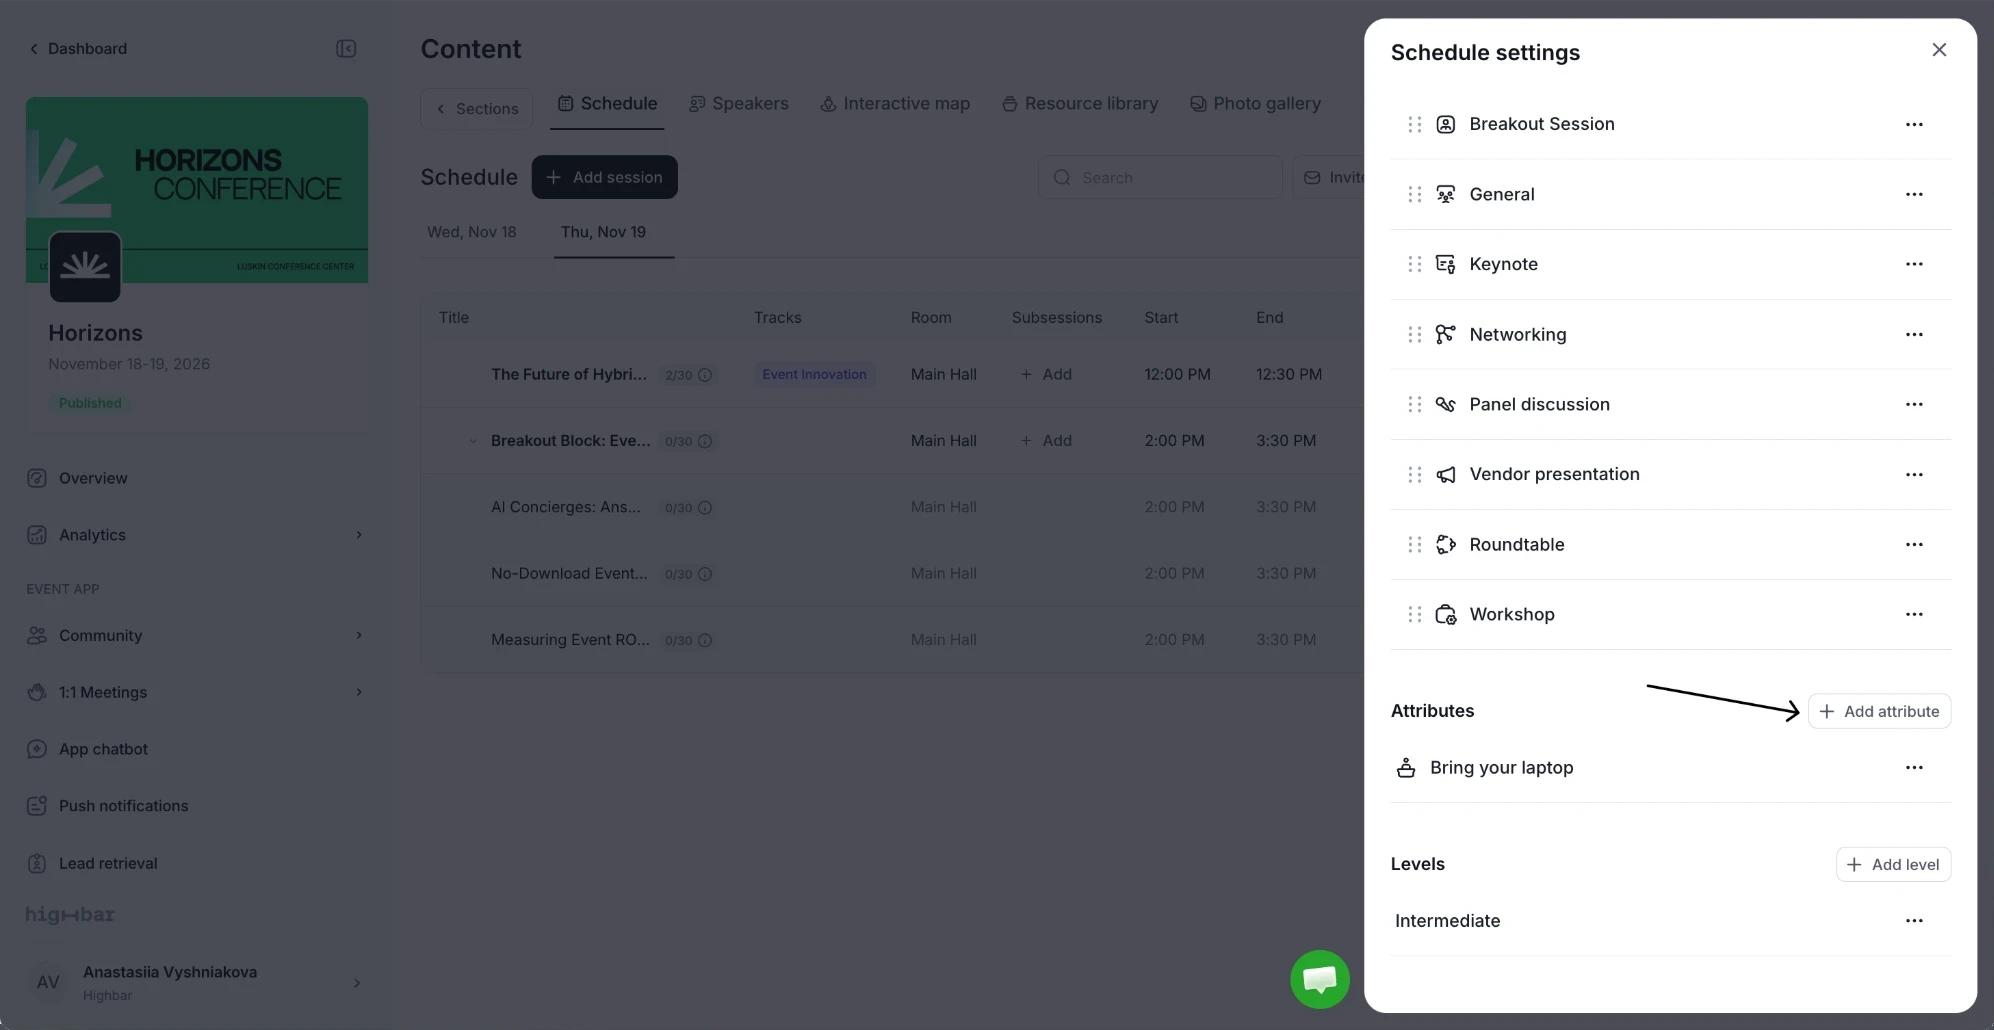
Drag items to set their order. Levels keep your order in the attendee filter, so "Introductory" can come before "Advanced".
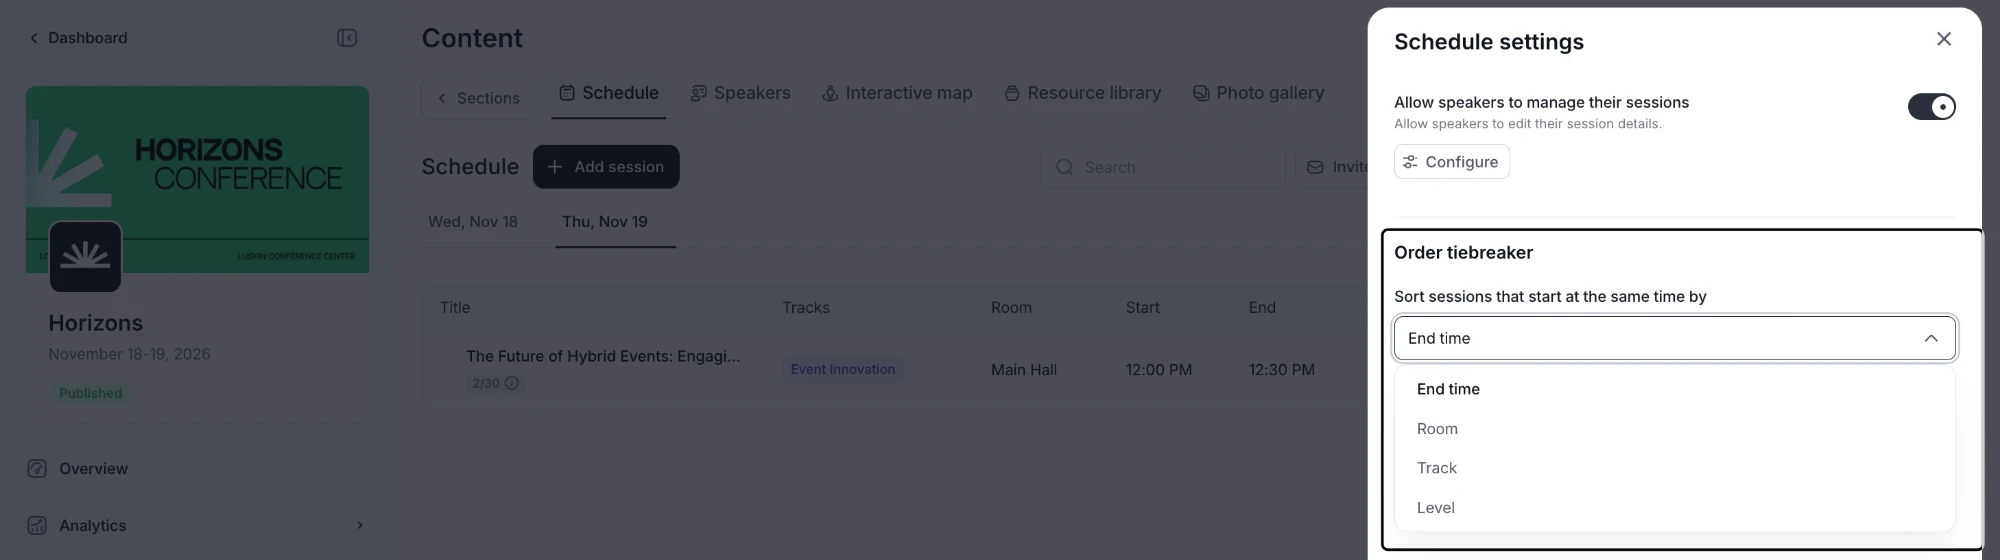
When several sessions start at the same time, Order tiebreaker decides which comes first: End time, Room, Track or Level.
Rename sessions for attendees
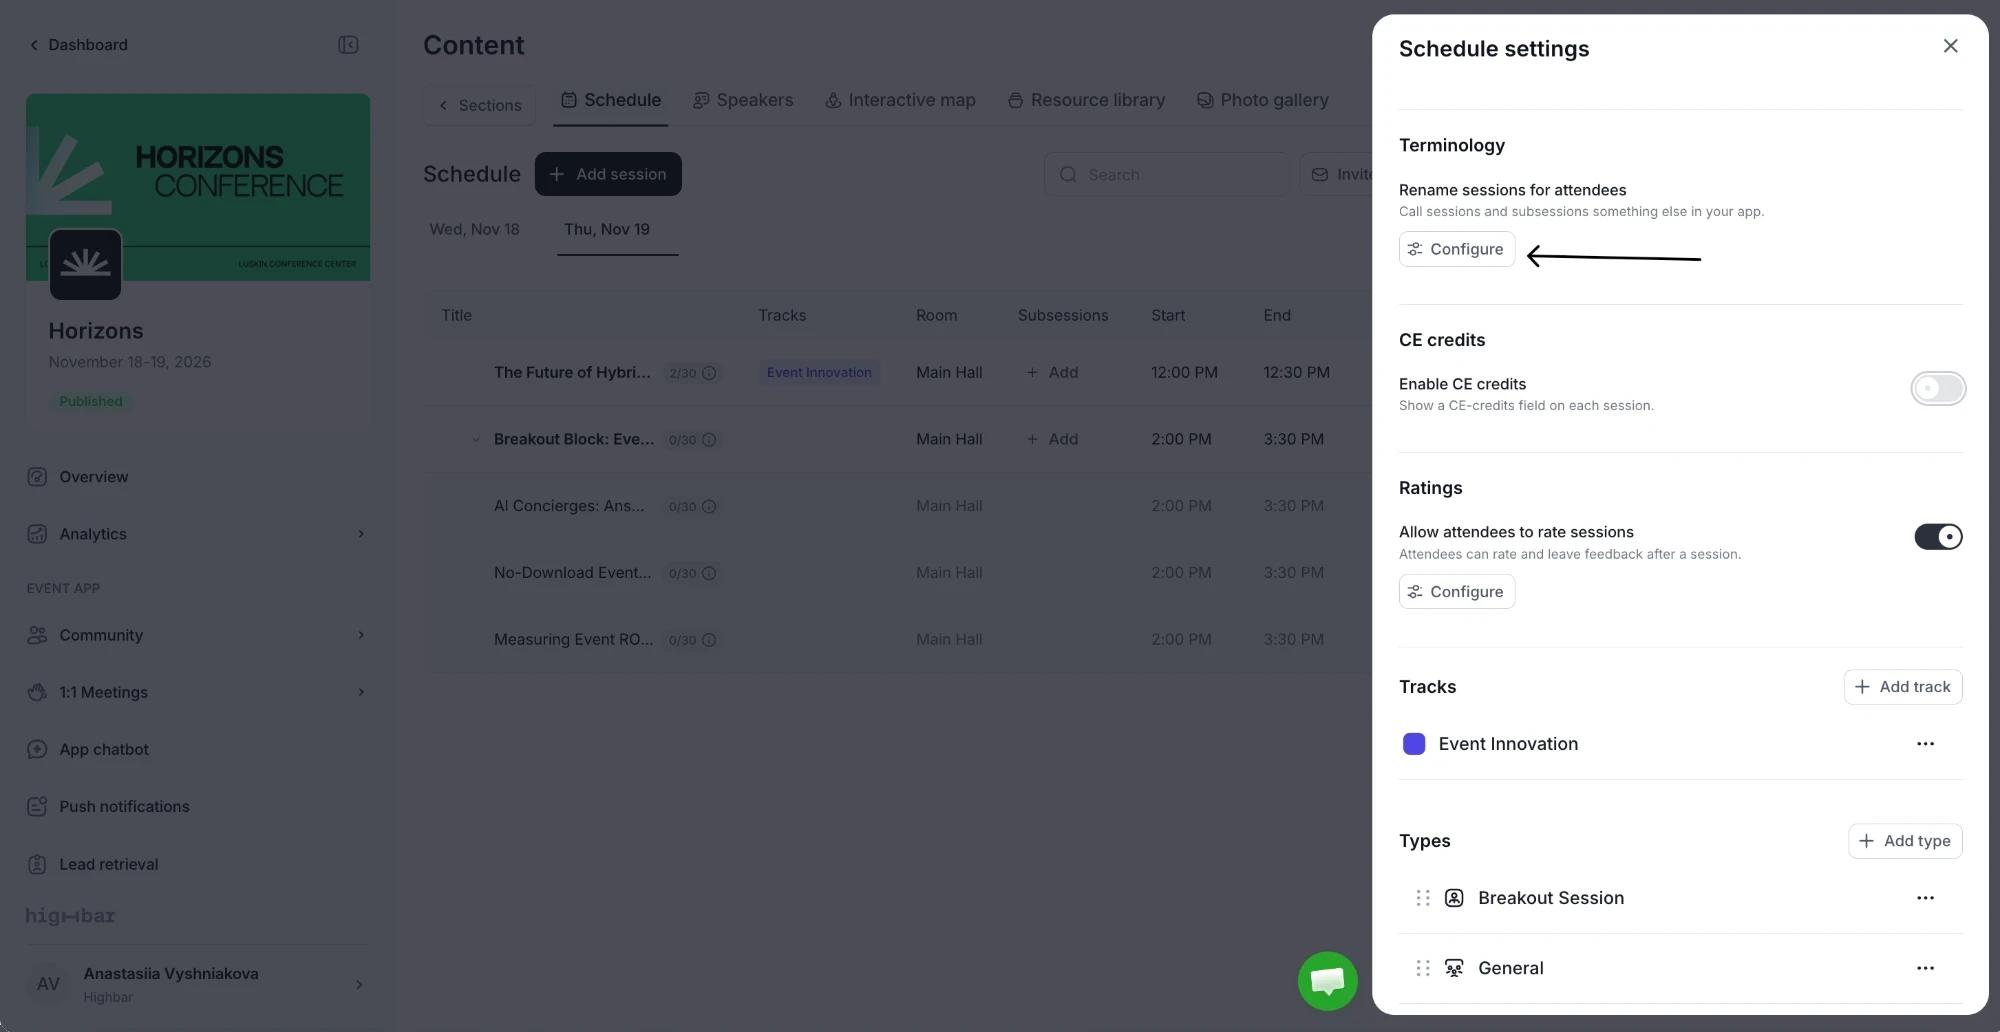
If your event says "talks" or "breakouts" instead of sessions, rename them in the app. In Schedule settings, click Configure under Terminology.
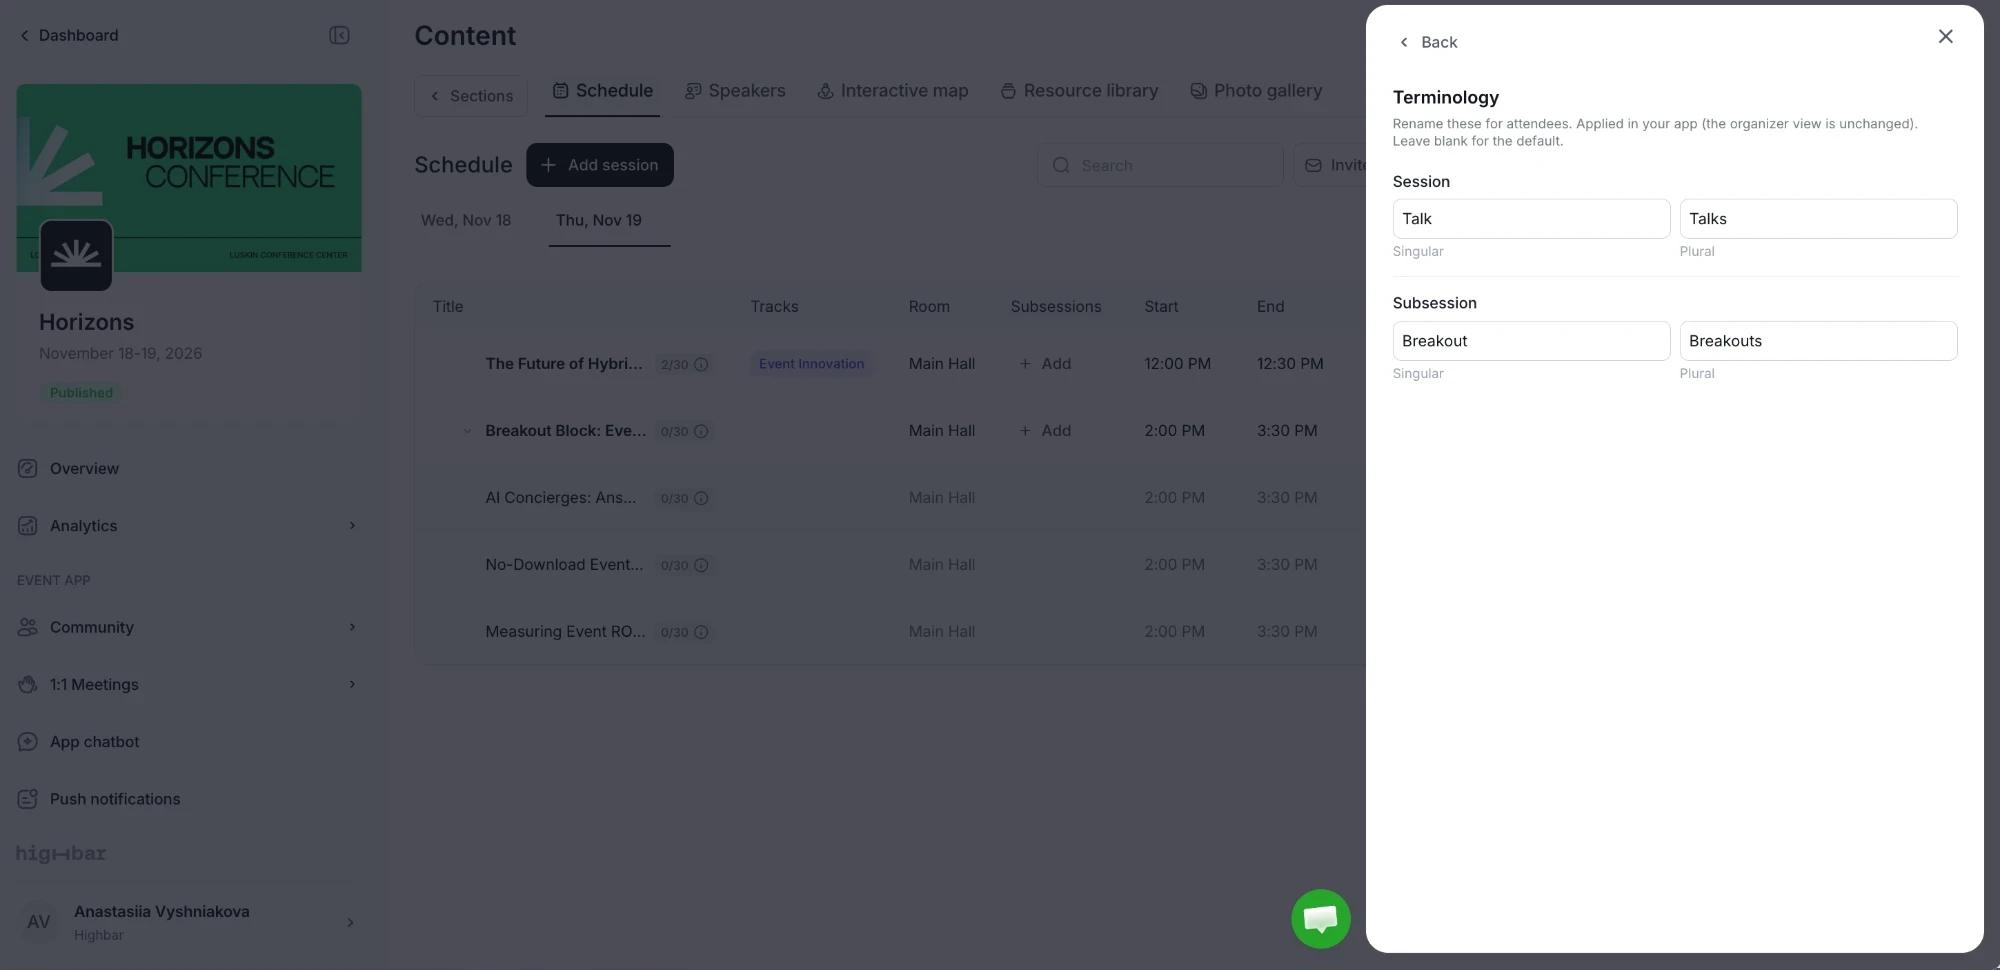
Enter the Singular and Plural for Session and, if you use them, Subsession. Leave a field blank to keep the default. The new names show in your app only: the CMS keeps saying sessions.
Show CE credits
If sessions earn continuing education credits, show them on each session page.
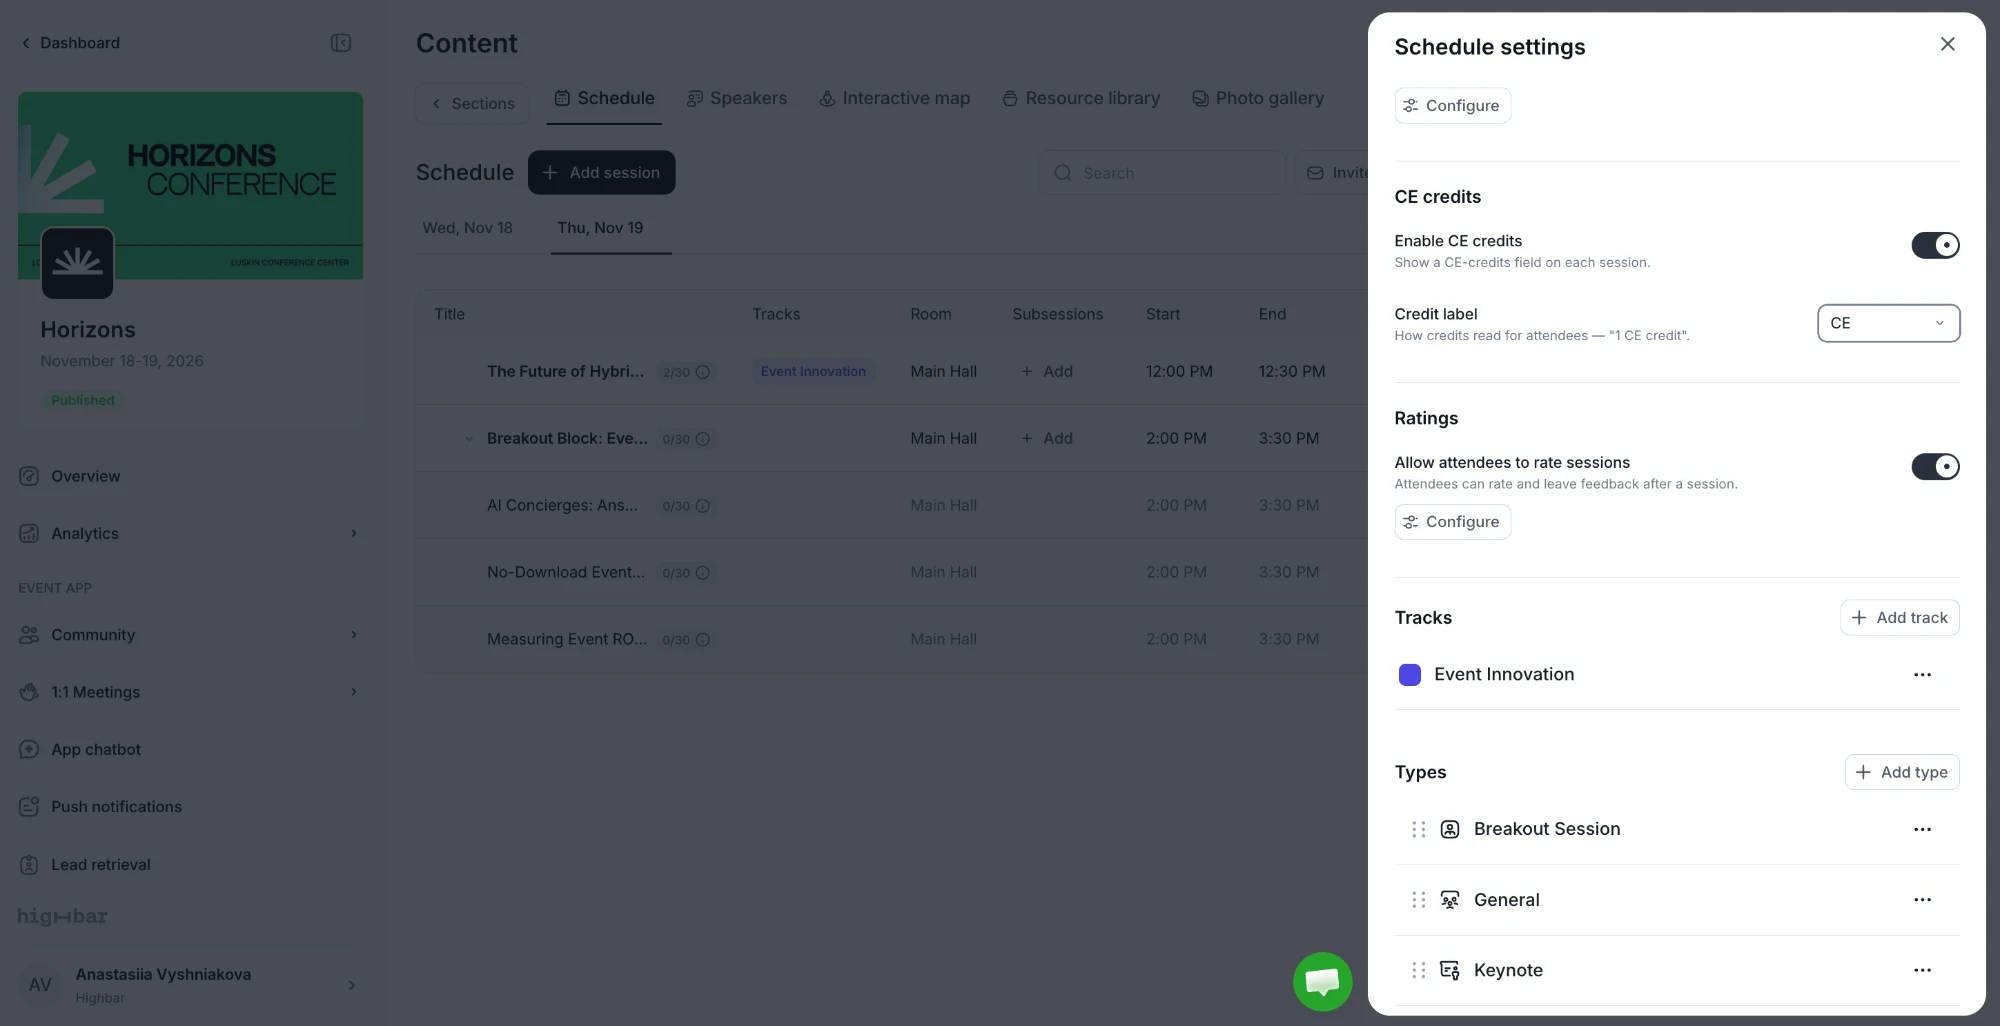
In Schedule settings, turn on Enable CE credits.
Choose a Credit label: CE, CME, CEU, CLE, CPE, or Custom… to type your own. Attendees see it as, for example, "1 CE credit".
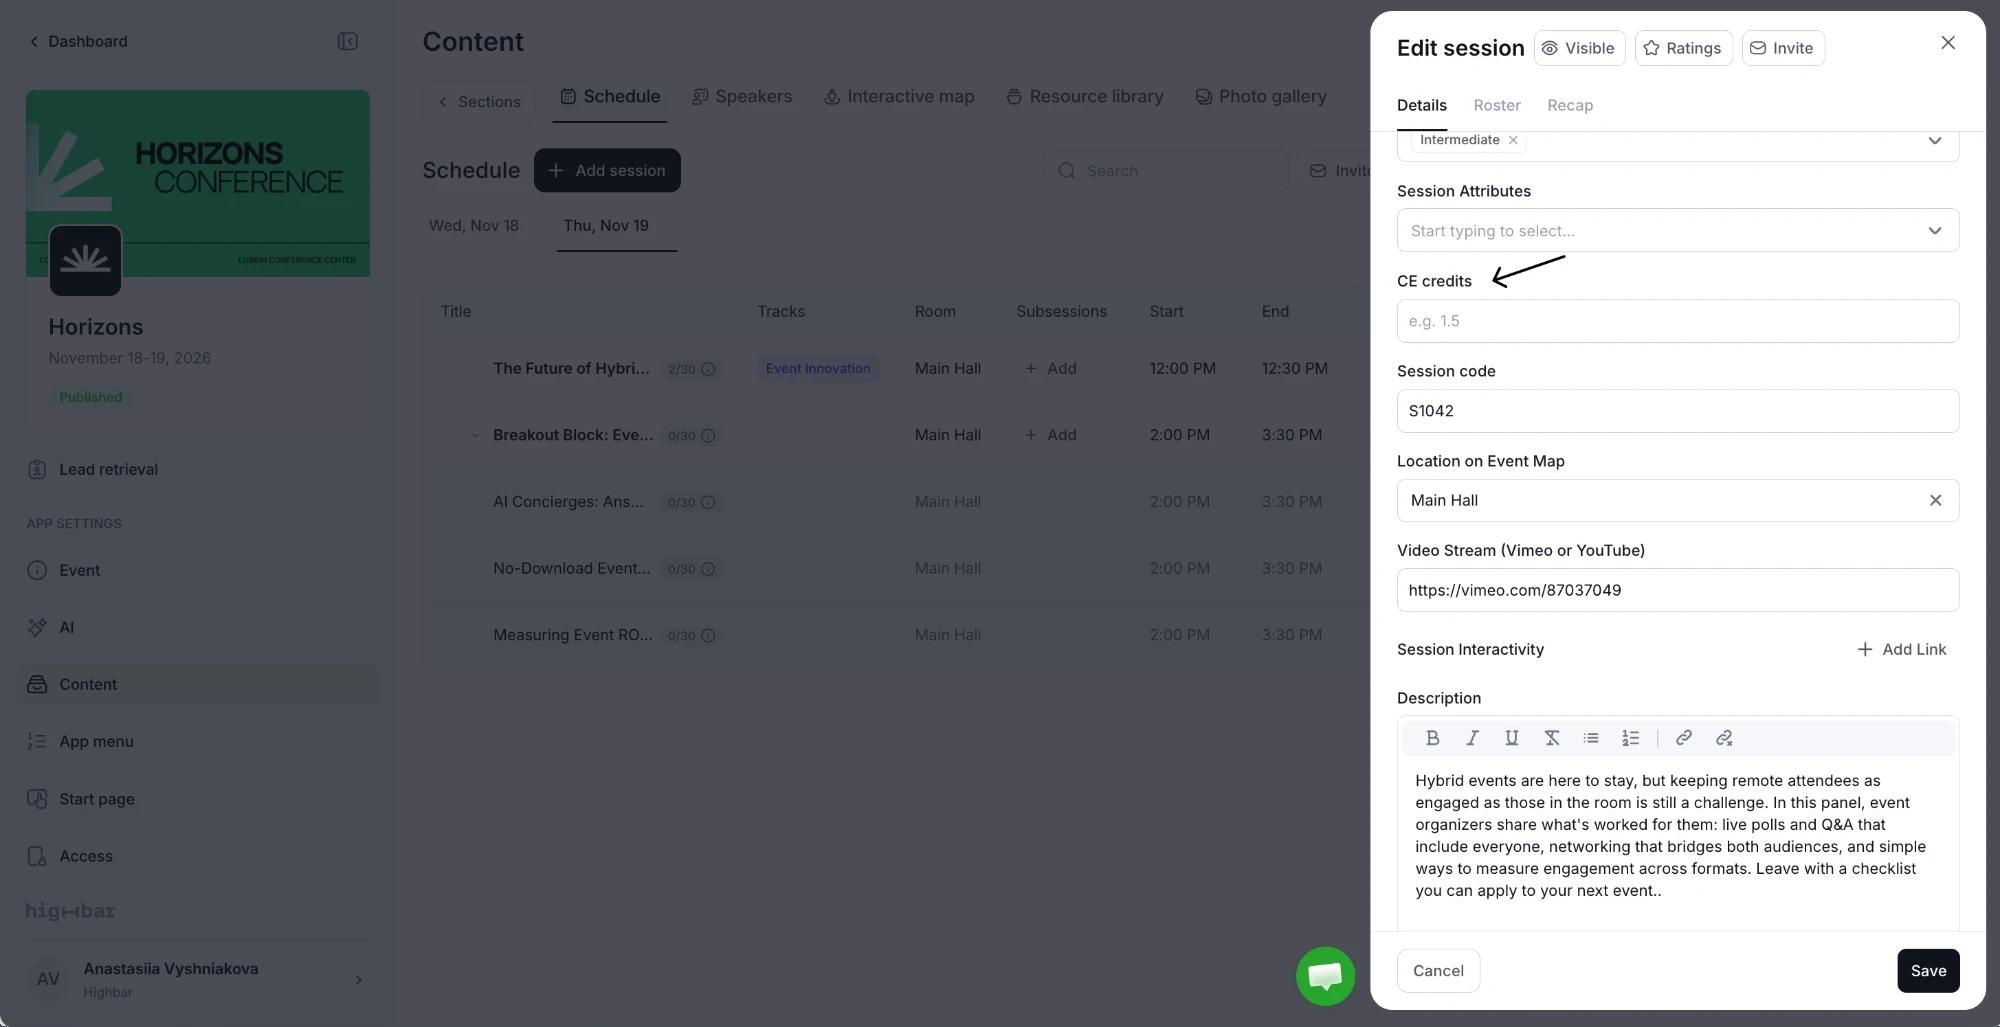
Open each session and enter its credits in the CE credits field, such as 1.5. The field appears under Session Attributes once credits are on.
Sessions with no credits entered don't show any.
More schedule features
- Subsessions: put sessions inside a parent session, such as talks in a breakout block.
- Capacity and waitlists: let attendees reserve a spot in sessions with limited room.
- Recaps and ratings: publish an AI recap after a session, and collect star ratings.
- Embed the schedule: show your schedule on your own website.
- Let speakers edit their sessions: send speakers a private link to update their session.