Quickstart: launch your first event app
Go from a new account to a live event app, one setup step at a time.
This guide takes you from sign-up to a launched event app. Each step links to a full article if you want more detail. You can stop at any point: everything saves as you go, and nothing is public until you launch.
Create your account
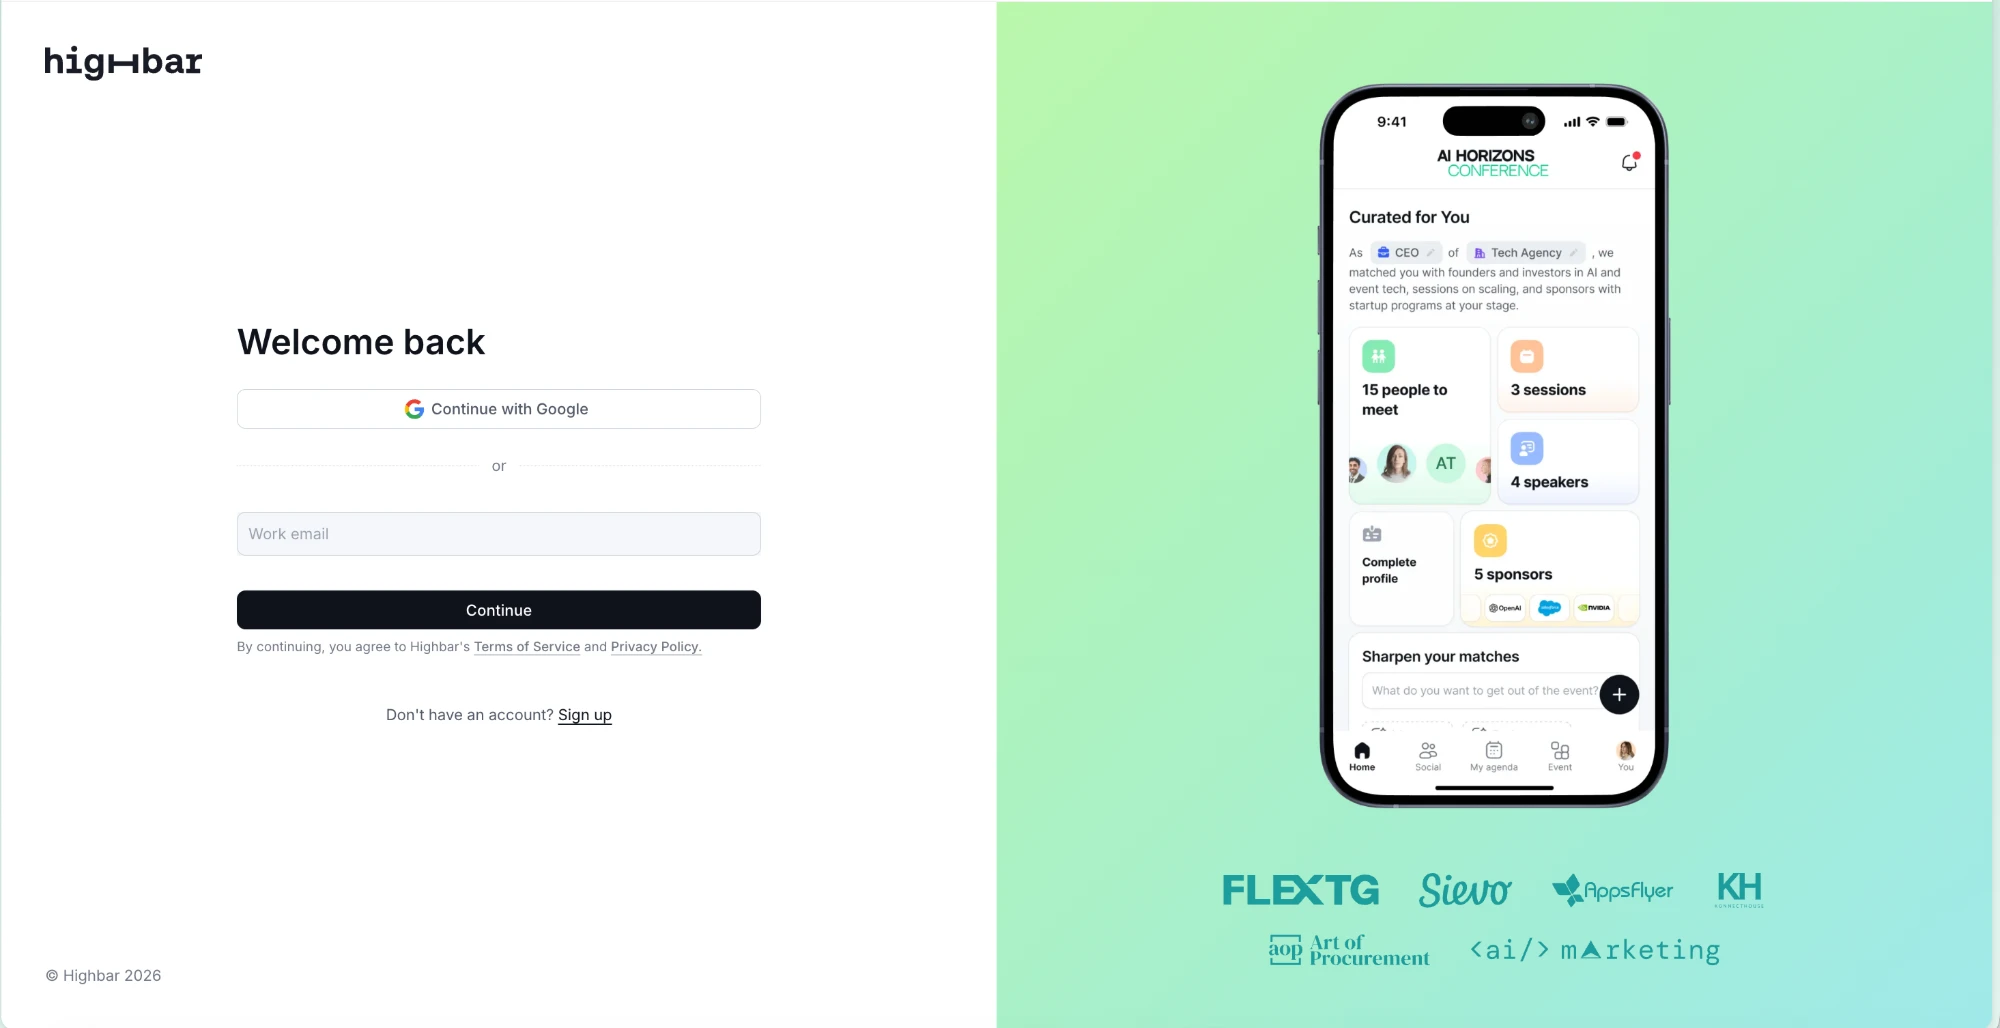
Go to hub.highbar.ai, enter your work email and click Continue, or choose Continue with Google. If the email is new to Highbar, you're asked for your first and last name. Highbar then emails you a code to confirm your address.
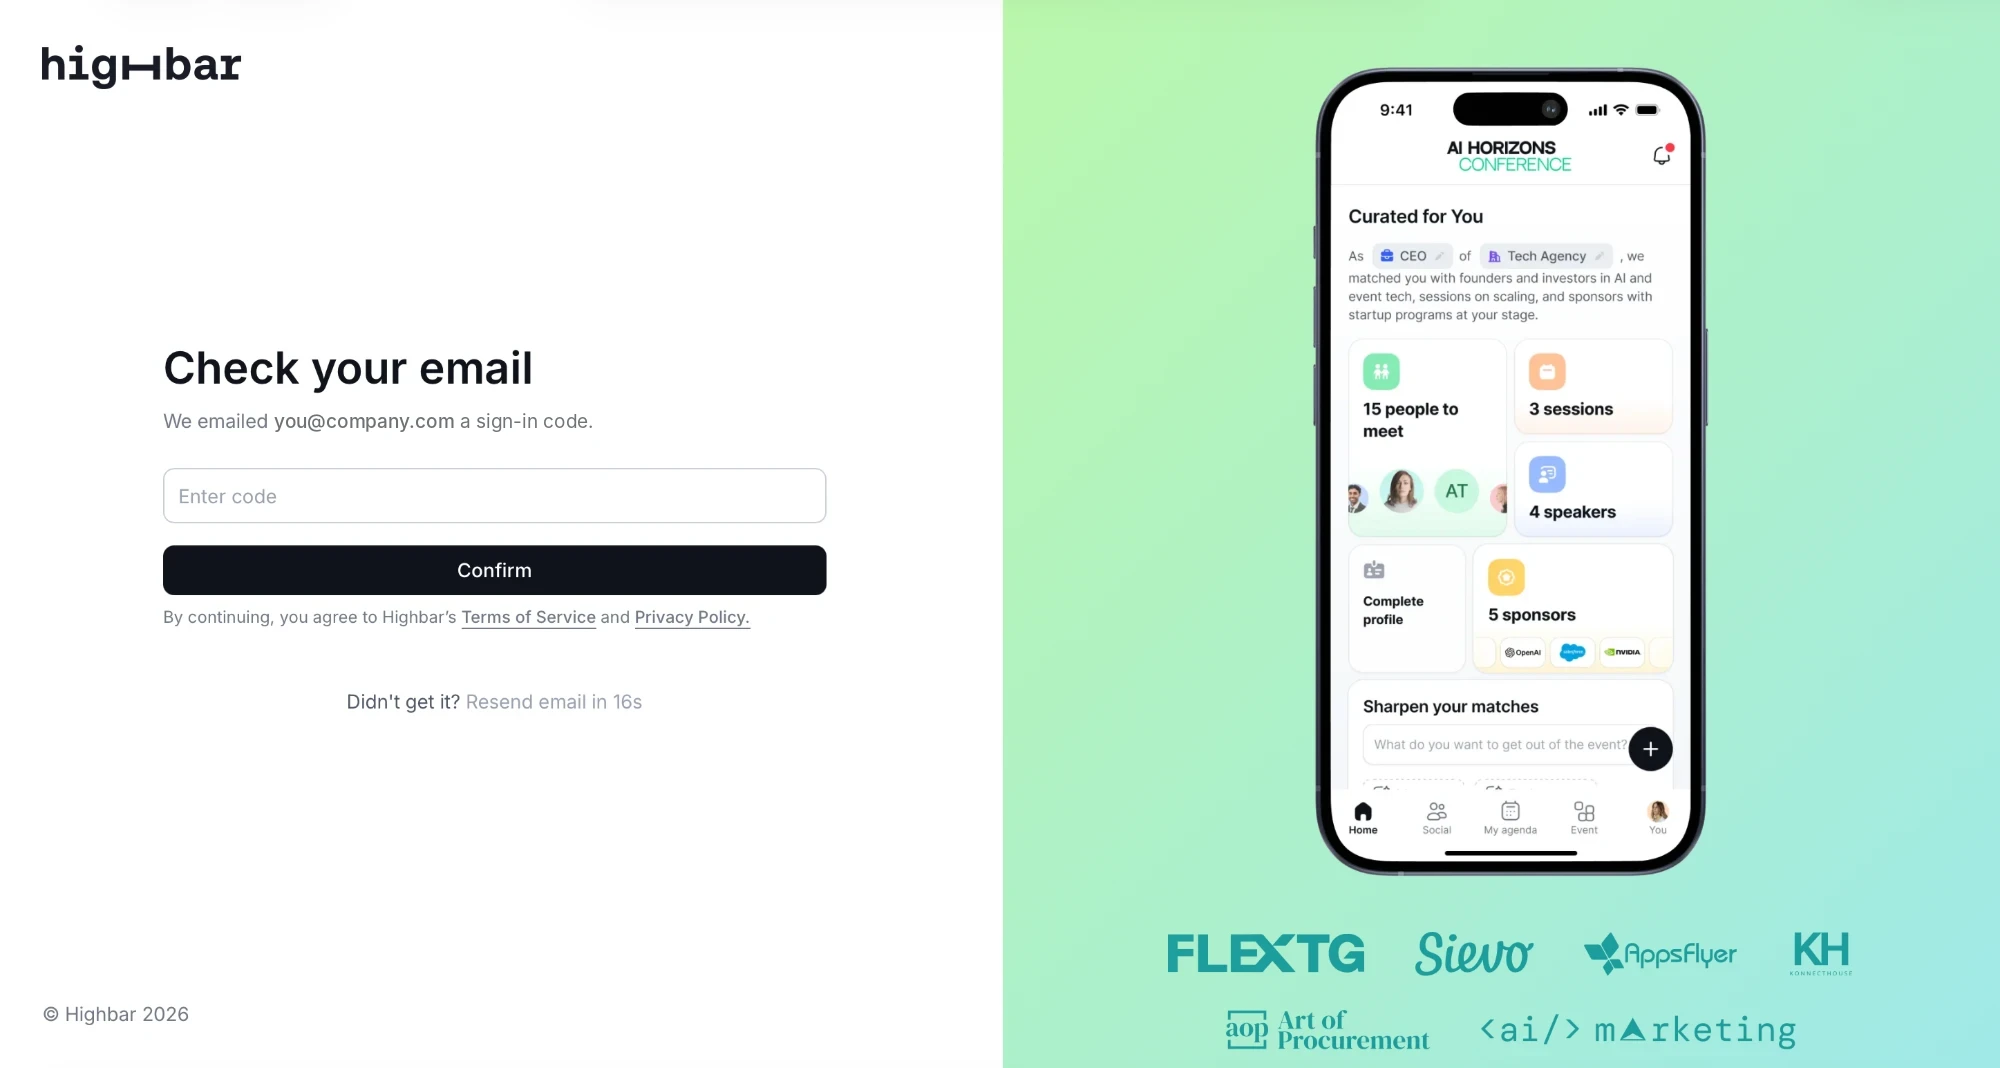
Enter the code and click Confirm. If the email hasn't arrived, check your spam folder or click Resend email.
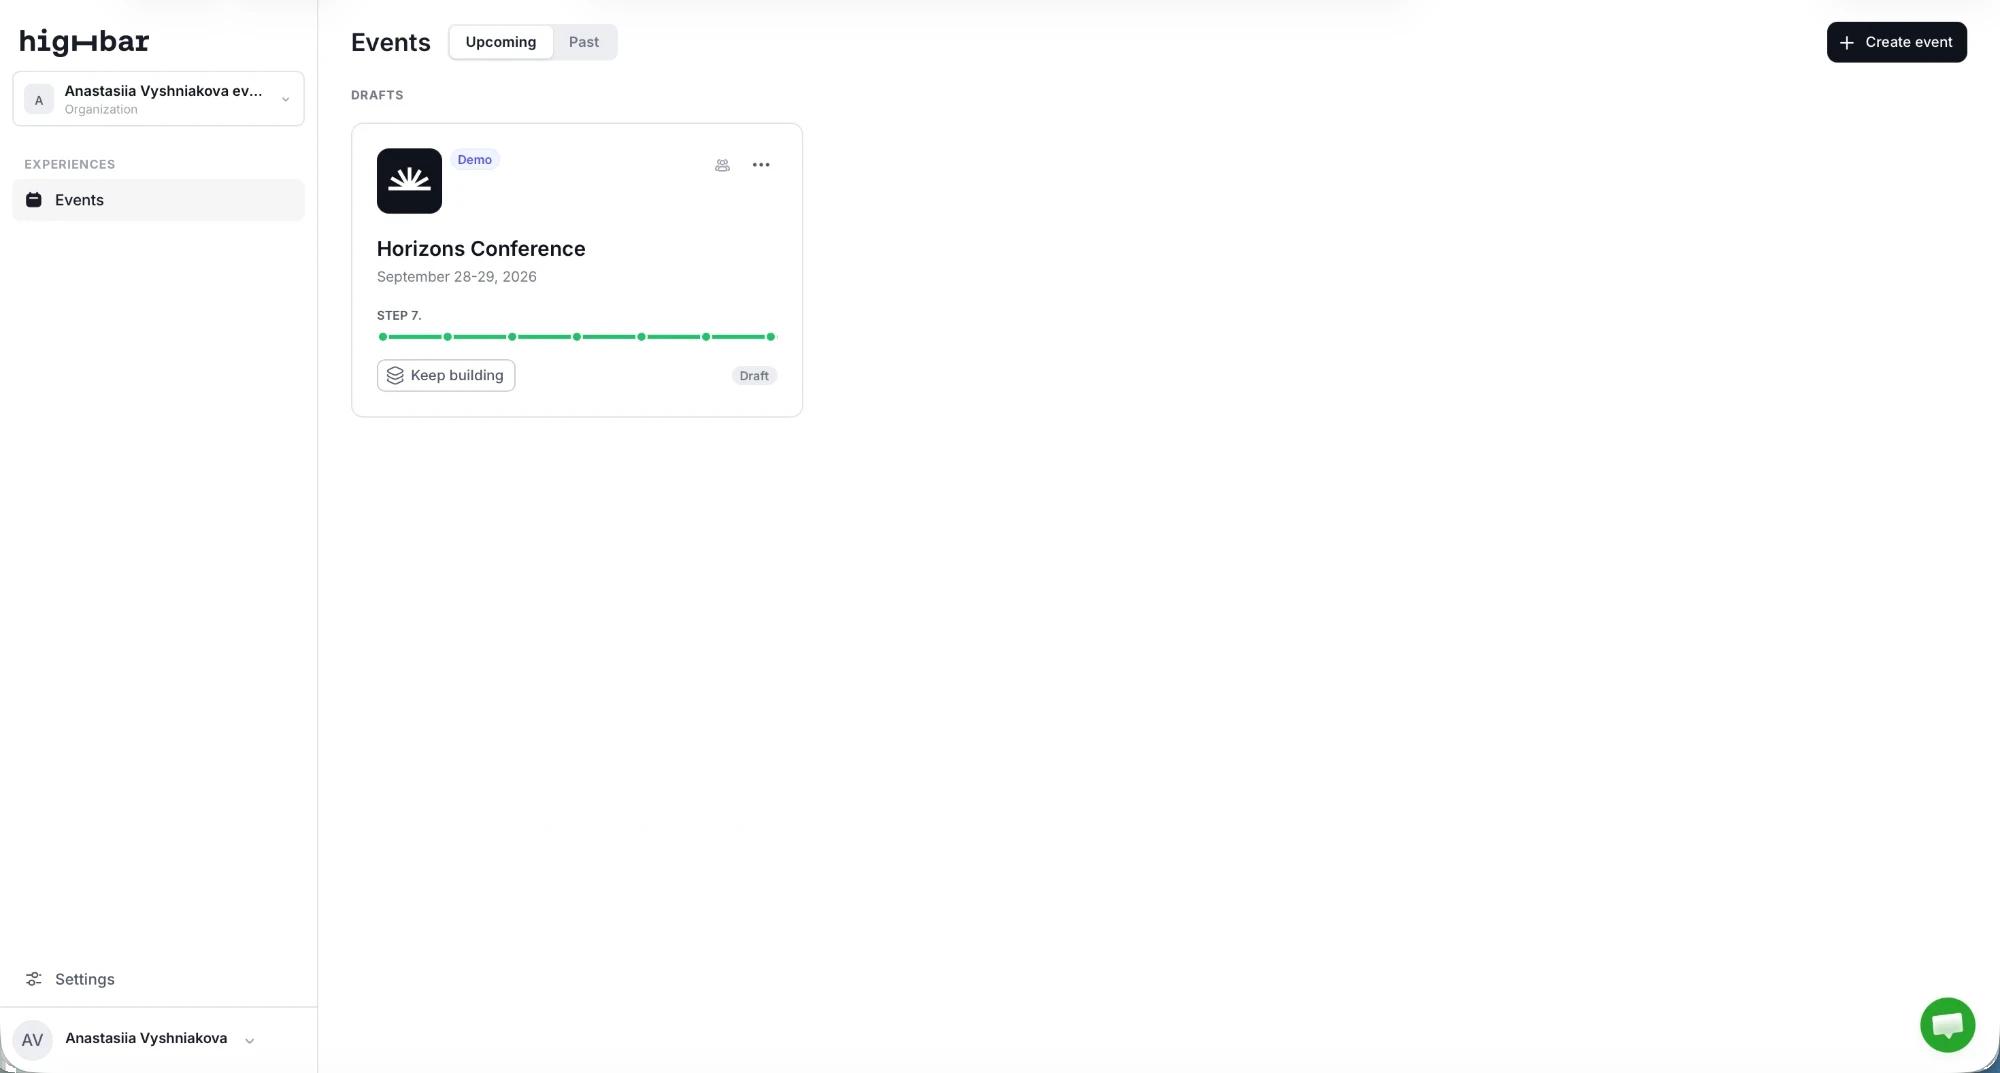
Your account comes with a Demo event: open it to see what a finished app looks like.
Create your event
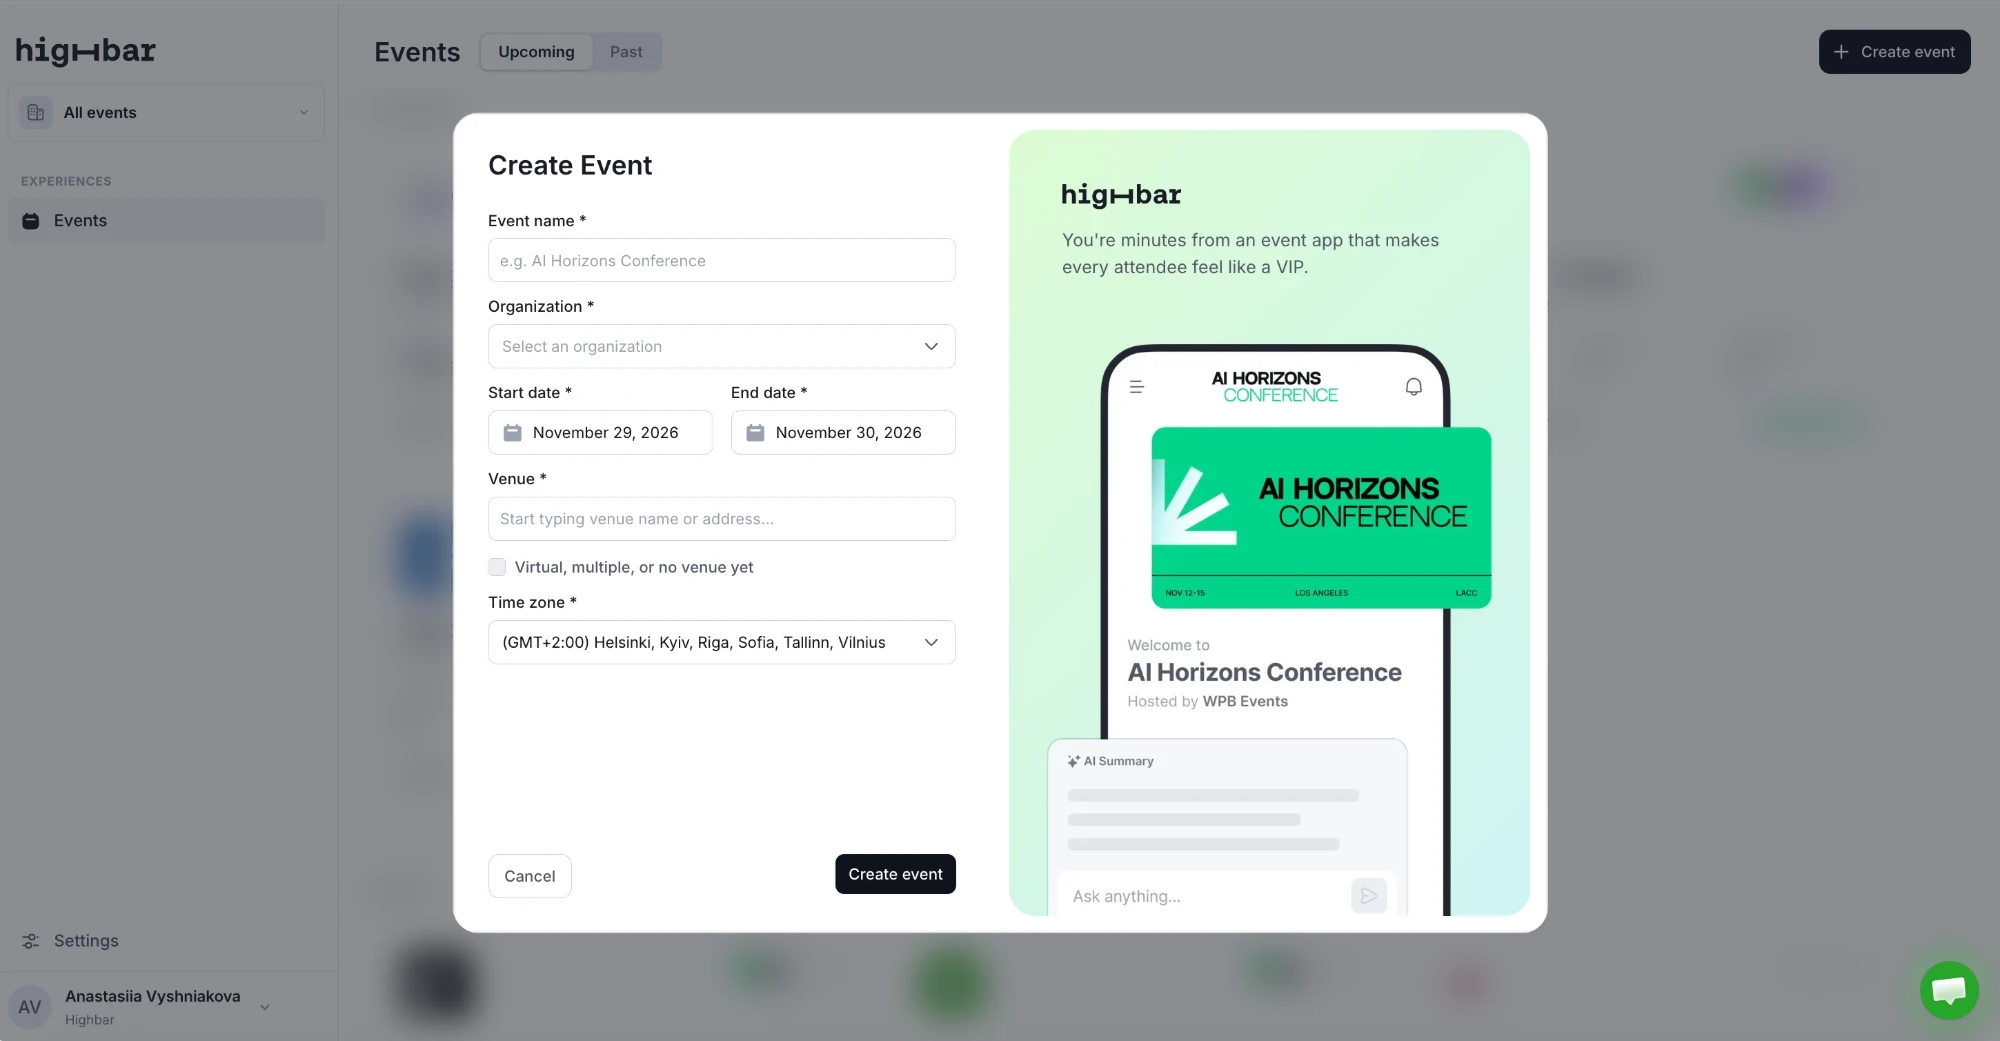
On the dashboard, click Create event.
Enter the event name, dates and venue (or tick Virtual, multiple, or no venue yet), check the time zone, then click Create event. If you already own an organization, also choose the one the event belongs to.
Your event opens with the setup steps in the sidebar. See Event details.
Event: add your branding
In the Event step, open Appearance and add an app label, app icon, navigation bar logo and event cover. All four are required to launch. You can also pick a Navigation bar color to match your brand.
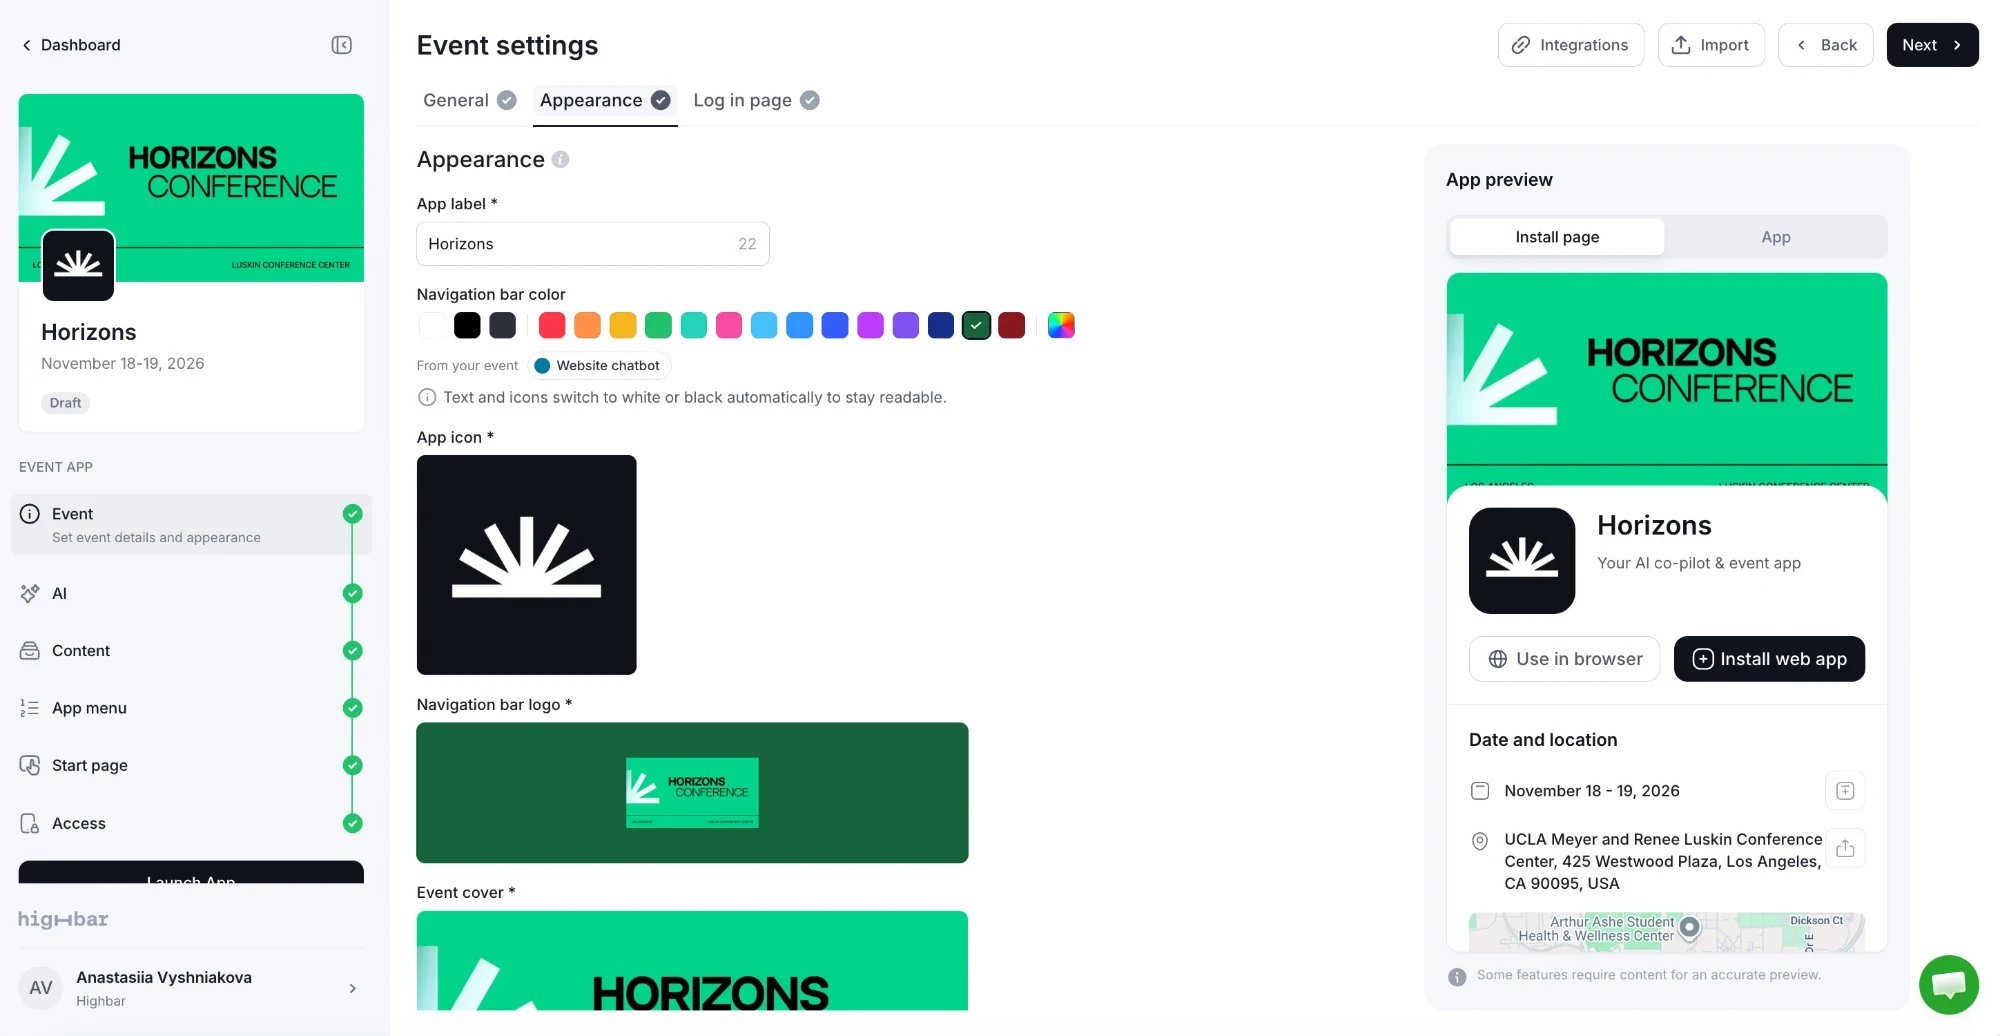
See Appearance.
AI: set up the AI Concierge
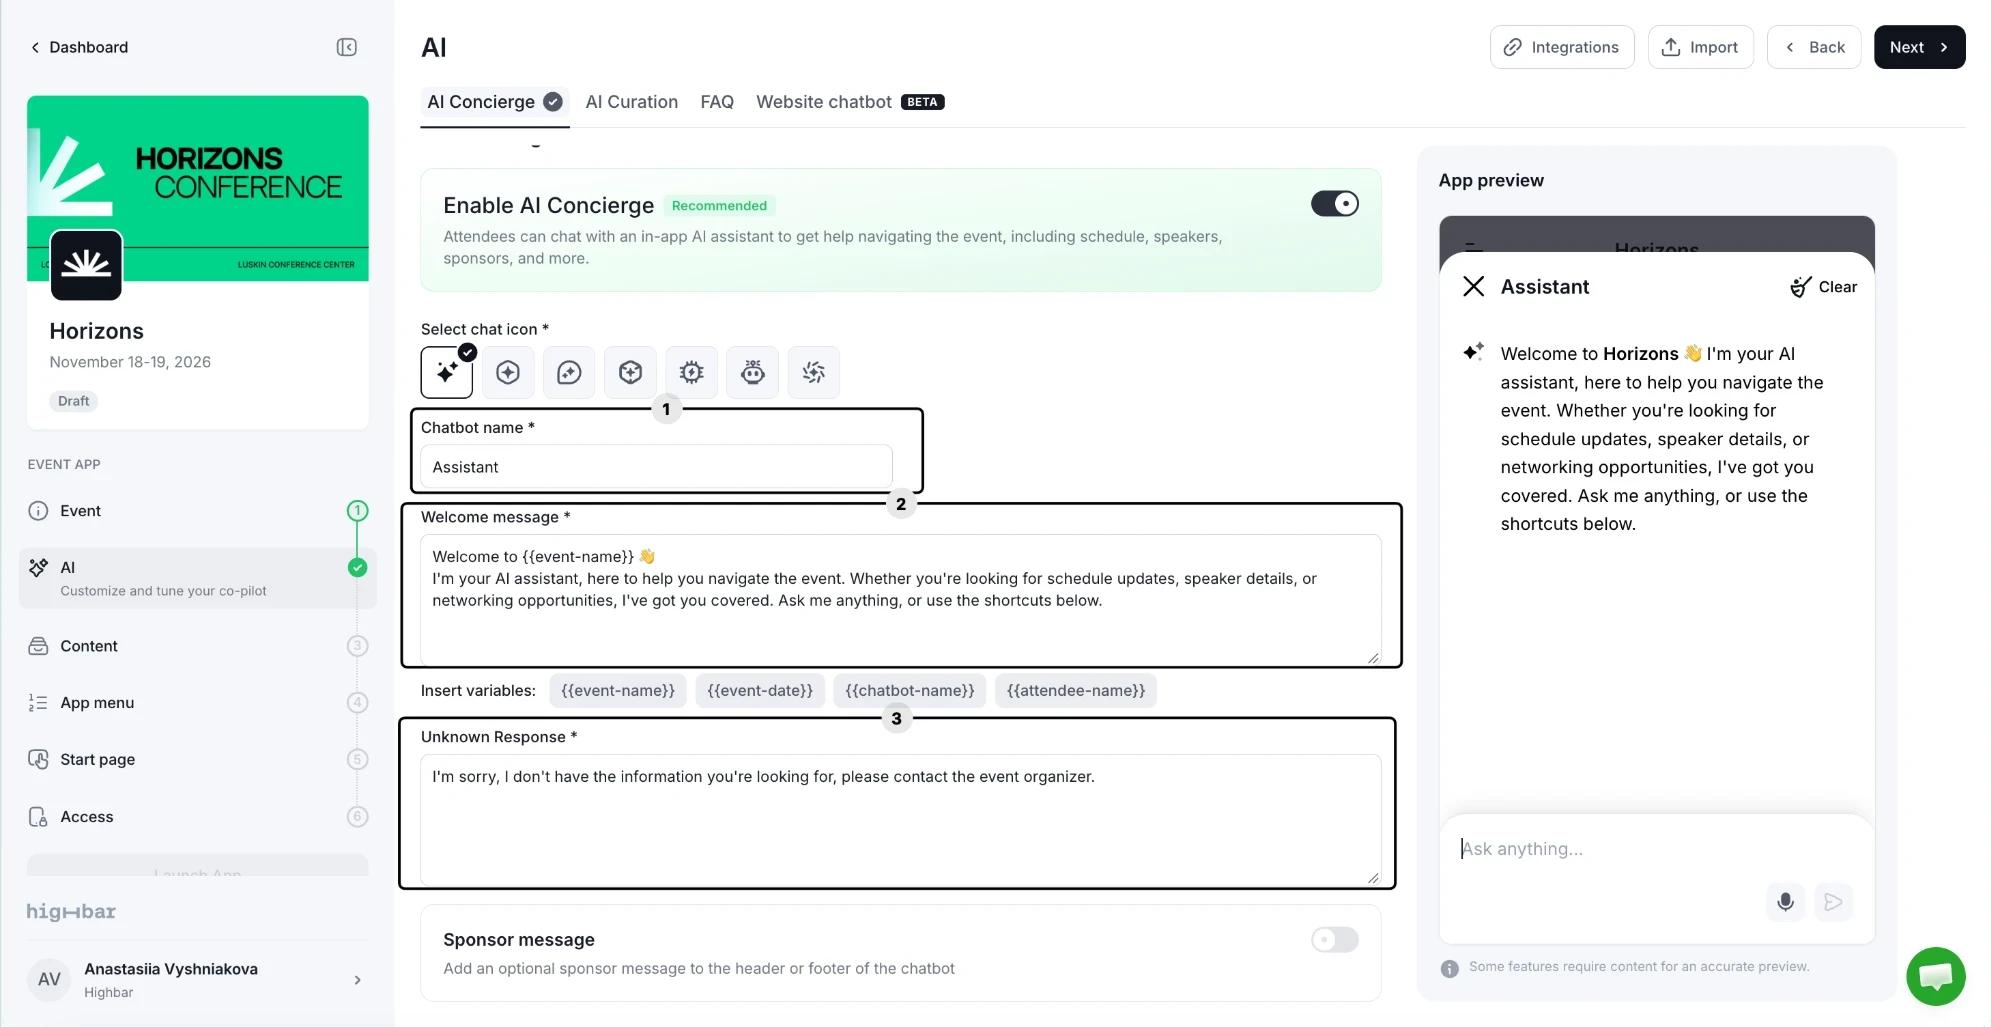
In the AI step, give the AI Concierge a Chatbot name (1), a Welcome message (2) and an Unknown Response (3), the reply for questions it can't answer.
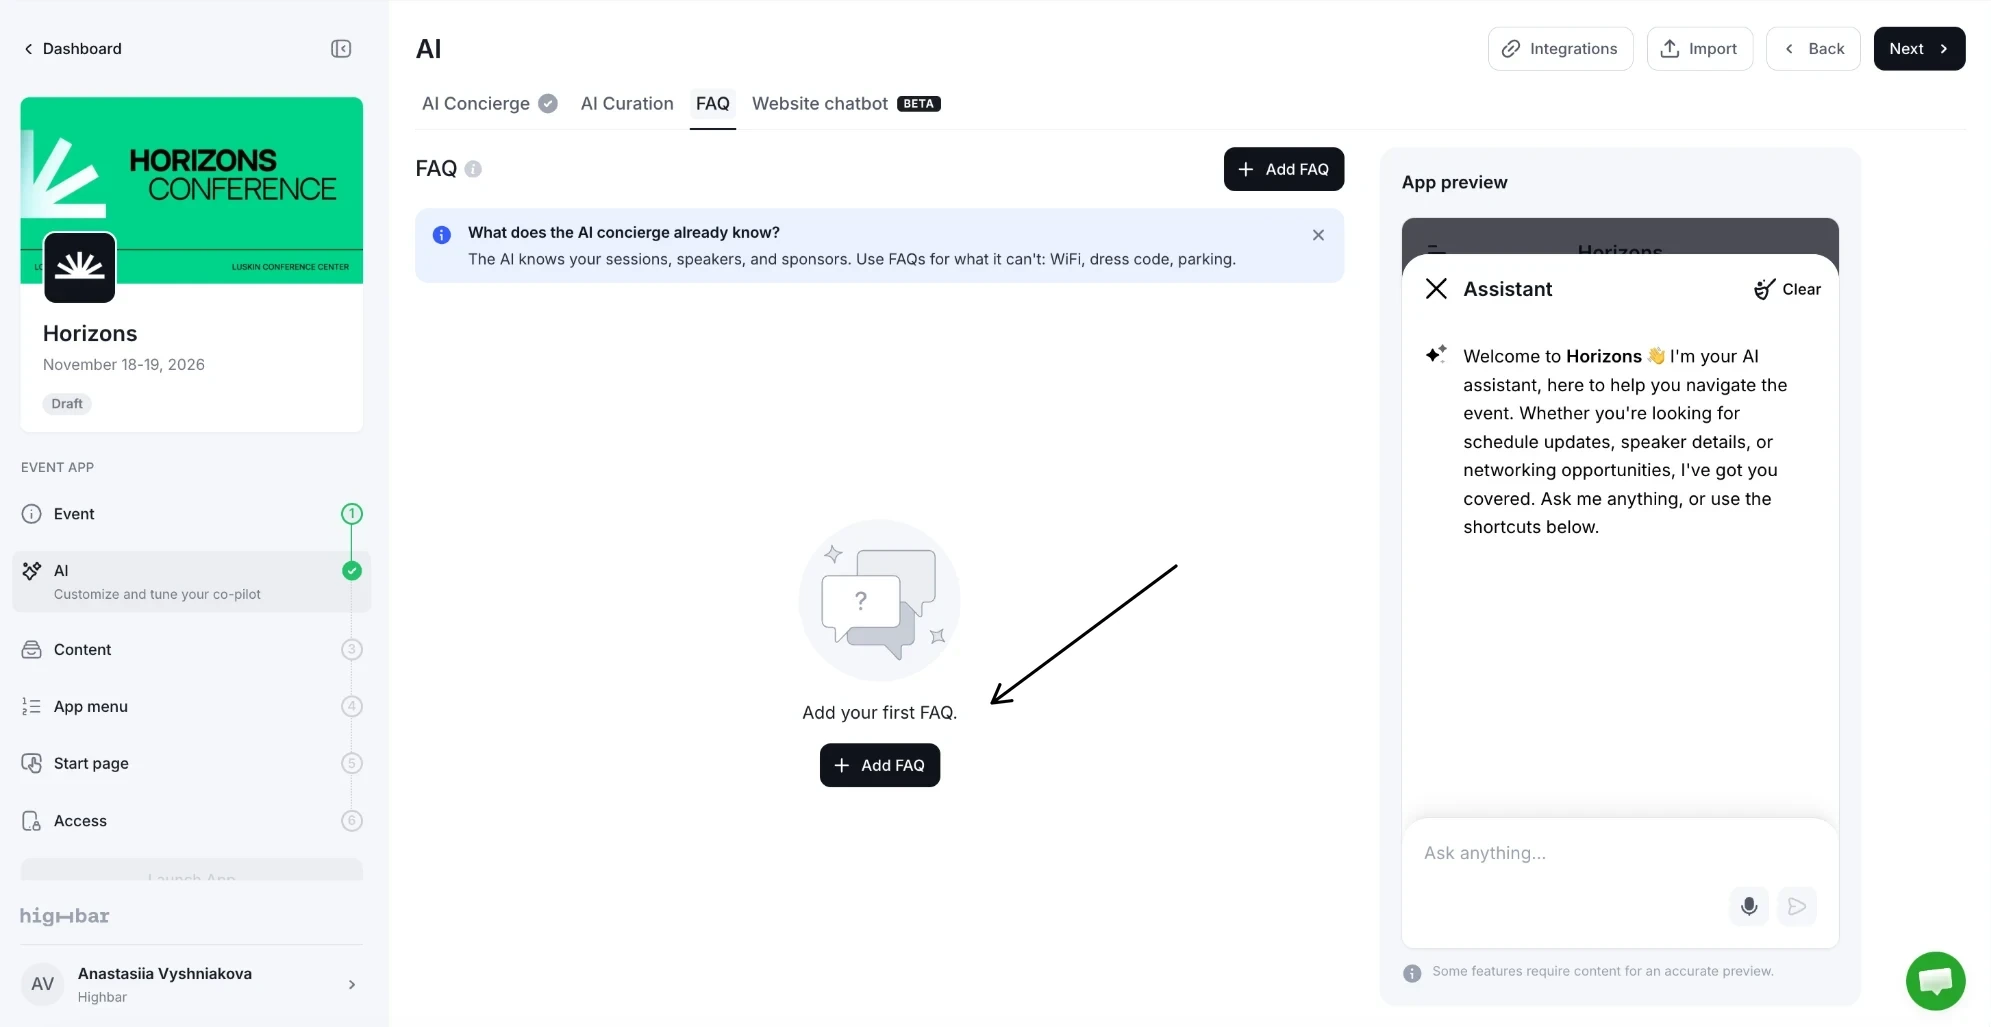
Then open the FAQ tab and click Add FAQ. The AI Concierge already knows your sessions, speakers and sponsors, so add FAQs for anything else attendees will ask, such as wifi, parking and where to pick up badges.
Content: add your agenda, speakers and sponsors
Open the Content step (1) and click Add section (2).
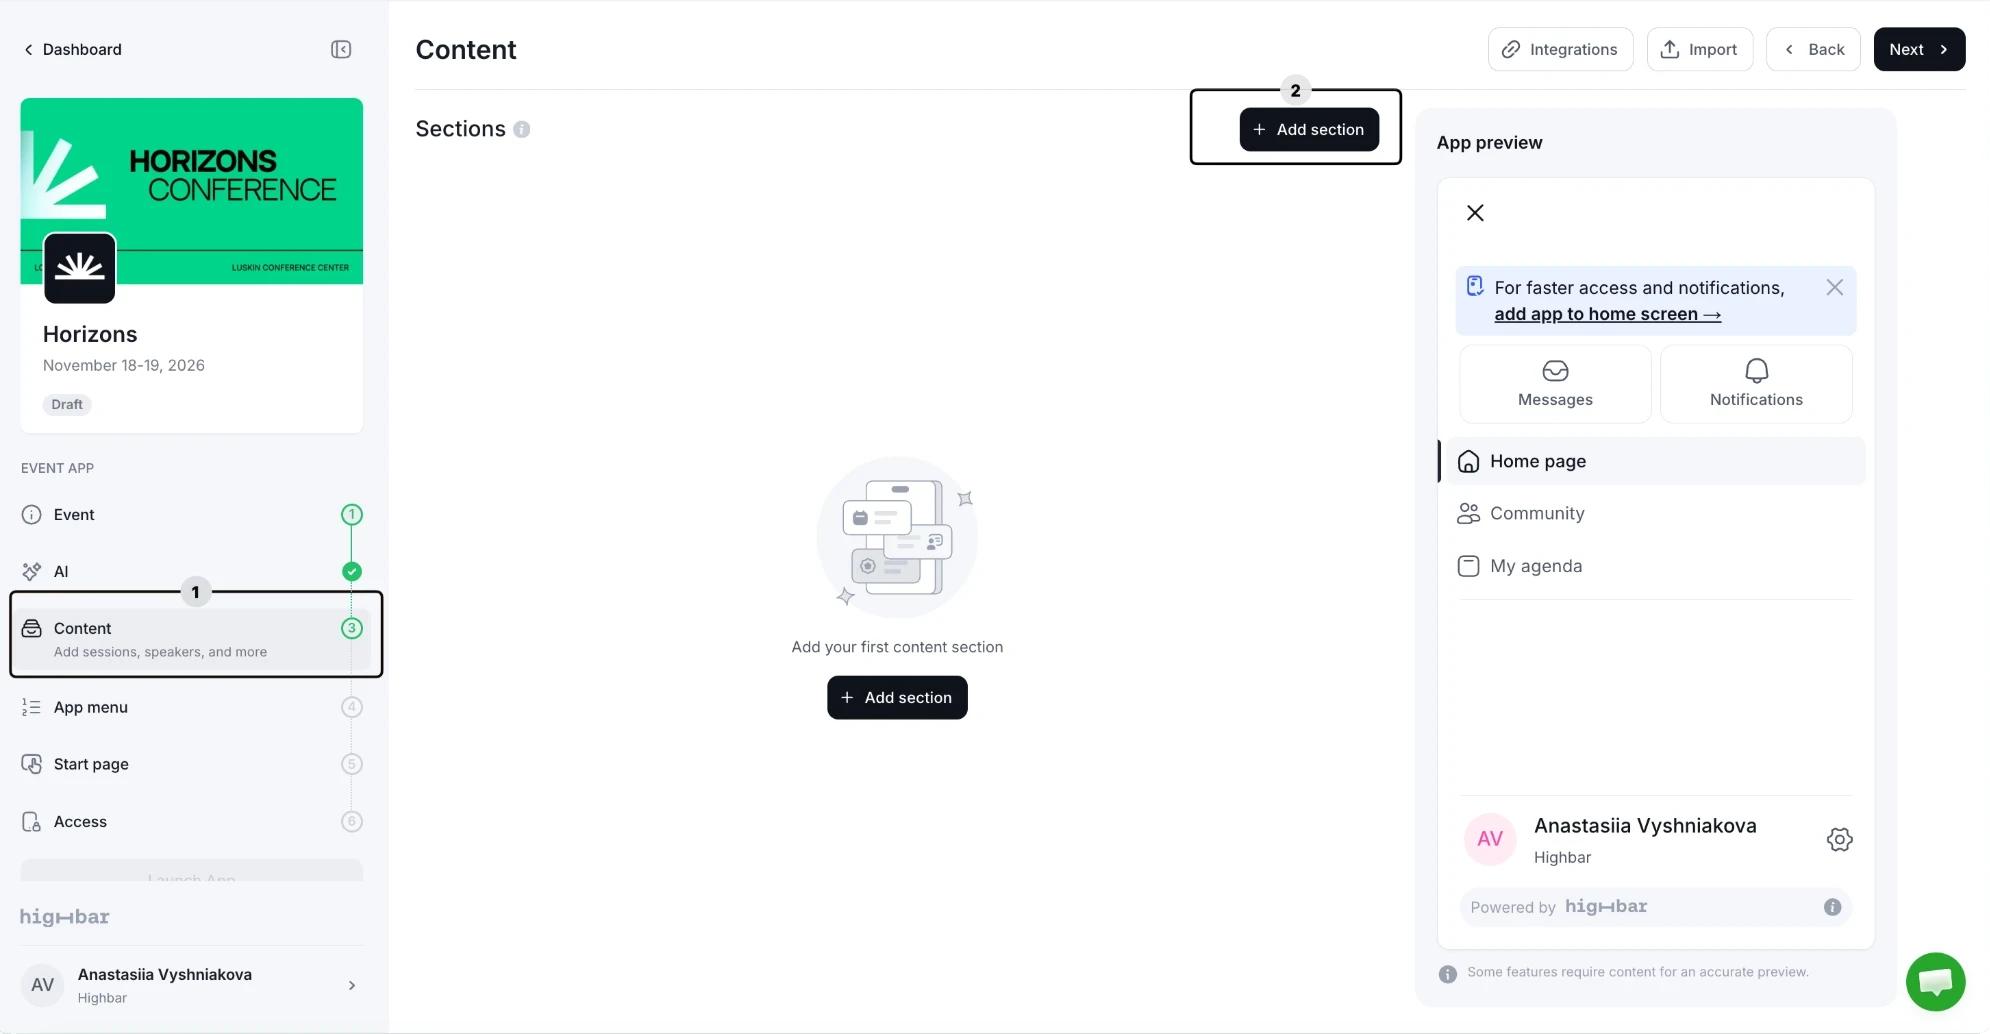
Choose a section type: Schedule, Speakers, Sponsors, Interactive Map, Resource library, Photo gallery or Web view. Add a section for everything your attendees need.
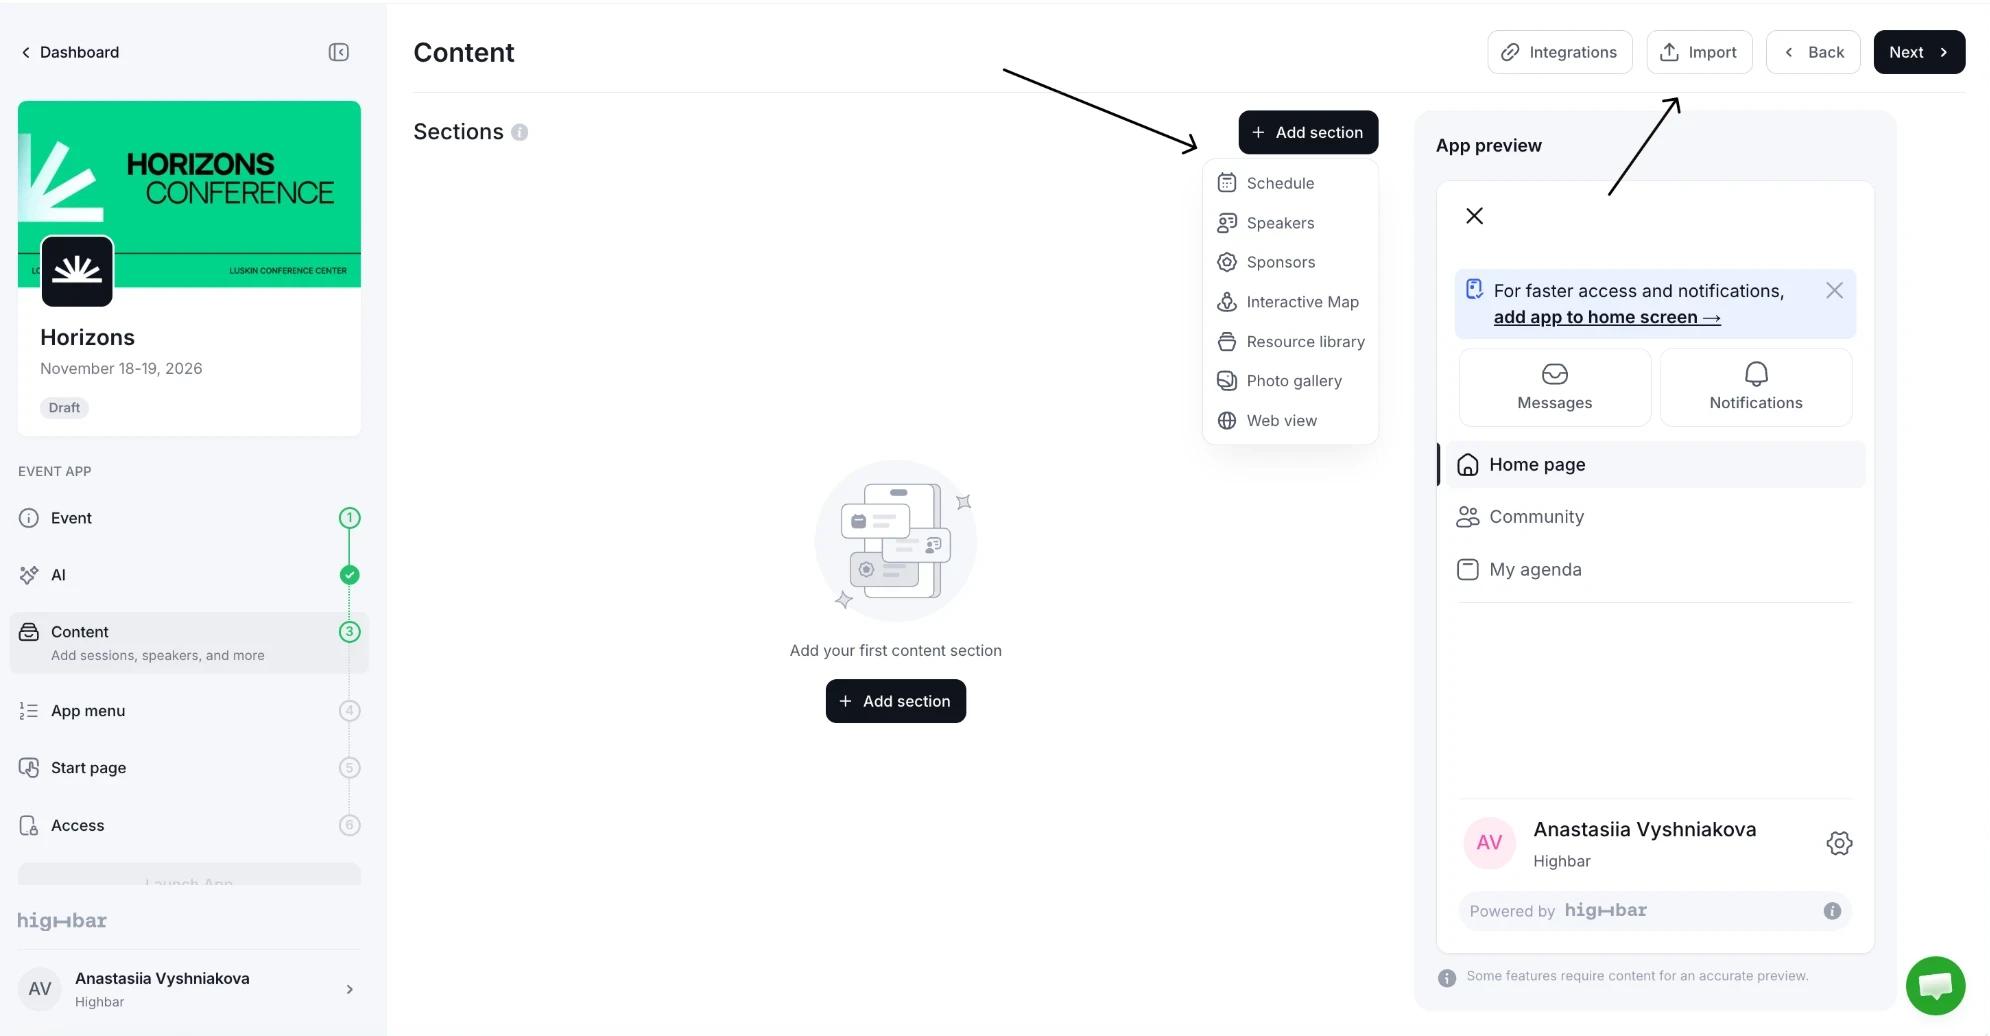
Then fill each section. To add items one at a time, click Add content next to the section. To add many at once, Import them from a spreadsheet or connect a platform you already use with Integrations. See Sections and visibility and Importing content.
App menu and Start page
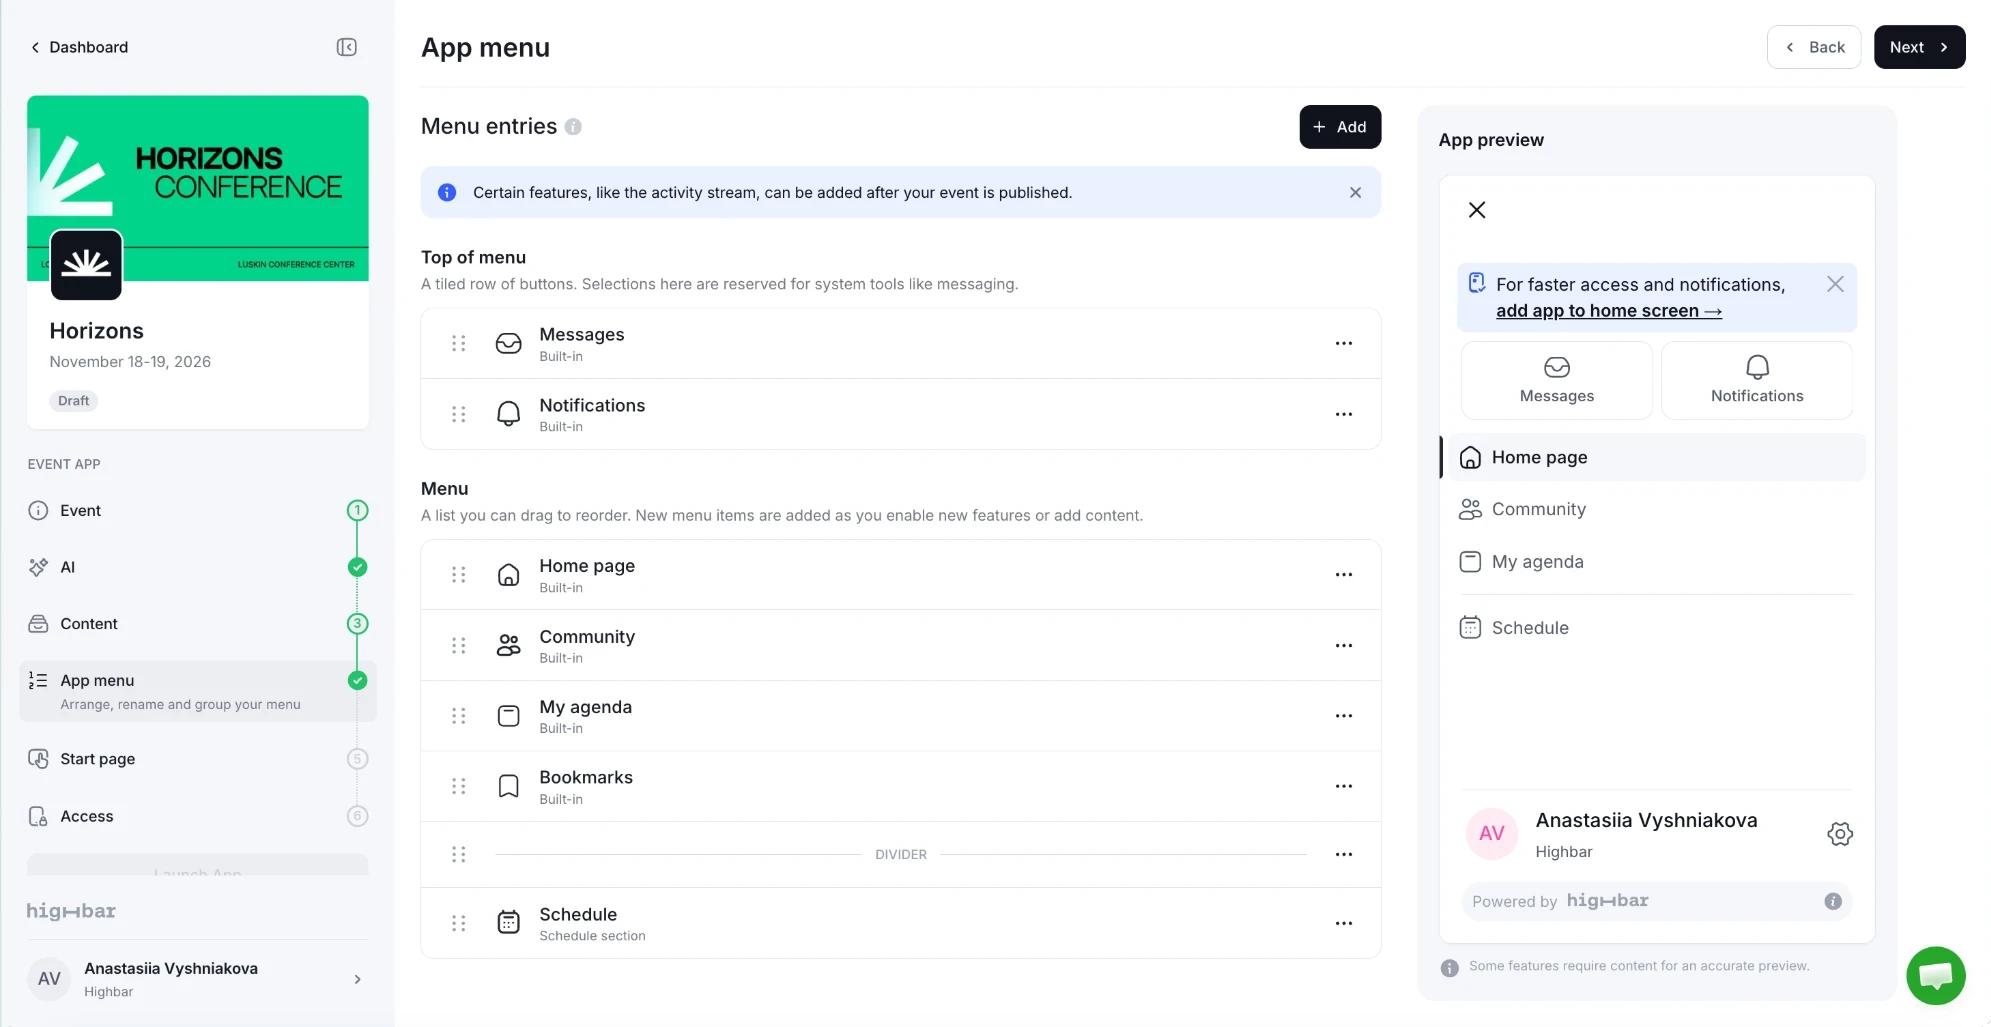
Check the App menu, which sets the order attendees see your sections in. Each section you add appears under Menu automatically: drag entries to reorder them.
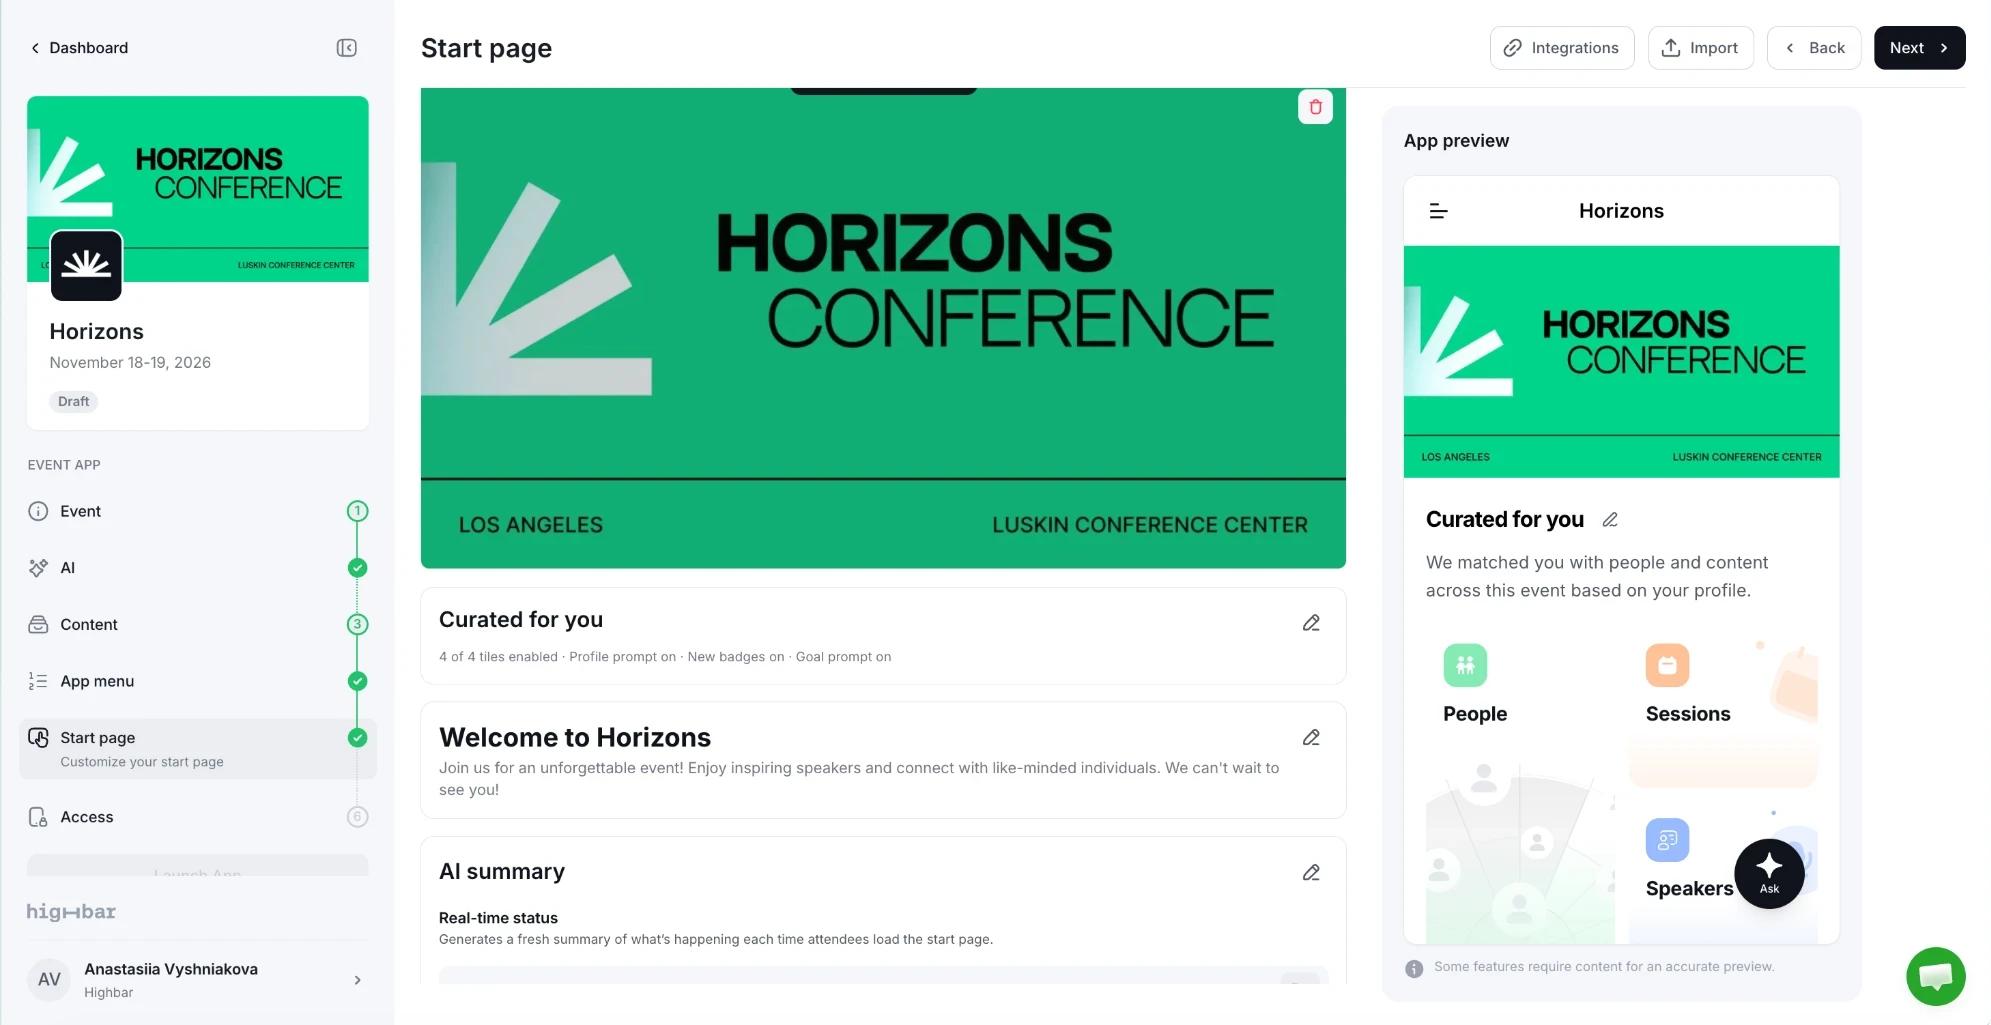
Then build the Start page, the first screen attendees see after logging in. It's made of sections, such as a cover image, Curated for you, a welcome message and an AI summary: hover over a section and click Edit to change it.
The App menu and Start page both start from defaults you can keep. See App menu and Start page.
Access: decide who can log in
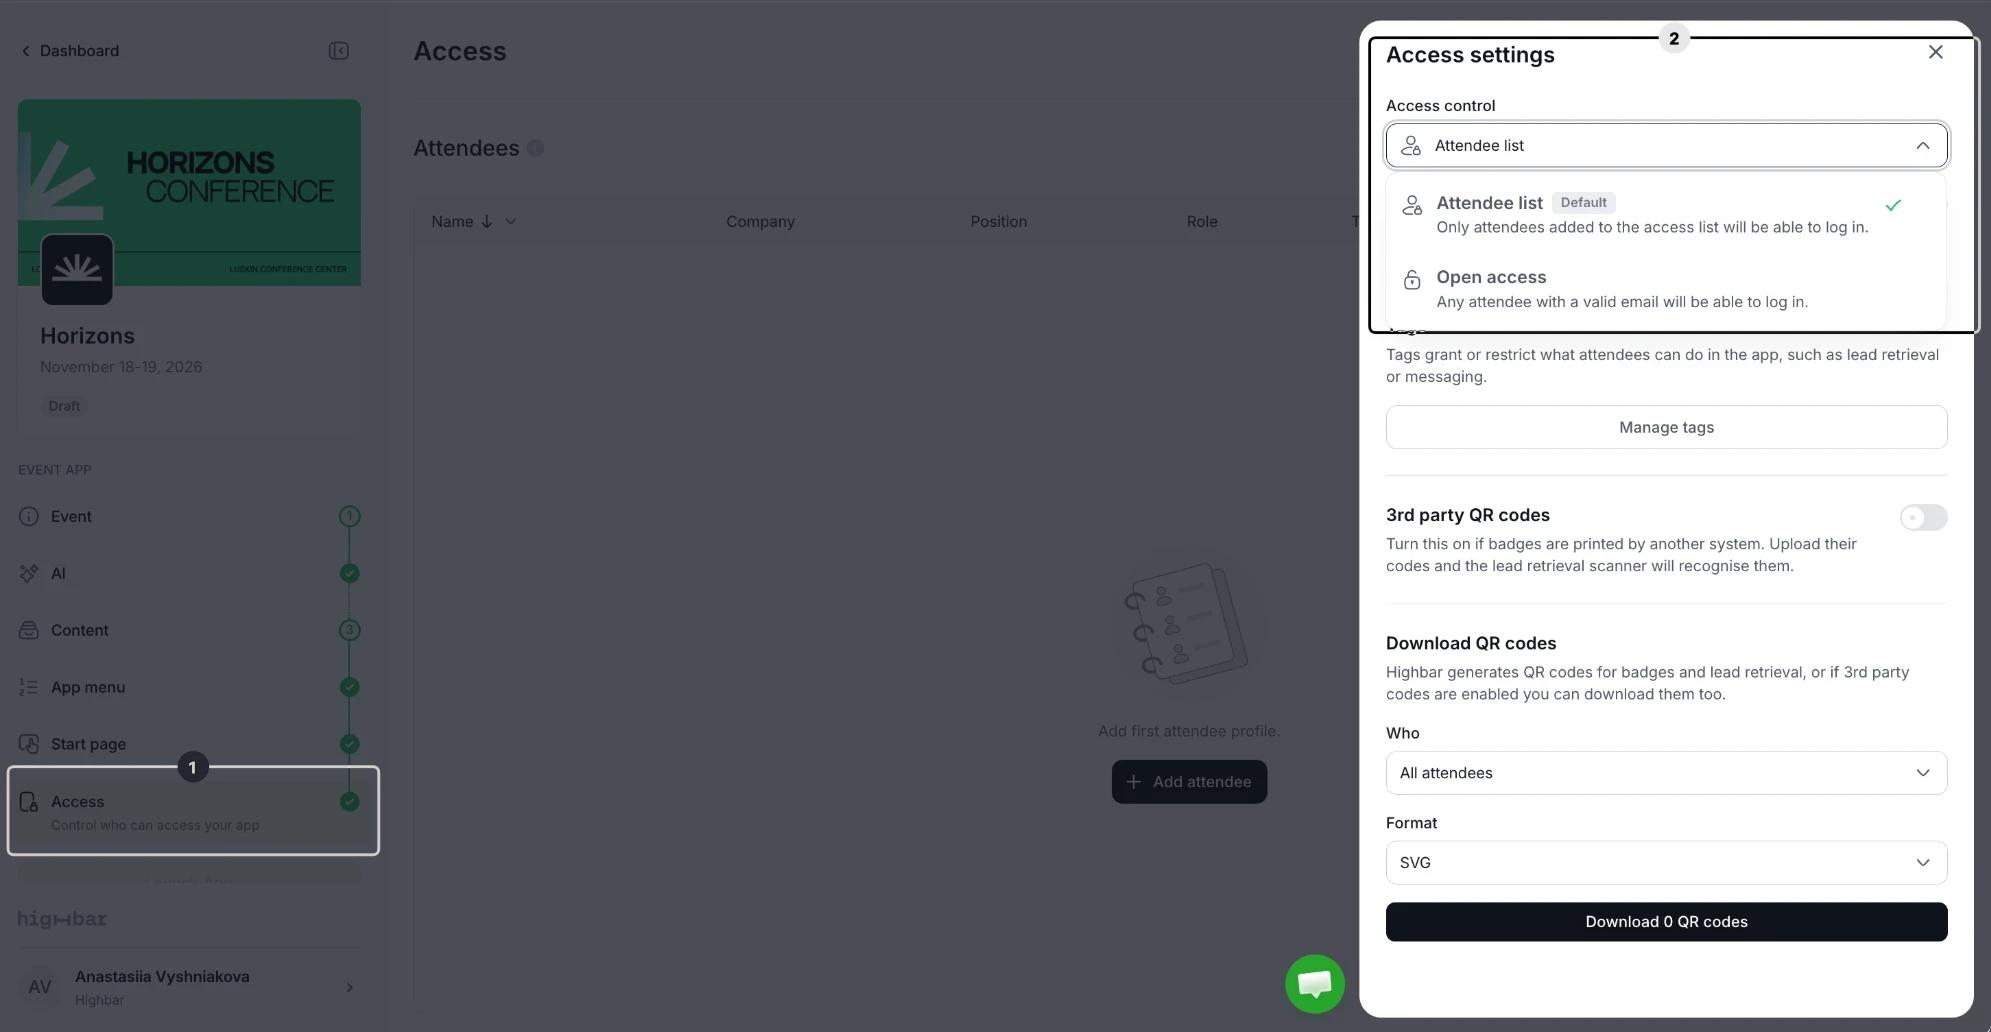
Open the Access step (1), then open Access settings. Under Access control (2), choose Attendee list (only people you add) or Open access (anyone with a valid email address).
Then add your attendees by upload, one by one with Add attendee, or through an integration. See Access: who can log in.
Launch
When the Event, AI and Content steps show a check mark (Content needs at least one session, speaker or sponsor), click Launch App at the bottom of the sidebar. Under Your app link, choose the Domain name you'll share with attendees. Under Card on file, add a card or US bank account for billing after the event, then click Launch app.
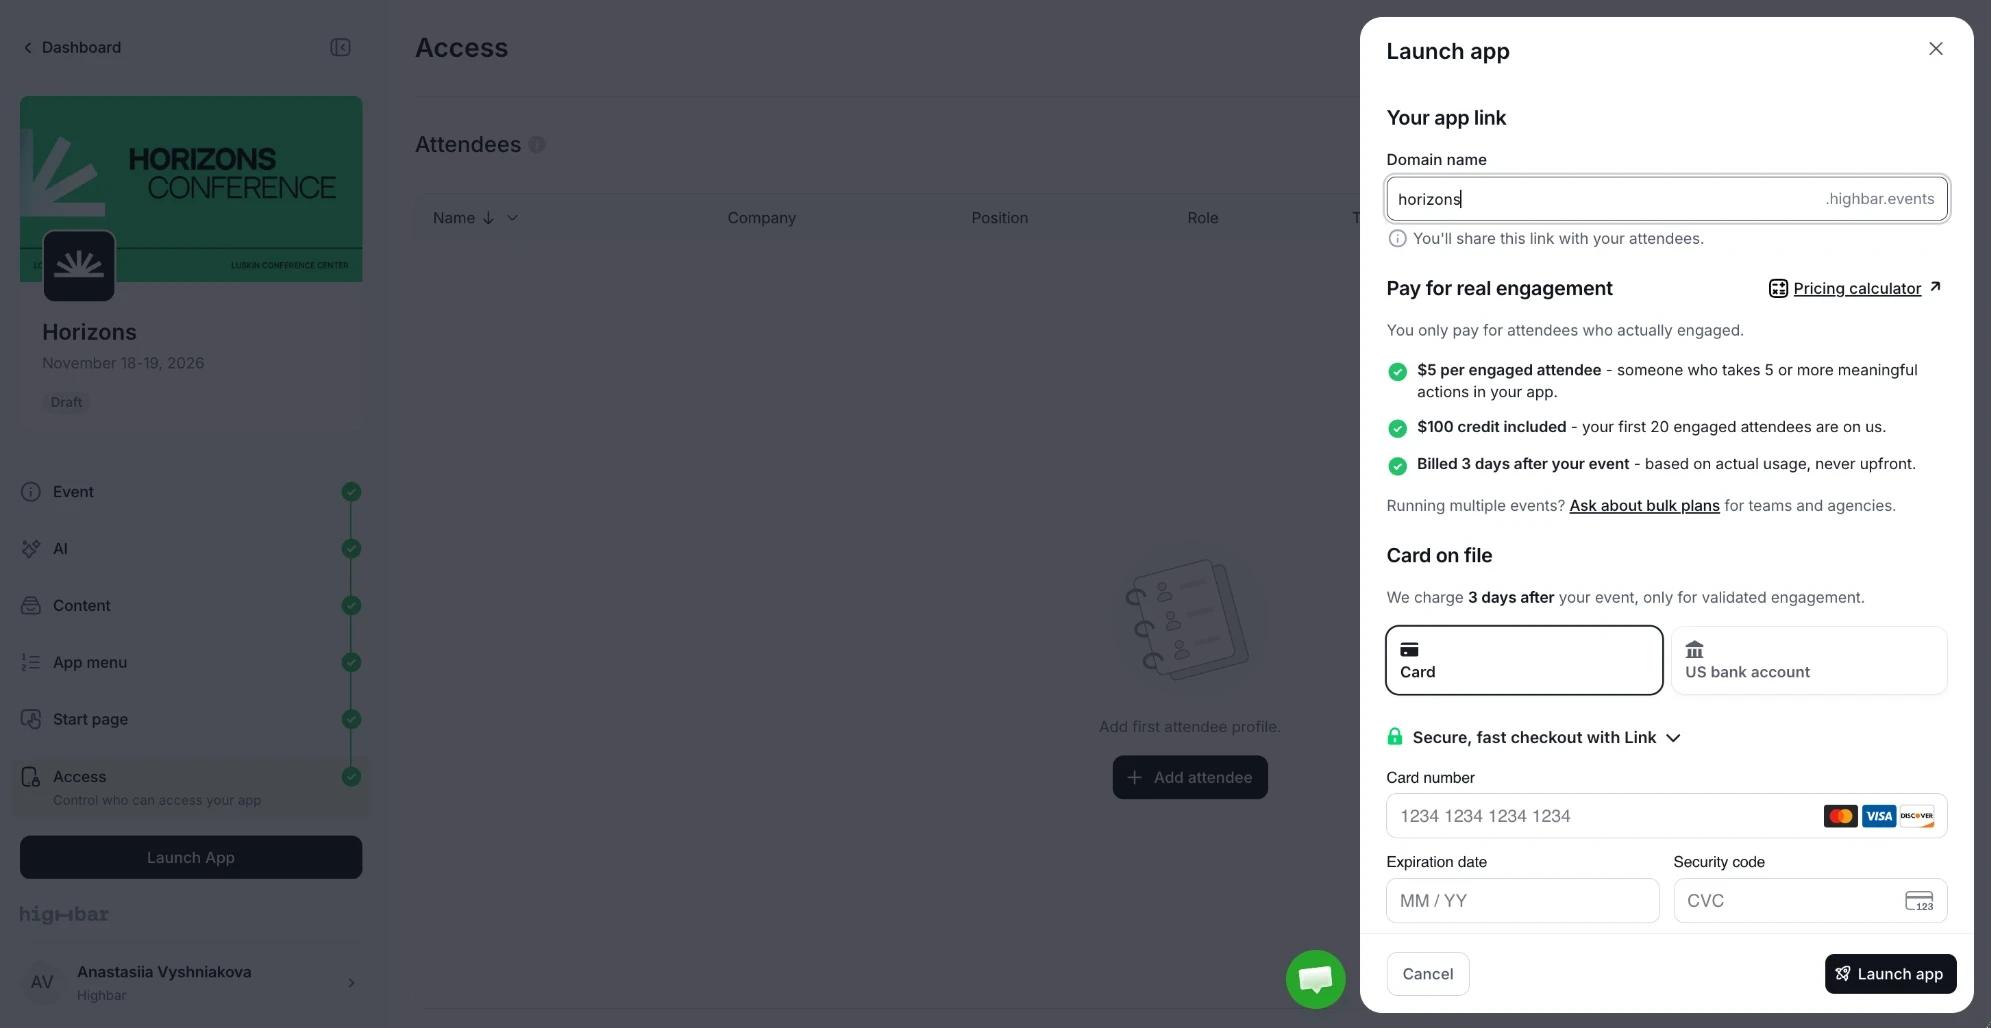
See Launch your app.
Share it
On your dashboard, click Published on the event's card to open Share, where you can copy the app link or download its QR code. The same link is on the event's Overview page, under Quick Links: click Copy or QR Code.
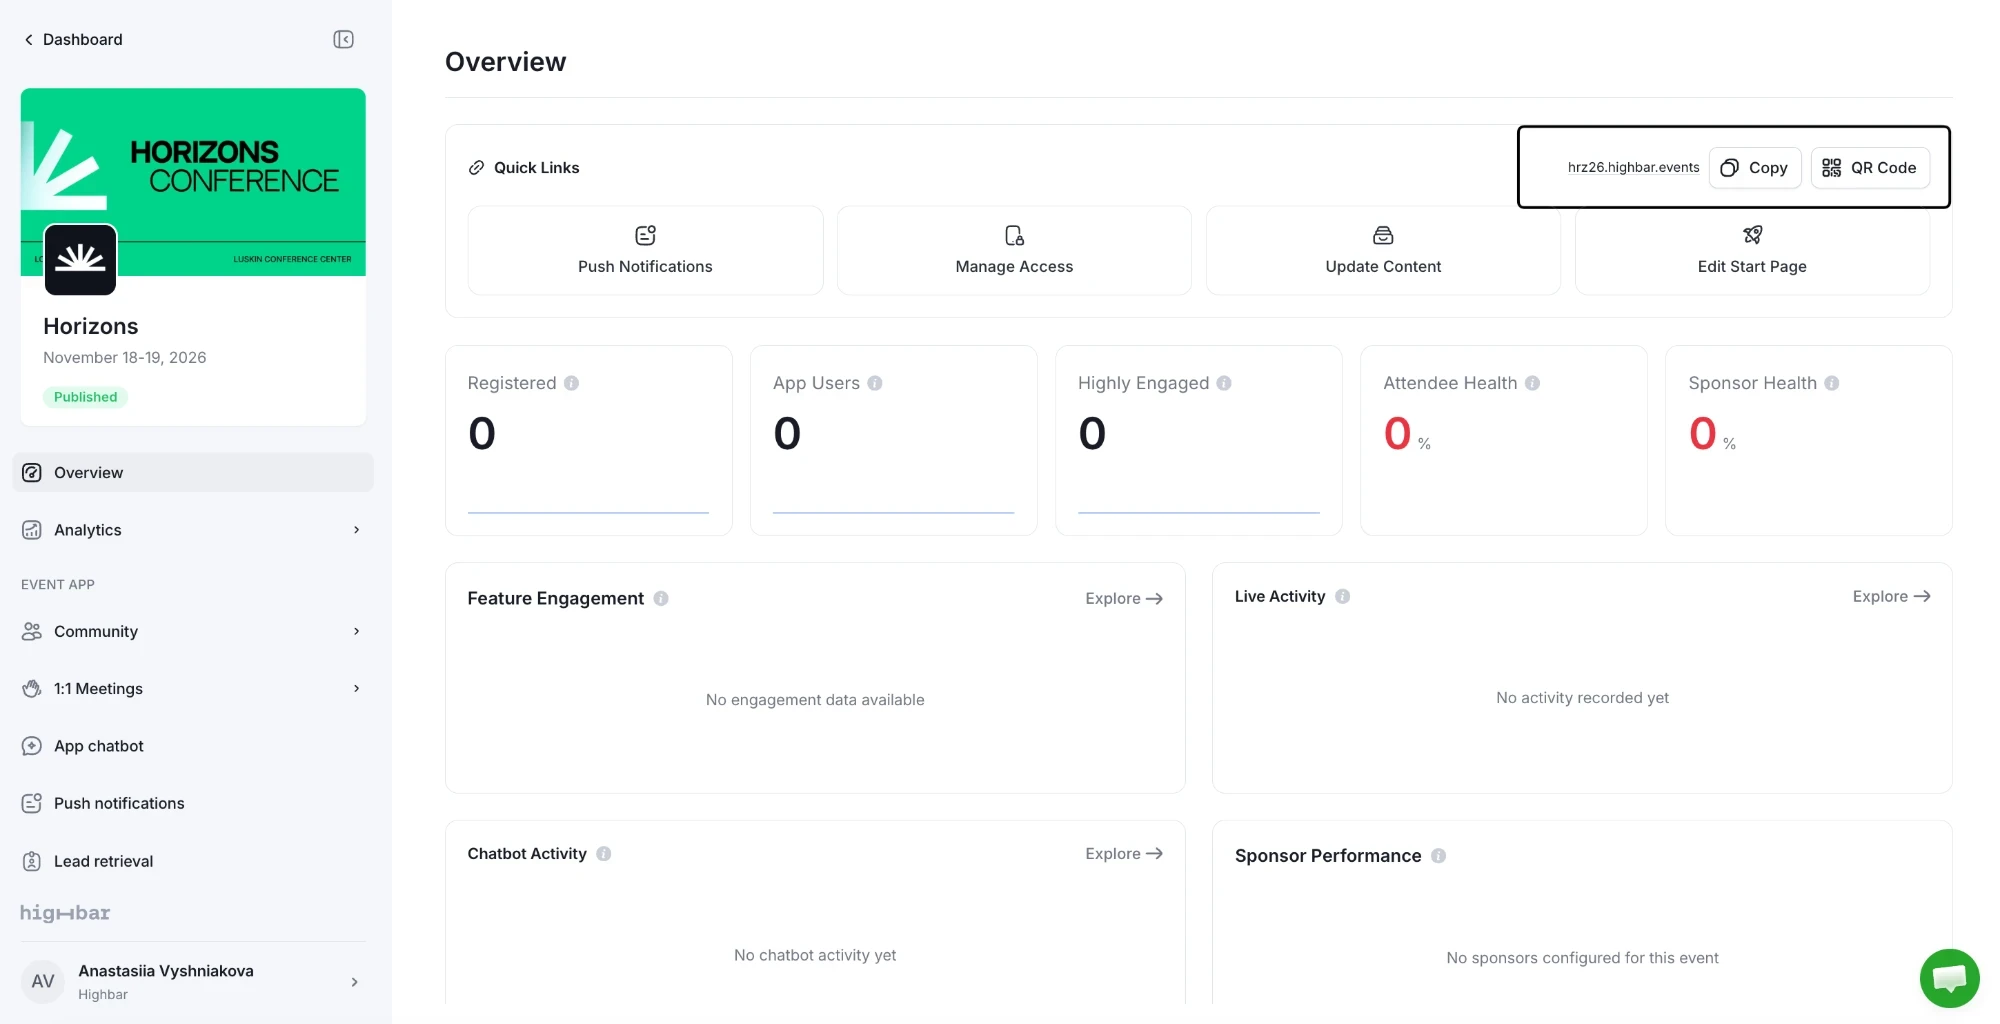
Put it in your confirmation and reminder emails, on your website, and on signage at the venue. Send attendees to Installing the app if they need help getting in.
What's next
- Before the event, ask a few colleagues to log in and try the app on their phones.
- During the event, use push notifications for changes and reminders.
- Watch engagement on the Overview page to see how attendees are using the app.